g33zy's wiring secrets: Antec P160 Super Lanboy, Nine hundred/Lian Li PC-7

g33zy

Goes Down Easy
Joined
Apr 19, 2005
Messages
3,227
So here we go...

Unfortunatly wire management varies a lot from case to case and also depending on the mobo and how many things you have attatched to the mobo.


Best advice, take a pic and post it. There are some cool guys in the rate my cables thread that will help you out. But first of all there are some things that you have to sort out first.


The first thing they are gonna tell you in there is to mount your hard drive with the plugs side hidden, basically reverse the way you mount it.


My advice too, be honest with yourself on what you "really" use. If you don't use many usb items, there is no need to plug in front usb connections because they just add to clutter. The rear usb connections are imo the worst thing you can have. They usually only have like 2 pots and the wires are thick and make a mess (usually the first thing you can get rid of to make it look better). You don't need to cut the unused wires, but just make sure you put them somewhere hidden and put a zip/twist tie around them to keep them in order.


The fan exhaust fan at the rear of the case can almost always be run under the mobo (and yes there is usually enough space under the mobo to fit molex plugs when they are flat)


On that "under the mobo" note, pretty much try to run as much as you can under there, its gonna depend on waht case you have but unused psu wires and that kinda stuff. There are some people who cut off unused wires but im not comfortable doing that so i just hide them.


Flat IDE cables are your friend too, they work very well because you can literally fold them right under the edge of the mobo and run them to where they need to go. Yeah the round ones are good for airflow, but thats only when they are exposed ;) . The round ones don't usually fit very nicely under motherboards and don't fold as easy as flat ones. A good idea would be to get some black IDE cables (most likely from ASUS).


Spend some time looking around at your case and try different things then take pics and take advice from these guys here. We all @ the [H] been thru a lot of cases and helped a lot of people and believe me, we all had to start somewhere.


First case I ever wired up in my life was in about in Feb this year. Was it ever a piece of crap. Looked horrible, but as time passed and I tried different things (and different cases) it got better.


I also practiced a lot on other people's machines. Not many people have thier case wired very well so ask them to let you re-wire it for practice.


Heh, I even re-wired my work pc for the hell of it.
So on with the PICS!

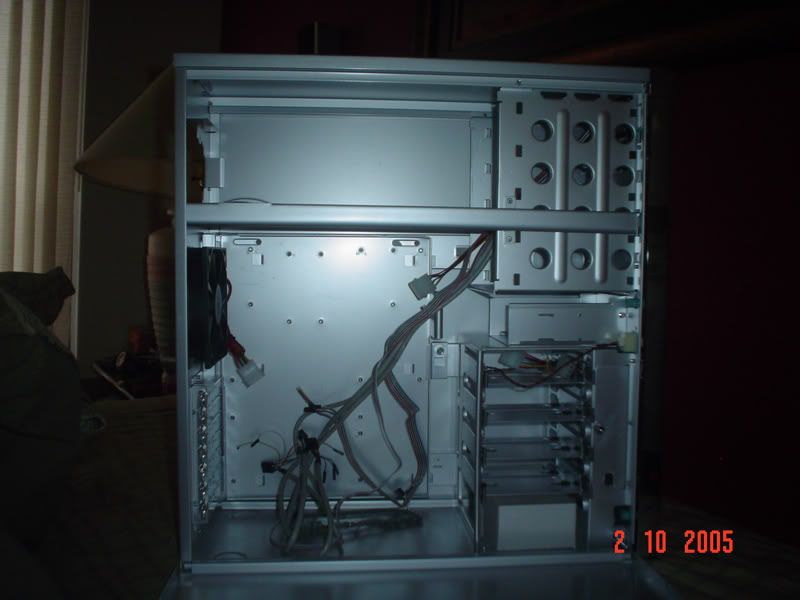
This is the Lanboy....

Fresh outta the box. Man was I excited

NewComps031.jpg


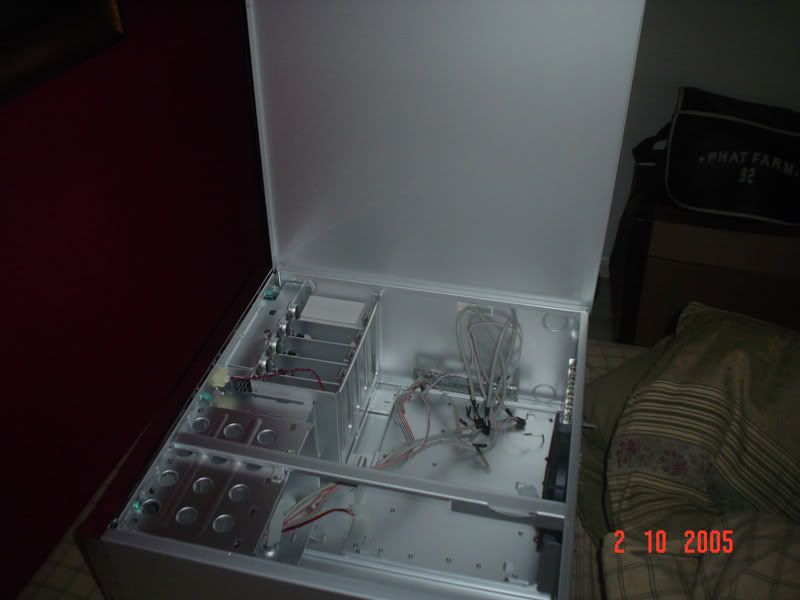
Installed the Antec TruBlu 480W PSU that I had sleeved yellow to match the DFI Lanparty nF3 I had before.

NewComps032.jpg


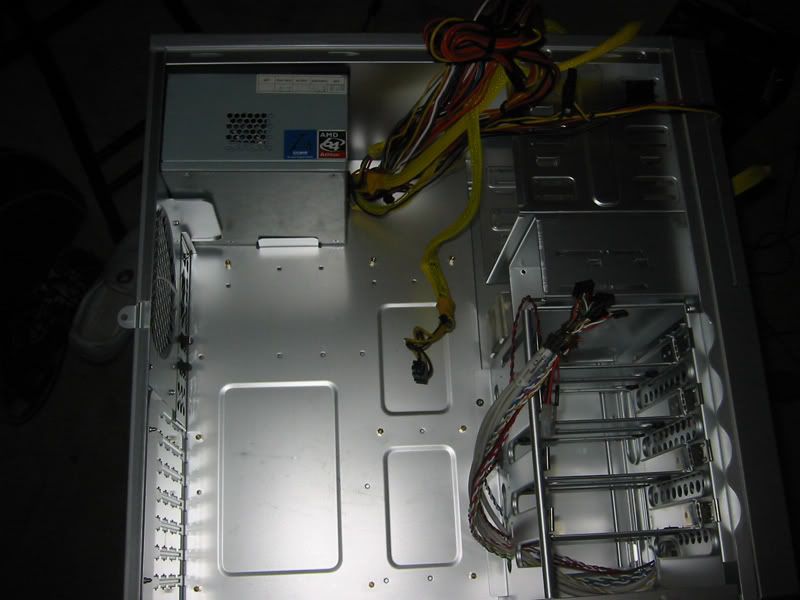
A bit of a jump I know, I wasn't too sure it would look good so I didn't want to take pics and it come out fugged up. Was I surprised! Also it was the brand name first case I had ever bought (had the old generic case that was nasty)

NewComps033.jpg


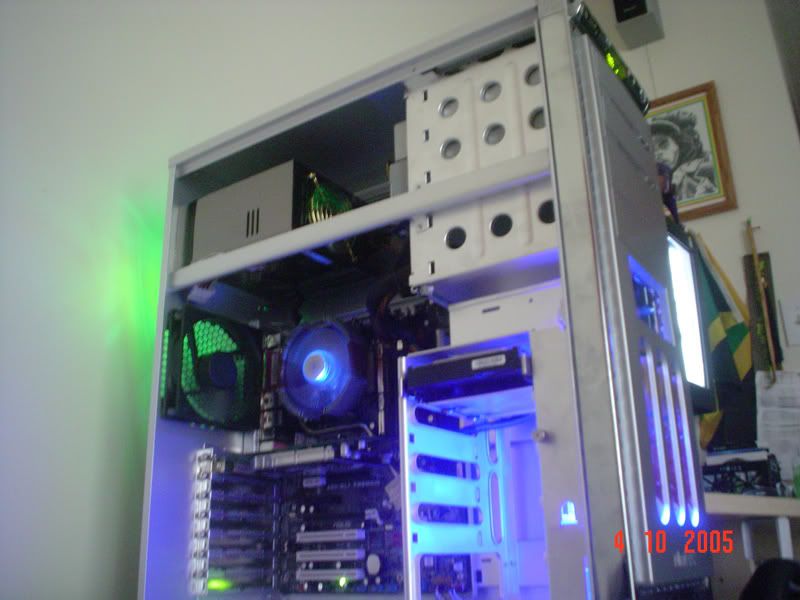
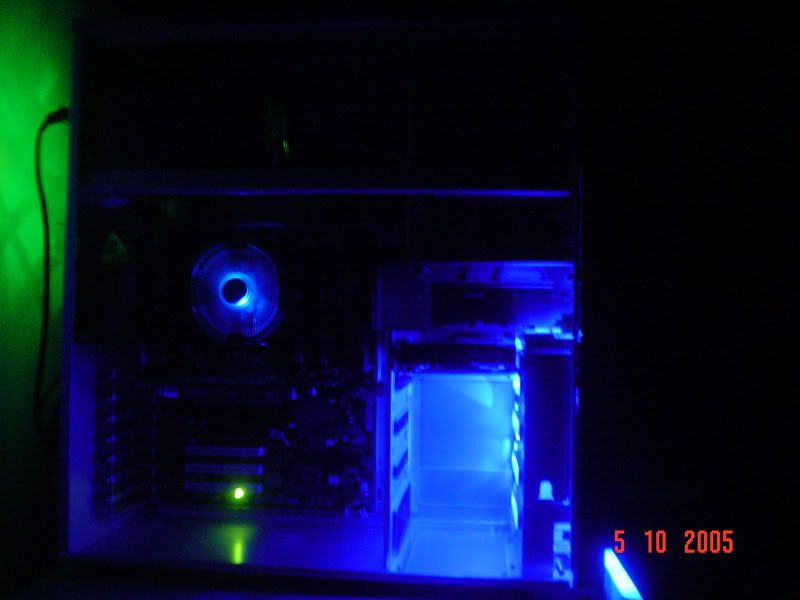
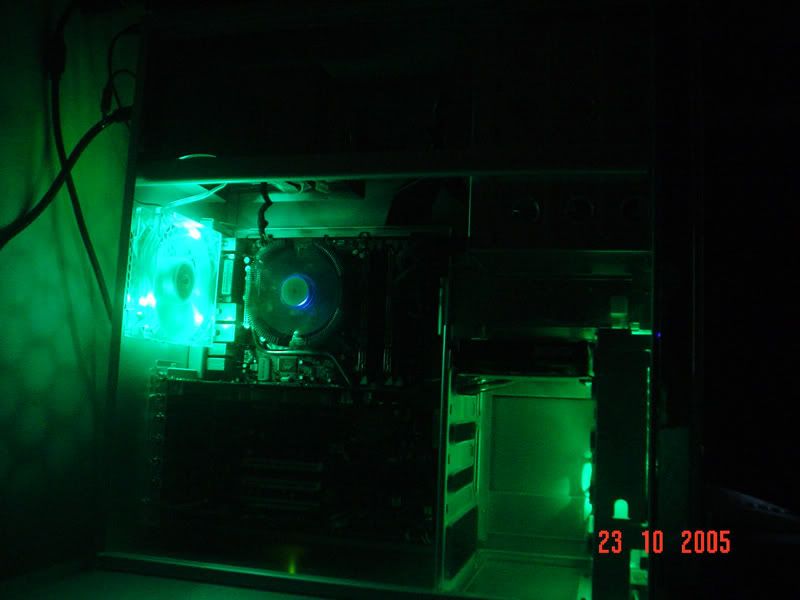
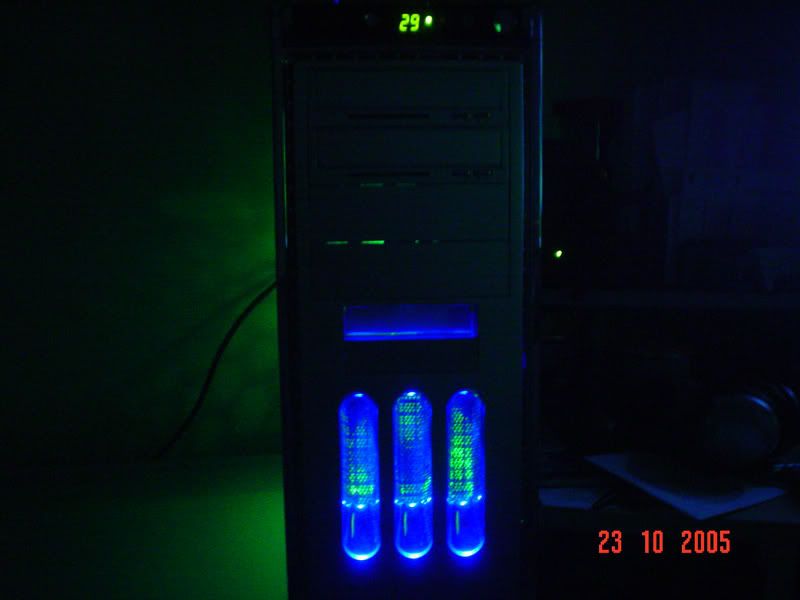
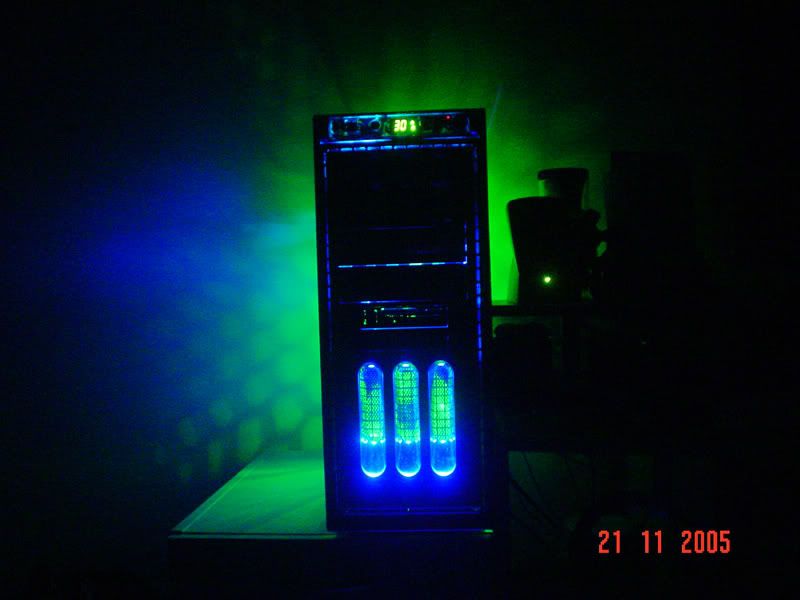
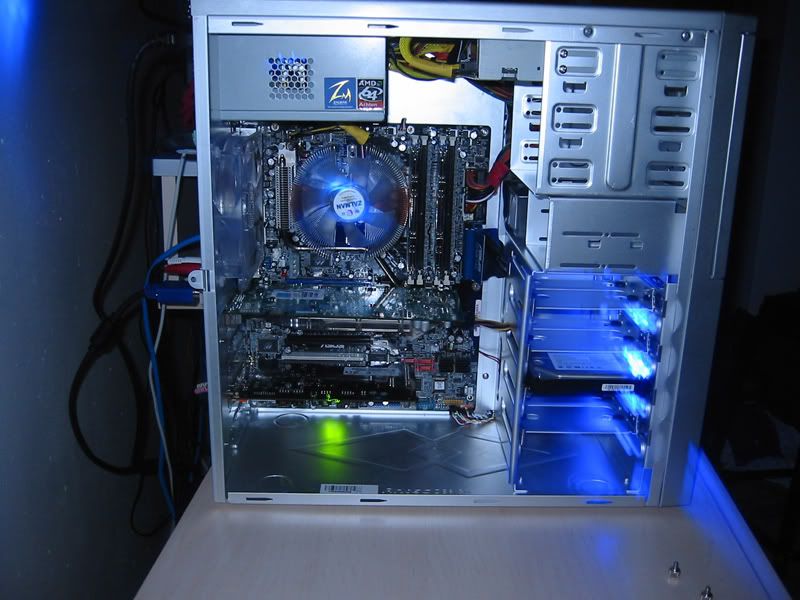
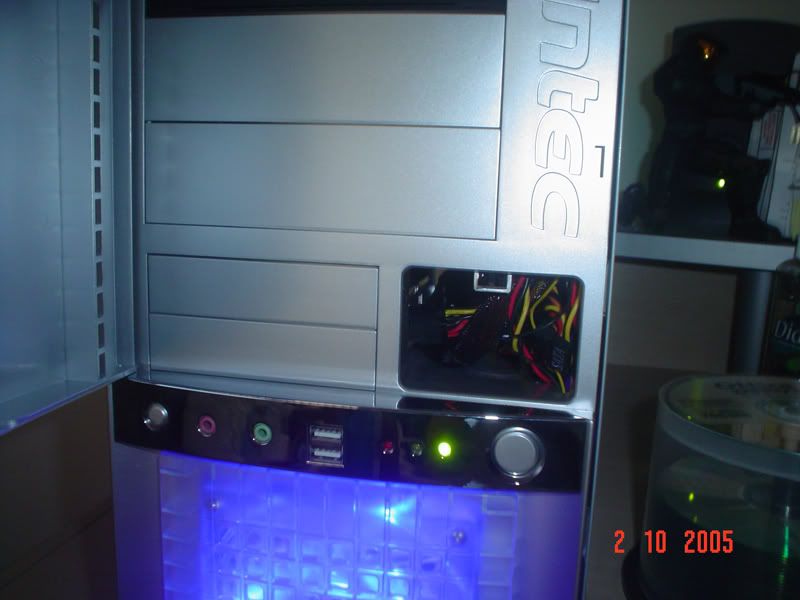
In a little different lighting. Turned the lights off and blue just made it sexeh.

NewComps045.jpg


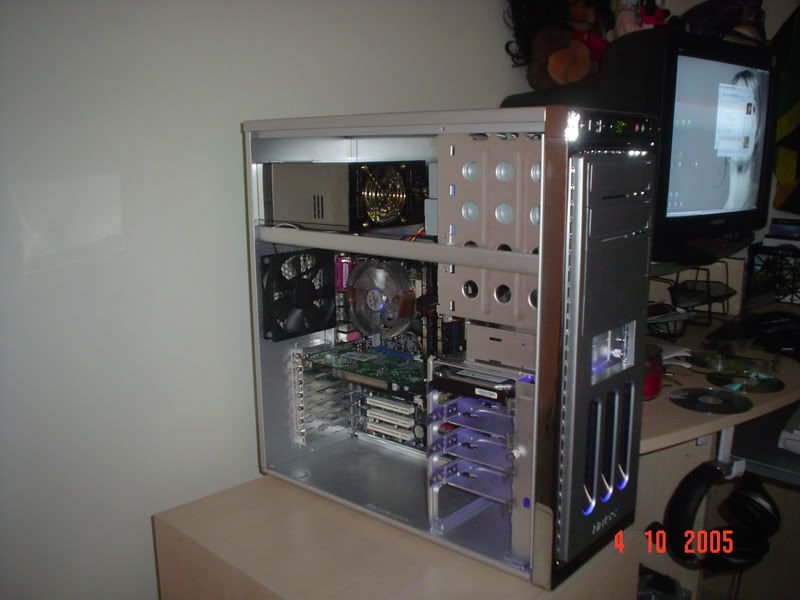
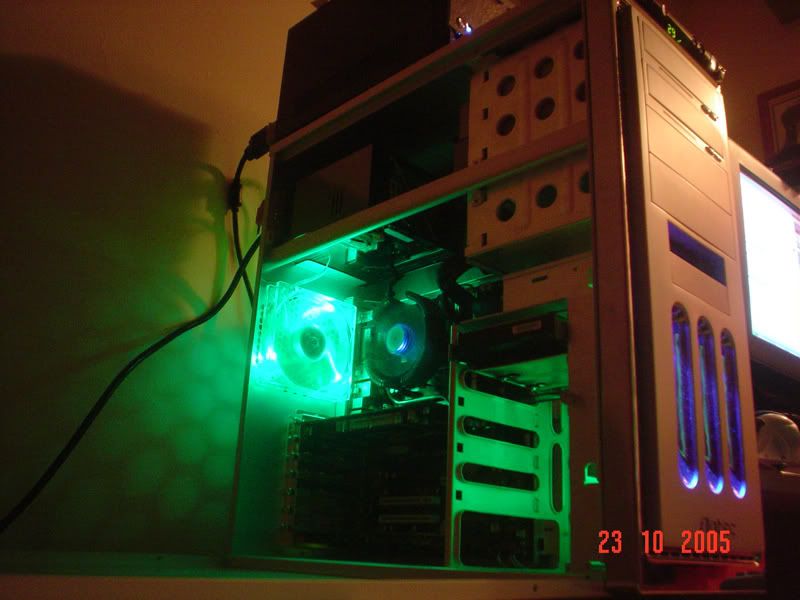
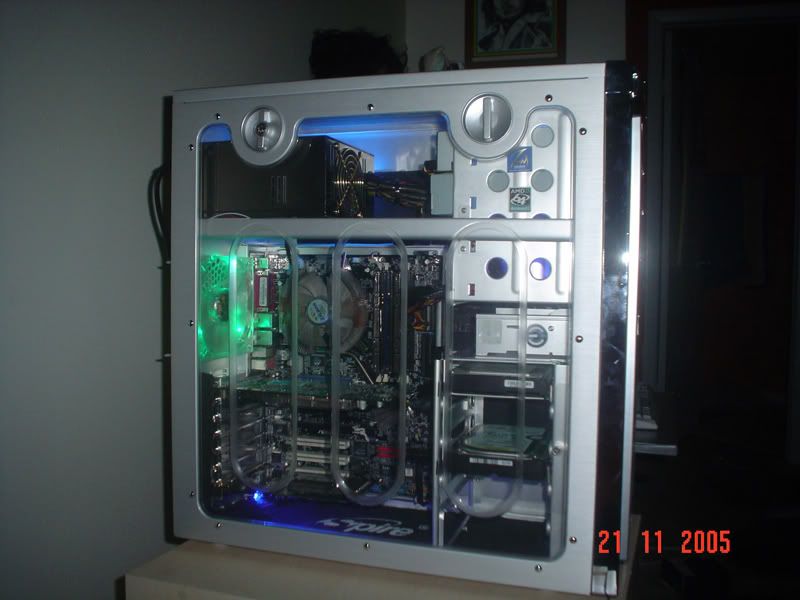
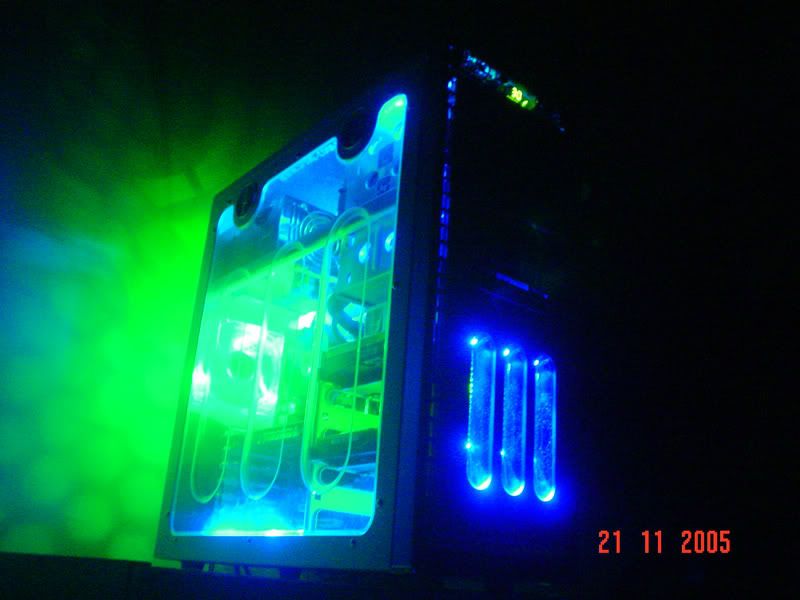
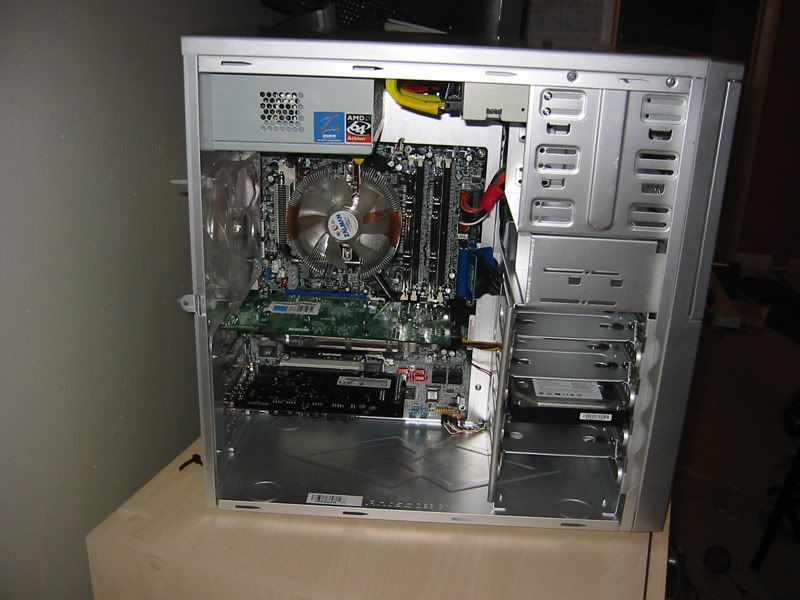
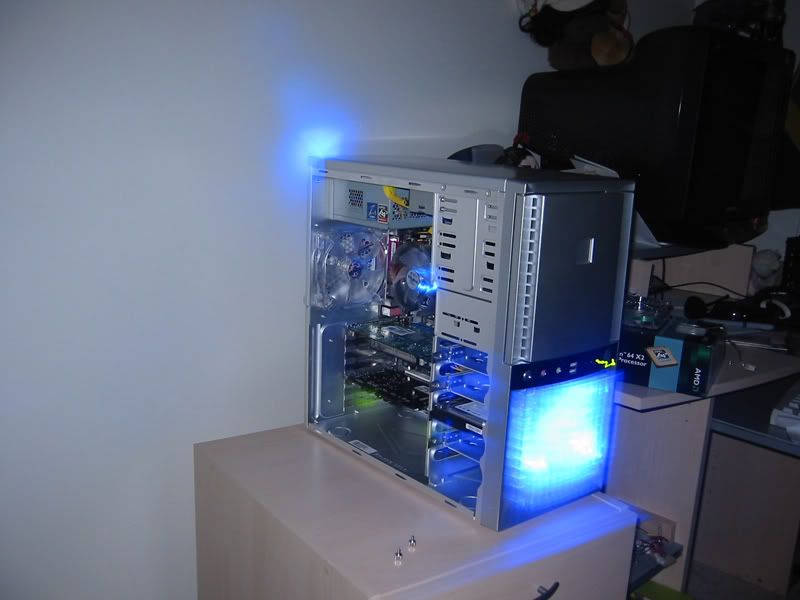
Took a bit of a profile shot. I think the side angle shot is so cool.

NewComps047.jpg


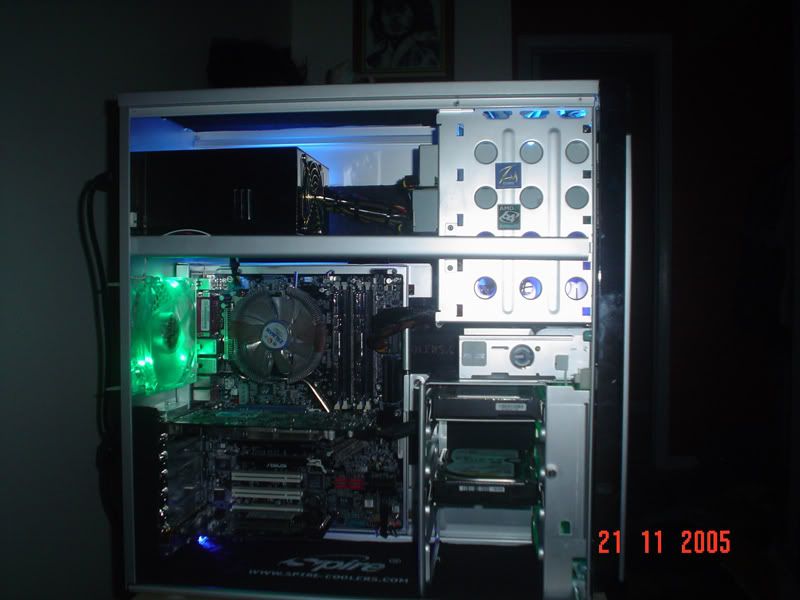
Another shot of the lanboy, but with the side panel on (the camera picked up scratches I couldn't even see!)

NewComps049.jpg


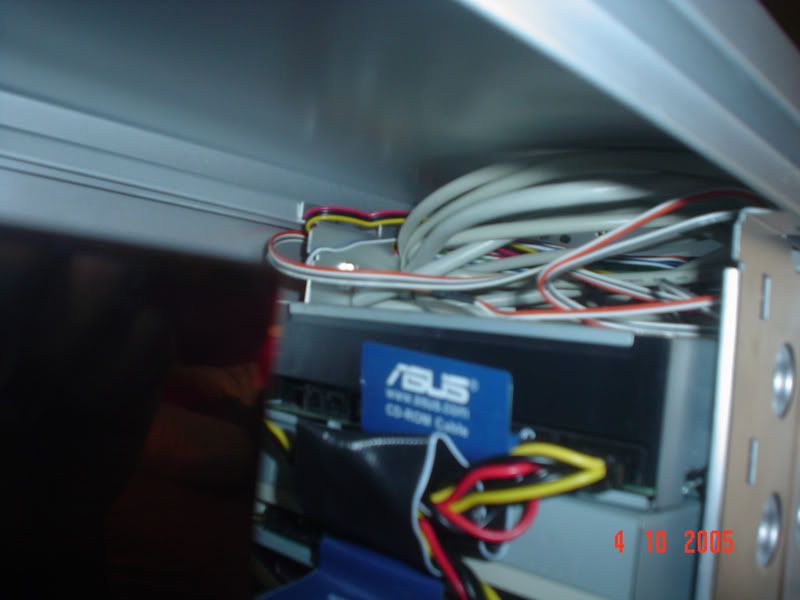
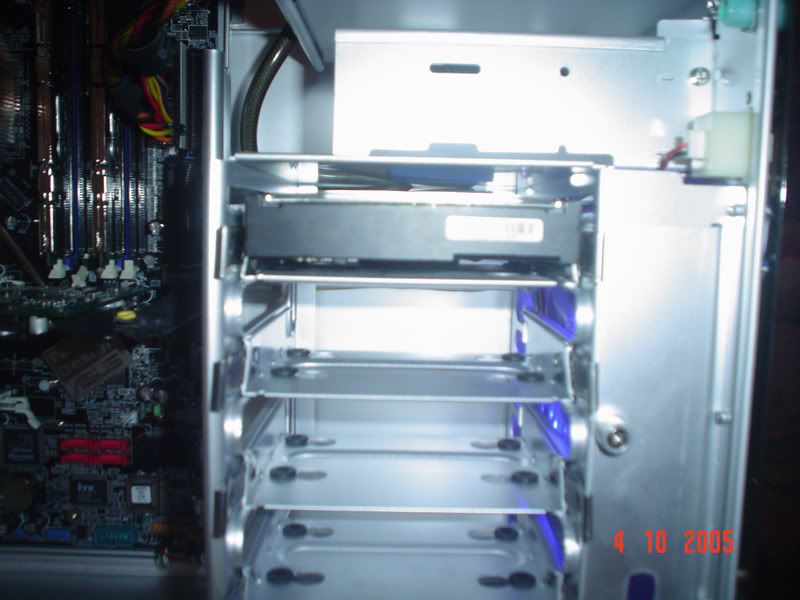
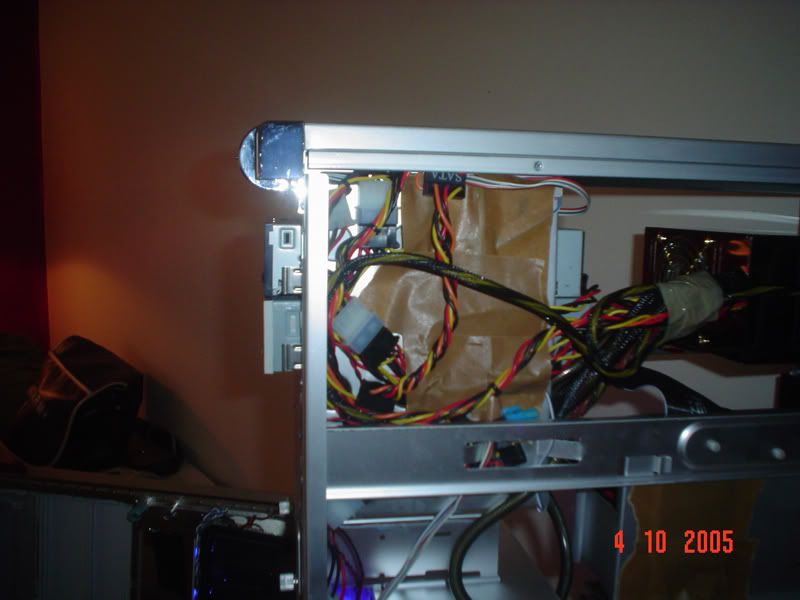
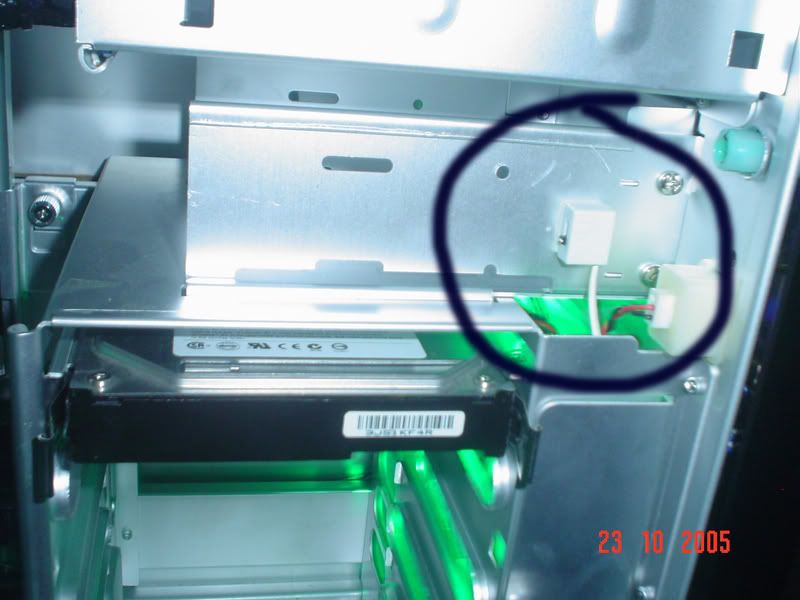
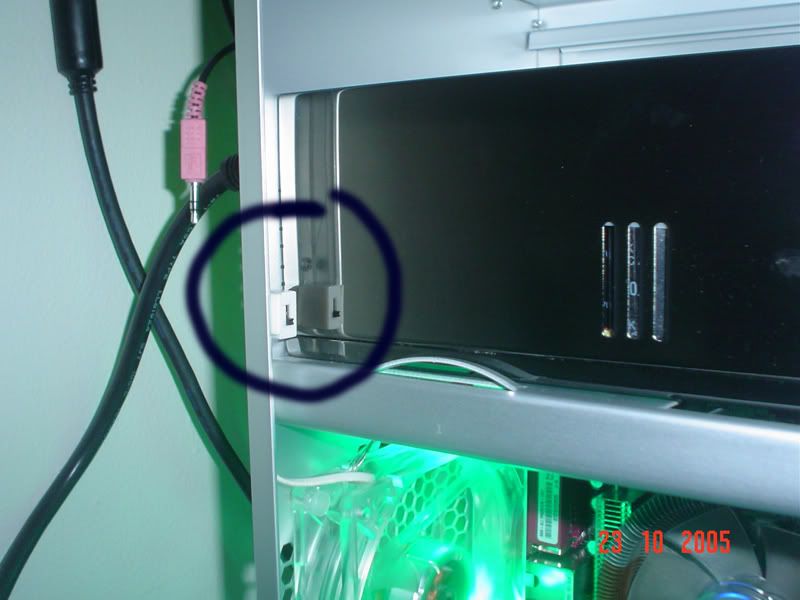
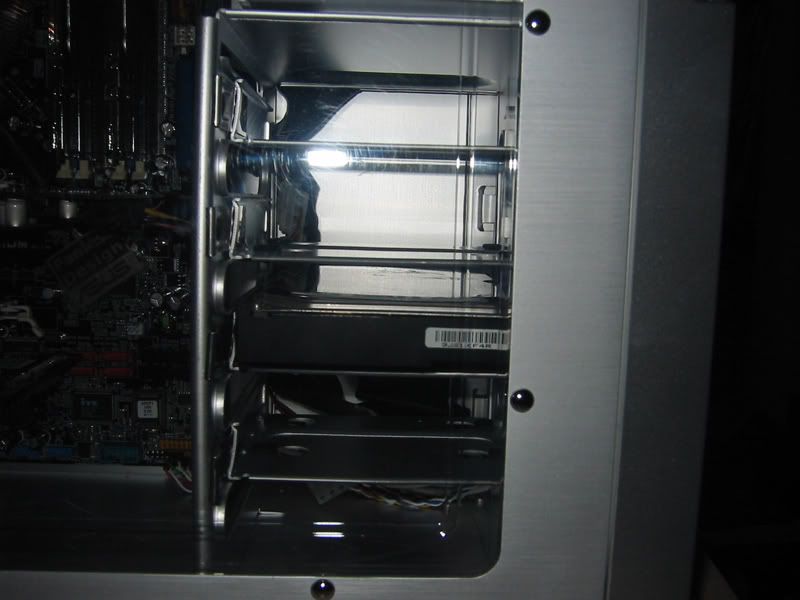
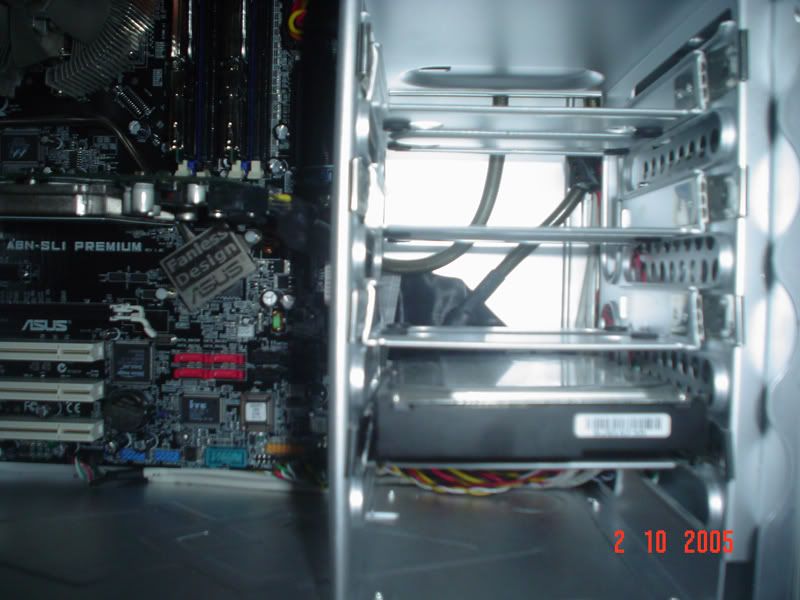
A detail shot of behind the HDD cage. You can see how some of teh wires are run. The front panel connectors run at the bottom of here. Ideally they should have gone under the mobo but this was the first step for me.

NewComps060.jpg


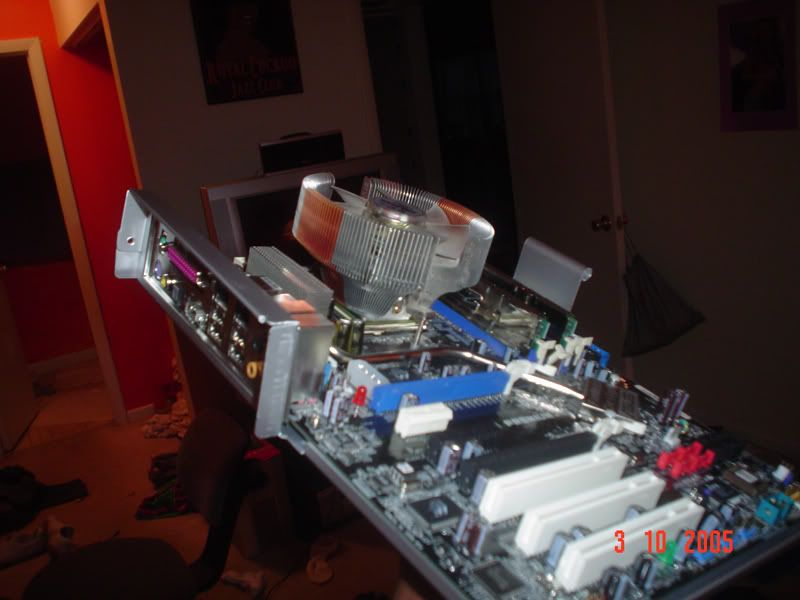
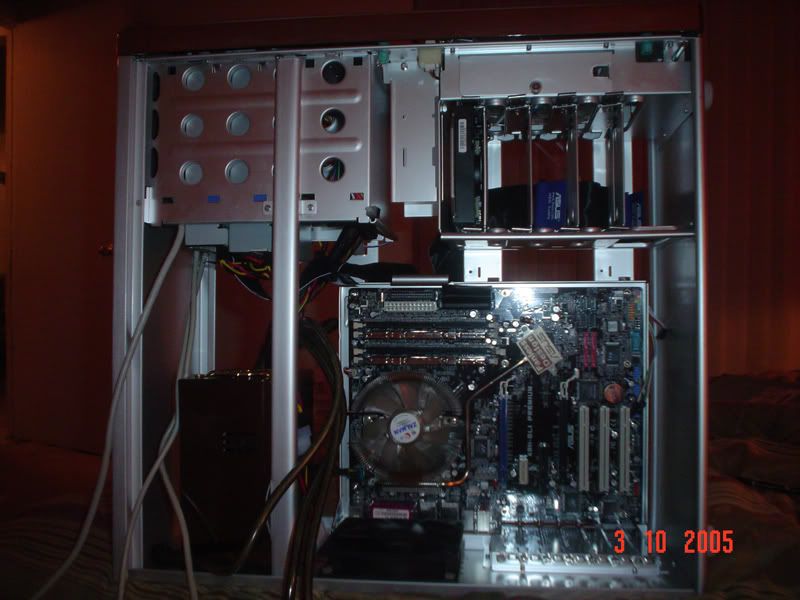
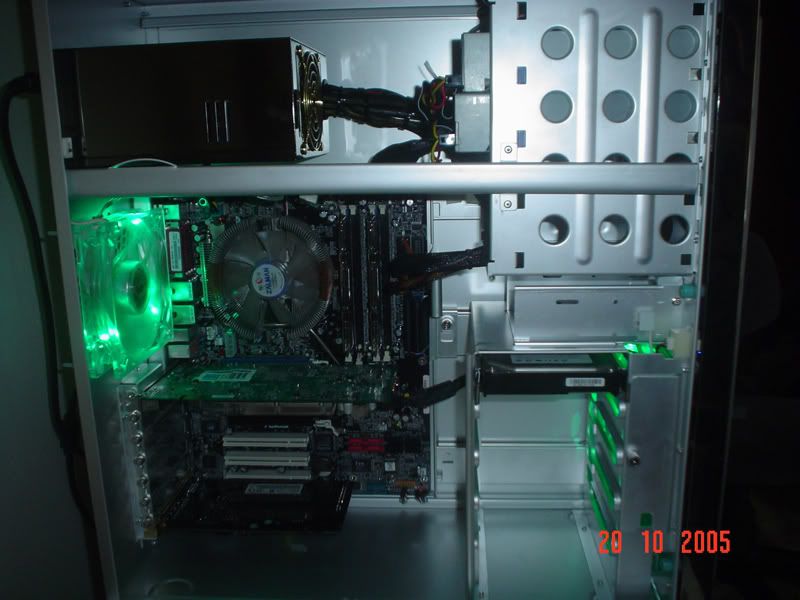
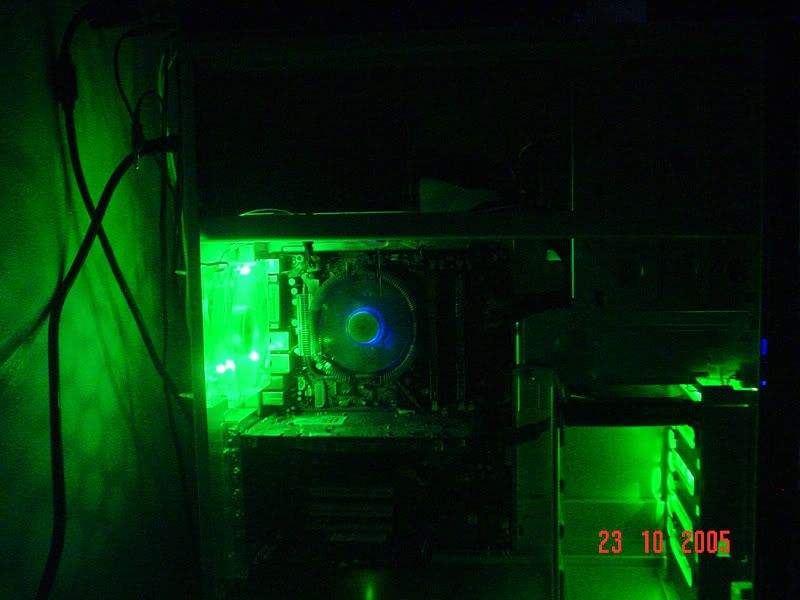
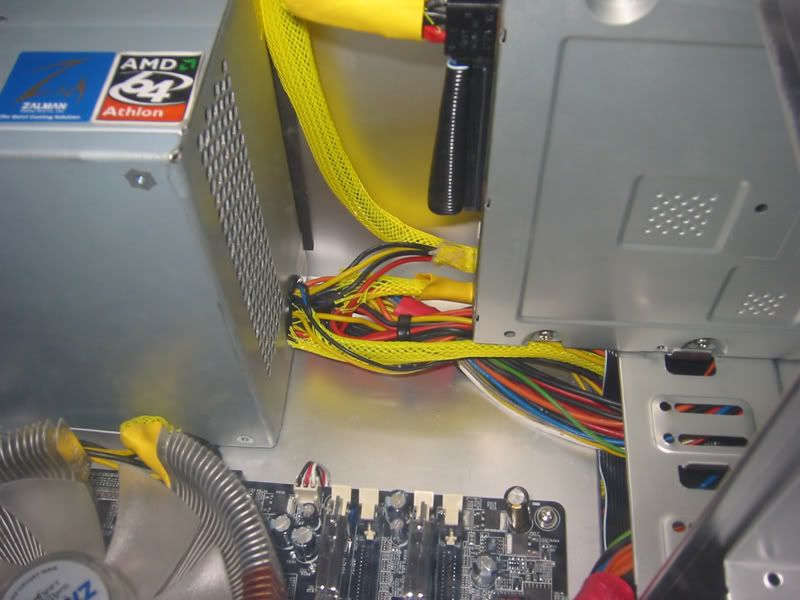
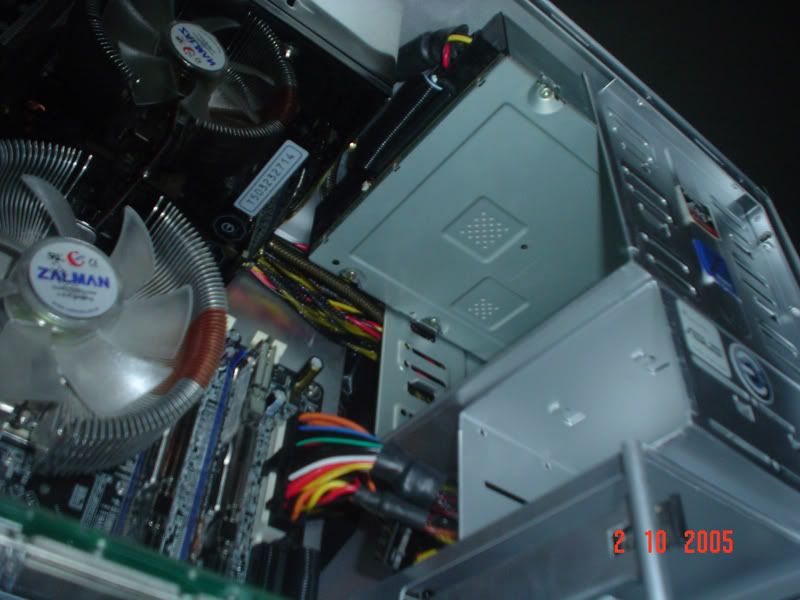
This is as if the processor was lookin up. This is what he would see. Kinda gives you an idea of how the PSU wires are run. Also the IDE ribbon runs up and on top of the DVD drive.

NewComps061.jpg


Here was where I made the first switch. Got the OCZ Powerstream. The wires are sleeved and bulkier so I had to remove the drawer to hide them properly. I don't have a pic but I created a neat little cover so it looked good. Im sure you guys and gals can come up with something creative to put there.

DSC04605.jpg


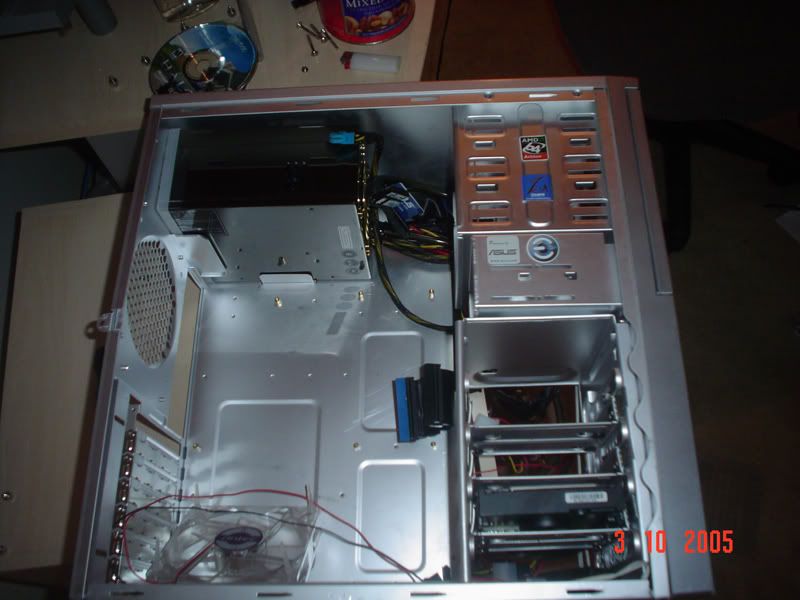
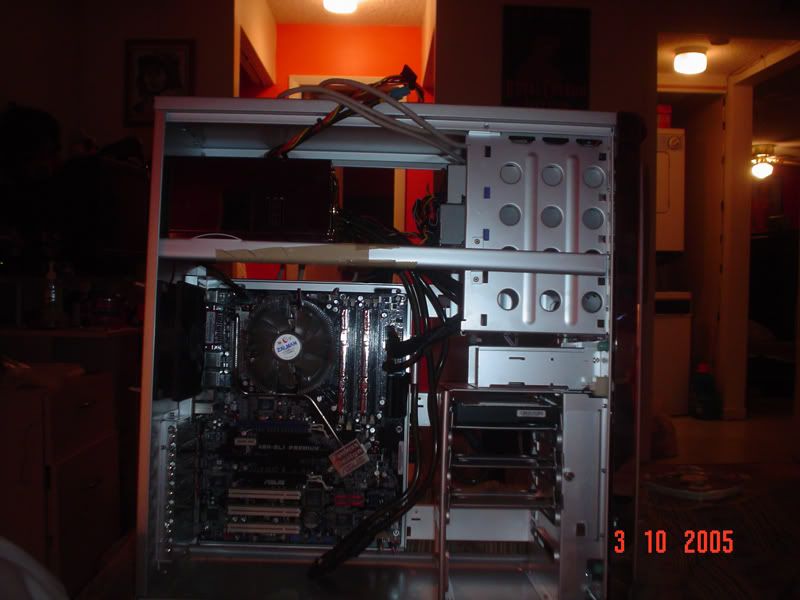
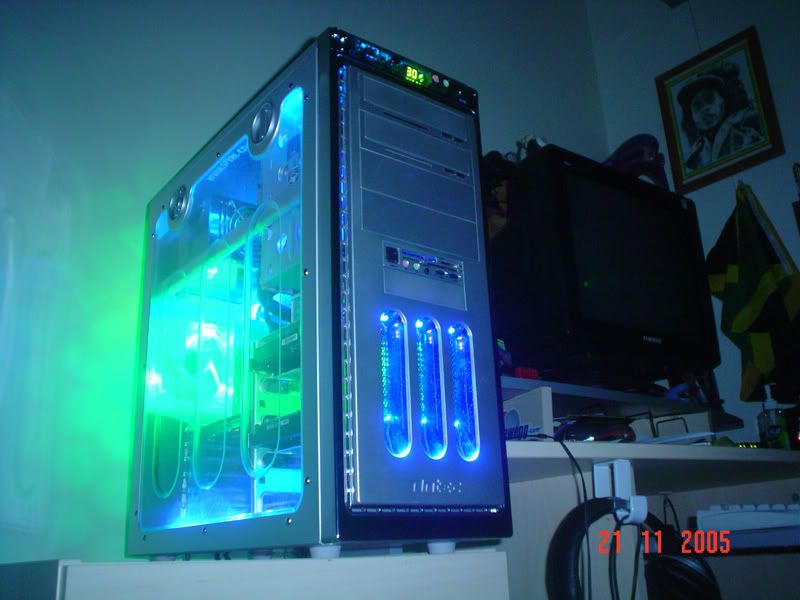
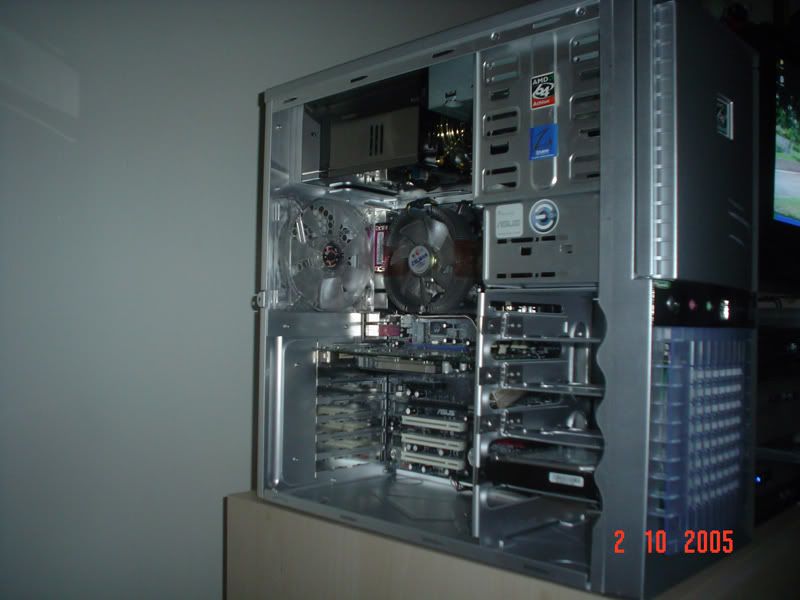
Another kinda profiling shot showing off the new PSU. Also, this is when I cut the hole in the mobo and run the IDE cables under there. Looking good.

DSC04606new.jpg


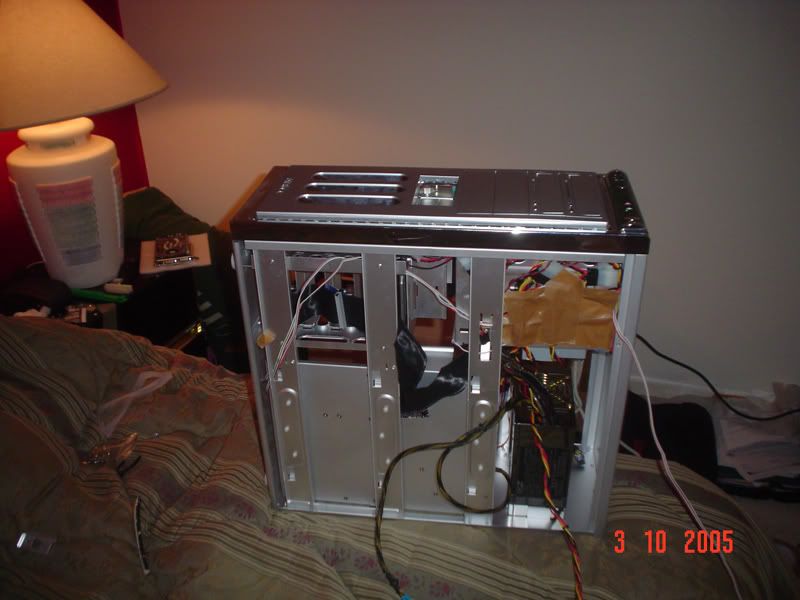
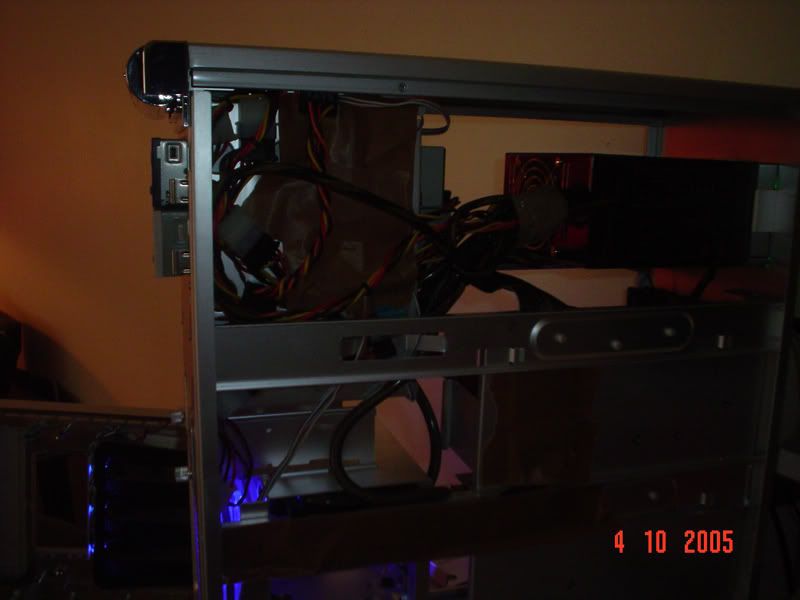
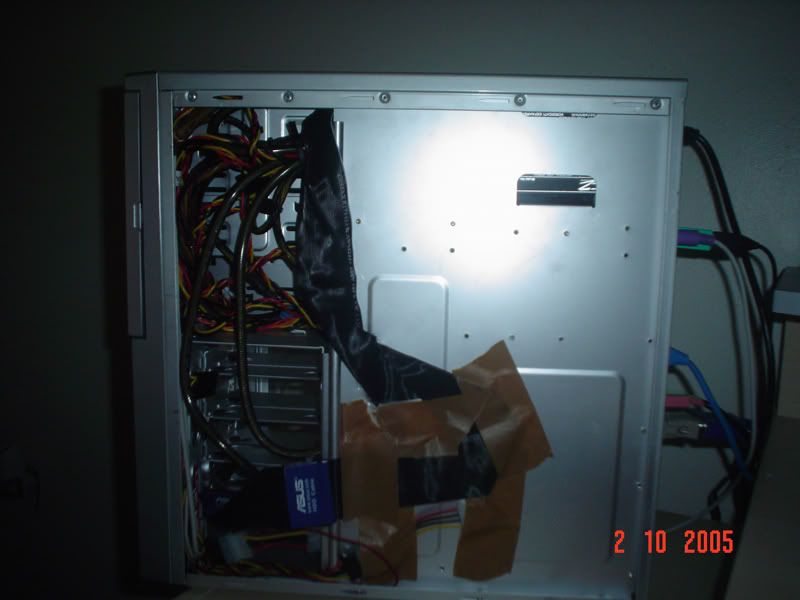
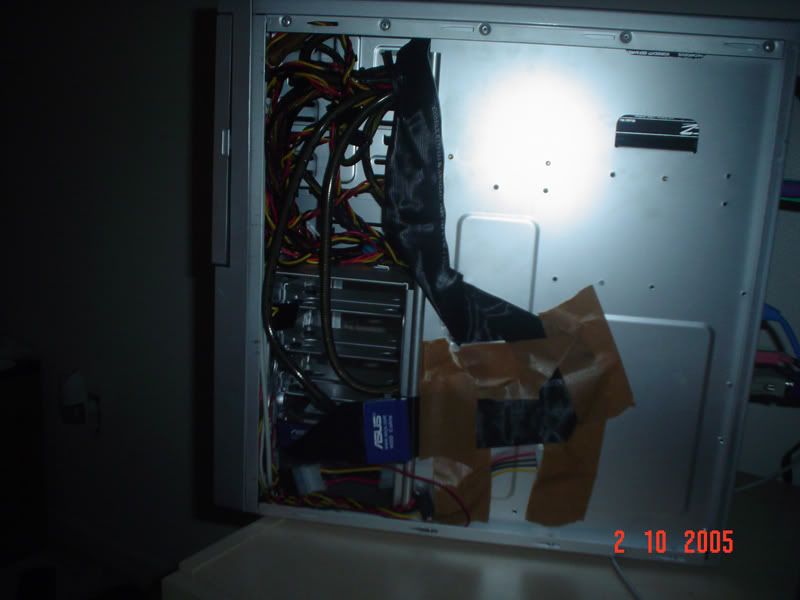
The backside with the Powerstream and showin where exactly to hide put the extra PSU wires.

DSC04633.jpg


Another shot of the backside.
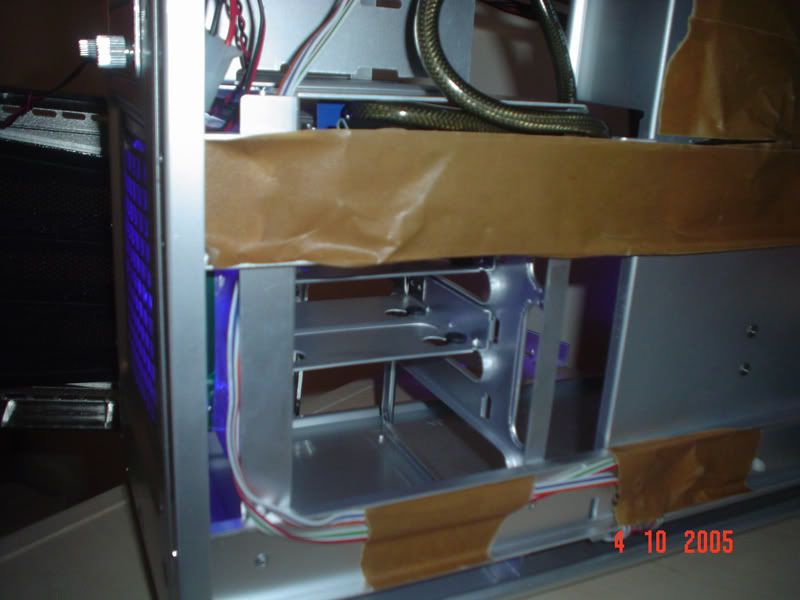
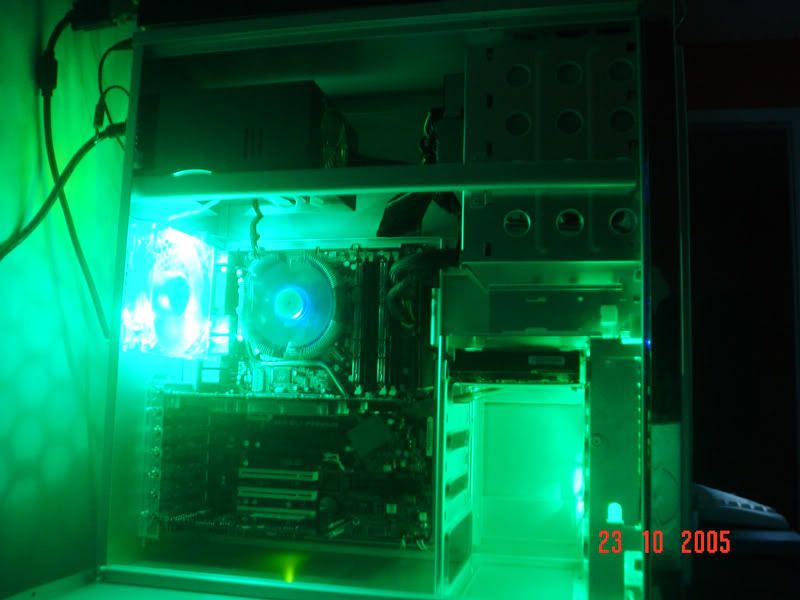
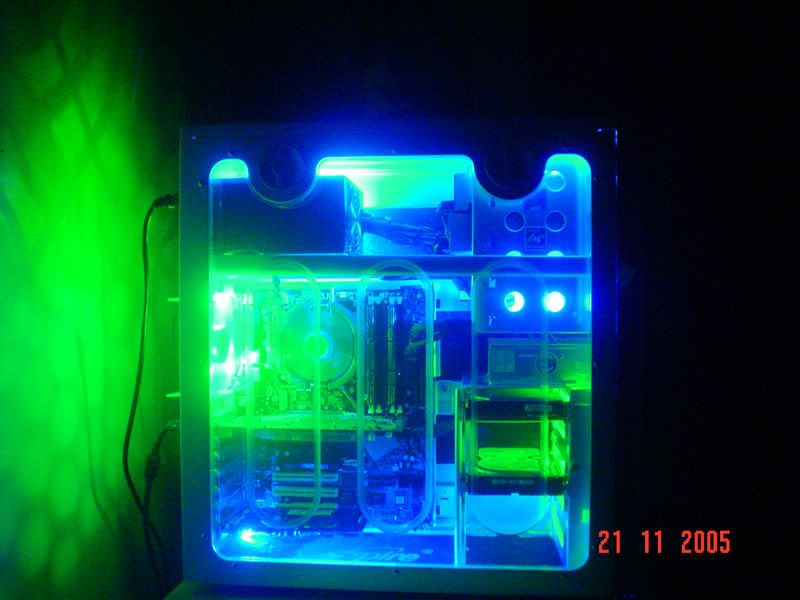
DSC04636.jpg


An upskirt shot ;) of the Lanboy showin how the PSU cables and IDE cable are run.

DSC04644.jpg


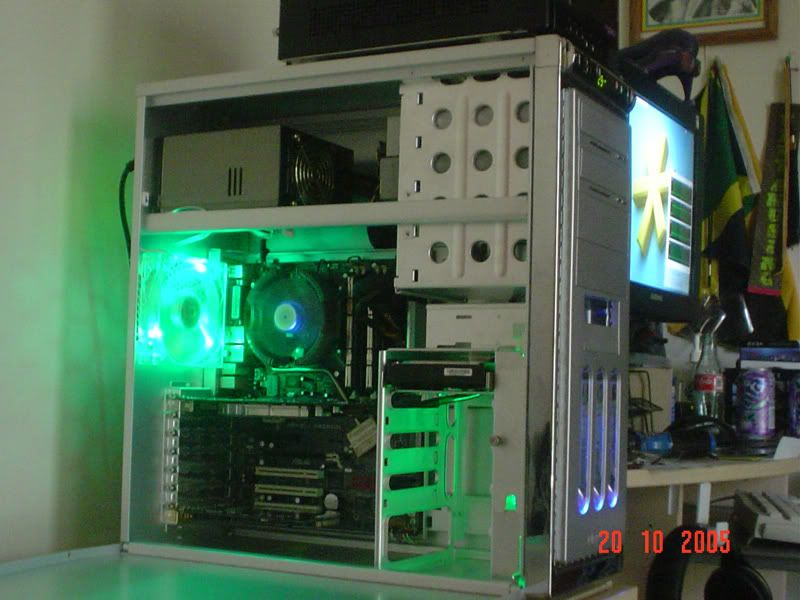
Here's that sexy side angle again.

DSC04646.jpg


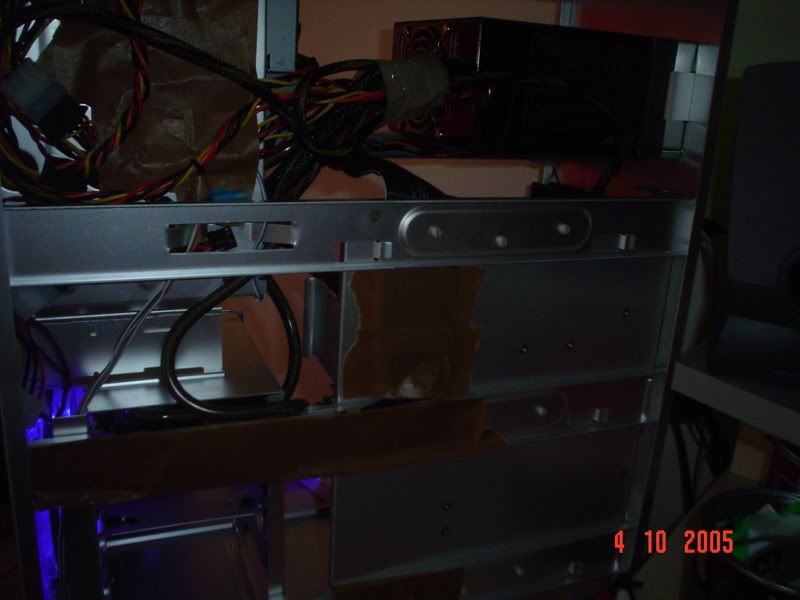
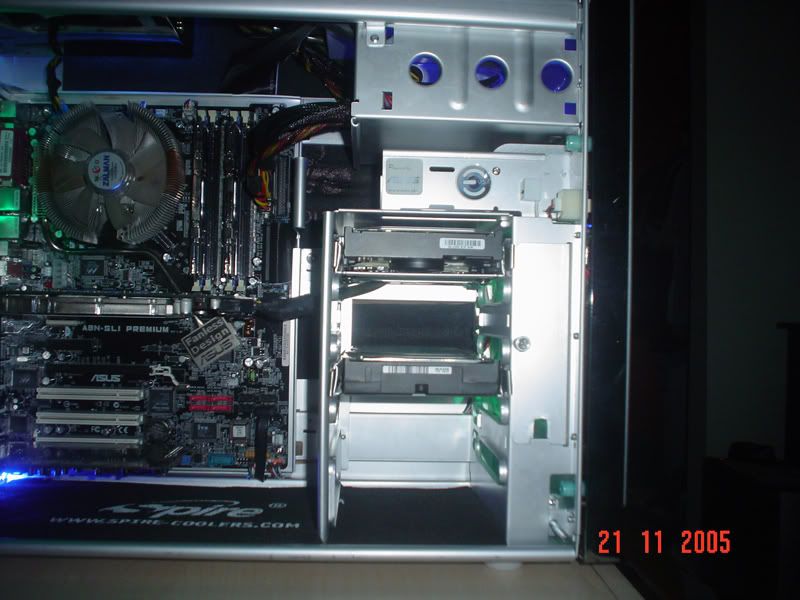
Here is what the HDD cages looked like after the new PSU

DSC04652.jpg
 
Here we go with the P 160

This is it, here we go. P160 fresh outta the box!

DSC04664.jpg


P160 opened up and ready for insertion :eek: :eek:

DSC04665.jpg


Got the Powerstream installed in the P160

DSC04672.jpg


In case nobody knows how the mobo tray for the P160 looks. This is it with teh Sli premi ready to go.

DSC04675.jpg


As I was wiring it up, I had it turned so I could get better access to the wires and do what g33z does.

DSC04679.jpg


The backside of the above shot, this is half way thru the wiring process.

DSC04680.jpg


A little furthur along. I had wires along the rail that has the tape on it. I was using it to train the wires to stay there until I could get some zip ties.

DSC04681.jpg


Out with the old and in with the new. The P160 and teh lanboy had a chance to hang out with each other for a little. Get to know each other ;)

DSC04687.jpg


So back to the P160. Some of you guys might recognize this, its one of the things I recommend most when I get questions about wiring the P160. All those USB and firewire cables are unnecessary and just add to clutter. Keep them up there. I also keep the temp probes up there too, I guess heat rises so it gives me a good idea on the ambient case temp in the "hottest" part.

DSC04692.jpg


The HDD cage as clean as can be.

DSC04693.jpg


Here is the backside of the P160. Kinda used the same method as the Lanboy. Most of the unused PSU wires go on the hidden side of the DVD cage.

DSC04694.jpg


Here you can see how things were run. The higher brown tape is where I had the IDE ribbons run (under the mobo, cut the mobo tray and along that rail)

DSC04695.jpg


Here is a little more zoomed out view of the backside

DSC04696.jpg


Detail shot of the backside of the DVD cage

DSC04697.jpg


You knew it was coming. Here's the patent pending side angle.

DSC04700.jpg


I also thought about another profile shot. I like this one too, makes the P160 look like a towering beast machine! rawr.

DSC04718.jpg


Detail of above the DVD drive. Its a mess that I had to get under control.

DSC04722.jpg


Lights out. This is what it looked like in the dark. The green you see is the fan from the Powerstream. (hmm green fan gives me idea)

DSC04724.jpg
 
So since the PSU fan was green and the exhaust fan that comes with the P160 is a POS (imo)

I Switched it to green!


DSC04766.jpg


Changed both the intake and exhaust fan to green. Looking good. (side angle, u kno :) )

DSC04768.jpg


Turned the some of the lights out so the fan shows up brighter.

DSC04779.jpg


Turned off the flash and this is what you get. My green machine.

DSC04780.jpg


Fan looking crazy bright but its cool. Literally. :p

DSC04785.jpg


This was my favorite thing about the new intake fan. The P160 comes with blue LEDs on the front. The green fan shines thru the filter and thru the grill looking amazing. It is definitely a VERY cool and easy mod if you got a p160.

DSC04789.jpg


Used a little different lighting and got the reflection from my orange wall to shed a little different light on the situation.

DSC04795.jpg


Lights out again. Just testing angles and lighting. The front led kinda shows, as does the blue in teh zalman.

DSC04817.jpg


So for the fans, I chose Antec Tri-Cool fans. Very good because the switch circled is the fan controller. High Med and Low. it helps a lot because its less mess with a fan controller and you can change fan speed and drop of a hat. From [H]ardcore Gaming to [H]ush [H]ush quiet. This is where I put the controller for the front intake.

DSC04820.jpg


This is where the rear exhaust fan speed adjuster is located. Very cool looking I think.

DSC04822.jpg
 
So here is the BIG upgrade.

I got the sound dampening from svc: http://www.svcompucycle.com/49spsoundpad01.html,

Since I bought the floor model P160 from CompUsa, I bought the windowed side panel from svc: http://www.svcompucycle.com/sp160w.html

the x-fi I bought from CompUsa since it was at retail price,

dual 4 inch blue cathodes from jab-tech: http://www.jab-tech.com/LOGISYS-4-DUAL-BLUE-COLD-CATHODE-KIT-pr-2575.html

and 2 Lazer LEDs from xoxide: http://www.xoxide.com/bluledligkit.html

Here she is all closed up. The 4 inch cathodes are on the hidden side of the PSU and on top of the DVD drive. The Lazer LEDs are under the x-fi and at the bottom of the DVD cage. (there is a diagram below that shows all that)

DSC04864.jpg


Who likes anything closed up? Not g33z, open up lets see the sexy insides :rolleyes:

DSC04872.jpg


Here is a little detail of the HDD cages, still keepin em clean and wirefree!

DSC04875.jpg


This is how the card reader, front panel connections and the SATA raptor are run. All under the mobo tray, the only cut in the tray is for the IDE ribbons cables.

DSC04878.jpeg


With the new cathodes and Lazer LEDs it adds a whole new dimension when the lights are off. Looks really bright but thats just becasue the lights are dark and the camera exposure settings.

DSC04897.jpg


The dark sexy, yup you guessed it, side angle ;)

DSC04901.jpg


Another favorite camera angle. I am p160 hear me ROAR!

DSC04905.jpg


Straight on with the side panel on.

DSC04911.jpg


Here are the details of what I used where

The red circles are the Lazer LEDs I got from xoxide.

The yellow/orange colored circles are the 4 inch cathodes that I got from jab-tech


dsc049113ou2uo.jpg


Used the orange wall again to get the different effect. Looks good.

DSC04931.jpeg


A higher side angle shot with the orange wall.

DSC04942.jpeg


If you guys need any of the full size pics just ask.

Should help out anyone who is looking to wire up a Lanboy or a P160.

Good luck to you all, they are both great cases to work with and wire up VERY nicely.
 
awesome job... very clean... i especially like how the green and blue compliment each other
 
THese pictures inspired me to clean my cables up, my case and its viewers thank you.
 
Damn that's nice. I have the powerstream and I know how annoying the sleeved molex/pci-e connectors are. Except in my case, there's NO WHERE to put any cables. No holes in the mobo tray.

Also, you might wanna see if you can salvage an old usb header. Gut the usb part, take the header that connects to the mobo, wire it up to the mobo, sleeve it, connect the power, led, etc wires to it, so it's just a single plug that fits in and gives it all.

It looks awesome.
 
Yeah, thanks guys.

I have had these pics on my comp forever and figured it was about time I shared so you can see what I was coming from.

I have recently upgraded again, I just don't have the camera right now. I have some pics but they are before I was finished and aren't very good looking.

I'm gonna get em asap tho.
 
Very very very very nice job. I like how you can actually see the wires, rather than you not seeing them at all.

Sorry if you didnt get that.
 
Noni said:
Very very very very nice job. I like how you can actually see the wires, rather than you not seeing them at all.

Sorry if you didnt get that.
I understand. It's not really by choice but the way things are situated, that layout works best.

It's always cool to make the wires that actually do show look neat. My problem was I was having shorting issues if everything was hidden and under the mobo.

I actually fried some of the stuff in the case. The mobo died, fried the card reader, fried one of the LED cannons and fried the Front panel (where it shows the temps). It was NOT cool.
 
Just waiting to get the camera to show you guys the latest.

Its looking gooood :D
 
HighwayAssassins said:
Very nice g33z. did some similar things to my P160...but now i got my eye on that lili V1000...
Lian Li - booo

too common ;) j/k


Its wierd to talk to you among these "other people" lol
 
g33zy said:
Its wierd to talk to you among these "other people" lol
I know what you mean...but whenever I see someone from genmay i pay more attention to their posts than the "other people". Because we matter more.
 
HighwayAssassins said:
I know what you mean...but whenever I see someone from genmay i pay more attention to their posts than the "other people". Because we matter more.
haha, qfmft!

no shens!

and I think DarthBeavis is trying to show his g.m. colors too
 
I got the pics fixed...so bringing it back to the top so for your help...


woo woo!
 
I got a new camera!!

look for some new pics tonight!! (maybe)
 
Nice and neat from the left side of the case, but not so good on the back of the motherboard tray - particularly on the Lanboy, I see lots of packing tape, messes of wires underneath, and a partially scrunched-up IDE ribbon.

Personally, I would rather die than stick tape all over the back of the motherboard tray or drive bays to hold cables in place. I use zip-ties on carefully bundled cables instead (usually one to bundle them, and another to hold the bundle to the frame). I find it looks a LOT neater, and it doesn't leave any residue on the case or cables.

In my cases, IDE ribbons are flat at all times, with only carefully 45/90 degree (etc) folds.
 
kani said:
Nice and neat from the left side of the case, but not so good on the back of the motherboard tray - particularly on the Lanboy, I see lots of packing tape, messes of wires underneath, and a partially scrunched-up IDE ribbon.

Personally, I would rather die than stick tape all over the back of the motherboard tray or drive bays to hold cables in place. I use zip-ties on carefully bundled cables instead (usually one to bundle them, and another to hold the bundle to the frame). I find it looks a LOT neater, and it doesn't leave any residue on the case or cables.

In my cases, IDE ribbons are flat at all times, with only carefully 45/90 degree (etc) folds.
Points taken. The pics of the lanboy were the initial phases and by the end it was electrical tape used to hold things. But the hidden side is always a mess. Doesn't affect performance, airflow or appearance so it suits me just fine. I would like to see how you did your wires. Post your "rate my cables" here post em in that thread so I can see and maybe get some pointers from you.

You might just start the "1000 zip tie showing the hidden side of the case revolution!"

we'll call it the "1ZTSTHSOTCR" for short ;)
 
okay, here are the pics I promised....

better camera so now you can see it better:

g33z10.jpg


-

g33z11.jpg


-

g33z12.jpg


-

g33z13.jpg


-

g33z14.jpg


-

g33z15.jpg


-

g33z16.jpg


-

g33z17.jpg


I think they came out decent.....
 
Thanks Qtip ;)


Also, not to be a traitor or anything but I gotta tell you guys. I have left Antec for now, keyword now. Got myself a silver Lian-Li PC-7.

I haven't had a chance to take the pics as yet but of course its wired up nicely. I went with the red tri-cools this time. I'm gonna see if I can get some shots tonight.

The good news is, I am also getting ready to grab a P-150. So when I get it in, i'll update this thread with the appropriate pics.
 
So away we go!

DSC00011.JPG


Here are all the parts I got from Performance-PCs. The sound dampening, the aluminum bay covers and the neXus 5.25 HDD silencer mount.
----------------------------------------------------------------------------------------------------------------------------------

DSC00012.JPG


Here's the first shot of the PC-7 in all her glory. I was wearing the orange gloves when working on the case because it was picking up all my fingerprints.
----------------------------------------------------------------------------------------------------------------------------------

DSC00015.JPG


Here's the first bit of sound dampening. Fits nicely on the back panel and I am loving the black on aluminum contrast.
----------------------------------------------------------------------------------------------------------------------------------

DSC00016.JPG


This is the sound dampening for the floor board. All the appropriate areas cut out to fit like it was made for the case.
----------------------------------------------------------------------------------------------------------------------------------

DSC00017.JPG


Put it in and it fits perfectly. now that the floor board is set, time to move up!
----------------------------------------------------------------------------------------------------------------------------------

DSC00018.JPG


the look of the cut out for the roof isn't as nice but it does its job and since its on the inside of the roof it'll be fine.
----------------------------------------------------------------------------------------------------------------------------------

DSC00019.JPG


Here she is naked with the first alu bay being put in place. Looks good so i think i'll add another.
----------------------------------------------------------------------------------------------------------------------------------

DSC00020.JPG


2nd aluminum bay and she's looking good.
----------------------------------------------------------------------------------------------------------------------------------

DSC00028.JPG


Here's the last shot of the my beloved P160 before i pull her down. She did me well....very well <.<
----------------------------------------------------------------------------------------------------------------------------------

DSC00030.JPG


Okay, so here's the reasoning behing this. Its something I have always done but this time i got a pic to maybe help some of you guys out. Most of the time what happens is, I get a big sheet of paper and outline the mobo.
----------------------------------------------------------------------------------------------------------------------------------

DSC00031.JPG


I then draw in where the appropriate/relevant parts are supposed to go. Only the parts that I am going to have to dremel out.
----------------------------------------------------------------------------------------------------------------------------------

DSC00033.JPG


Then with a bit of tape put the faux mobo in the case so I can get as much lined up without having the complication of the board disrupting everything.
----------------------------------------------------------------------------------------------------------------------------------

DSC00034.JPG


I do a front and back view so whichever side i am cutting from I know where everything is and where the appropriate holes should go. If you look as well, I include where the screws go because you don't want to cut a hole where you need to mount a screw!
----------------------------------------------------------------------------------------------------------------------------------

DSC00035.JPG


So after I set the mobo, sat down to the lunch of champions!

CHUNKY FTMFW!!!!
----------------------------------------------------------------------------------------------------------------------------------

DSC00037.JPG


Going back into my room, I was greeted by this mess. Cases everywhere, wires PSUs. Total chaos! and i love it >:)
----------------------------------------------------------------------------------------------------------------------------------

DSC00039.JPG


Grab the PC-7 and take her outside to my "work bench" for cutting. Fired up the ol dremel and got to work. I don't have any pics of that since I was dremeling by myself and its hard to cut and take pics. So you're just gonna have to take my word for it ;)
----------------------------------------------------------------------------------------------------------------------------------

DSC00040.JPG


Yeah its a bit of a jump but I had to put everything together once I cut the holes to make sure it looked good. I didn't want to let you guys down. So on the first test fit, it turned out okay. Not where I wanted it to be but not bad either.
----------------------------------------------------------------------------------------------------------------------------------

DSC00042.JPG


This was my biggest problem. I couldn't reverse the hard drives because they were running right into the fan. I thought what to do and got an idea. you'll see later.
----------------------------------------------------------------------------------------------------------------------------------

DSC00047.JPG


So I started taking the shots to see how she looks in different light with different angles.
----------------------------------------------------------------------------------------------------------------------------------

DSC00048.JPG


Lights a little lower and the zalmans glowing nicely.
The whole setup is a little dimmer than in the P160. That case was so bright you couldn't see the zalmans, now they are glowing beautifully.
----------------------------------------------------------------------------------------------------------------------------------

DSC00049.JPG


Here is a shot with the flash on.
----------------------------------------------------------------------------------------------------------------------------------

IMG_0059.JPG


A lower camera angle shot. Zalmans looking good again. This the first of the "revised" pics. Although you can't see it here I got my new SATA cables.
----------------------------------------------------------------------------------------------------------------------------------

IMG_0061.JPG


If you look closely you can see the new SATA cables here. Also you can see that the HDDs have been reversed.
----------------------------------------------------------------------------------------------------------------------------------
----------------------------------------------------------------------------------------------------------------------------------

IMG_0064.JPG


So here they are. The right angle SATA from Performance-PCs. They fit nicely and look great on the mobo. They are softer rubber/plastic so the bend nicely and tuck neatly under the mobo.
----------------------------------------------------------------------------------------------------------------------------------

IMG_0065.JPG


So here is one of the things I did. Since I was looking for a much quieter case this time around, I used the Zalman fan mates on the CPU and the top mounted 80mm.

The hole was there, I just drilled it out a bit more to fit the fanmat knob. I then used double side tape to stick the actual unit to the cage. The knob here is for the CPU.
----------------------------------------------------------------------------------------------------------------------------------

IMG_0066.JPG


This is the knob for the top fan. Gotta keep that 80mm in check!
----------------------------------------------------------------------------------------------------------------------------------

IMG_0070.JPG


Here is the front pic. Testing the lighting and stuff.
----------------------------------------------------------------------------------------------------------------------------------

IMG_0073.JPG


In the dark. Looking sexeh! I actually love this pic and use it as my wallpaper!
----------------------------------------------------------------------------------------------------------------------------------

IMG_0078.JPG


My side angle glory shot with the windowed panel on.
----------------------------------------------------------------------------------------------------------------------------------

IMG_0080.JPG


Full light from the front with no flash. Looking good baby, looking good!
----------------------------------------------------------------------------------------------------------------------------------

IMG_0082.JPG


Side shot with no flash, the SATA/HDD section is kinda dark but you can get the idea of how it looks.
----------------------------------------------------------------------------------------------------------------------------------

IMG_0097.JPG


Since the one above was so dark, this is a nice detail shot of how the SATA/Front panel wires are run.
----------------------------------------------------------------------------------------------------------------------------------

IMG_2510.JPG


A nice 3/4 angle shot.
----------------------------------------------------------------------------------------------------------------------------------

IMG_2511.JPG


Another one since the angle/lighting is so sweet!
----------------------------------------------------------------------------------------------------------------------------------

IMG_2512.JPG


Lights up and a similar angle.
----------------------------------------------------------------------------------------------------------------------------------

IMG_2513.JPG


repost? maybe :D give me a break i was uploading the pics at 3 a.m.
----------------------------------------------------------------------------------------------------------------------------------

IMG_2517.JPG


3/4 angle with the side panel on. Now THAT's a profile!
----------------------------------------------------------------------------------------------------------------------------------

IMG_2518.JPG


So here's the desk for now. She looks like she is happy there. And before the questions come in, thats brooke burke on the desktop. yes its a hawt pic, thats why its my wallpaper! :D

IMG_2520.JPG


Took a shot from the opposite side. This is how it looks standing at my desk.

IMG_2521.JPG


The g15 gleaming and the shot of the whole setup.
 
nice case mate, really like the lian-li's. I bet that covered section above the hard drive cage helped hide a couple of wires ;)
 
Okay, i'm gonna do the write up later but I just wanted to update you guys on something else. So, like I said my P150 is in the works, in the meantime I get a call today to wire up anothe rig.

An conroe build, with the ASUS PW5 mobo inside an Antec Nine Hundred case!

I've been waiting a long time to see one of those cases and am pretty excited about wiring it up!

Stay tuned! Plans to get that done tonight!
 
oo looking more closely i love the new SATA cables, the redone HD section ANd the lil block of foam under the bottom HDD, thats awesome. everything so nealty hidden, i wish we could just see some more of the red shiningg thru. maybe for the night shots you gotta change the ISO and let it take a loooooooooooong exposure to really get the nice lighting effect.
PRETTY

oh and good to hear about the antec 900, can't wait to see it!
 
el rolio said:
oo looking more closely i love the new SATA cables, the redone HD section ANd the lil block of foam under the bottom HDD, thats awesome. everything so nealty hidden, i wish we could just see some more of the red shiningg thru. maybe for the night shots you gotta change the ISO and let it take a loooooooooooong exposure to really get the nice lighting effect.
PRETTY

oh and good to hear about the antec 900, can't wait to see it!
You know, i'm such a freaking moron. The reason the red isn't shining through enough is I have the fan controller on low and it turns down the light. The whole night I was trying to get a good pic showing the red and was wondering why it was looking so dim.

Just now I realise why. :rolleyes:

I'll get it done tonight as well as put up a proper pic from the side since there are none that show the full open "rate my cables" shot.
 
Title change ftw!

Let's hope that UPS doesn't pull one of thier usual stunts and the P5W mobo gets here today so I can get busy on the Nine Hundred build!
 
mrmetal_53 said:
what i want to know is how you still have SLI cards in your build.... ;) :D
hahaha, when I unpacked and repacked I realised that I didn't take any new pics so I put it in just to snap the pics.

Thats a good one.
 
g33zy said:
Okay, i'm gonna do the write up later but I just wanted to update you guys on something else. So, like I said my P150 is in the works, in the meantime I get a call today to wire up anothe rig.

An conroe build, with the ASUS PW5 mobo inside an Antec Nine Hundred case!

I've been waiting a long time to see one of those cases and am pretty excited about wiring it up!

Stay tuned! Plans to get that done tonight!

Awesome, dude. I'm definitely looking forward to seeing the Nine Hundred in action; I've got my eye on getting one sometime around Christmas...and I'm thinking red LED fans might look nicer than the traditional blue LED fans included with the case. (I'm also a huge fan of your Lian-Li project)

Thanks and happy building! :D
-JP
 
Back
Top