Project: CrossFlo (the sequel)

markkleb

Gawd
Joined
Jun 2, 2006
Messages
710
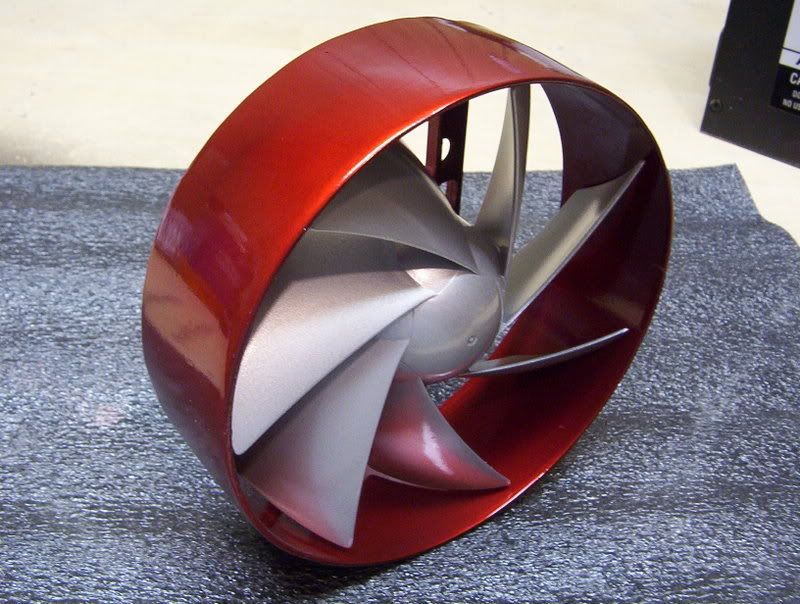
My earlier version was made out of plastic. Much simpler as well.
http://www.hardforum.com/showthread.php?t=1123090&highlight=crossflow

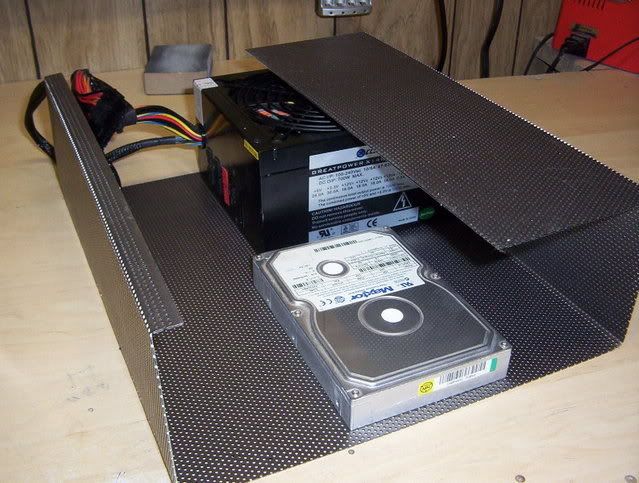
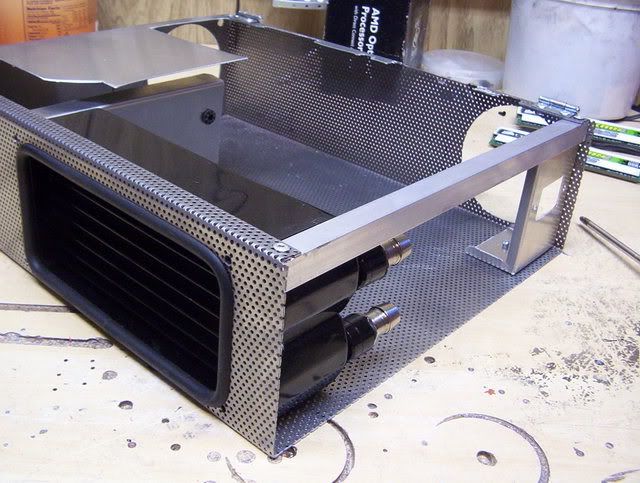
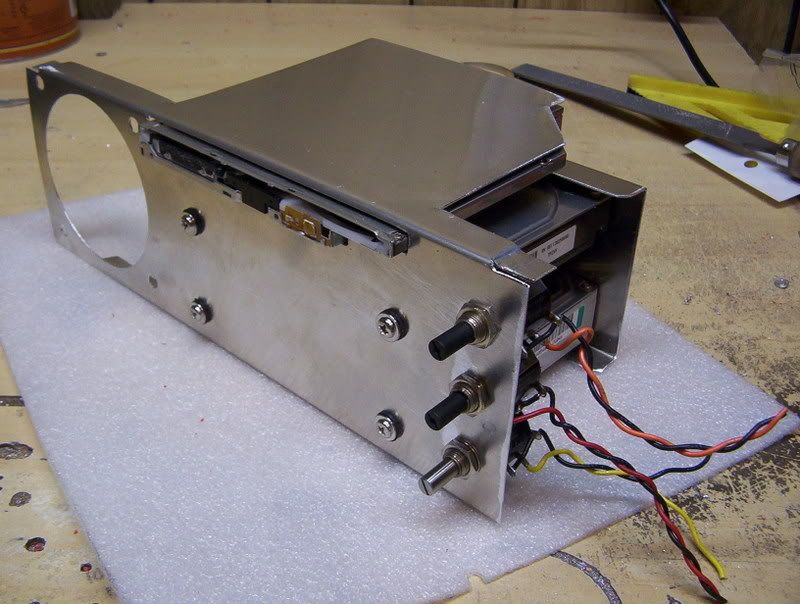
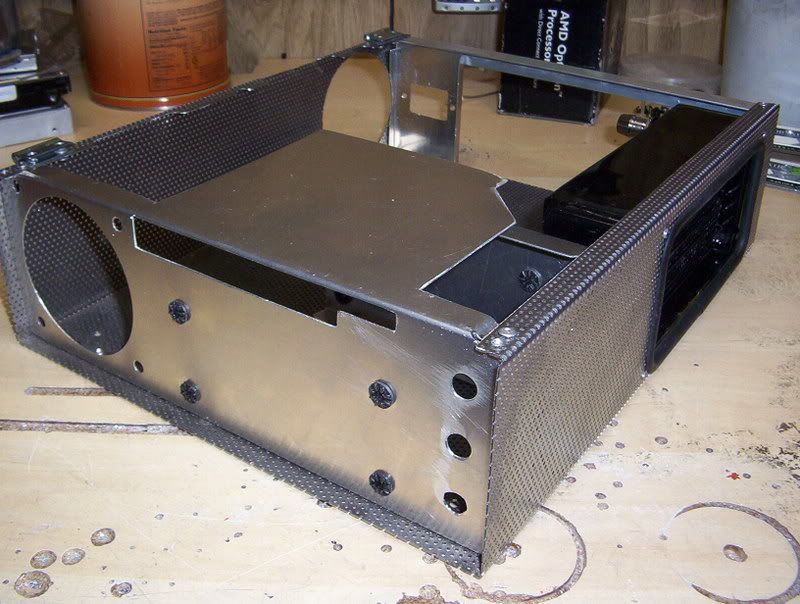
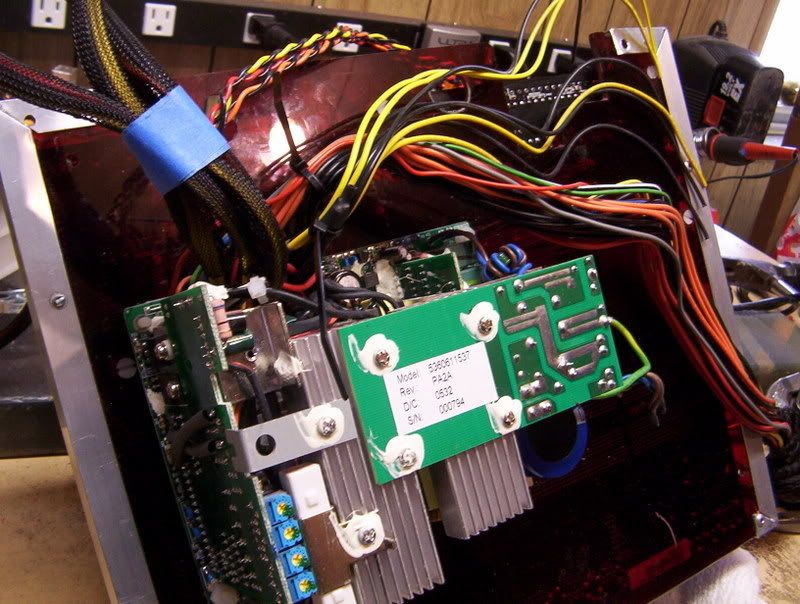
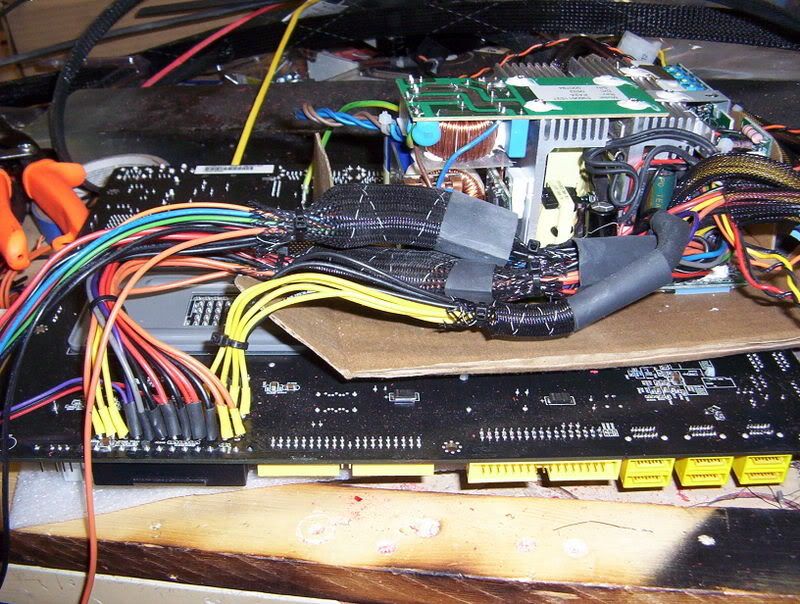
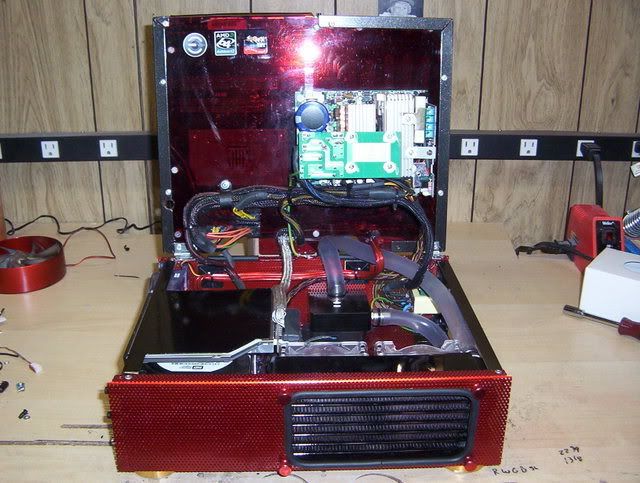
I like to mount the PS under the mobo so it frees up the top and definitely eliminates clutter which aids airflow a bunch.

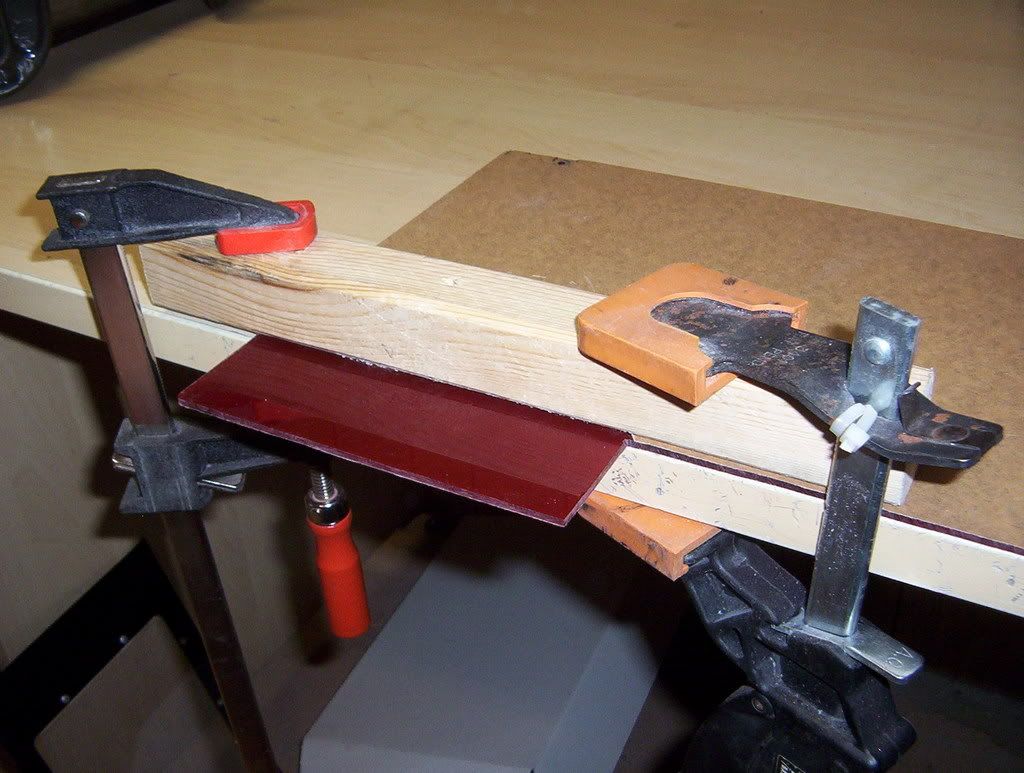
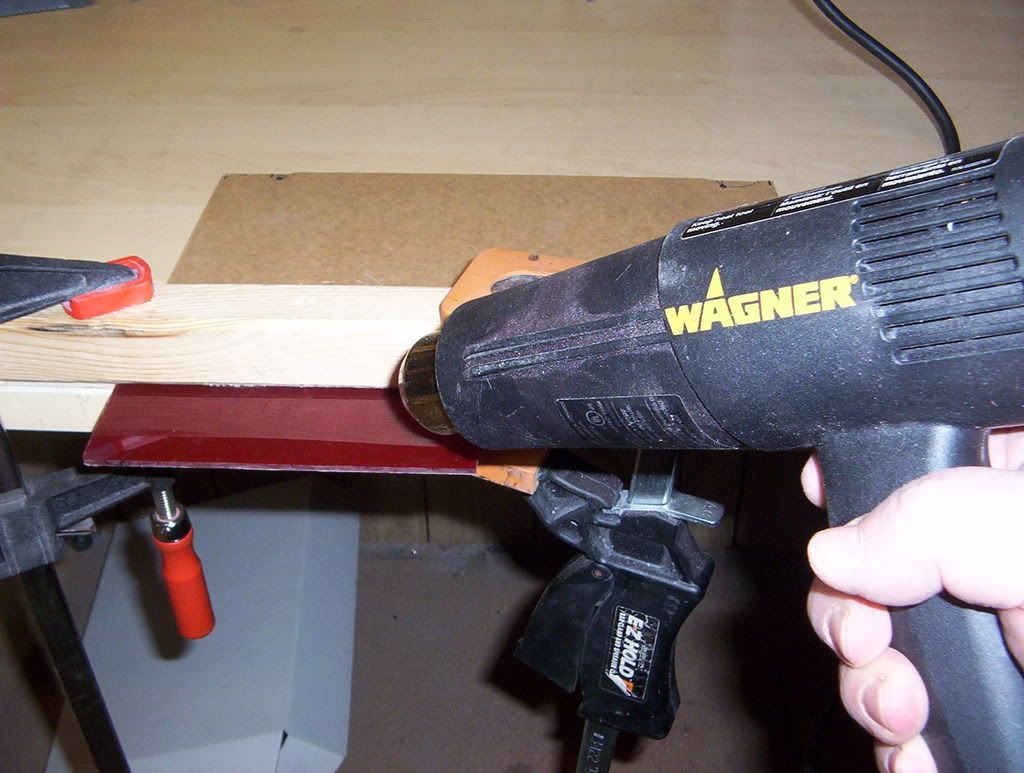
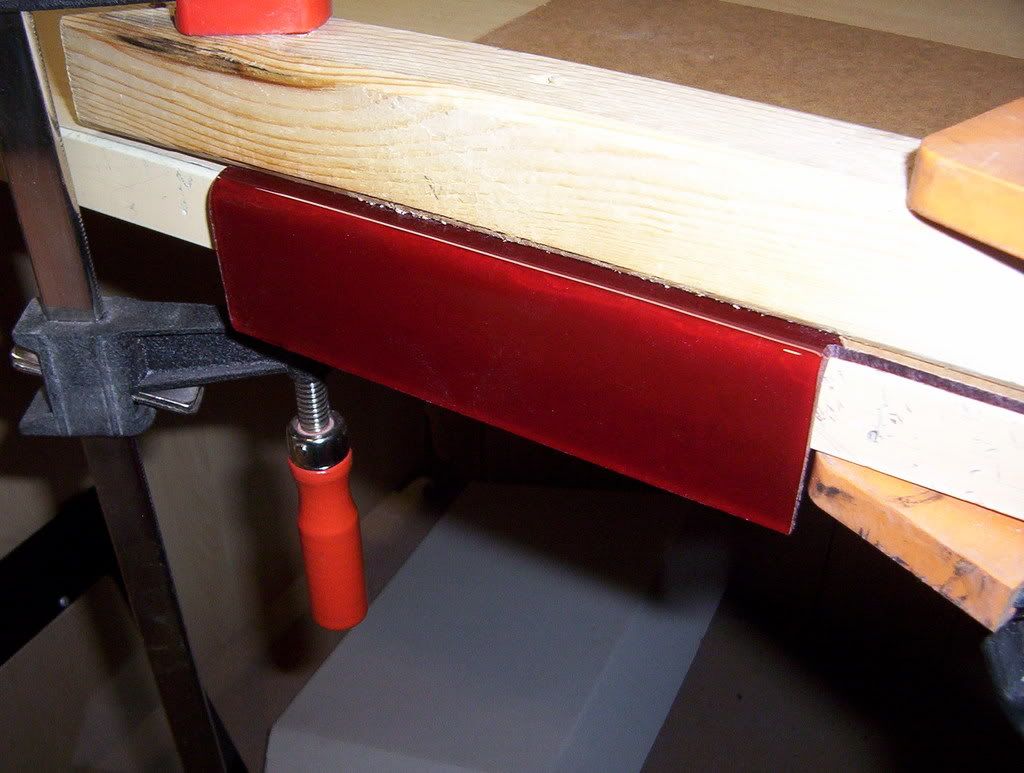
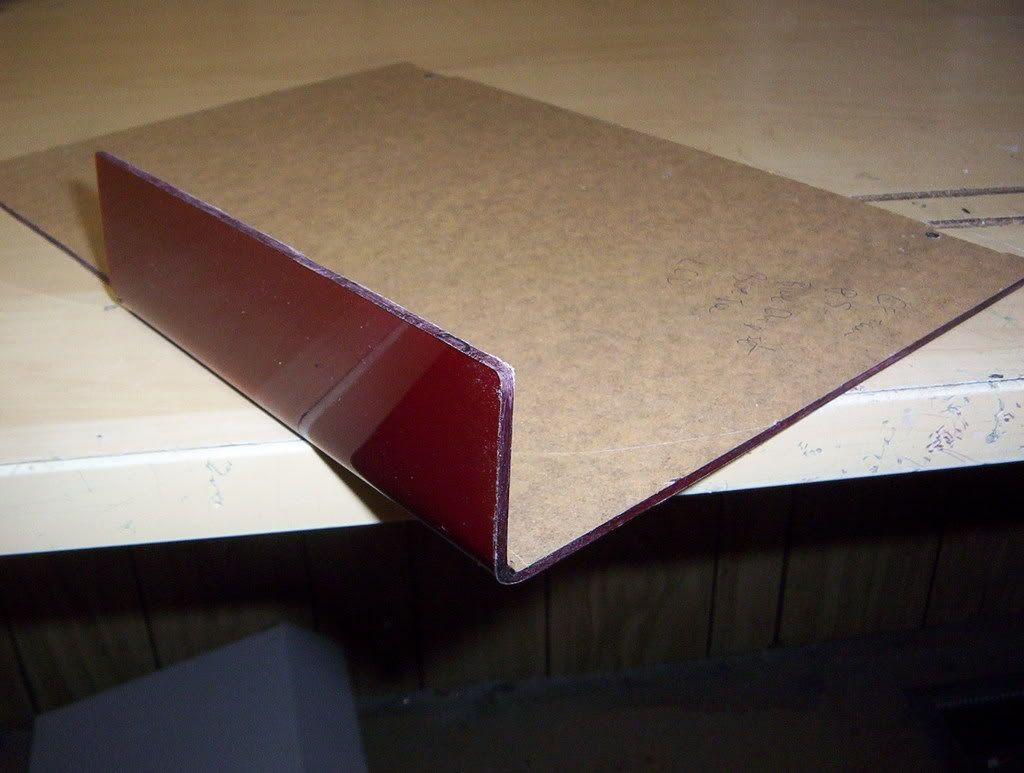
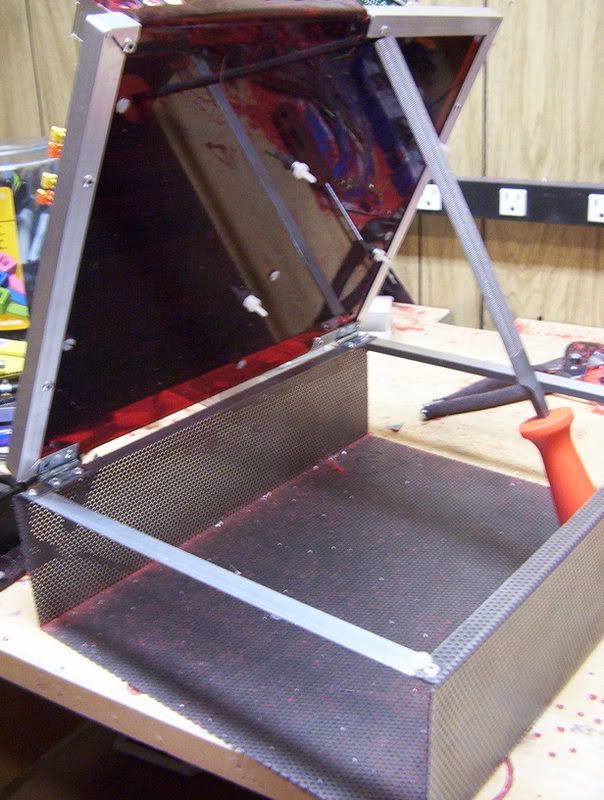
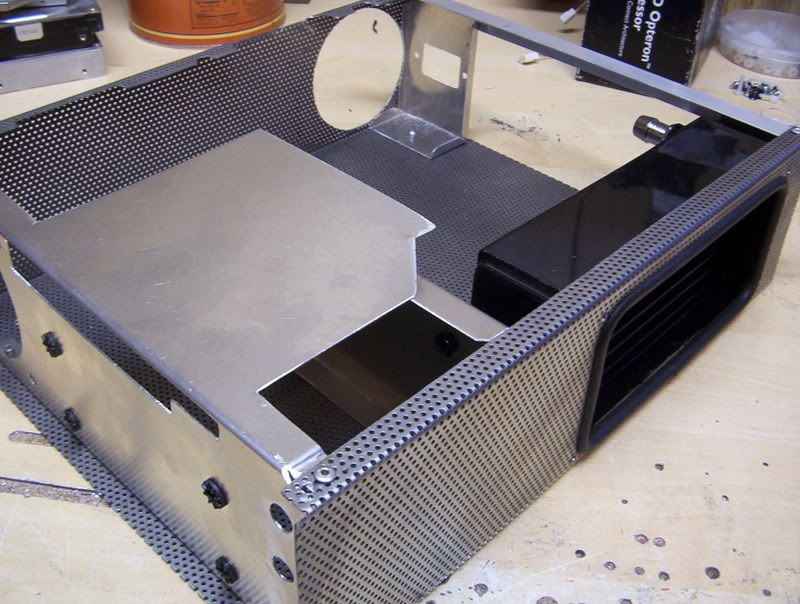
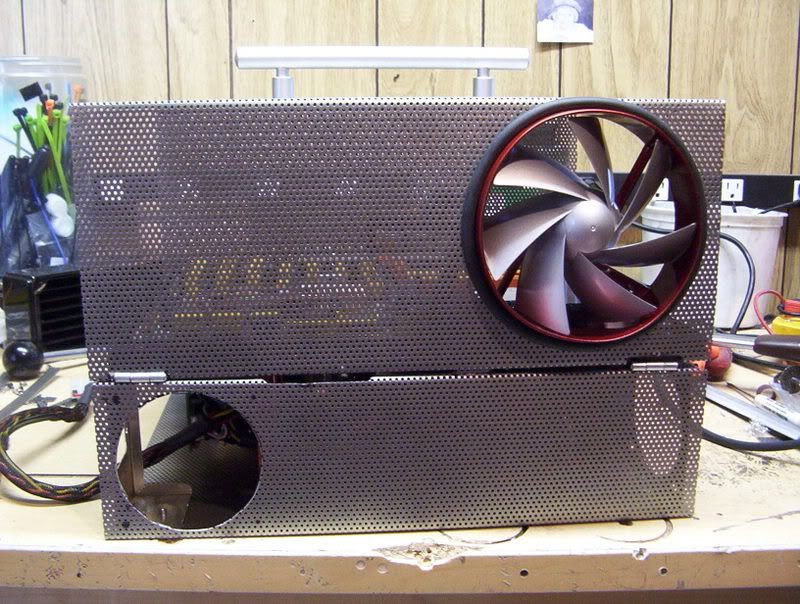
For this version I am going to use perforated steel and Plastic. I built this a month ago for PDXLAN and was putting in 20+ hour days so I couldn't post it on multiple forums. Now its done I thought I would post the picts here because there are some cool ideas.

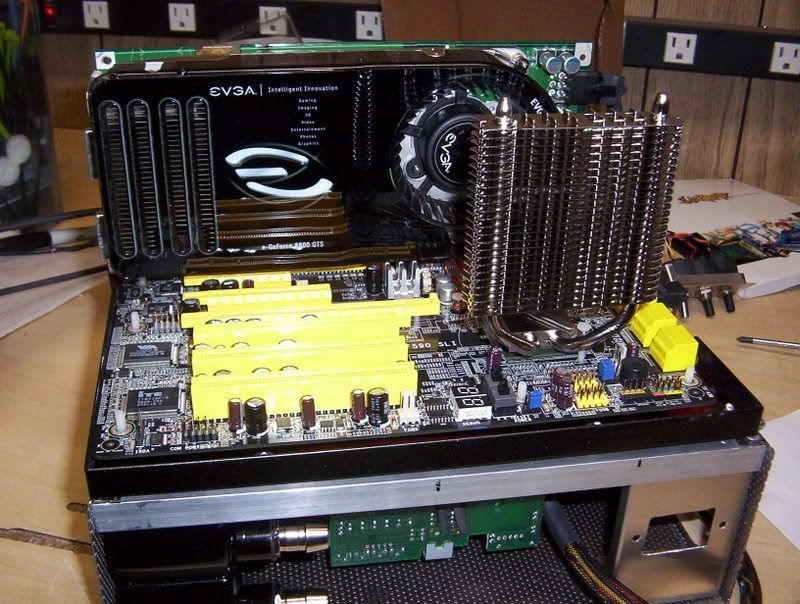
Basically my thought is to use a full size ATX mobo in a case smaller than a Qpack. I posted the original in the SFF forum but because I dont use a mATX mobo they say I cant be part of their group:p

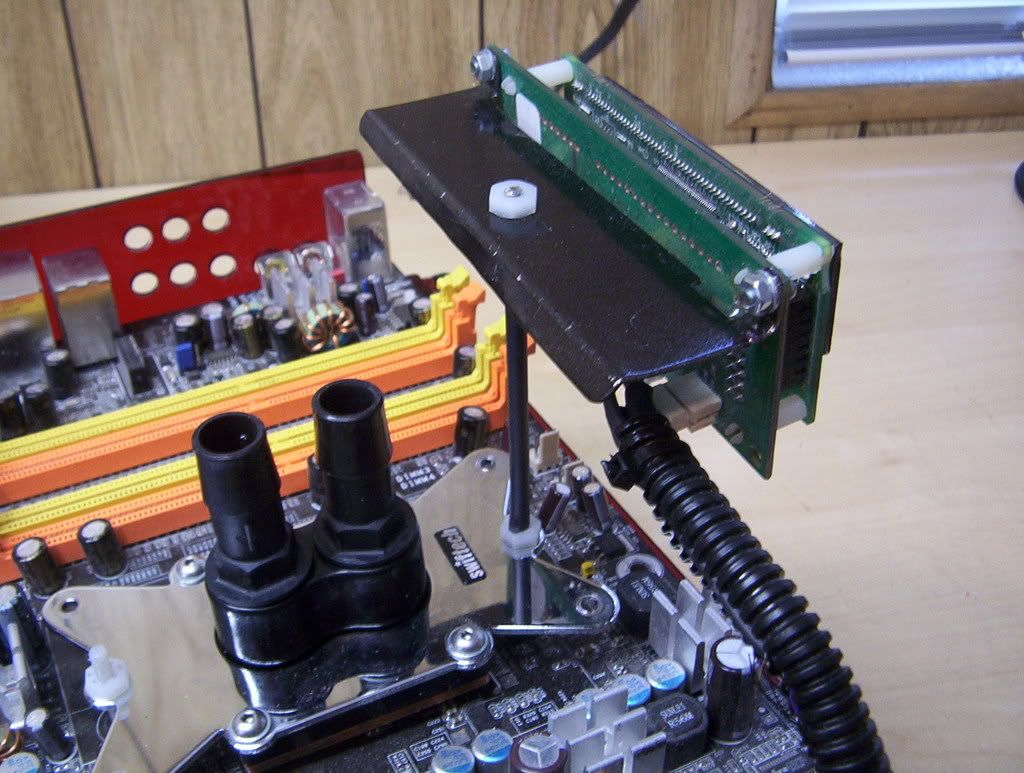
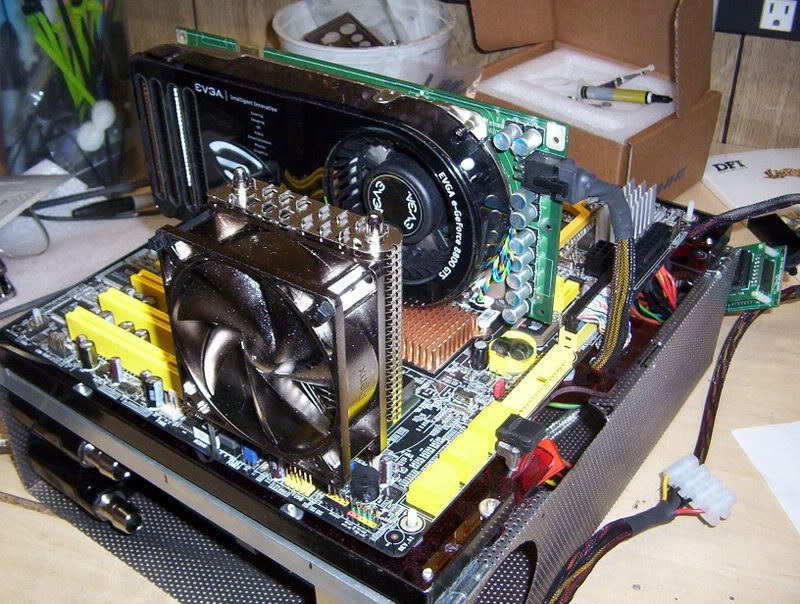
For this version I will be Using a DFI LP 590 mobo, 8800GTS, PC Power&Cooling 510 (thanks
DELL_DUDE_B120 ) and Dangerden/Swiftech water cooling.

Here is a pict of one of my first comps. A Qpack showing just how cluttered the insides are
QpackClutter.jpg


For those interested in Dimentions this comp is 10 1/2" wide X 12 3/4" deep X 8 3/4" tall (and can house a pair of 8800GTS EASY)
 
So on this comp I will be using perforated metal. I am going with .036 thickness and 1/16" holes on 1/8" centers.
Basically I bend it over the edge of my desk
bendingbottomhalf.jpg


The plan is to put the PS, Hdds, DVD and Water cooling in the bottom section (below the mobo)

Since the bottom half is only 3 1/2" tall I will be using a DangerDen dual 80mm rad.
80mmradmounted.jpg


to mount the HDDs and DVD I made a plate out of alum using grommets for the HDD mounting to reduce vibration and transfer of noise.
Picture053.jpg

(the 3 controls to the right are to adjust the voltages of the PC Power&Cooling 510, 3.3V, 5V, and 12V)

Here is a shot with the alum panel mounted in the case
Picture071.jpg
 
awesome can't wait to see this, i loved your last case mods and i thought you should have been part of the sff club:p
 
Thanks Kid8. I really love learning as I go. I dont mean to tease steeeeve and them too much (oh who the hell am I kidding) I love teasing those that said my comp wasent SFF...;)

Here is how I did the mobo tray. I am going to be using Red Plastic with a alum angle to help with stiffness because its gonna be hinged. I am making the I/O plate as part of the mobo tray.

So basically I cut the plastic and clamp it to my table.
Picture003.jpg


Than I get my heatgun (can use a flame or hairdryer but be careful) and move back and forth till the corner is soft.
Picture004.jpg


Than I just bend it over the corner of the desk
Picture005.jpg


Once it cools (just a min) this is what a good bend looks like
Picture006.jpg


( I have a bunch that didnt turn out so good, lol)
 
Ok I am mounting the mobo on one side and the PS on the other. I use Nylon screws as they are MUCH safer (no mobo scratches)
Picture092.jpg


Here is what the hinges/alum rails look like
rivitingmobotray.jpg
 
This is the " DO NOT TRY THIS AT HOME" part of our story.

To get the PS to fit in the small bottom section and still allow air to pass through I removed the PS from its case.
PSwithoutcover.jpg


Again "DO NOT DO THIS UNLESS YOU HAVE A THROUGH UNDERSTANDING OF ELECTRICITY AND PROPER GROUNDING"

before you say "what the hell are you doing butchering a $300 PS?" Thanks to Del_Dude I got this PS for $85. And since it was used i figured there was no guarantee anyways.

Ok on to the messy part. The PS comes with a LOT of wires. Since I know what hardware is going to be in this comp I can eliminate the wiring that is not necessary by unsoldering it at the power supplies circuit board.
Picture038.jpg

PSMobowiring.jpg


Also I like to solder the wiring to the back side of the mobo.
Picture045.jpg

Picture046.jpg

This is the USB connection for the iMON and the On/Off button. After I solder them (very small soldering tip) I put a dab of glue over it to protect the joints and keep the wires from moving around too much
 
Argh, you beat me to it. This weekend / next week I am starting a worklog (the system is a tower, not a custom case), and I was going to make the entire thing "wireless" by doing exactly what you did with the motherboard. Oh well, nice job so far. I think it will look really cool. :D
 
Argh, you beat me to it. This weekend / next week I am starting a worklog (the system is a tower, not a custom case), and I was going to make the entire thing "wireless" by doing exactly what you did with the motherboard. Oh well, nice job so far. I think it will look really cool. :D

Here is a tower I built for Ultras mod contest last year The soldered/hidden wires really clean up a case.

alumultra2.jpg
 
Oh man, I'm loving that soldered-on wire..... I'm going to have to grow a pair and do that on my system stat.
 
Thanks guys.
Ok on to finish up the bottom half. I am using a Petras top (beautiful work Petras tech) on my Laing pump with 1/2" hose. I am only cooling the CPU as I have modded the 8800GTS to cool much better with its own cooler (more on that later)

Here is the bottom done with the 2 WD 160s in Raid0 and the liteOn Laptop Slotload DVD. For a finish I am using a Metalic black on the alum pieces and a Red Anodize paint on the case.
wiringattachedtomobotray.jpg


I am using 2 80mm Coolink 802s to pull air through the Rad and blow past the PS and out the other side. the Coolinks blow a lot of air for 80s and are really quiet and adjustable.
http://www.coolink-europe.com/main.php?show=art_list&item=1&cat=1&cat_set=1

I added a hole and grill so the warm air could escape a little easier
Picture066.jpg
 
Pretty neat! Arent you worried about dust/dirt though using the perforated aluminum?
 
Pretty neat! Arent you worried about dust/dirt though using the perforated aluminum?

Its steel, and no.from my experience in the past for some reason my designs dont collect much dust.
I think it has to do with the very short distance air travels in my comp and also it dosent have to change course like a tower (up, over, around stuff). I think thats how dust gets trapped in bigger cases.
Also Costco sells air in a can for 4 for $10 just in case.:D
 
Ok on to the top section. I need to mount the iMON.
http://www.soundgraph.com/Eng_/main.aspx

It basically is a 2 line VFD(vacuum fluorescent display) That also allows complete remote control of your comp. Since the front panel is going to be Smoke plastic (the iMON will show through it) I remove it from its housing and mount it to the Apogee mounting plate with a piece of threaded rod (covered by shrink tubing)
Picture012.jpg

Picture010.jpg
 
Ok now on to the Chipset/Video Card cooling. I am going with a Thermalright HR-05 for the chipset. dam this thing is as tall as the 8800 but cools Beautifully.
Picture081.jpg
\

I am going to draw air from the back of the case to cool the chipset and than on to the 8800
Picture084-1.jpg
\
(notice there is plenty of room for a pair of 8800GTXs)
The fan is going to be mounted into the rear panel after I finish modding it.
 
Ok on to the fans now. I am using a couple of Silenx fans, 1 is 120mm and 1 is 80mm. They are $$ but excellent fans. I think the mounting ears are too much so I am removing them. Here it the original fan.
stocksilenxfan.jpg


Out comes the Dremel
cuttingears.jpg


After a little belt sanding
beltsand.jpg


Throw in a little Bondo, more sanding, a bunch of coats of primer/filler, more sanding/smoothing than Red Anodized paint followed by clear and Voila
100_2716.jpg
 
Thanks. they really are GREAT fans stock (the CFM and Dbs may be a little exaggerated) but if you dissect the fan you will see the good part. I added a synthetic lube to further reduce friction and I balanced the blade as well as smoothed the casting marks and its nearly silent.
I did the same to the 80mm Chipset fan as well.
 
I like this mod. Those fans seem nice except for they sound like they have sleeve bearings. Other then that it looks great. The blade design looks like it really cuts the noise.
 
Those fans seem nice except for they sound like they have sleeve bearings.

You say that like its a bad thing:D
If you buy a fan with ball bearings and the fan costs $5 how good can the bearings be?

Add to that that any vibration will be transfered through the ball bearings to the case.

Silenx uses a much harder material for its bearings and a better lube with teflon rings to seal in the lube and cut friction even more.

Show me a fan that is that quiet and blows that much air and looks that cool, I will be happy to use it in my next mod.:)
 
That fan(along with the rest of the mod) looks amazing.

After the first pic of the fan after the dremel, I was like dude! your doing all this hard work and you make your fan look like that?!?!. Then I saw the rest and gave a big ol sigh of releif.

Keep up the good work man, looks abso-fricken-lutely amazing.
 
I bought that fan a while ago when they were $30 :eek:

I am not sure why I bought them because $5 is usually my limit for fans but it was probably because some people were talking so much shit about them and I wanted to know for myself.

So yea when I started to cut it up my friends were like "are you nutts?" So I worked REAL hard to make sure I didnt destroy them.
 
The wireless tactic is so hot, i had to drag my wife into the room to see.
 
Relaly nice work, looks like something I could even do if I spent the time (although I never will).

I like you you kept it simple enough to bend over the desk (I don't even have a work area to do that!) but someday maybe :)

I would never solder the wires to the back of the MB though. I have had too many MB's go bad, or get upgraded or PSU blow up for it to be worth the effort. The couple of wires visable in my computer do not bother me to the point where I would give up the luxury of the plugs. Maybe I would consider soldering the plug onto the backside of the MB instead though :) Hell even with brand new hardware about 50% of what I buy is defective these days. In my last rig alone I recieved Bad OCZ memory, Bad WD Raptor, Bad PSU, Bad DD Pump... Can never figure out what is causing the problems with QC these days.

This case is going to look great, I love working with metalcast paint.

Anyways you got me back on [H] to watch your progress.
 
Thanks, its for guys like you that I do what I do.
(sorry about all the bad hardware:( )
 
What kind of clear coat did you use on that fan? I bought some Krylon Clear Acrylic shit that kind of finished looked like I threw sand on my case after it dried. . . . (aka, i think i bought the wrong stuff).

Anywho, very good, I can't wait to see the final product.

Any tips on soldering wires? Is it terribly difficult?

For paint I go to Autozone and similar auto parts stores.To me their paint is more like I am used to working in the automotive field.

For primer I try to use "Self Etching Primer" as it sticks better. Paint is designed to stick better to Primer and a even coat of primer makes the final coat look more even

For the paint I try to use Lacquer (because it dries 100times faster than enamel:) )
The red paint I used is called Metalcast by Dupli-Color (it is heat resistant to 500F)

The clear I use is Rust-Oleum "Crystal Clear Enamel" (I use a enamel for the clear because it has a little more gloss and I wont have to sand it)

If you read the labels on the can there is a bunch of good info. I try to get paint that dries fastest(Lacquer) so I dont have to wait weeks for it to dry.

Some times I sand the color and some times I dont depends if it looks smooth or not.

And REALLY make sure the part is clean (no finger prints) and there is no dust around when you paint (it will be drawn to the part like a magnet)

For soldering tips, thats harder. Clean the parts first, clean the tip before EVERY solder joint and PRACTICE a LOT first on junk stuff before you mess up a good mobo.
 
OK back to the picts. The 8800 cards are real heat makers. One of the MAIN reasons is the absolutely ridiculous exhaust port. Its such a bad design they had to cut slots into the side of the card to let the heat that backs up escape into ur case.

CrossFlow&


Ok get out the Dremel and cut
Picture078.jpg

(there is a bunch of filing to do yet)

Here is what the 120mm fan looks installed
Picture075.jpg


faninhole2.jpg
 
Back
Top