So if you have seen my worklogs before you know im a quiet computing, performance machine, wiring enthusiast. Since its my hobby I figured I would enjoy making machines for others, and here is the computer I built this week.
Specs:


Basically we wanted an affordable but powerful system. that means a good Mobo between $100-$150, a really good gfx card, and a good PSU. I was even surprised by the total cost. its good to know you can build a monster for between $1000-$1300.
GOALS
Awesome wiring
Clean system
Quiet
Somewhat powerful (this means overclocking and lots of stress testing/OS optimizing)
-----------------------
Here we go:
The newegg stuff arrived before the weekend and it took 5 more days for the case and accessories to arrive. pics-

-

-

-

-

-

-

-
So I figured that I might as well setup a test bench, get the system fully installed, tweaked, OC'ed and tested. Best use of time.
--

--
--
It was great. I had the bench setup on the desk with a spare keyboard n mouse attached, with both the bench and my system plugged into the monitor. Eventually the final clocks rested at 2.9ghz on the CPU with the ram just under DDR600 and stock timings. I was able to keep the vcore down and keep the fans on silent Q-fan profiles which meant they only spun up linearly with load and heat. Its great.
---------------
Now we build!
First things first, strip down the case. We don't need no silly drive cages!
-

--

--

--

--
I removed the front fan to make way for a yate loon, plus grouped and taped the front panel lights and buttons. Next up I needed the mobo to measure spots for cutting and fitting.
-

--

--

--

--
What a pretty PSU! and quiet!
Next up, I went outside to me deck, got out the trusty dremel and metal files. Have to make cuts before any sound damping foam or components can go in.
-

--

--

--
Awesome. Since I wanted to use the stock fan for the back area, assuming it had more airflow than the YL fan, and knowing there would be some heat to get outta the case, i went ahead and sleeved the fans. After that it was simply a matter of running the cables thru the holes!
-

--

--

--
The main power cable was a BITCH to lay flat thru the hole! the mobo was not even coming close to laying flat to be screwed down. I ended up stripping the sleeving a bit to fan out the 24 wires to allow it to work. I got thru eventually. Its definitely hard to install a packed mobo WITH 2 power cables already attached!
-

--

--

--

--
For the HDD, we got a Nexus disktwin so I could maybe silence the drive a bit, but also mount it up high and hidden One major problem that reared its head was how the bezel would fit back on! The disktwin mounts the drive very close to the front of the case and left no space for the bezel to clip into place. And then I looked closer and pulled out my trusty snips!
-

--

--

--

--

--
Voila! Last thing to do is drop in the Vid card (so dam pretty! and QUIET! but SUNblazing hot!) and attach the cables, then take it to ma room for heat and sound testing.
-

--

--

--

--

--

--

--

--
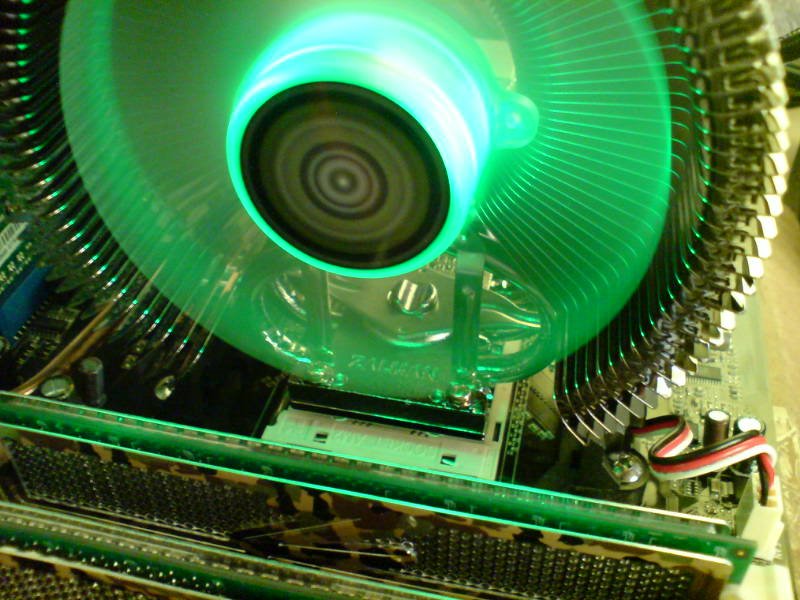
I put 3dMark06 to native res (1680x1050) upped settings and put it on a loop with background apps running. I BEGGED the machine to crash. nope, stable as a rock and venting all the gfx card air from the side fan without bothering the CPU that much. In addition, the cpu pulled some good air from the top 80mm square hole (where I took the top down shots of the cpu fan thru).
The next morning, I tried to take a few more farewell sunny shots. some came out decent most did not. :/
-

--

--

--

--

--

--

--

--
I was late for work so the plan was to pack and ship over lunch. A suggestion came to think about the PC speaker location, so I went ahead and moved it, and finished up the sound damping, with some "texture"
-

--

--

--

--

--

--

--

--
---------------------------------
SHIPPED! that's all folks. hope you enjoy!
Specs:
Basically we wanted an affordable but powerful system. that means a good Mobo between $100-$150, a really good gfx card, and a good PSU. I was even surprised by the total cost. its good to know you can build a monster for between $1000-$1300.
GOALS
Awesome wiring
Clean system
Quiet
Somewhat powerful (this means overclocking and lots of stress testing/OS optimizing)
-----------------------
Here we go:
The newegg stuff arrived before the weekend and it took 5 more days for the case and accessories to arrive. pics-
-
-
-
-
-
-
-
So I figured that I might as well setup a test bench, get the system fully installed, tweaked, OC'ed and tested. Best use of time.
--
--
--
It was great. I had the bench setup on the desk with a spare keyboard n mouse attached, with both the bench and my system plugged into the monitor. Eventually the final clocks rested at 2.9ghz on the CPU with the ram just under DDR600 and stock timings. I was able to keep the vcore down and keep the fans on silent Q-fan profiles which meant they only spun up linearly with load and heat. Its great.
---------------
Now we build!
First things first, strip down the case. We don't need no silly drive cages!
-
--
--
--
--
I removed the front fan to make way for a yate loon, plus grouped and taped the front panel lights and buttons. Next up I needed the mobo to measure spots for cutting and fitting.
-
--
--
--
--
What a pretty PSU! and quiet!
Next up, I went outside to me deck, got out the trusty dremel and metal files. Have to make cuts before any sound damping foam or components can go in.
-
--
--
--
Awesome. Since I wanted to use the stock fan for the back area, assuming it had more airflow than the YL fan, and knowing there would be some heat to get outta the case, i went ahead and sleeved the fans. After that it was simply a matter of running the cables thru the holes!
-
--
--
--
The main power cable was a BITCH to lay flat thru the hole! the mobo was not even coming close to laying flat to be screwed down. I ended up stripping the sleeving a bit to fan out the 24 wires to allow it to work. I got thru eventually. Its definitely hard to install a packed mobo WITH 2 power cables already attached!
-
--
--
--
--
For the HDD, we got a Nexus disktwin so I could maybe silence the drive a bit, but also mount it up high and hidden
One major problem that reared its head was how the bezel would fit back on! The disktwin mounts the drive very close to the front of the case and left no space for the bezel to clip into place. And then I looked closer and pulled out my trusty snips!-
--
--
--
--
--
Voila! Last thing to do is drop in the Vid card (so dam pretty! and QUIET! but SUNblazing hot!) and attach the cables, then take it to ma room for heat and sound testing.
-
--
--
--
--
--
--
--
--
I put 3dMark06 to native res (1680x1050) upped settings and put it on a loop with background apps running. I BEGGED the machine to crash. nope, stable as a rock and venting all the gfx card air from the side fan without bothering the CPU that much. In addition, the cpu pulled some good air from the top 80mm square hole (where I took the top down shots of the cpu fan thru).
The next morning, I tried to take a few more farewell sunny shots. some came out decent most did not. :/
-
--
--
--
--
--
--
--
--
I was late for work so the plan was to pack and ship over lunch. A suggestion came to think about the PC speaker location, so I went ahead and moved it, and finished up the sound damping, with some "texture"
-
--
--
--
--
--
--
--
--
---------------------------------
SHIPPED! that's all folks. hope you enjoy!

