Ok here goes,
This will be the second computer I've built from the ground on up. You couldn't say I'm a pro at it, but after doing the first, hopefully it should be a bit easier. None the less, there's a special satisfaction of building your own machine to spec and powering it on for the first time. Yes, we're geeks and proud of it!
This project is already in progress so I can't say that is something that was started with this forum post. Be that as it may, I'll try and fill in the details of the progress of the operation and update it with pictures regularly.
I use my computers for schoolwork, gaming, a little web development and video playback/editing. Recently Intel dropped the price of their Q6600 so I've finally been tempted to upgrade.
If you have any suggestions as to how make this build work out better, please by all means pipe up! I'll admit that half the time I don't know what I'm doing until I've broken or tried something a dozen different ways. Your feedback is most welcome and strongly encouraged. Don't be afraid to take this noobie to task if you think something needs amendments.
My previous system which is now looking a bit long in the tooth is a:
Athlon XP 2500 (OC'ed to a 3000 spec)
1.5 gigs of slow-poke DDR ram
ATI Raedon 9700 (best of show when it came out, but we all age)
The new system is as follows:
All of the P35 mobos on the market these days seem very solid, so chosing the right mobo to pair up with the excellent Q6600 was hard. I finally found the DS3P that had all the features I needed plus an extremely reasonable price. I don't know how Gigabyte does it, but for the price, it is absolute steal. (We'll see if it boots up!)
MSI and EVGA both seem to make excellent GPU's and the 8800 GTS 640mb seems like the best tradeoff of price and performance these days. The MSI one I picked was a little cheaper than th evga and had a factory enabled overclock.
There isn't much to say about the Corsair PSU, other than it seems to be stealing 10's on every review site on the net. Awesome power supply.
As for all the nitty gritty, let's get down to the work in progress.

Nice sturdy box.

Excellent foam packing for safe delivery. You can never tell with UPS!

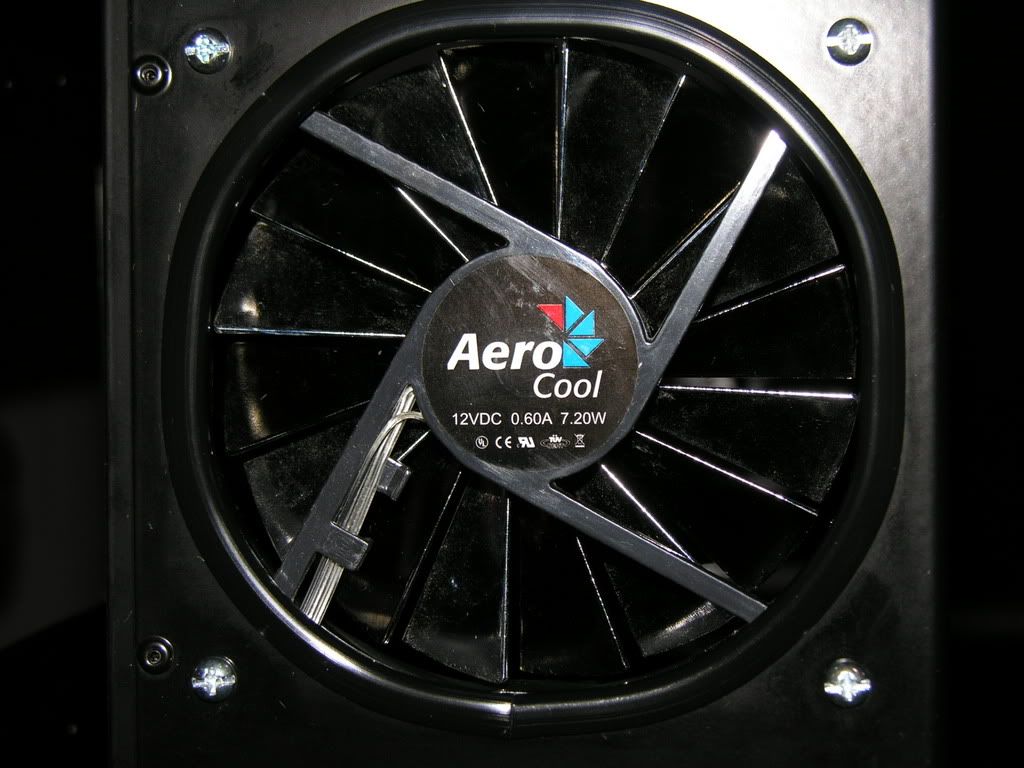
Backside of the PSU.


We'll see if the G0 stepping makes a difference. I got this special from clubit.com, as Newegg was unable to guarantee G0. They have gotten rich off me in the past, I'm not feeling too sorry for them.


I decided to take the standard purple fan mounts out so as to increase airflow and reduce noise. At first I was going to just cut out some of the extra plastic. Hacksaw time! I've spent a lot of time at www.silentpcreivew.com, great resource!

That still leaves the issue of the honeycomb grill that is blocking a lot of potential airflowI start reading SPCR more and some people have suggested that cutting out the grill will increase airflow and reduce noise impenece from the slats. I brandish some...

Fiddle sticks! My handy little snips were too light for even the light-gauge steel. Right tool for the right job eh? Time to make a trip to the hardware store...

Ah, proper snips! The stripping is going to be used as a damper near the case doors. I've heard that silicone has excellent noise stopping properties, plus it already had adhesive on it so hopefully it will be easy to install.

Back to the fans for a minute. Here's a shot with the grill out of the picture. Notice I haven't cleaned it up yet.

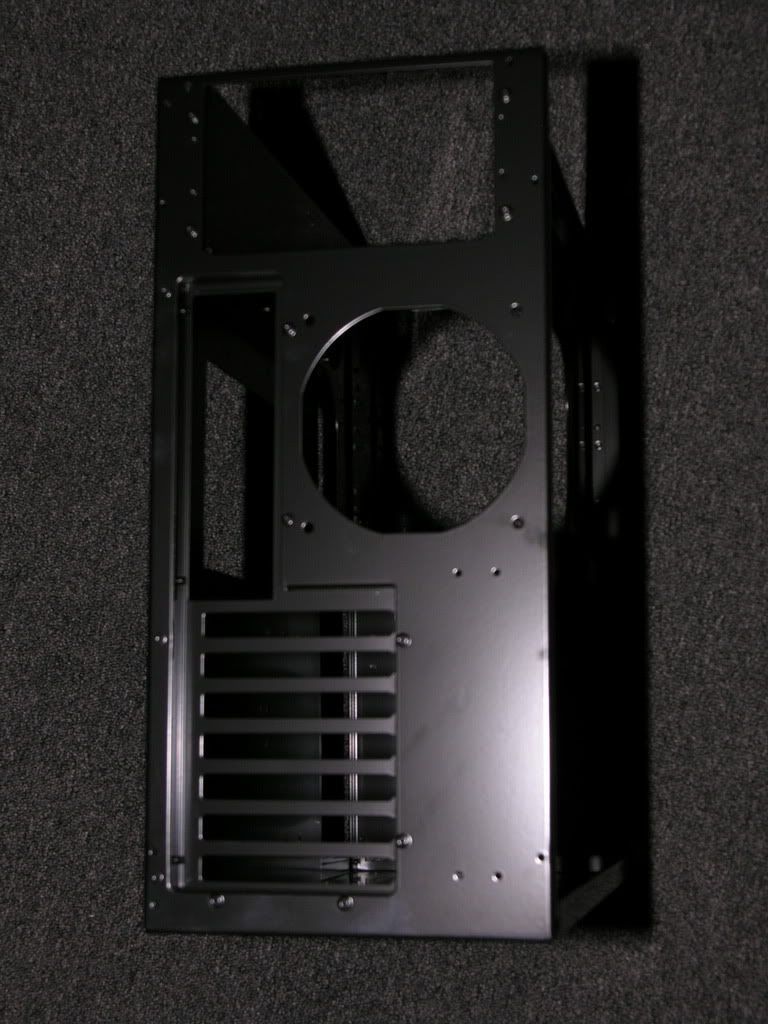
Here's a shot of the case with all the guts removed.

Front pannel, mmmmm, stickers!

Shot of the Ascutipac sound proofing in the rear. The strip near the case door frame is the silicone from Home Depot. We'll see if it shuts!

Pre-taped seal.
I put small pieces of the stripping under the rail that holds the door. There's small holes you can't see in this picture, but I'm really trying for a silent (as possible) machine.

Time for a coffee break. Does the computer room look lived in?

Another survey of the carnage.
I'll try to post some more pics of the progress shortly. I need to clean things up a bit before something important gets lost or stepped on.
This will be the second computer I've built from the ground on up. You couldn't say I'm a pro at it, but after doing the first, hopefully it should be a bit easier. None the less, there's a special satisfaction of building your own machine to spec and powering it on for the first time. Yes, we're geeks and proud of it!
This project is already in progress so I can't say that is something that was started with this forum post. Be that as it may, I'll try and fill in the details of the progress of the operation and update it with pictures regularly.
I use my computers for schoolwork, gaming, a little web development and video playback/editing. Recently Intel dropped the price of their Q6600 so I've finally been tempted to upgrade.
If you have any suggestions as to how make this build work out better, please by all means pipe up! I'll admit that half the time I don't know what I'm doing until I've broken or tried something a dozen different ways. Your feedback is most welcome and strongly encouraged. Don't be afraid to take this noobie to task if you think something needs amendments.
My previous system which is now looking a bit long in the tooth is a:
Athlon XP 2500 (OC'ed to a 3000 spec)
1.5 gigs of slow-poke DDR ram
ATI Raedon 9700 (best of show when it came out, but we all age)
The new system is as follows:
- GIGABYTE GA-P35-DS3P LGA 775 Intel P35 ATX Intel Motherboard
- Antec Solution Series SLK3700AMB Case
- AcoustiPack Sound Damping System (fit to spec for the case mentioned above
- Windows Vista 64-bit
- Intel Q6600 CPU w/G0 stepping
- Sticks of 2gig PAT DII800 PDC24G6400ELK RAM
- MSI 8800GTS-640mb version, OC'ed from vendor
- CORSAIR CMPSU-620HX 620W Power Supply
- Scythe Ninja Rev B Heatsink/fan
- 2 Yate Loon 120mm fans
- 3 Noctua 120mm fans
- 2 (two) 74gb - 7200 RPM Hardrives from IBM SATA 1.5
- 1 160 Seagate - 7200 RPM Hardrive IDE
- Lite On DVD Burner
- Fast enough to play the newest games
- Fast enough to make Photoshop feel a bit more snappy
- Fast enough to playback HD content with issues
- Cool enough to overclock the Q6600 should I need to when it starts looking long in the tooth
- Quiet it enough so I can get to sleep at night (computer will be in bedroom)
All of the P35 mobos on the market these days seem very solid, so chosing the right mobo to pair up with the excellent Q6600 was hard. I finally found the DS3P that had all the features I needed plus an extremely reasonable price. I don't know how Gigabyte does it, but for the price, it is absolute steal. (We'll see if it boots up!)
MSI and EVGA both seem to make excellent GPU's and the 8800 GTS 640mb seems like the best tradeoff of price and performance these days. The MSI one I picked was a little cheaper than th evga and had a factory enabled overclock.
There isn't much to say about the Corsair PSU, other than it seems to be stealing 10's on every review site on the net. Awesome power supply.
As for all the nitty gritty, let's get down to the work in progress.
Nice sturdy box.
Excellent foam packing for safe delivery. You can never tell with UPS!
Backside of the PSU.
We'll see if the G0 stepping makes a difference. I got this special from clubit.com, as Newegg was unable to guarantee G0. They have gotten rich off me in the past, I'm not feeling too sorry for them.
I decided to take the standard purple fan mounts out so as to increase airflow and reduce noise. At first I was going to just cut out some of the extra plastic. Hacksaw time! I've spent a lot of time at www.silentpcreivew.com, great resource!
That still leaves the issue of the honeycomb grill that is blocking a lot of potential airflowI start reading SPCR more and some people have suggested that cutting out the grill will increase airflow and reduce noise impenece from the slats. I brandish some...
Fiddle sticks! My handy little snips were too light for even the light-gauge steel. Right tool for the right job eh? Time to make a trip to the hardware store...
Ah, proper snips! The stripping is going to be used as a damper near the case doors. I've heard that silicone has excellent noise stopping properties, plus it already had adhesive on it so hopefully it will be easy to install.
Back to the fans for a minute. Here's a shot with the grill out of the picture. Notice I haven't cleaned it up yet.
Here's a shot of the case with all the guts removed.
Front pannel, mmmmm, stickers!
Shot of the Ascutipac sound proofing in the rear. The strip near the case door frame is the silicone from Home Depot. We'll see if it shuts!
Pre-taped seal.
I put small pieces of the stripping under the rail that holds the door. There's small holes you can't see in this picture, but I'm really trying for a silent (as possible) machine.
Time for a coffee break. Does the computer room look lived in?
Another survey of the carnage.
I'll try to post some more pics of the progress shortly. I need to clean things up a bit before something important gets lost or stepped on.