!gOtVolTage!
Gawd
- Joined
- Apr 10, 2007
- Messages
- 609
8800GTS/GTX/Ultra.......Thermal Paste MX-2 MOD......90cfm or 120cfm Fan MOD........Also a nice Lap and polish job for watercooling like Temps and performance on  AIRCOOLING
All of us know how bad the stock cooling is on the 8800GTS/GTX/ULTRA . We also know that these cards have great overClocking potential too! Well like most people out there ,I wanted to keep my card cool and not spend money on another cooling solution. So after seeing that my card idled @69c Stock, I set the fan to 100% using Rivatuner . I still had plenty of Heat and wanting a nice overclock 24/7 drove me too make this thread....Besides who really wants to spend $150.00 on cooling when you can MOD for almost free!
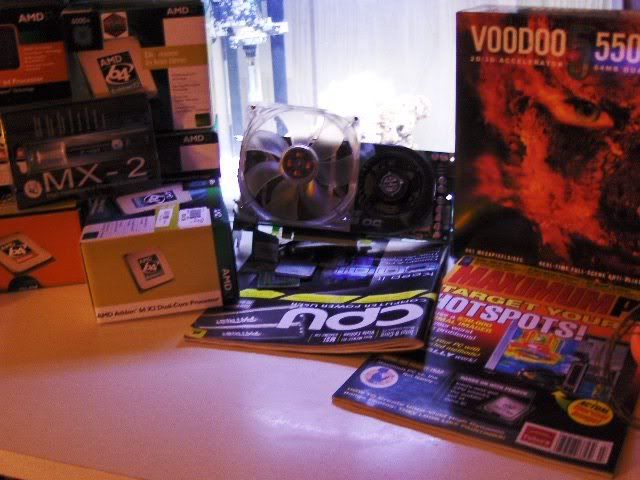
The 1st Mods include adding NYLON WASHERS to the card so you can use MX-2 paste on the GPU ,,the Shader and the Memory. Also you will be using the old thermal pads for the PWM's only.
The 2nd Mods will be too Polish/Lap the Shader Pad on the heatsink along with the copper base for the GPU. You can also lap the GPU ,but i think it will Void your warranty:yepp:
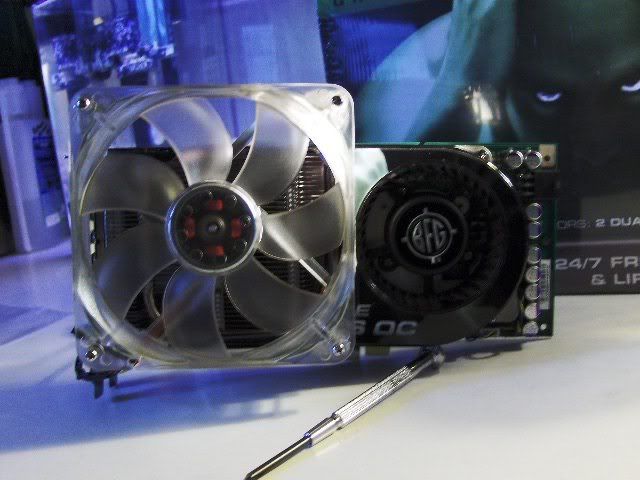
The 3rd Mod I will be installing a 110cfm fan and cutting the Fan Shroud. Also the stock fan will still be used , it cools the PWM's as well as the front half of the memory. You could use a 90cfm fan instead of a 110cfm . The 90cfm is exactly the same width as the 8800, but dosnt offer as much extra cooling. I personally like the 110cfm ,because when the fan is done correctly it will overhang the card allowing cool fresh AIR to blow up to the top of your case,elimanating any hotair dead spots above the card!
Lets get MODDING
1st step remove the (4 small )fan shroud screws . Two of these screws will be under the sticker on the shroud. Next you will remove the heatsink screws. There will be (2 screws) in the rear of the card and (8 to 12) BIG SCREWS that hold the heatsink on. Do not remove the (8 really small)screws that are in the center of the card!
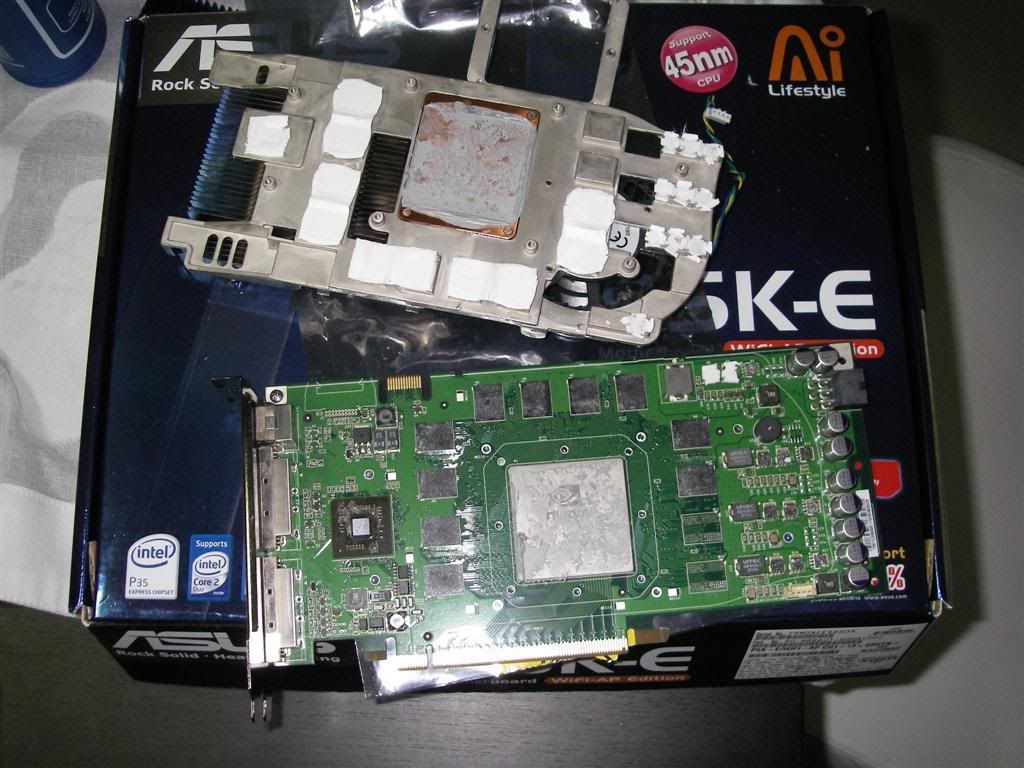
If you wish you can use a blow dryer to heat the card ,this softens the paste a lil bit. Now gently remove the heatsink by lightly twisting left to right, DO NOT USE FORCE ,Once its off give a real good cleaning with some denatured alchohal or sumthing. Make shure you save some of the old thermal tape. It will be used later on the PWM's!
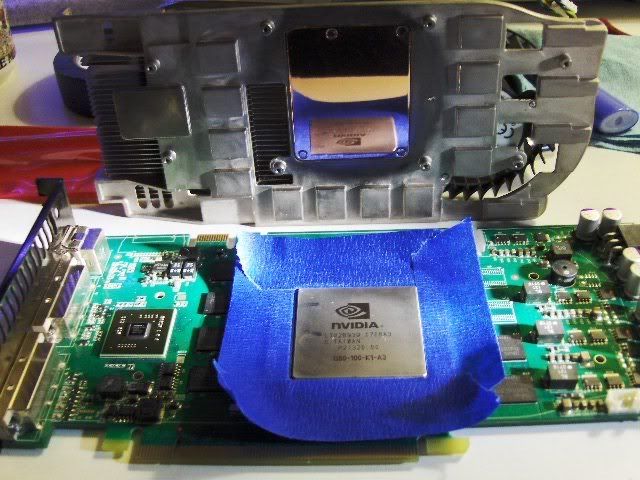
2nd Step Ok this is where you need the nylon washers. In the picture below im using white nylon washers . They are 2/32nd thick and will be placed under the factory screws . These washers will take up th slack in the springs and create more down force on GPU . They also close the gap between the memory and the SHADER. The washer allows you to use MX-2 Thermal Paste . Do not use AS5 artic silverit is not conductivly safe!
3rd Step Now that the heatsink and card have been cleaned ,you will need to DRY fit the heatsink with NYLON Wahers installed under the SPRING SCREWS Check the gap between the memory and shader when after its tightened down.
ALWAYS tighten the spring screws starting with the GPU, tighten them in a criss cross patern and then the end screws last. When you tighten the screws you will need to push down the spring to start them. Tighten the screws till they are fully compressed ,you will feel them stop!The ideal thickness is a lil less or more than a buiseness card. Now remove the heatsink and lets get to the fun stuff! see how the SPRING SCREWS are full seated below

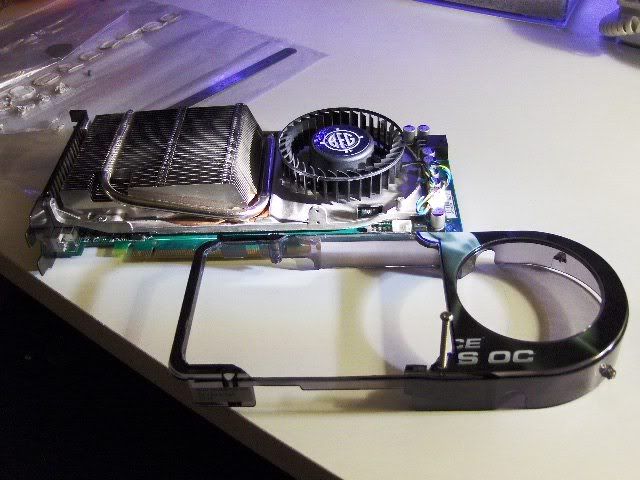
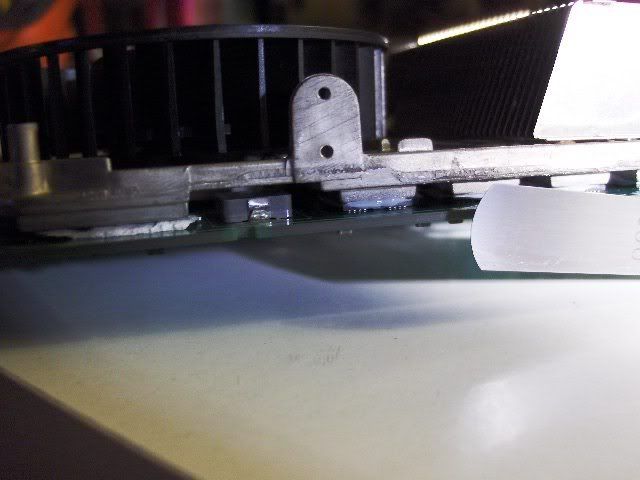
4th Step Mod the fan shroud. You will only cut out the vents and leave the sides and front portion of shroud intact! Use your 90cfm or 110cfm as your template and dont cut too much away, you can not replace what you cut out!:yepp: I used two zip ties to hold rear of fan to the exaust vent on the back of the 8800 and then threaded 1 screw to the top of the shroud.
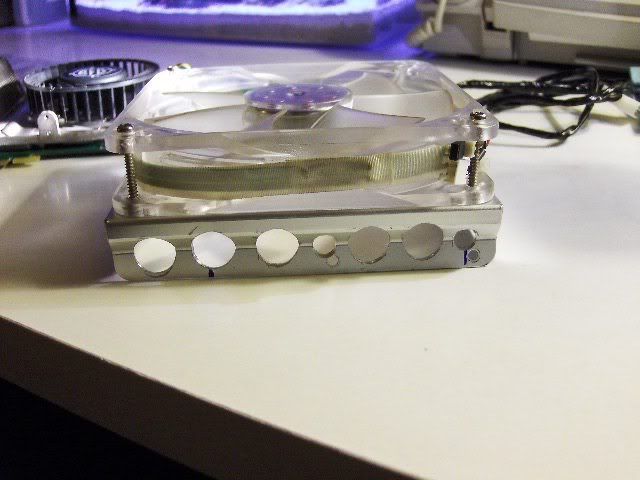
5th Step I had a Big typhoon laying around in which i stole the fan a 110cfm and the aluminum fan mount . I then drilled and cut the aluminum fan shroud to fit. i wanted a fan that would hang over my card . This way i could use it to push cool air up in my case as well as out the rear!
6th Step I recomend this to everyone ! If you dont add a fan and just do the thermal paste Mod , cut the rear exuaste vent out and then remove the metal tab that goes between the two slots in your case. This will increase your stock air flow by 75%! can you imagine the flow of a 110cfm
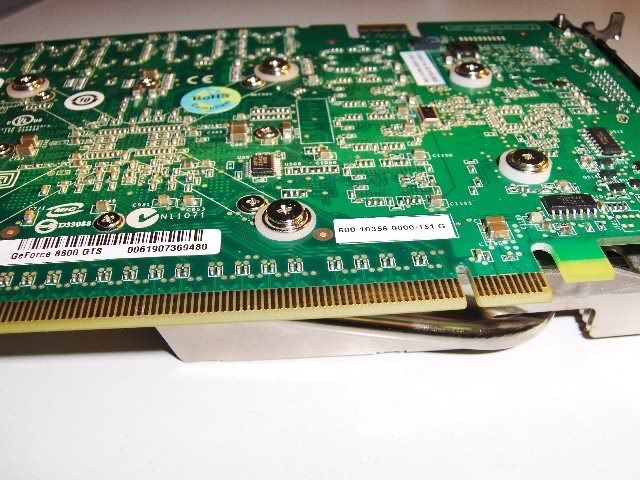
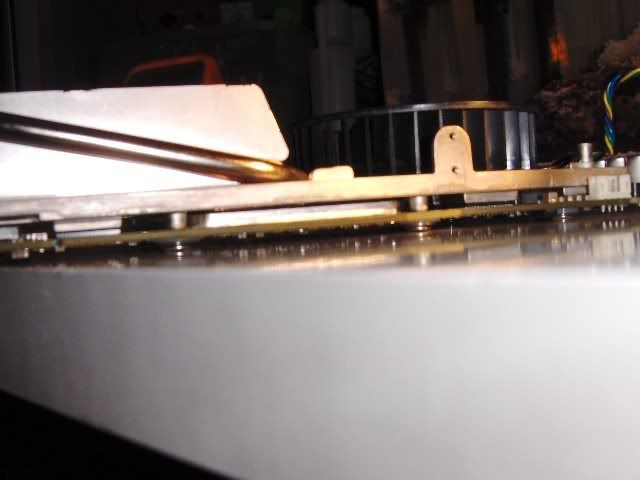
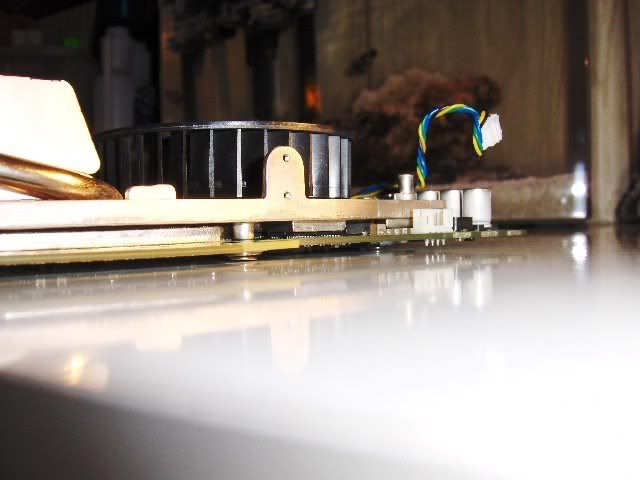
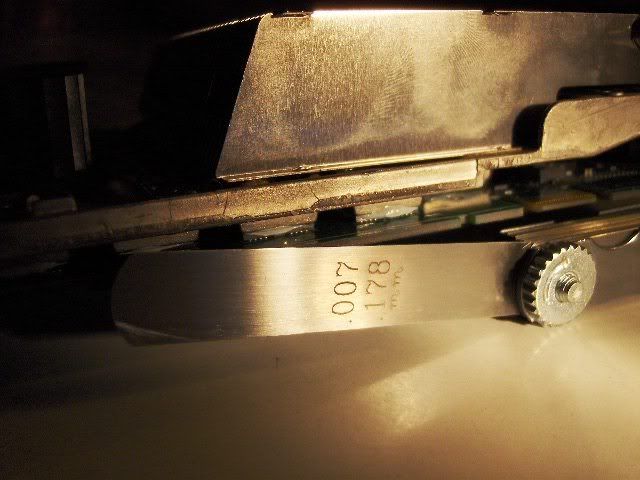
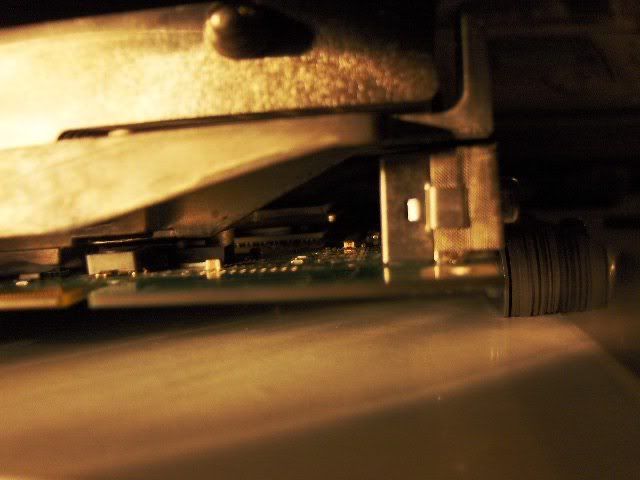
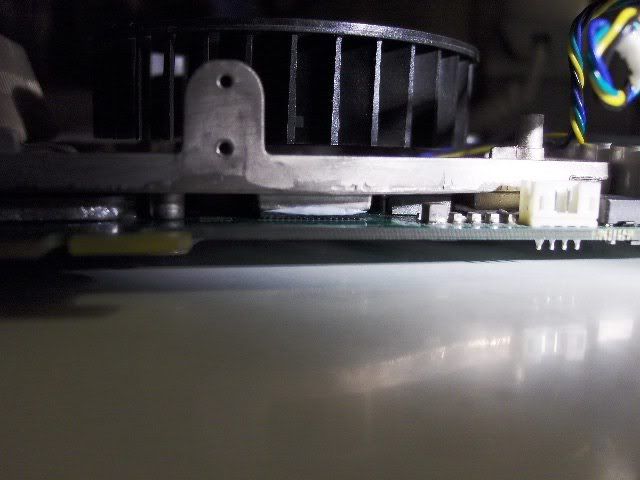
Ok LOOK CLOSE at these next two pictures. See the barely visiable gap between the memory and how well the card is snuggled up with the SPRING SCREW MOD This was my dry run before i lapped everything
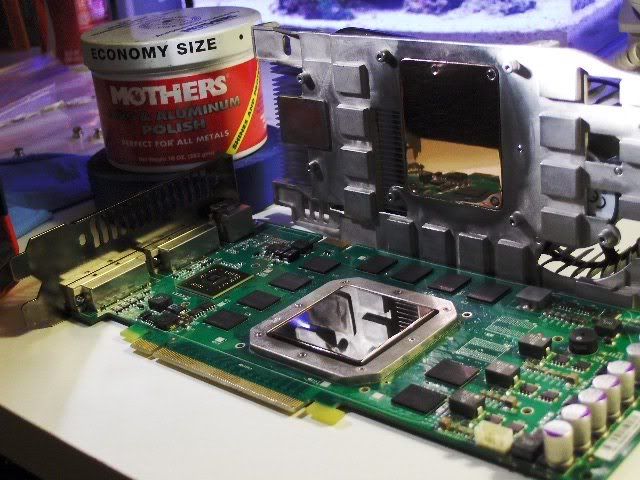
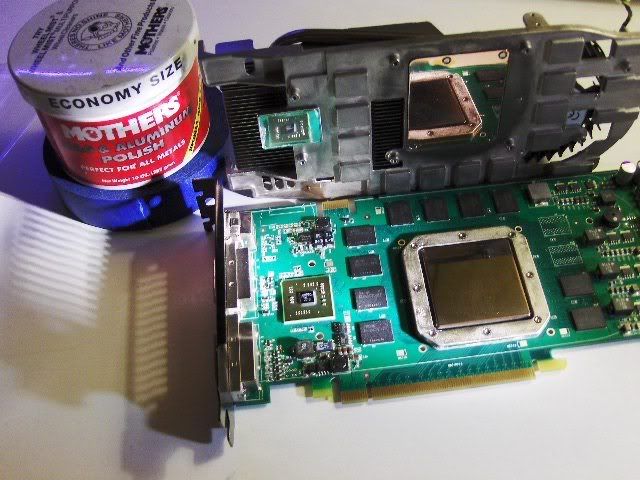
This is my favorite part the 7th Step The next three pictures are of lapping/polishing ,1st Heatsink2nd GPU 3rd the Shader mount on heatsink You will need to take your time while doing this. You can bump things real easy while sanding or polishing and must take great care to not do so! i used 2000 grit wet/dry sand paper and did not use water,JUST LOTS OF TIME I then polished the surfaces by hand ,DO NOT USE A DREMAL! Cleaned with alchohal when done. I use only MOTHERS ALUMINUM WHEEL POLISH . Brasso does not work as good trust me. Once your happy with the Lap job , the next step is too apply the MX-2 and cut strips of thermal pad from the OLD STUFF you saved which will go on the PWM's
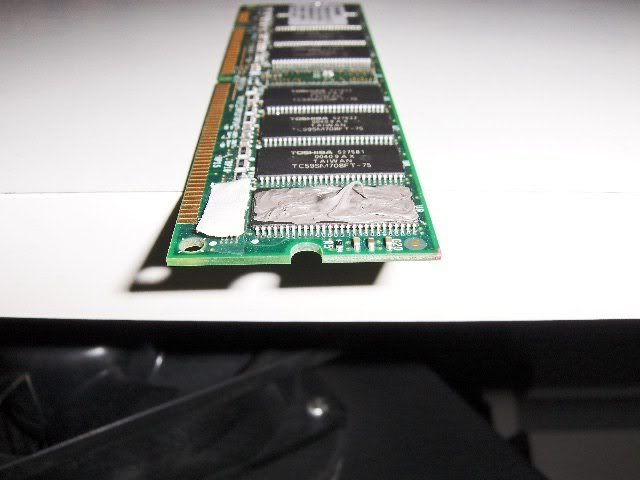
8th Step MX-2 must be used! do not use as5 Artic silver for this , it is not conductively safe... Ok the picture below shows how much paste to put on the Memory chips , the GPU and the Shader ... For the GPU cover the whole chip with paste put a BB size dot in the middle.. for the memory apply even on all chips with just a lil dot of paste in center to top it off. Exactly how it is shown in the picture on the stick of ram! Also cut four strips of thermal tape that was saved from earlier and use those on the 4 rows of PWM's. last put a BB size ball of MX-2 on the center of the shader chip.
9th inning strech This is the hardest part to do! PLEASE TAKE YOUR TIME Now that the PWM's are covered with thermal tape and the Shader ,GPU and memory have MX-2 installed you have to gently and evenly set the heat sink on the card. Thise means the card facing UP, this also means you will set the heatsink down on it making shure the thermal tape dosnt come off the PWM's!!.. Once the Heatsink is resting on card you need to wiggle it left to right ,only about a degree each way . this will set the paste and help the heat sink stick. Now CAREFULLY FLIP the card over while holding the heasink tighly against the card . Once you have it upside down you will install the (4 GPU spring screws with the nylon washer and tighten in a criss cross partern untill fully tight). Now install the end spring screws and nylon washers slowly tightening each a lil at a time untill fully tight. Do NOt CRANK DOWN on the spring screws . You will feel them stop with out much force. The springs will be fully compressed! It should look like the pictures below when done correctly.
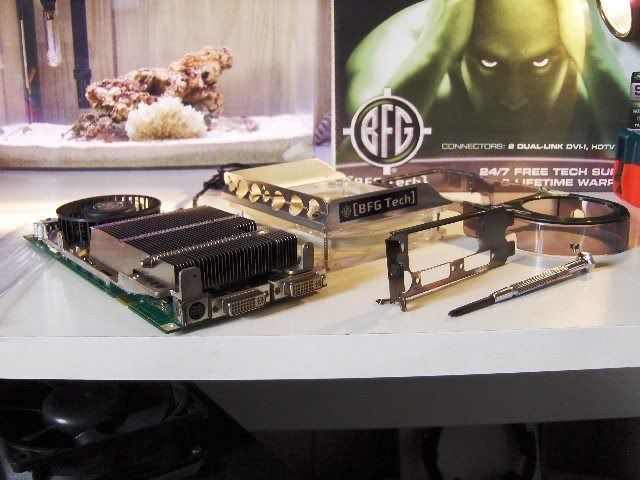
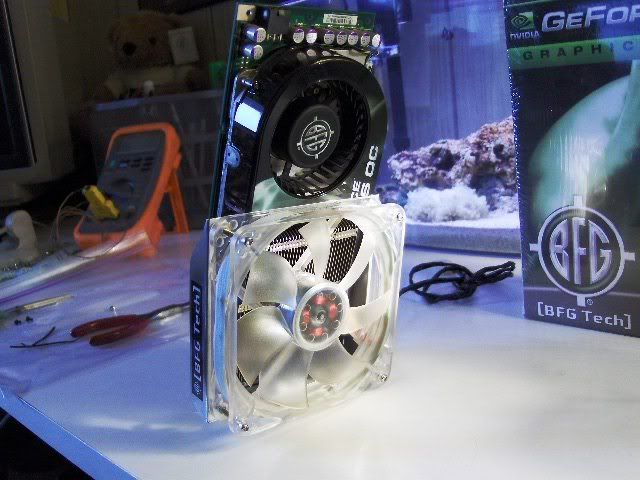
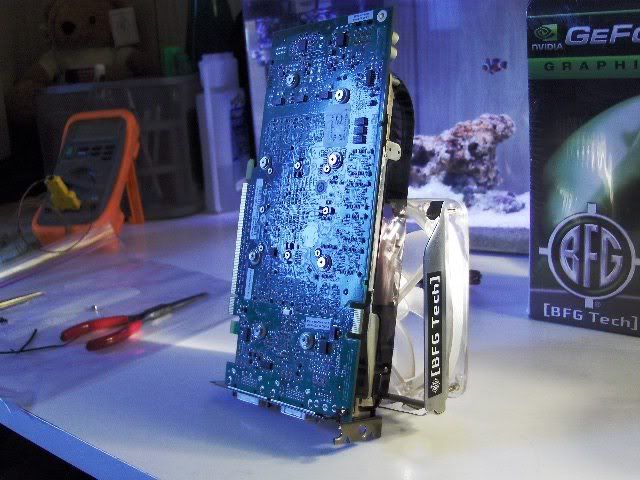
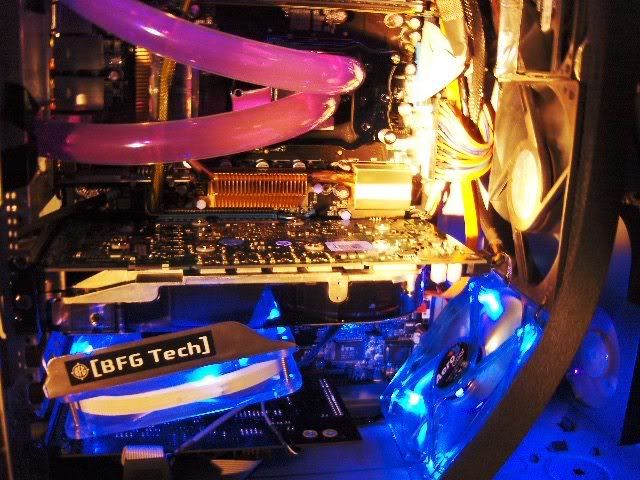
All right the tuff stuff is over lets party!!!!! If every thing looks good ,procede to installing your fan shroud fan and get that baby humming:up: Below are a few shots of the finished card
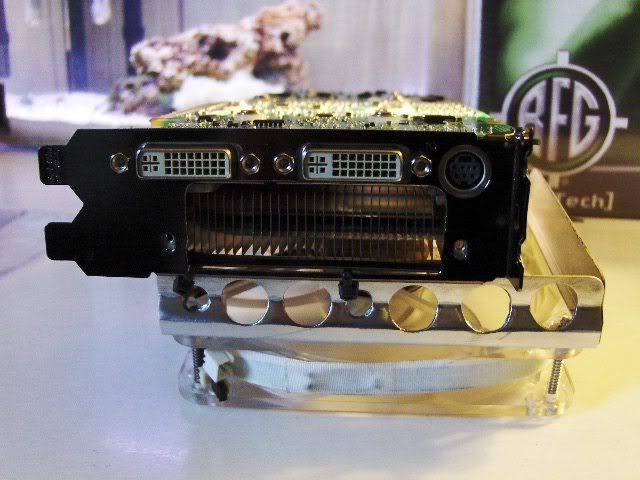
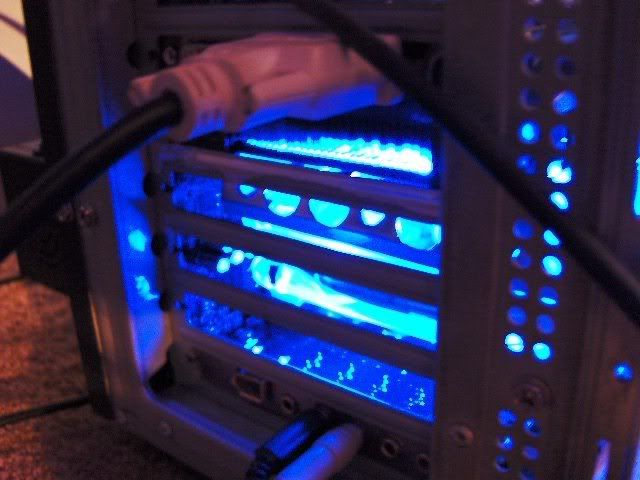
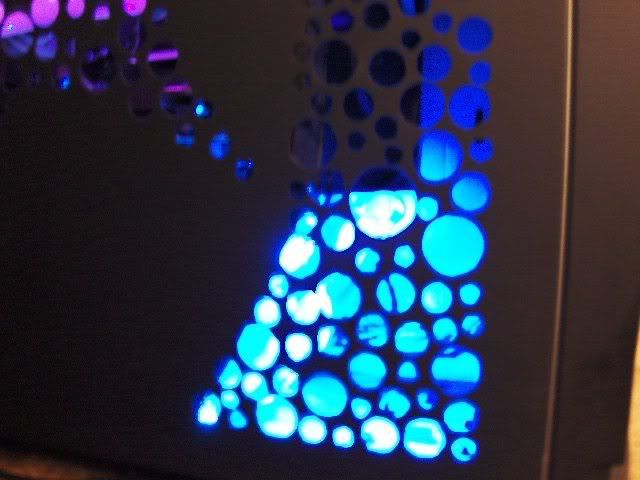
See the vent Mod, this will get the air out:yepp:

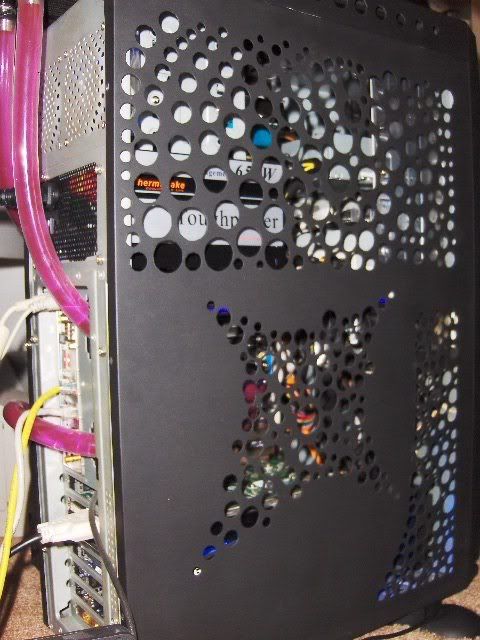
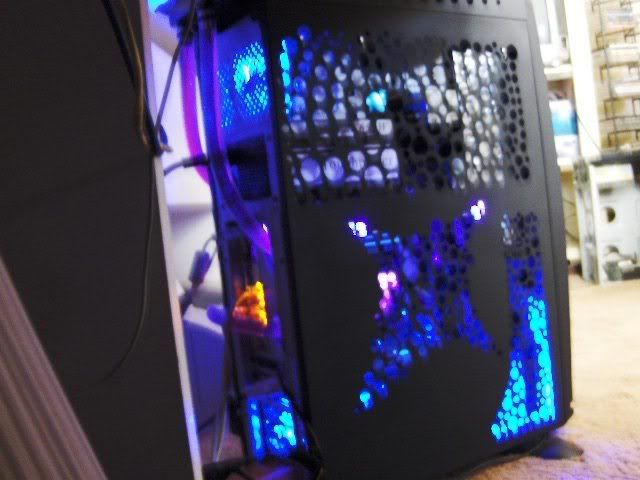
Well here is the happy home my card rest in...Its a 1996 ANTEC TOWER CASE I painted it ,drilled it ,water cooled it, All last week because i sold my other case! This is the sytem in my SIG
Ok not bad for being 69c@ idle and 81c load Before the MODS Just think i almost put a water block on the thing!
P.S Hope everyone likes the mods for my card using 100%AIR I fully disasembled 8800 during the week just so you guys/gals could have full pics of the Mods
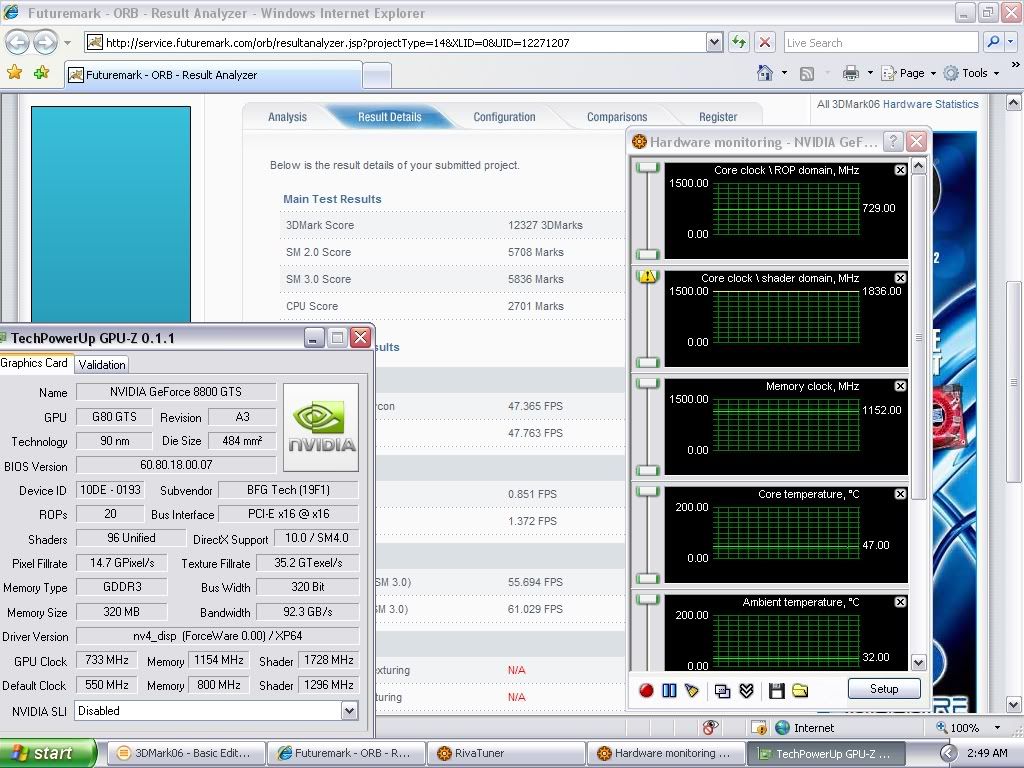
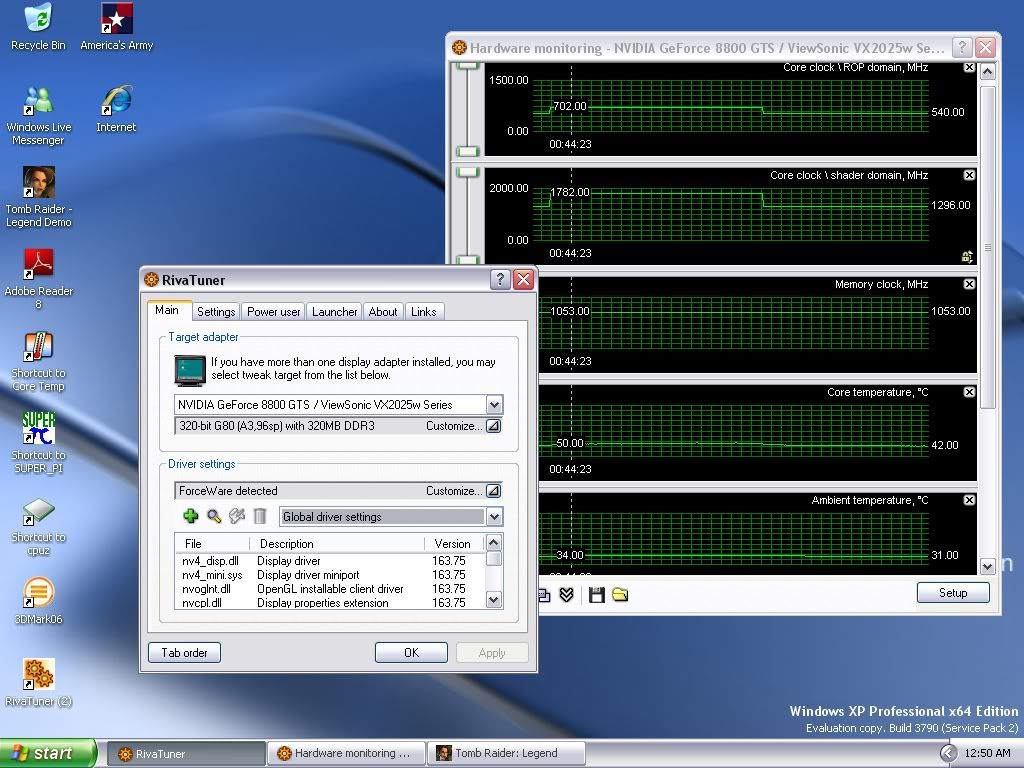
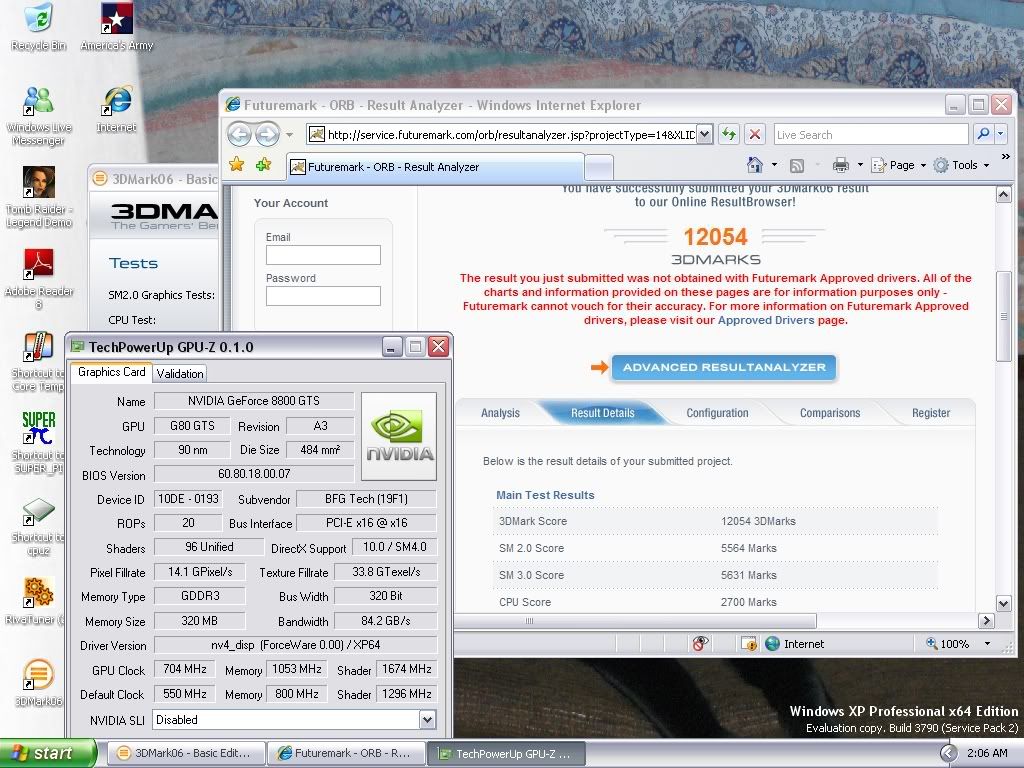
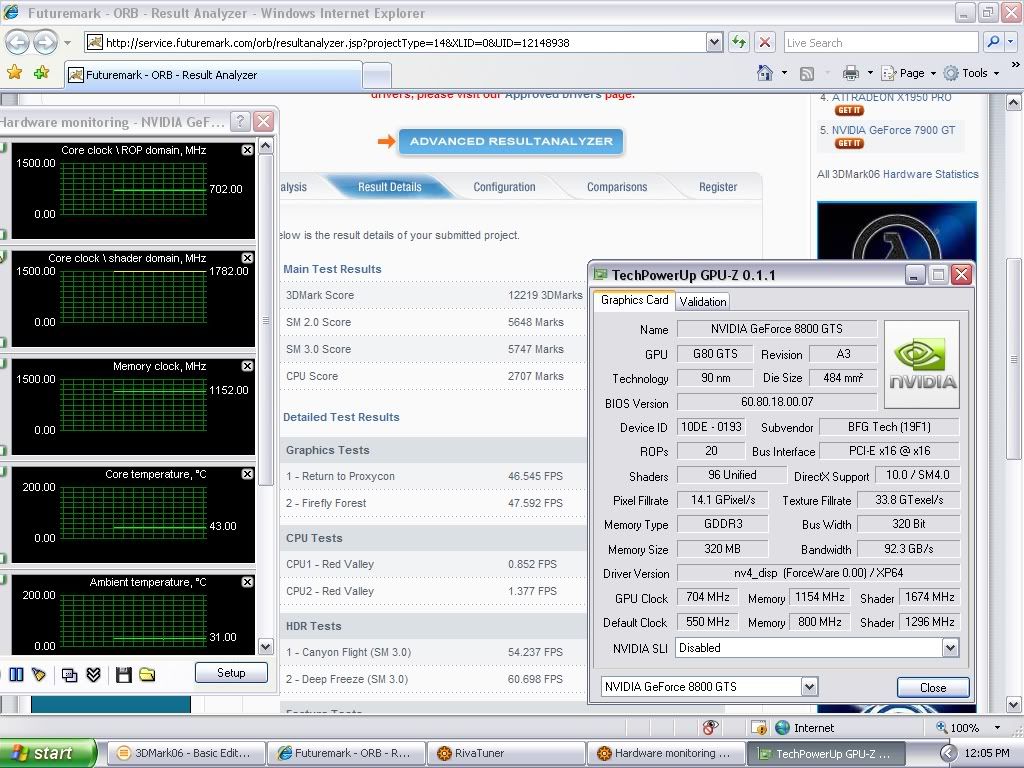
This 3dmark is the very first run i did after putting my card back together from its lil photoshoot I am now shooting for 13000+ with this lil 8800GTS 320 on my 6000+X2Ill keep em coming and by the way ,I still havnt done any Volt Mods to this yet
This Screen says it all and yes i still need to push my GPU some more,but my Bandwidth// 92.3 GB/s and Memory @2308mhz is beyond PRICELESS for no voltmodding!!!!!
AIRCOOLING
All of us know how bad the stock cooling is on the 8800GTS/GTX/ULTRA . We also know that these cards have great overClocking potential too! Well like most people out there ,I wanted to keep my card cool and not spend money on another cooling solution. So after seeing that my card idled @69c Stock, I set the fan to 100% using Rivatuner . I still had plenty of Heat and wanting a nice overclock 24/7 drove me too make this thread....Besides who really wants to spend $150.00 on cooling when you can MOD for almost free!
The 1st Mods include adding NYLON WASHERS to the card so you can use MX-2 paste on the GPU ,,the Shader and the Memory. Also you will be using the old thermal pads for the PWM's only.
The 2nd Mods will be too Polish/Lap the Shader Pad on the heatsink along with the copper base for the GPU. You can also lap the GPU ,but i think it will Void your warranty:yepp:
The 3rd Mod I will be installing a 110cfm fan and cutting the Fan Shroud. Also the stock fan will still be used , it cools the PWM's as well as the front half of the memory. You could use a 90cfm fan instead of a 110cfm . The 90cfm is exactly the same width as the 8800, but dosnt offer as much extra cooling. I personally like the 110cfm ,because when the fan is done correctly it will overhang the card allowing cool fresh AIR to blow up to the top of your case,elimanating any hotair dead spots above the card!
Lets get MODDING
1st step remove the (4 small )fan shroud screws . Two of these screws will be under the sticker on the shroud. Next you will remove the heatsink screws. There will be (2 screws) in the rear of the card and (8 to 12) BIG SCREWS that hold the heatsink on. Do not remove the (8 really small)screws that are in the center of the card!
If you wish you can use a blow dryer to heat the card ,this softens the paste a lil bit. Now gently remove the heatsink by lightly twisting left to right, DO NOT USE FORCE ,Once its off give a real good cleaning with some denatured alchohal or sumthing. Make shure you save some of the old thermal tape. It will be used later on the PWM's!
2nd Step Ok this is where you need the nylon washers. In the picture below im using white nylon washers . They are 2/32nd thick and will be placed under the factory screws . These washers will take up th slack in the springs and create more down force on GPU . They also close the gap between the memory and the SHADER. The washer allows you to use MX-2 Thermal Paste . Do not use AS5 artic silverit is not conductivly safe!
3rd Step Now that the heatsink and card have been cleaned ,you will need to DRY fit the heatsink with NYLON Wahers installed under the SPRING SCREWS Check the gap between the memory and shader when after its tightened down.
ALWAYS tighten the spring screws starting with the GPU, tighten them in a criss cross patern and then the end screws last. When you tighten the screws you will need to push down the spring to start them. Tighten the screws till they are fully compressed ,you will feel them stop!The ideal thickness is a lil less or more than a buiseness card. Now remove the heatsink and lets get to the fun stuff! see how the SPRING SCREWS are full seated below
4th Step Mod the fan shroud. You will only cut out the vents and leave the sides and front portion of shroud intact! Use your 90cfm or 110cfm as your template and dont cut too much away, you can not replace what you cut out!:yepp: I used two zip ties to hold rear of fan to the exaust vent on the back of the 8800 and then threaded 1 screw to the top of the shroud.
5th Step I had a Big typhoon laying around in which i stole the fan a 110cfm and the aluminum fan mount . I then drilled and cut the aluminum fan shroud to fit. i wanted a fan that would hang over my card . This way i could use it to push cool air up in my case as well as out the rear!
6th Step I recomend this to everyone ! If you dont add a fan and just do the thermal paste Mod , cut the rear exuaste vent out and then remove the metal tab that goes between the two slots in your case. This will increase your stock air flow by 75%! can you imagine the flow of a 110cfm
Ok LOOK CLOSE at these next two pictures. See the barely visiable gap between the memory and how well the card is snuggled up with the SPRING SCREW MOD This was my dry run before i lapped everything
This is my favorite part the 7th Step The next three pictures are of lapping/polishing ,1st Heatsink
2nd GPU 3rd the Shader mount on heatsink You will need to take your time while doing this. You can bump things real easy while sanding or polishing and must take great care to not do so! i used 2000 grit wet/dry sand paper and did not use water,JUST LOTS OF TIME I then polished the surfaces by hand ,DO NOT USE A DREMAL! Cleaned with alchohal when done. I use only MOTHERS ALUMINUM WHEEL POLISH . Brasso does not work as good trust me. Once your happy with the Lap job , the next step is too apply the MX-2 and cut strips of thermal pad from the OLD STUFF you saved which will go on the PWM's
8th Step MX-2 must be used! do not use as5 Artic silver for this , it is not conductively safe... Ok the picture below shows how much paste to put on the Memory chips , the GPU and the Shader ... For the GPU cover the whole chip with paste put a BB size dot in the middle.. for the memory apply even on all chips with just a lil dot of paste in center to top it off. Exactly how it is shown in the picture on the stick of ram! Also cut four strips of thermal tape that was saved from earlier and use those on the 4 rows of PWM's. last put a BB size ball of MX-2 on the center of the shader chip.
9th inning strech This is the hardest part to do! PLEASE TAKE YOUR TIME Now that the PWM's are covered with thermal tape and the Shader ,GPU and memory have MX-2 installed you have to gently and evenly set the heat sink on the card. Thise means the card facing UP, this also means you will set the heatsink down on it making shure the thermal tape dosnt come off the PWM's!!.. Once the Heatsink is resting on card you need to wiggle it left to right ,only about a degree each way . this will set the paste and help the heat sink stick. Now CAREFULLY FLIP the card over while holding the heasink tighly against the card . Once you have it upside down you will install the (4 GPU spring screws with the nylon washer and tighten in a criss cross partern untill fully tight). Now install the end spring screws and nylon washers slowly tightening each a lil at a time untill fully tight. Do NOt CRANK DOWN on the spring screws . You will feel them stop with out much force. The springs will be fully compressed! It should look like the pictures below when done correctly.
All right the tuff stuff is over lets party!!!!! If every thing looks good ,procede to installing your fan shroud fan and get that baby humming:up: Below are a few shots of the finished card
See the vent Mod, this will get the air out:yepp:
Well here is the happy home my card rest in...Its a 1996 ANTEC TOWER CASE I painted it ,drilled it ,water cooled it, All last week because i sold my other case! This is the sytem in my SIG
Ok not bad for being 69c@ idle and 81c load Before the MODS Just think i almost put a water block on the thing!
P.S Hope everyone likes the mods for my card using 100%AIR I fully disasembled 8800 during the week just so you guys/gals could have full pics of the Mods
This 3dmark is the very first run i did after putting my card back together from its lil photoshoot
I am now shooting for 13000+ with this lil 8800GTS 320 on my 6000+X2Ill keep em coming and by the way ,I still havnt done any Volt Mods to this yet This Screen says it all and yes i still need to push my GPU some more,but my Bandwidth// 92.3 GB/s and Memory @2308mhz is beyond PRICELESS for no voltmodding!!!!!