Arcygenical
Fully [H]
- Joined
- Jun 10, 2005
- Messages
- 25,066
The Ultimate Low Tech Case Painting and Baking Tutorial
Arcygenical
Saturday, April 26th, 2008
0.0 Introduction
One of the most common questions I see asked or debated upon in the Case Modding subforum deals with case painting... The popularity of interior painting has risen significantly in the last 12 months or so, with good reason too. Cases like the P180B brought a coloured interior mainstream, and showed the enthusiast community just how nice a coat of paint can be. I've painted the insides of many cases over the last 2 years, and now I'm going to show my fellow [H] users how to accomplish a great finish, with little to no effort.
This guide will be written for the most absolute of novices. I'm sorry if I insult your intelligence, but I'm assuming you've never even seen a can of spray paint, and you don't know what news paper is... Since I'll be writing in great detail and length, I'll try to impart humor wherever I can, to keep you from falling asleep. Spending 30m to really internalize the techniques of this tutorial will give you enough knowledge to pull off a great paint job, with ease. This is not a shorthand or abridged guide. So, read on, and I'll do my best to impart the knowledge I've gained, the tricks I've picked up, and the pitfalls to avoid.
1.0 What you need
Note: Self etching primers contain metal etchants which help the paint adhere to metal. These etchants are manufactured to eat the surfaces of steel and aluminum. They will do the same to your lungs. Please, do your priming outdoors, and wear a painter's mask if you have one available. Sanding an etching primer releases toxic chemicals as well, often lead and dried acids, wear a mask during primer sanding, especially if it's done indoors. Painting/sanding with regular paint is nowhere near as toxic though, so later steps can be done in doors, without a mask. I never recommend painting a colour coat outdoors, as every insect on the planet will be attracted to your work, suicidally bent on destroying your creation.
1.0 Preparatory Work
One of the best things about my technique is the lack of need for sanding. Yep, if you're painting bare metal, absolutely no sanding is required. Sanding sucks, I'm not going to lie to you... So why should you do it? I don't, and neither should you. If you're going to be painting over something that's already been painted (let's say an outside door panel or something) sand the entire thing with 400g sandpaper so it looks hazy (use a circular or figure 8 motion) and proceed to the next step.
Note: If you are baking your paint, you'll want to leave the oven door cracked a tiny bit. This will prevent the volatile gasses from building up in the oven, and damaging it. If you can't keep the door cracked only a tiny bit, you can use a small metal object (I use a ladle) to prop it open about 2-3".
2.0 Priming
Hmmm... Priming. My favorite step. The matte finish of a self etching primer is glorious, really. It seems to absorb all light, and emit absolutely no sheen. Remarkable. Remember, if you're BAKING your paint, you don't need to prime, but you can, it really makes no difference.
If you DO end up sanding to bare metal by accident, lightly sand the entire area around the exposed metal (Think about "evening out" the surrounding area, so it gradually dips to the depth of the paint penetration) a bit. Nothing much, and certainly not enough to increase the size of the penetration. You must then repaint the ENTIRE area of the penetration (or the ENTIRE side panel, if you're doing a panel) not just the spot it's self, and let it dry.
3.0 Colour Coat
4.0 Clear Coat
If you're doing the inside of your case, chances are you won't want a clear coat. Clear coats take lots and lots of time to dry properly, but really do add to the level of protection, and obviously, shine.
5.0 Proper Painting Techniques
Ahh. Here's where we start emphasizing technique over procedure. As I stated earlier, painting is roughly 80% skill 19% prep and 1% materials.
Hopefully, with a little practice, you'll eventually get a piece that looks like:
A nice smooth finish is very easy to accomplish by baking the paint, and will create a finish durable enough to stand up to almost any reasonable amount of torture.
Arcygenical
Saturday, April 26th, 2008
0.0 Introduction
One of the most common questions I see asked or debated upon in the Case Modding subforum deals with case painting... The popularity of interior painting has risen significantly in the last 12 months or so, with good reason too. Cases like the P180B brought a coloured interior mainstream, and showed the enthusiast community just how nice a coat of paint can be. I've painted the insides of many cases over the last 2 years, and now I'm going to show my fellow [H] users how to accomplish a great finish, with little to no effort.
This guide will be written for the most absolute of novices. I'm sorry if I insult your intelligence, but I'm assuming you've never even seen a can of spray paint, and you don't know what news paper is... Since I'll be writing in great detail and length, I'll try to impart humor wherever I can, to keep you from falling asleep. Spending 30m to really internalize the techniques of this tutorial will give you enough knowledge to pull off a great paint job, with ease. This is not a shorthand or abridged guide. So, read on, and I'll do my best to impart the knowledge I've gained, the tricks I've picked up, and the pitfalls to avoid.
1.0 What you need
- 1 can of a self etching primer. Yes, self etching, NOT regular primer. If it doesn't say self etching, it's NOT self etching! It doesn't matter which colour you pick up (I suggest gray as it works on all surfaces) but white etching primers work for light colours (like yellow, pink, white, etc.), brown etching primers work on medium-dark coloured surfaces (gunmetal, blue, camo, etc.) or a black etching primer for your dark colours (black, navy, etc.). As I said, it doesn't matter, get whatever is available to you. If you're BAKING your case, you do not need this.
- 2 cans rust or metal paint in the colour you want. I recommend Rustoleum or Tremclad. Rustoleum has some really nice glossy and sparkly colours now, but they're not technically "rust paints". I'll describe the difference between rust and non rust paints later. 2 cans will successfully paint a stacker 810, and any case smaller.
- [Optional] 1 can of clear coat. Totally optional if you want a matte coat, but if you want a really glossy look, you'll need to get a clear coat. There are 3 types of clear coat, matte, semigloss, and gloss, and they're all exactly what they say the are. Be warned though, even the most expensive matte clear coat will reflect light a bit, and give your paint a sheen. It doesn't matter which you get, but I recommend any made by Krylon.
- Some sand paper. 3 sheets of 400g and 800g will do. Wet Dry sandpaper is usually sold in packs of 3 (perfect!) at auto stores for 3$. With my painting tech, you won't even need sandpaper, so this is only for use if you screw up, pool paint, or get a drip (both will be described later). 400g may be substituted for 600g, but nothing lower than 400 will do.
- Some soap. Regular liquid dish or laundry soap will work. Alternatively, acetone or rubbing alcohol can be used, at a great waste. If you have it on hand, and want to get REALLY technical, you could mix up a solution of Sodium Hydroxide (lye, or Draino crystals) and water. 1 tbsp of crystals to every 1L of water will do it, but be careful, lye will burn you if you let it.
- Rubber of Vinyl gloves Yep, gloves. Get ones that ARE NOT POWDERED. Cloth gloves work too. Powder is bad, avoid gloves coated with talc (if you're not sure, you may put them on, and then wash your hands with water to remove talc).
- [Optional] An oven.. Yep... to save about 3 days of drying time, you can bake your case. An oven where paint has been baked is safe to use for food, so long as you let it run at 400f for 30-60m afterwards. All baking should be done between 170f and 200f. The cooler your oven can get, the better.
Note: Self etching primers contain metal etchants which help the paint adhere to metal. These etchants are manufactured to eat the surfaces of steel and aluminum. They will do the same to your lungs. Please, do your priming outdoors, and wear a painter's mask if you have one available. Sanding an etching primer releases toxic chemicals as well, often lead and dried acids, wear a mask during primer sanding, especially if it's done indoors. Painting/sanding with regular paint is nowhere near as toxic though, so later steps can be done in doors, without a mask. I never recommend painting a colour coat outdoors, as every insect on the planet will be attracted to your work, suicidally bent on destroying your creation.
1.0 Preparatory Work
One of the best things about my technique is the lack of need for sanding. Yep, if you're painting bare metal, absolutely no sanding is required. Sanding sucks, I'm not going to lie to you... So why should you do it? I don't, and neither should you. If you're going to be painting over something that's already been painted (let's say an outside door panel or something) sand the entire thing with 400g sandpaper so it looks hazy (use a circular or figure 8 motion) and proceed to the next step.
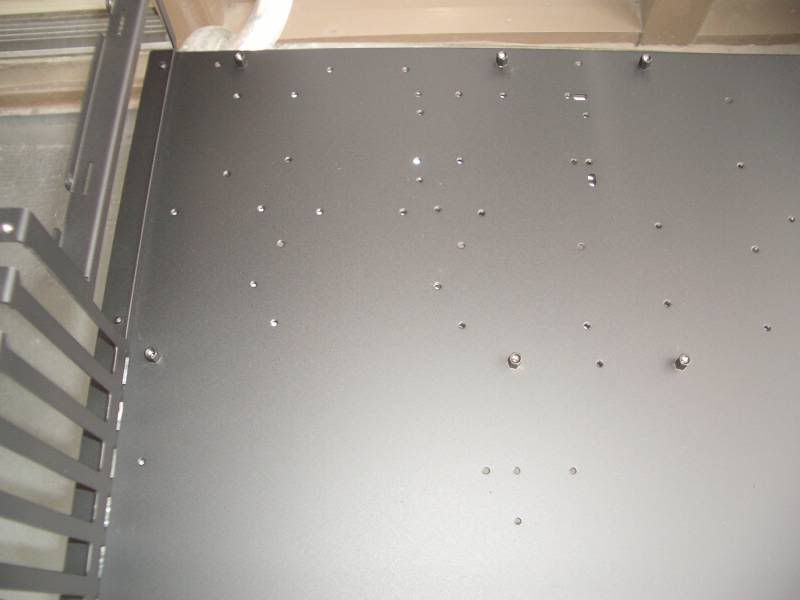
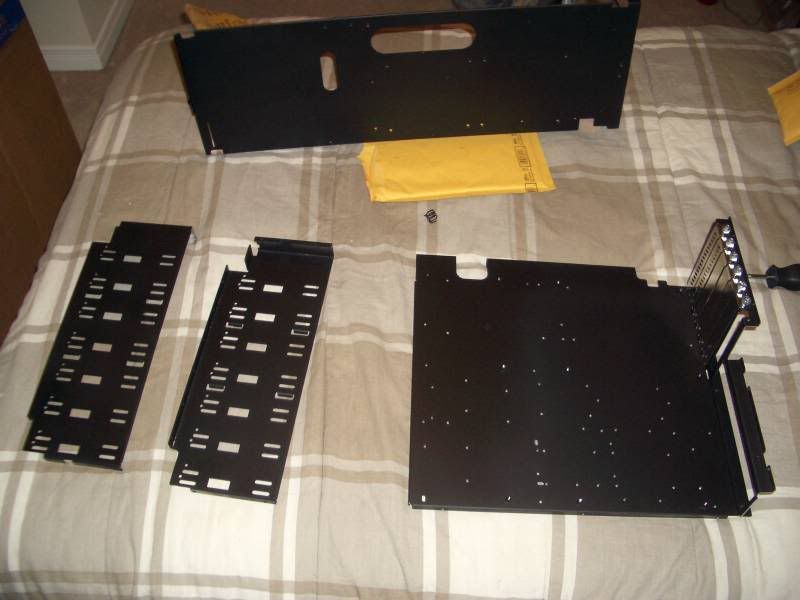
1.0 - If you're going to be painting the inside of your case, you're going to want to remove as many pieces as you can. Remove plastic tool less drive rail pieces, the case front/top (yes, that means drilling rivets usually, use a 7/64 drill bit, as these fit in your Dremel with ease) any fans, any rubber bits (including case feet), and of course, your system. You want a bare chassis.
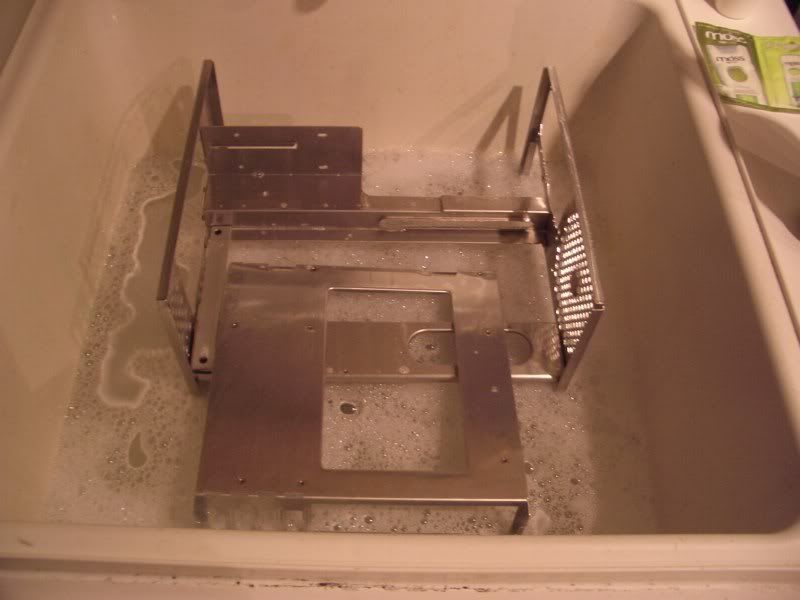
1.2 - I told you to get some soap, alcohol/acetone or hydroxide in section 1. This is where this comes into play. Your case is covered in greases and oils whenever you touch it. Ever taken a picture of a bare metal case with your camera's flash on? I urge you to try it, it's disgusting. In this step, we're going to wash your case. In a large laundry tub, bathtub, or shower (yes, you can shower with your case. I do it, and it's a nice bonding experience, I urge you to try it). Cover your case in liquid soap, lather it up, and let it sit for a few minutes. Then rinse it with cool, clear water for a good 5-10m. Letting it sit under the showerhead is a great way to do this.
1.2.5 - If you're going to use acetone, alcohol, or sodium hydroxide, let it sit in a plastic garbage pail with a 20% concentration of any of those chemicals. 1:4 mix for alcohol or acetone, or 1tbsp of dissolved lye/draino/hydroxide per liter of water. Let the case sit for 15m in the mixture before rinsing in water for a good 5 minutes.
1.3 - Remove your now clean case. Your hands should be clean from all the washing, but there's no reason not to use gloves here. Wear them. Pat the case dry with a clean cloth. It doesn't have to be lintless, but a dirty cloth is just a bad idea. You can also put your stripped case in an oven set to 200f for 20-30 minutes to heat dry it.
1.4 - Move your case to the point of priming or painting. Rust paint sprays for MILES, so do it in low wind, outdoors (if possible) and on a whole days worth of newspaper. If you're baking the paint (aka: not priming) preheat your oven to 180f at this point.
Note: If you are baking your paint, you'll want to leave the oven door cracked a tiny bit. This will prevent the volatile gasses from building up in the oven, and damaging it. If you can't keep the door cracked only a tiny bit, you can use a small metal object (I use a ladle) to prop it open about 2-3".
2.0 Priming
Hmmm... Priming. My favorite step. The matte finish of a self etching primer is glorious, really. It seems to absorb all light, and emit absolutely no sheen. Remarkable. Remember, if you're BAKING your paint, you don't need to prime, but you can, it really makes no difference.
2.1 - Go read "5.0 Proper Painting Techniques". Yep, I said it. Go read ahead. Did you do it? Are you sure you did it? Good! Now you know how to paint, so you may continue onwards.
2.2 - Primer is very forgiving with application. It's very easy to apply, and the only way you can screw it up is if you have a drip. You can't over apply it, nor can you pool it. You'll want to apply about 2 medium coats of primer, until you can't see any bare metal underneath. Please adhere to section 5.0 Proper Painting Techniques, which is discussed later in this tutorial.

2.3 - You may bake your primer if you'd like. This is by no means required, but it does let you do the entire priming process in under 1 hour. If you're not baking your paint (either colour or primer) you must wait about 10m between coats, and at least 2 hours between the final primer coat and your first colour coat.
2.4 - After drying, check all the visible areas for drips or rough patches. Drips are, fairly obvious, small pools of paint at least 1mm thick. Rough patches are a tiny bit harder to define, but you can literally feel them to find them. They look different from the surrounding paint, and well, feel rougher too (hence, rough patch). These patches should be sanded with 400g sand paper until smooth. Drips should be sanded with 400g sand paper as well, making sure you don't sand down to bare metal.
2.2 - Primer is very forgiving with application. It's very easy to apply, and the only way you can screw it up is if you have a drip. You can't over apply it, nor can you pool it. You'll want to apply about 2 medium coats of primer, until you can't see any bare metal underneath. Please adhere to section 5.0 Proper Painting Techniques, which is discussed later in this tutorial.
2.3 - You may bake your primer if you'd like. This is by no means required, but it does let you do the entire priming process in under 1 hour. If you're not baking your paint (either colour or primer) you must wait about 10m between coats, and at least 2 hours between the final primer coat and your first colour coat.
2.4 - After drying, check all the visible areas for drips or rough patches. Drips are, fairly obvious, small pools of paint at least 1mm thick. Rough patches are a tiny bit harder to define, but you can literally feel them to find them. They look different from the surrounding paint, and well, feel rougher too (hence, rough patch). These patches should be sanded with 400g sand paper until smooth. Drips should be sanded with 400g sand paper as well, making sure you don't sand down to bare metal.
If you DO end up sanding to bare metal by accident, lightly sand the entire area around the exposed metal (Think about "evening out" the surrounding area, so it gradually dips to the depth of the paint penetration) a bit. Nothing much, and certainly not enough to increase the size of the penetration. You must then repaint the ENTIRE area of the penetration (or the ENTIRE side panel, if you're doing a panel) not just the spot it's self, and let it dry.
3.0 Colour Coat
3.1 - Time to paint the case. If you're not baking the case you'll want to apply several very light coats of paint rather than a few heavy ones. Literally, open up MS Paint, select the largest "spray paint" tool size, and quickly tap the mouse button. See how it covers at most 10% of the possible circle? That's about the amount of coverage you want per coat of colour paint. Repeat this until the entire case is painted, waiting 10m between coats. It's not uncommon to require 8 or more coats.
3.2 - If you are baking the case, you'll want to do about 2-3 thicker coats, and bake them for 1 full hour each. Bake the last coat for 2 hours. You want to see very little primer coat under your first wet colour coat... But don't spray so much that the paint runs or drips. If you're worried about a drip, let the paint sit for a good 15 minutes before baking it... Too much paint at once will cause a run, so it's always better to do 3 lighter coats, than 2 heavier ones, if you think you're going to get a run.
3.3 - As before, you'll want to let your paint dry. If you chose not to bake your paint, leave it for AT LEAST 3 DAYS before moving to the next step. If you did bake it you should leave it in a cool place for about an hour.
3.4 - Like during the priming session, you'll need to check your paint for runs, drips or rough patches. If you have a:
Either way, you'll need to repaint the immediate area (or entire panel, if that's the piece you're working on) with a few EXTREMELY LIGHT coats of paint until you can't see the difference between the sanded and un-sanded areas.
3.2 - If you are baking the case, you'll want to do about 2-3 thicker coats, and bake them for 1 full hour each. Bake the last coat for 2 hours. You want to see very little primer coat under your first wet colour coat... But don't spray so much that the paint runs or drips. If you're worried about a drip, let the paint sit for a good 15 minutes before baking it... Too much paint at once will cause a run, so it's always better to do 3 lighter coats, than 2 heavier ones, if you think you're going to get a run.
3.3 - As before, you'll want to let your paint dry. If you chose not to bake your paint, leave it for AT LEAST 3 DAYS before moving to the next step. If you did bake it you should leave it in a cool place for about an hour.
3.4 - Like during the priming session, you'll need to check your paint for runs, drips or rough patches. If you have a:
- Drip: Sand it lightly with 400g sandpaper after it's TOTALLY dry. Sanding wet paint is a bad, bad, bad, bad idea. You will smear it, and it does require a LOT of work to get right.
- Run: You'll want to lightly sand the entire area of the run with 400g sandpaper, just a tiny bit, so it's flush with the rest of the paint around it.
- Rough patch: Same as before, a light sand.
Either way, you'll need to repaint the immediate area (or entire panel, if that's the piece you're working on) with a few EXTREMELY LIGHT coats of paint until you can't see the difference between the sanded and un-sanded areas.
4.0 Clear Coat
If you're doing the inside of your case, chances are you won't want a clear coat. Clear coats take lots and lots of time to dry properly, but really do add to the level of protection, and obviously, shine.
4.1 - Prepare your case for clear coating. If you'd like to optimize the clarity and gloss of your finish, you may do the following, or you may skip to 4.1 entirely. Sand any rough areas with 800g sand paper, wiping it off with a soft cloth. You must then polish the ENTIRE piece with a paper towel. You don't have to polish if you have nothing to sand. Cheap paper towels are the best for this (as is cheap toilet paper, although that breaks easier) as they're rough and inexpensive. Basically, as if you were lapping a processor, go left to right over the piece with a few folded up paper towels. Use the weight of your hand, and don't press down. Every linear inch of what you're polishing should take 100-200 passes. Yes, this takes awhile.
4.2 - You may now hit the piece with clear coat. If you're going for a high gloss look, you'll want to carefully apply a single thick coating of it. If you're going for a matte look, you'll want to use 4-5 really thin coats so the surface is just covered, waiting 1 hour between coats. Let this dry at least over night. Do NOT bake clear coat, EVER.
4.2 - You may now hit the piece with clear coat. If you're going for a high gloss look, you'll want to carefully apply a single thick coating of it. If you're going for a matte look, you'll want to use 4-5 really thin coats so the surface is just covered, waiting 1 hour between coats. Let this dry at least over night. Do NOT bake clear coat, EVER.
5.0 Proper Painting Techniques
Ahh. Here's where we start emphasizing technique over procedure. As I stated earlier, painting is roughly 80% skill 19% prep and 1% materials.
5.1 - How to actually paint. Well, painting is a very simple process really, but first attempts often go wrong. Why is this? Well, that's easy to answer: Starting and Finishing points. If you press the nozzle on the can down while the can is over the piece, move it across the piece, then finish while it's at the end of the piece (but still over it) you're going to get pools of paint. Professional painters start painting about a foot to the left of the piece in question, quickly sweep over the piece, and finish about a foot to the right of it. Yes this wastes paint. Yes you must do the same thing. Here's what I'm talking about. Let's say you're painting a side panel:
o...|.............|...x
o...|.............|...x
o...|.............|...x
o...|.............|...x
If we consider the "|.............|" section of the above (poor) ASCII art to be the panel you're painting, one would press the nozzle down while it's to the left of the piece, at the o, pass across it, go BEYOND the piece, and stop at the x. It's really that simple. If you do the following though:
|o.............x|
|o.............x|
|o.............x|
|o.............x|
You're going to get 2 pools of paint on either side of the piece... 1 pool at the o, and the other at the x. This is simply because you spend more time at the start and finish points than you do in the middle while moving the can.
Here's a series of pictures detailing this technique.
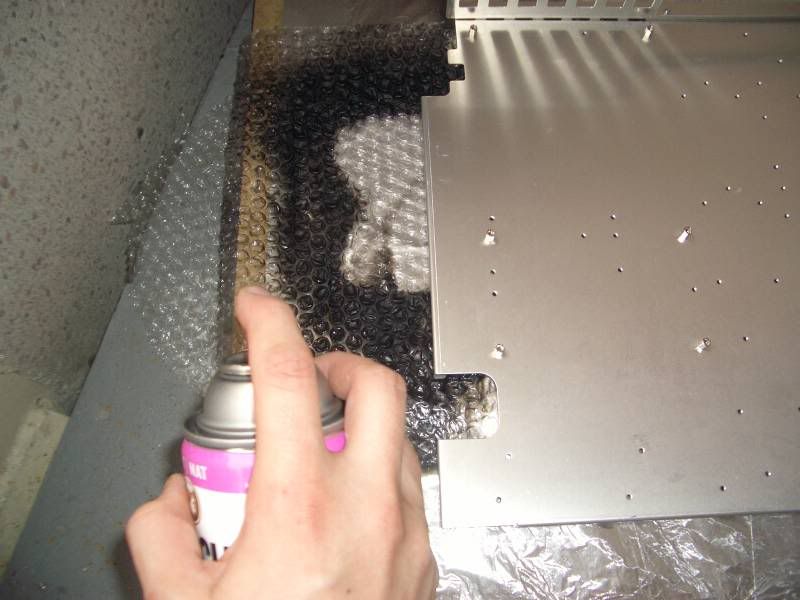
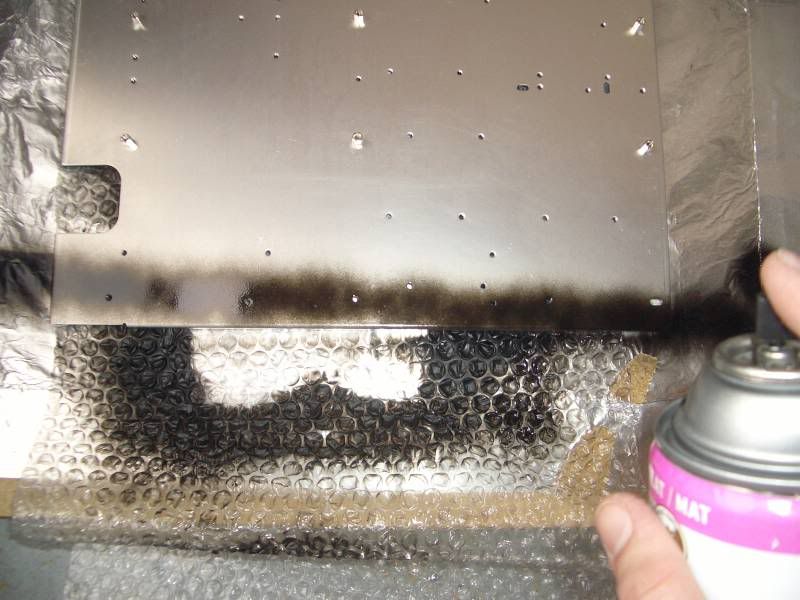
You can see I started spraying 1" to the left, and finished 1" to the right.
5.2 - Warming the can. Yes, warming the can causes the paint to behave totally different from cool, or room temperature, paint. Warm paint flows easier, dries faster, and has less of a "honeycomb" or "orangepeel" texture when dry. It will, however, drip and run easier. If you're painting a section of your case that's flat to the ground (aka, you're pointing the paint at the floor) do not warm your paint. If you're painting a piece that's vertical (aka, you're shooting the paint directly towards it) warming can be beneficial.
To warm your paint, place it in a tub or sink filled with warm water. It should be just at the cusp of a comfortable water temperature. Not hot, not cool, but just above skin temperature. It should be left in this water for 10m (adding more warm water when it cools) and periodically shaken.
NEVER place a full can of paint in warm water. Always empty it for about 20s before you immerse it. ALWAYS check the bottom of the can every minute while warming. The bottom will bulge out a bit (or in a few localized spaces) if the can is building pressure.
5.3 - Painting straight, not down. The last section briefly touched on this... But this is very, very important. Never paint towards the ground. Always paint at an angle perpendicular to yourself. Aka, you should never rest your piece flat on the ground, and paint at it. Instead, prop your piece up against a wall, some bricks, a few cans of paint, etc, and spray at it. Painting down will cause a tiny bit of the conical spray pattern to collect on the rim of the can, and drip on your piece. UGH.
5.4 - Test your painting. I always save those 5.25" bay punch-out covers that come with a case to test my paint on. Paint will always look different applied on metal than cardboard, or paper, or what not... and every metal gives paint a different personality. Test your newfound skills on a part of the case (for example, the PSU divider on a Lian Li case) or a few PCI slots. These are easy to repair if you screw up. In addition to this, you can check to see how well the paint adheres to the metal by scratching it with a key. After you've let it oven dry (or dry for 5 days without a clear coat, 20 days with one) most rust paints can be scratched lightly with a key or a fork without it cracking or peeling off.
o...|.............|...x
o...|.............|...x
o...|.............|...x
o...|.............|...x
If we consider the "|.............|" section of the above (poor) ASCII art to be the panel you're painting, one would press the nozzle down while it's to the left of the piece, at the o, pass across it, go BEYOND the piece, and stop at the x. It's really that simple. If you do the following though:
|o.............x|
|o.............x|
|o.............x|
|o.............x|
You're going to get 2 pools of paint on either side of the piece... 1 pool at the o, and the other at the x. This is simply because you spend more time at the start and finish points than you do in the middle while moving the can.
Here's a series of pictures detailing this technique.
You can see I started spraying 1" to the left, and finished 1" to the right.
5.2 - Warming the can. Yes, warming the can causes the paint to behave totally different from cool, or room temperature, paint. Warm paint flows easier, dries faster, and has less of a "honeycomb" or "orangepeel" texture when dry. It will, however, drip and run easier. If you're painting a section of your case that's flat to the ground (aka, you're pointing the paint at the floor) do not warm your paint. If you're painting a piece that's vertical (aka, you're shooting the paint directly towards it) warming can be beneficial.
To warm your paint, place it in a tub or sink filled with warm water. It should be just at the cusp of a comfortable water temperature. Not hot, not cool, but just above skin temperature. It should be left in this water for 10m (adding more warm water when it cools) and periodically shaken.
NEVER place a full can of paint in warm water. Always empty it for about 20s before you immerse it. ALWAYS check the bottom of the can every minute while warming. The bottom will bulge out a bit (or in a few localized spaces) if the can is building pressure.
5.3 - Painting straight, not down. The last section briefly touched on this... But this is very, very important. Never paint towards the ground. Always paint at an angle perpendicular to yourself. Aka, you should never rest your piece flat on the ground, and paint at it. Instead, prop your piece up against a wall, some bricks, a few cans of paint, etc, and spray at it. Painting down will cause a tiny bit of the conical spray pattern to collect on the rim of the can, and drip on your piece. UGH.
5.4 - Test your painting. I always save those 5.25" bay punch-out covers that come with a case to test my paint on. Paint will always look different applied on metal than cardboard, or paper, or what not... and every metal gives paint a different personality. Test your newfound skills on a part of the case (for example, the PSU divider on a Lian Li case) or a few PCI slots. These are easy to repair if you screw up. In addition to this, you can check to see how well the paint adheres to the metal by scratching it with a key. After you've let it oven dry (or dry for 5 days without a clear coat, 20 days with one) most rust paints can be scratched lightly with a key or a fork without it cracking or peeling off.
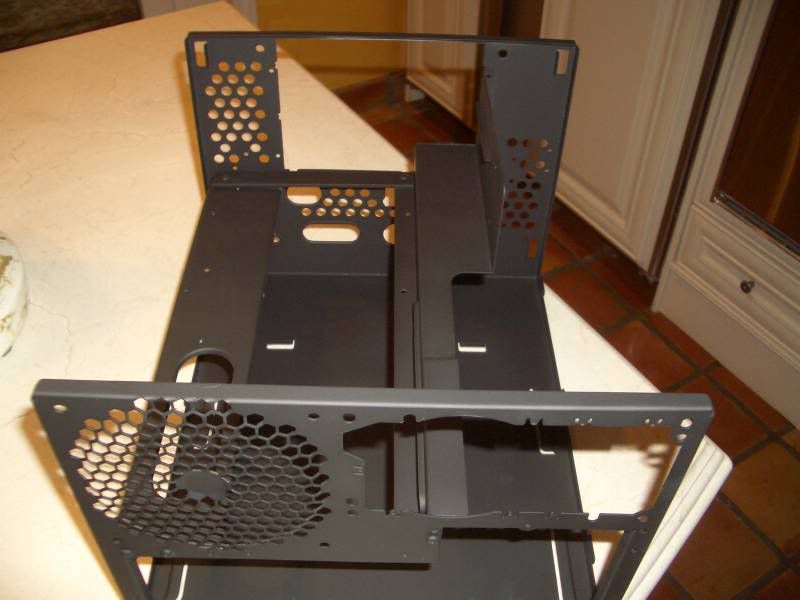
Hopefully, with a little practice, you'll eventually get a piece that looks like:
A nice smooth finish is very easy to accomplish by baking the paint, and will create a finish durable enough to stand up to almost any reasonable amount of torture.
") .
.


