Project: Pirate Sonata

R@Mo

Limp Gawd
Joined
Jun 16, 2004
Messages
185
pirate_sonata2.jpg


Long time lurker, first time poster. This is my first mod, so play nice. I'm starting out with a stock Antec Sonata case, and the idea is to emerge with a quiet, elegant, yet bad-ass machine at the end of my modding adventures.

My current setup:

(hardware in white, performance mods in yellow)

- Intel Pentium IV 2.4C @ 3.0Ghz (Zalman CNPS7000A-AlCu + AS3)
- Abit IC7-G (northbridge fan unplugged, was too damn noisy)
- Corsair 512MB TWINX 3200LL v1.2 @ 2-5-3-2
- ATI AIW 9700 Pro (Artic Cooling VGA Silencer, copper BGA heatsinks)
- Maxtor 120GB 7200RPM 8MB
- LiteOn 16X DVD
- LiteOn 52X/32X/52X CDRW
- Logitech Z680 5.1 THX Speakers
- Logitech Cordless MX Duo
- 19" LG F900P
- and of course, Antec Sonata case w/ TP380S PSU


I didn't take any pictures of my case while performing any of the mods I've completed so far, the reason being the lack of a digital camera. I'm posting now because I got hold of a video camera and took a few shots with it. They aren't of the best quality, but will have to do for now.

The stock Antec Sonata case:

stock_exterior.jpg

stock_interior.jpg


I knew I wanted a theme for my case, but was unsure what to go with.

At first, I was thinking of doing a Mortal Kombat theme, having grown up with that game :). So I started by making my own 120mm fan grill from plexiglass. I cut it using my Dremel (which I only purchased a few months ago...yes I'm a newb but getting accustomed rather quickly). Here is the fan grill after the cutting was done:

mkgrill1.jpg


After filing down the edges:

mkgrill2.jpg


And after painting with black paint:

mkgrill3.jpg


But then, I saw this in a French case mod gallery:

dope.jpg


So, dissatisfied with my unoriginal idea, I abandoned it, and starting searching once again for some inspiration.

So after about 2 months of brainstorming, and browsing multiple case mod galleries (just to make sure my ideas were somewhat unique), I came up with the idea of doing a pirate theme. I hadn't seen anything piratey out there as of late, so I hope what I produce will indeed be original. The Sonata being already black helped in making this decision. I also liked the finish on the outside of the case and wanted to keep it intact.

One of the first things I experimented with was closing the perforated holes spelling "Antec" in the sides of the case. They were letting way too much dust in. What was the point of the dust filter in the front of the case if dust could easily enter from here, I ask ya?!?

So I used plexiglass to cover the holes, and attached it using some 3M double sided tape. Doing so caused my power supply temperatures to rise considerably. To remedy this, I decided to mod the front bezel to allow more air to flow into the case. My inspiration for this came from here.

Doing this did improve airflow, and PSU temperatures dropped slightly, but not low enough. When the PSU fan is spinning quickly, so is the 120mm case fan (they're linked using the fan-only connector, which is temperature regulated in the PSU). My case became noisy, and I wouldn't have that.

So I started running my PC with my side panel off. My PSU temperatures dropped to record levels, and my computer became nice and quiet, but now I was worried about the hard drive, which was getting waaaay hotter than it should be (so hot it would hurt to touch it for more than 5 seconds).

So this is a problem I have yet to fix. Perhaps in the future I will cut the front bezel and somehow add an intake fan. I don't know. Any ideas are appreciated.


Visual Mods Completed To Date
========================

- Sleeved power supply, painted the cover, swapped in a blue/red LED fan, added a "Skull" chrome 3D fan grill, added a window, and stuck a "Danger: High Voltage" chrome applique on it.

case006.jpg

case055.jpg

case017.jpg

case011.jpg


I know, I know. The ATX 12V line isn't sleeved yet. Couldn't get the damn connector off, even with the proper tool. Will try again later.


- Changed power LED to blue, and HDD activity LED to red.

case024.jpg

case051.jpg


Sorry, couldn't get any pictures of the red LED in action. Maybe I'll defrag my hard disk soon or something, so I can take pictures. In general though its not nearly as bright as this blue one, so I'm not very happy with it.


- Added a blue and a red CCFL, and took the switch out of the supplied PCI bracket, and mounted it in the front of my case instead for easy access. Also installed some mirrored plexi in the sides of the case, to enhance its appearance. Now it's possible to see the Artic Cooling VGA Silencer on the ATI card.

case022.jpg

case010.jpg

case039.jpg


I will be replacing the mirrored plexi with new pieces with better fit (current ones got scratched as well). Also, at the moment there are no mirrors below the HDD rack, so that will need to be addressed as well.


- Replaced stock screws with black anodized thumbscrews on the PCI brackets, and replaced the stock case fan with a blue 120mm LED case fan in back.

case045.jpg

case048.jpg

case060.jpg


Other Planned Mods
===============

Case handles: I've been looking all over for some nice chrome case handles, that are stylish and between 12 and 16cm wide. So far only found a single pair at Home Depot, at 24 bucks (CAD) each!! Looking for a cheaper alternative before springing for them.

LCD Screen: I'm researching the posibility of incorporating the PSOnce 5" screen into the 3.5 inch bays and ditching the floppy drive I currently have in there (which actually DIED on me...since when do floppy drives DIE!?).

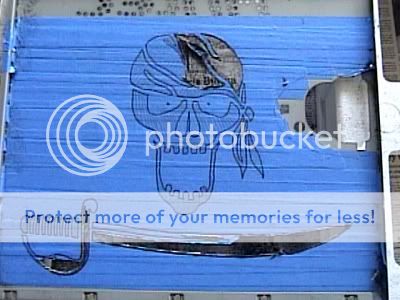
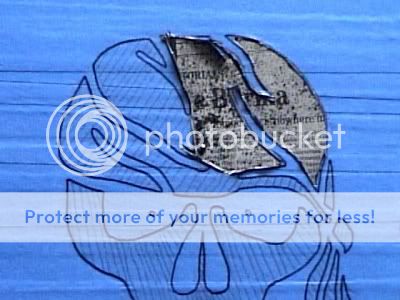
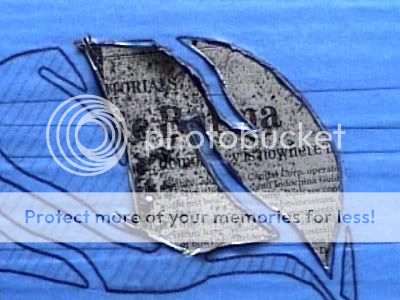
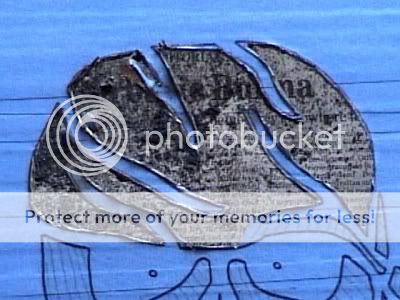
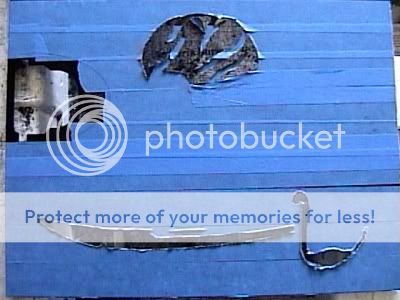
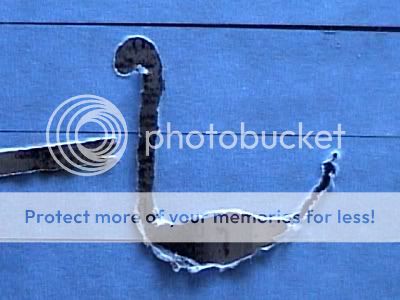
Case side panel window: This is an obvious future addition that will need to be made. In fact, this is what I'm working on next. I thought about a little and decided to go with a cutout instead of a full window. I searched the net for ideas and came up with this:

pirateflag.jpg


which I modified to this:

piratefinal.jpg


which better fits the side panel's layout. Cutting this out will leave the Antec holes intact (unfortunately), unless I mess things up and end up going with a full window (remember, I'm new with the Dremel).

I will be starting on the side panel tomorrow. :cool:

Here are some overall pictures of the case as it is currently:

case026.jpg

case038.jpg

case036.jpg

case061.jpg

case049.jpg


That's all for now. Any comments/suggestions/ideas?
 
Quick update: As promised, I started working on the side panel today. Taped it up using Painter's tape on the inside and out, drew my (mirrored) pattern on the inside with a sharpie, and starting cutting away with a dremel. Here are some pics.

dremel05.jpg

dremel03.jpg

dremel04.jpg


Cutting in the living room isn't a great idea, but I don't have much choice living in an apartment. I have to leave the room for a while afterwards to let the metal dust settle so I don't breathe it in. :eek:
 
Quick Update: Did some more cutting. Steel takes forever to cut, hence the slow progress.

Got more of the sword cut out now.

dremel09.jpg


Here are some close ups of my work so far:

dremel06.jpg

dremel10.jpg


I tried to cut within the edges. I'll file them down between Dremel breaks.

I also went out and bought a tungsten carbide cutter bit, which I'll use on the sword handle parts. I think I need to drill a hole in each part to start though. I'll worry about the detailed areas after the larger areas are done.

Thanks to everyone for the feedback so far. :D
 
Looks pretty sweet, and very nice dremel work there. On a side note it ook like 5 minutes before your pictures appeared, that just might be something on my end though.
 
Not sure why the pictures won't load properly every time. I uploaded them to some free webspace, so I have no control over whether they come up right away or not unfortunately. :confused:
 
Looks good so far. Definitely nice work with the cutting. I liked the original fan grill :eek: Your hardware is pretty similar to mine except that I've been planning on making mine more silent, as yours is now.
 
R@Mo said:
Cutting in the living room isn't a great idea, but I don't have much choice living in an apartment. I have to leave the room for a while afterwards to let the metal dust settle so I don't breathe it in. :eek:

Open an outside door or window and cut in that direction? If it's daytime (to not disturb others) you could also run a vacuum cleaner hose next to what you are cutting.
 
Pherret said:
Open an outside door or window and cut in that direction? If it's daytime (to not disturb others) you could also run a vacuum cleaner hose next to what you are cutting.

Good idea. Next time I'll move my table next to the window. Maybe I'll be able to breathe easier afterwards. :)

Not sure how the vacuum thing can be set up. Sparks fly everywhere, not in only one general direction. :(
 
Quick Update: I stopped working on the sword, because the sword requires smaller disks. So I switched to cutting the skull (never thought I'd use that phrase :D). Since I'm working indoors, I'm restricting myself to working hours (9-5) so that my neighbors are out while I'm causing all that noise. :eek:

Here are some pictures of my progress so far.

dremel18.jpg


dremel15.jpg


dremel16.jpg


So far the 'creases' in the pirate skull's bandana are holding up fine. I discovered that the sanding drums that came with my dremel kit do a great job of making the edges of metal nice and smooth, without applying much pressure. I will be using them on these 'creases' as well as the other edges of the cutout. They get used up really quickly though, so I may need to buy a few more.

So far so good. :D
 
Looks great. I cant wait to see it when its done. I still cant decide if i should mod in my apartment or not. id hate to be the annoying noisy neighboor.

BTW, where did you get your mirrored plexi?
 
that looks damn good for a first mod. you can always file down the edges later. nice work with the dremel too.
 
Another Update:

Did some more cutting today. Worked on both the top half of the skull and some finer parts of the sword handle. Here's an overall picture of my progress:

dremel19.jpg


Close up of the sword:

dremel20.jpg


and of the skull:

dremel21.jpg


I used the tungsten carbide cutter (#9901) to do most of the sword handle. Problem is, the bit doesn't stay in the tool for very long, and is continuously jumping while I cut. Maybe I'm using the wrong approach or something? :confused: I always use this while cutting to add stability, but the bit still jumps and occasionaly falls out of the collet, despite it being screwed in tight! :eek:

Anyways, if anyone is wondering how things are looking from the other side of the panel, here are some more pics:

dremel22.jpg


dremel23.jpg


dremel24.jpg


As you can see in that last image, the painters tape burns up in some areas. :eek: I will most likely be taking a day off tomorrow and getting some fresh air instead. Also need to work on my Honours project, which is way behind schedule. :(
 
I used th cuttoff wheel to make the initial cuts when I cut my blowhole - then I used the same 9901 to do the finishing work - it came out very smooth. I then used a stone to take out any sharp parts.

I think a few things might be happening - you have a part not working or are using the wrong speed setting. Additionally you might be using the wrong amount of pressure...
 
What I would use for the finer parts of the handle would be a roto zip. Best tool in the universe for delicate work. hmm... But you may not be all that well off on the money and buying a tool that will just make it faster/easier isn't always good... I have a workshop of my dads that I get to go through though. Hmm... I agree with the speed thing and the bit jumping out along with maybe the pressure. I don't really know what to say...

With the cutoff disks what speed are you using? I notice that you have to 10 speed dremel (I believe). If you use a slower speed it will be harder on the motor and will burn it out a tad bit faster. Along with making it harder to cut. The reason for it wearing so is that it doesn't have the juice to let it cut through easily... Thus making it bog down and get hot... etc

As for metal dust. I agree with the vaccuum. The sparks will go in but do absolutely no damage. They are just peices of metal that get hot before they come off. They will cool really fast and be just fine before they even get to the main body of the Vac.

Hope I helped.
 
TANKORR, you were right. Turns out I was using the wrong speed setting with the 9901 bit. :eek: I was cutting at 10, when I was supposed to be using 5 or 6. :eek: That's why it was skipping.

I always use speed 10 with the cutoff disks, so no worries there. §pix, you're lucky to have access to a workshop. I live in an apartment alone and had to buy all the tools I'm using. :(

Gonna be working on my project on Sunday, so look for an update come Monday afternoon! :D
 
I am glad I could help ya out - I am looking forward to the finished product.
 
Got some yummy stuff in the mail today. Check these babies out.

Skull & Bones Case Badge:

case066.jpg


Skull & Bones Thumbscrews:

case065.jpg

case064.jpg


They match the general theme of the case nicely, don't you think? ;)

I plan on using two of the thumbscrews for the side panel, and one of the remaining 2 will be modded into a key for the front door/side panel. Not sure what to do with the last one. Any ideas?

Back to work! :D
 
Just had a nice meal (chicken breasts fried in BBQ sauce, white rice and mashed potatos) which I made myself btw :cool: ...

case067.jpg


Did I make anyone hungry? :p

Alright, enough of that. I've been experimenting with paint lately, and I have to say, the Duplicolor paints are definately higher quality than the Krylon. Remember how I cut out a window in the PSU? Well, I used that scrap piece of metal to test the paint on. Here is what I was able to achieve.

case068.jpg

case069.jpg

case071.jpg


Metalic blue...mmmmm...

So yeah, that was after sand (320), primer, sand (320), primer, sand (320), paint, sand (600), paint, clearcoat, sand (2000), clearcoat, sand (2000), polish, polish, polish....lol....Its taken about a week to get through this process. I used Krylon primer with the Duplicolor paint (despite warnings not to on the can) and it turned out pretty good still. I like the results, so I will probably be stripping the Krylon blue paint from my PSU and using this sexy Duplicolor metallic blue instead.

Lots of mods, so little time. :D
 
Update time!

OK, 5PM, everyone is coming home from work, so I had to stop making a racket. Here are some new pics:

Overall progress:

dremel26.jpg


Close-ups:

dremel27.jpg


dremel29.jpg


dremel30.jpg


I drilled a hole in each eye which will eventually hold LED's, for a scarier effect. :cool:

Pretty much all the cuts remaining are precise cuts, so to tackle them I will use a combination of the #409 disks (because as somebody said earlier, they really do slice throught the metal like butter, and they get small fast!), and my trusty tungsten carbide cutter (#9901).

Hopefully in 2 days or so I should be done the side panel cutting and you'll all be able to see the final result. :D

Thanks for all the compliments btw! You guys are great! ;)
 
looks nice so far.

as far as inhaling dust goes, invest a few dollars in a pack of painting masks (little blue things like the dentist wears) so you don't swallow any.

as to fresh air - who needs it?

soldering isn't hard, just get a good soldering iron, keep it hot, and when applying solder, it doesn't need much, and don't move the wires while it cools off. with standard lead/tin solder, you want to avoid it looking silvery and shiny when you finish. instead you want it to be dull. also, put some heatshrink on it before you solder (just shift it out of the way) to protect the joint.
/i am fairly certain about the shiny=bad when soldering, but double check so you don't screw up ifi was wrong, mkay?/
 
did u follow my idea i gave on "go with the metallic blue" paint? or did u already have that planned.lol!! i love it
 
Dude, must say you've got some kick-ass dremel skills.
Sorry if you mentioned it before - is it your first dremel experience?
 
Yup, my first time with a dremel. :D

Don't get me started on cigarettes...I hate smoking AND smokERS....no offence to anyone here of course! Thank God they banned that shit in public! :eek:
 
i might have to pick up some of that paint...i got some rust oleom stuff, navy blue. that shit looks pretty good. keep up with the good work.
 
Quick update:

Alright, some good news and some bad news. First the bad news.

I had to meet my professor today, and I got home after 5PM, so couldn't do any cutting. :mad:

The good news? Before I came home, I decided to make a visit to the mall to look for stuff to use in my computer mod. It's a lot of fun looking at random things to find one that fits your case's theme and thinking of ways it can be incorporated. And guess what? I found the perfect item!!

It's a belt buckle. A belt buckle you say? Well yes, a SKULL belt buckle!! :cool: NOW you see where I'm going with this. :D

Check this out. I cut off (using a dremel :dremel: of course) the slot the belt would normally pass though, and wet-sanded it down using 2000 grit sandpaper to give it a shiny chrome-like appearance. Before it was rather dull and stainless-steel looking. I didn't take any 'before' pics :wallbash:, but here are some 'after' pics:

The front:

case073.jpg


The back:

case074.jpg


And a picture with some outdoor lighting:

case075.jpg


I haven't decided yet where I will use it, but most likely it will be placed on the front door of the case. So what do y'all think? :)
 
cool looking skull! are you going to backlight it or cut out the eyes and light them?
 
How about "Pirates Of Death" looool :D I dunno...I'm kinda making it up as I go along...so whatever looks good gets implemented.

I thought about cutting out the eyes and using LED's, but I already plan to do that on the side window (possibly as a HDD indicator), so doing it on the front is overkill...then again...overKILL....hmmm... :D :D :D
 
R@Mo said:
How about "Pirates Of Death" looool :D I dunno...I'm kinda making it up as I go along...so whatever looks good gets implemented.

I thought about cutting out the eyes and using LED's, but I already plan to do that on the side window (possibly as a HDD indicator), so doing it on the front is overkill...then again...overKILL....hmmm... :D :D :D

Yeah, I agree. Either lit up eyes on the belt buckle, or on the side window, not both. Both would just look overdone, or riced, or both.

Love the look though, that'll look great on the case
 
FOr a first time dremel it is kick ass. Looks as good as mine and I have been messing with powertools since I was a little child. Keep up the good work man.

One mor ething... Can you send a little bit of that food my way?
 
Update time: I did some more cutting today, but this time no pics, sorry. I still have the teeth to cut, as well as the detailed parts of the sword handle. The next time I show you guys pics the side panel will be reunited with the rest of the case, with lexan in place and backlit with my CCFL's. Plus, its fun building up some suspense in the thread. :p

Some bad news: while I was filing away at the edges today, my hand slipped and I accidentally scratched the paint nearby. :( Does anyone know how I can retouch the tiny scratch because I really don't want to paint the whole side panel. And if anyone says 'sharpie' I will castrate them! :D I want this thing to look nice in the end!!

One other thing: I bought some LED's and resistors online today from Hong Kong. Can't wait for them to arrive! Need to learn how to solder soon! :eek:

So, does anyone know how long a package takes to arrive from Hong Kong to Canada usually?
 
Back
Top