Well since so many people like using these Aqua Computer Evo grills for their rads I thought I would start a thread for tips. 
My TN-Tips are:
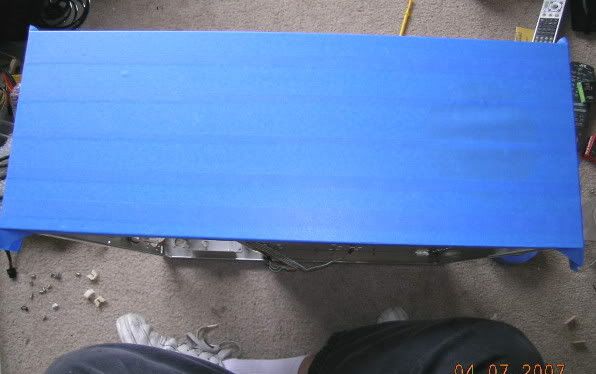
Cover the whole top of your case with that blue painters masking tape as it easier to get off than the regular cream colored stuff. I usually get the stuff with not much sticky power as it is only their to help protect your case.
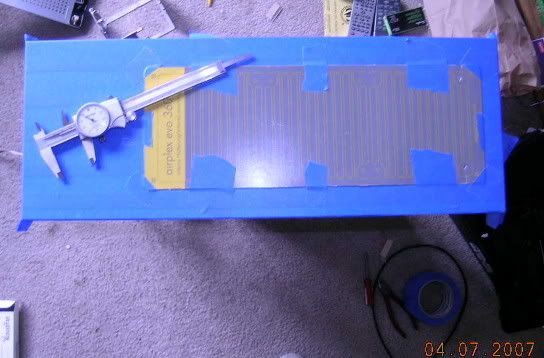
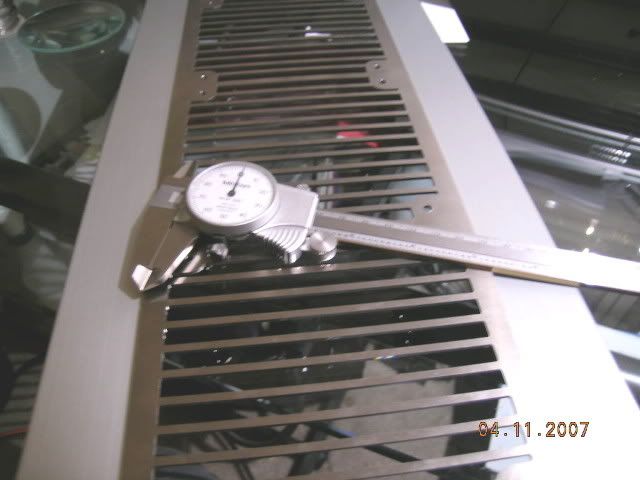
Place your grill on top of your template (printed on outside of box) and line up the holes. Tape securely and use an X-acto blade or single edge razor blade to cut it so that it is the exact same size. Place template on part of case where you want it. I found it helpful to use a dial caliper to measure exactly so the template is exactly centered. If your not as anal as I am then eye-ball it. Once you get it where you want it take some blue painting tape and secure it with several small width pieces.
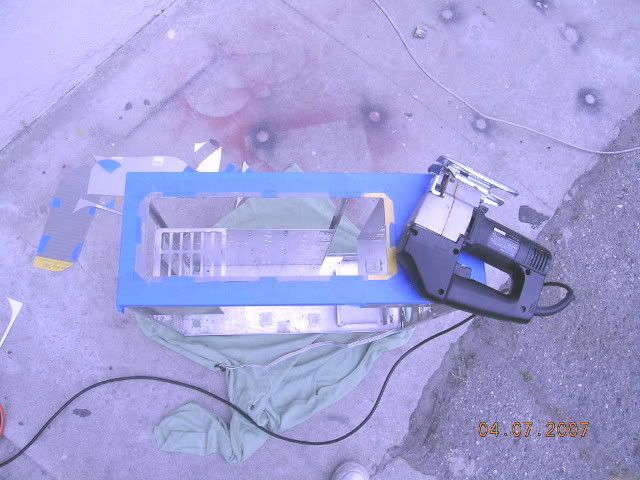
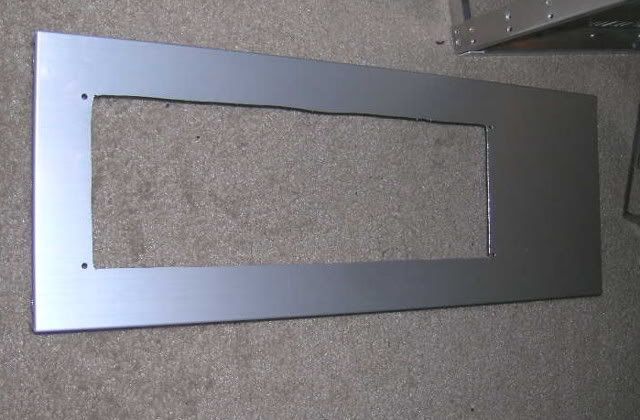
Next drill hole big enough to get a jig saw blade in the area where you are going to cut out. A Dremel reinforced cut-off disc will work, but it is easy to make a mistake. To prepare the jig saw you should clean the plate and tape up with some of the blue tape so that you do not scratch your case. Also I would suggest you use a cobalt blade about 3 1/2" with fairly fine teeth (I used 24 tpi). Then you just follow the dotted line.
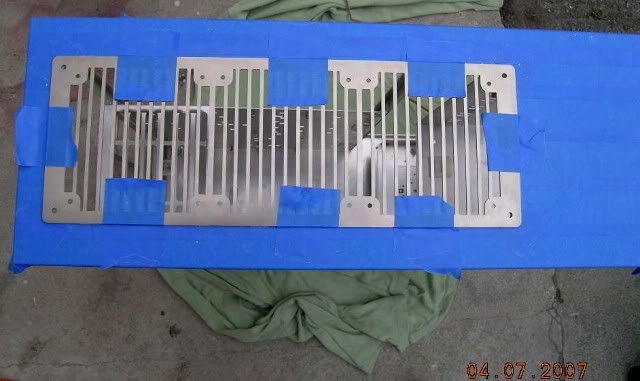
Next you take off the template and tape and brush off any aluminum chips (paint brush works great). Now you will assmble your radiator and fans into one unit. Attach fan/rad assembly to the Evo grill. That means the grill is sitting on the box and you screw it together with the rad on the inside of the box. Now you should have everything sitting pretty. Check again for alignment and if necessary remove rad/grill assembly and grind away any high spots on the hole you just cut so your fan will sit the way you want it to. Use your blue tape again to secure your rad/grill assembly so it won't move.
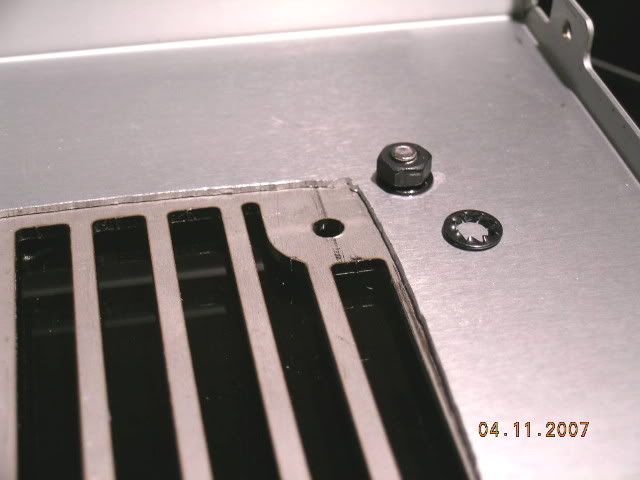
Now comes the fun part. Here you need to make a decision as to whether you want to use bolts and nuts or just bolts and tap your holes. The four holes that the Evo grill attaches with are for 4mm Metric bolts. If you are going to tap your case skip to the next paragraph. If you decide to use bolts and nuts then just follow the same procedure in the next paragraph, but omit the taping sequence and you wil use a drill that will clear the screws you are using. I should mention that even though tapping the case may seem a little daunting it is a lot easier than trying to get a little nut and washer around the radiator to where you need to get it. The easier simple way is to tap.
I used 8-32 stainless steel Button Head socket cap screws instead. You will do one hole at a time. So I drilled the holes with a # 29 drill which is a tap drill. You can also use a 1/8 drill bit if push comes to shove. Then you get out a 8-32 plug tap and using a T-handle tap wrench you tap the first hole. Clean out with some compressed air and gently screw in your 8-32 screw. Remember this is aluminum so just make it snug! Now make sure that you are correctly aligned amd drill and tap another hole on the opposite side of the grill at the other end. Once you have done these two and have your screws in you can just drill all the holes and tap them in whatever manner you wish.
Clean off all your metal chips with compressed air, admire your work, and take a pic!
Notes: The Evo grills have fan spacing to fit the Airplex Evo radiators for the 240 and 360 sizes. The 120 grill fits any 120mm fan. The fan spacing for the popular Black Ice series radiators are different. However you will see that if you are inventive you will be able to either use smaller screws that will work or others might elongate the holes in their fans.
My TN-Tips are:
Cover the whole top of your case with that blue painters masking tape as it easier to get off than the regular cream colored stuff. I usually get the stuff with not much sticky power as it is only their to help protect your case.
Place your grill on top of your template (printed on outside of box) and line up the holes. Tape securely and use an X-acto blade or single edge razor blade to cut it so that it is the exact same size. Place template on part of case where you want it. I found it helpful to use a dial caliper to measure exactly so the template is exactly centered. If your not as anal as I am then eye-ball it.
Once you get it where you want it take some blue painting tape and secure it with several small width pieces.Next drill hole big enough to get a jig saw blade in the area where you are going to cut out. A Dremel reinforced cut-off disc will work, but it is easy to make a mistake. To prepare the jig saw you should clean the plate and tape up with some of the blue tape so that you do not scratch your case. Also I would suggest you use a cobalt blade about 3 1/2" with fairly fine teeth (I used 24 tpi). Then you just follow the dotted line.
Next you take off the template and tape and brush off any aluminum chips (paint brush works great). Now you will assmble your radiator and fans into one unit. Attach fan/rad assembly to the Evo grill. That means the grill is sitting on the box and you screw it together with the rad on the inside of the box. Now you should have everything sitting pretty. Check again for alignment and if necessary remove rad/grill assembly and grind away any high spots on the hole you just cut so your fan will sit the way you want it to. Use your blue tape again to secure your rad/grill assembly so it won't move.
Now comes the fun part. Here you need to make a decision as to whether you want to use bolts and nuts or just bolts and tap your holes. The four holes that the Evo grill attaches with are for 4mm Metric bolts. If you are going to tap your case skip to the next paragraph. If you decide to use bolts and nuts then just follow the same procedure in the next paragraph, but omit the taping sequence and you wil use a drill that will clear the screws you are using. I should mention that even though tapping the case may seem a little daunting it is a lot easier than trying to get a little nut and washer around the radiator to where you need to get it. The easier simple way is to tap.
I used 8-32 stainless steel Button Head socket cap screws instead. You will do one hole at a time. So I drilled the holes with a # 29 drill which is a tap drill. You can also use a 1/8 drill bit if push comes to shove. Then you get out a 8-32 plug tap and using a T-handle tap wrench you tap the first hole. Clean out with some compressed air and gently screw in your 8-32 screw. Remember this is aluminum so just make it snug! Now make sure that you are correctly aligned amd drill and tap another hole on the opposite side of the grill at the other end. Once you have done these two and have your screws in you can just drill all the holes and tap them in whatever manner you wish.
Clean off all your metal chips with compressed air, admire your work, and take a pic!
Notes: The Evo grills have fan spacing to fit the Airplex Evo radiators for the 240 and 360 sizes. The 120 grill fits any 120mm fan. The fan spacing for the popular Black Ice series radiators are different. However you will see that if you are inventive you will be able to either use smaller screws that will work or others might elongate the holes in their fans.