The Tower of Power

Joined
Aug 17, 2005
Messages
29
Hello Everybody.

This is my first real computer build. I decided to go the HTPC route and didn't need an entertainment center, so I've started building a new "PC case" that will house my PC, amplifier and cable boxes in a cabinet style piece of furniture. My friend Jason is co-building this project with me. He is always needed for the technical areas. But he is also gracious enough to help with the woodworking aspect as well, which is essential since I broke my arm on vacation in Greece and have to recover from surgery.

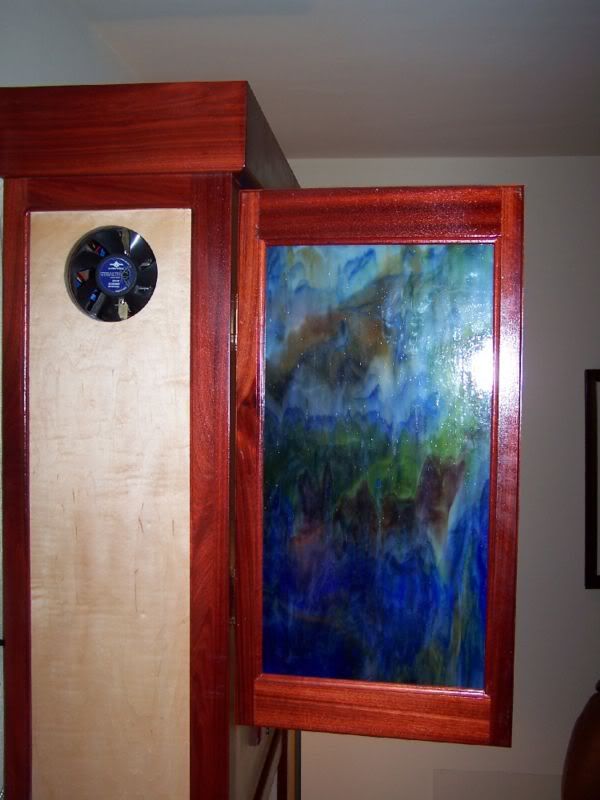
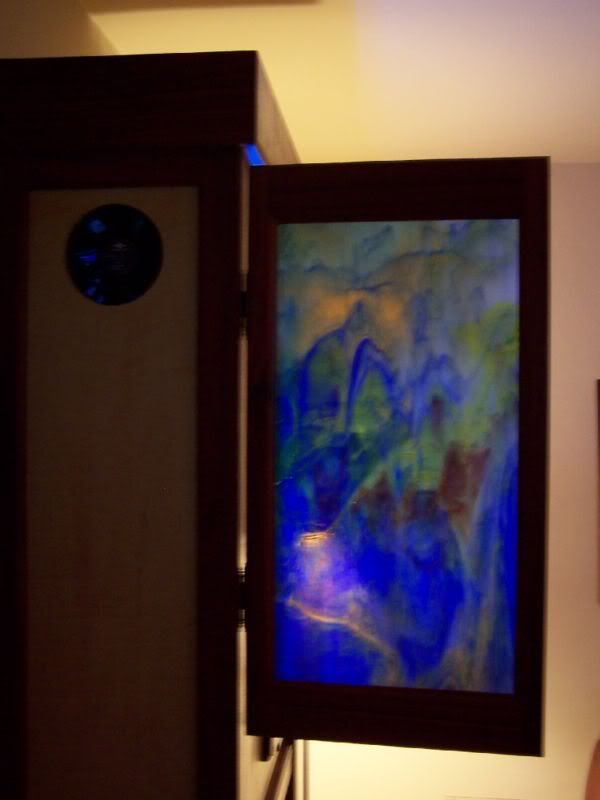
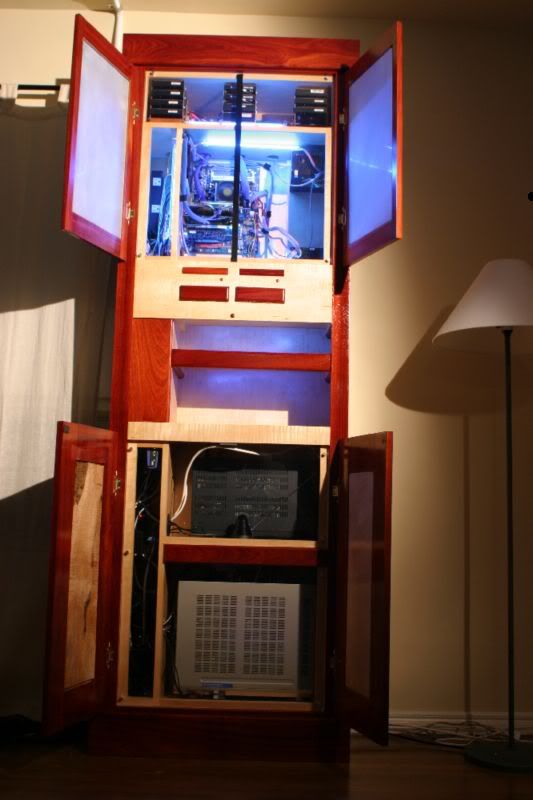
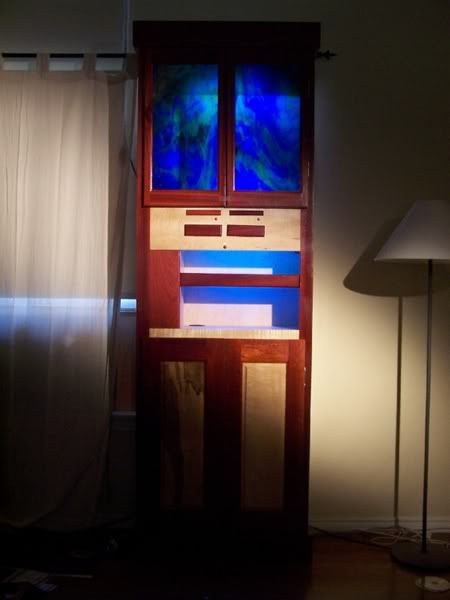
This will essentially be a tall (7 feet) cabinet. I want to make raised panel doors for the bottom half and glass doors on the top half. The carcass will be sealed off with acrylic on the front to keep a good airflow.

I really like the idea of having all of my media completely on hard drives, so I am going to put in as many as possible. They will be housed above the main CPU area in a wind tunnel like pocket to keep them cool.


COMPONENT LIST

PROJECTOR: Panasonic PTL500U w/ 96" screen
MOTHER BOARD: MSI
CPU: AMD 64 |3200+ ATHLON 64 939
MEMORY: (2) Corsair DDR 512MB
VIDEO CARD: Gigabyte 6800 128M GV-N68128DH
AUDIO CARD: Sound Blaster
HARD DRIVES: (8) 250GB SATA, (2) 250GB IDE
HD CONTROLLER: (1) Hightech 1640 4 channel RAID controller
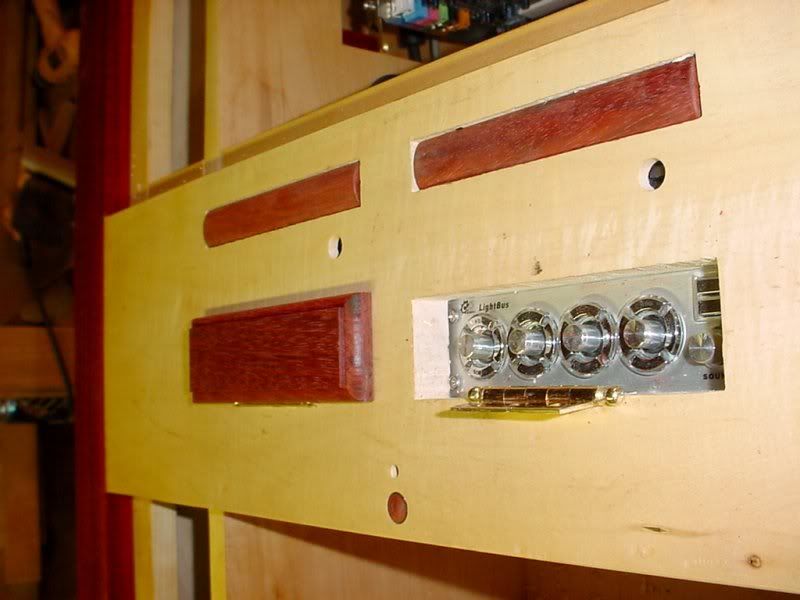
LIGHTING CONTROL: Smart Home IR X10 command console
POWER SUPPLY: (2) Just PC 450w

We haven't been able to get more than one RAID
controller to work (yet). Once we do I can add another 4 disks to the mix.

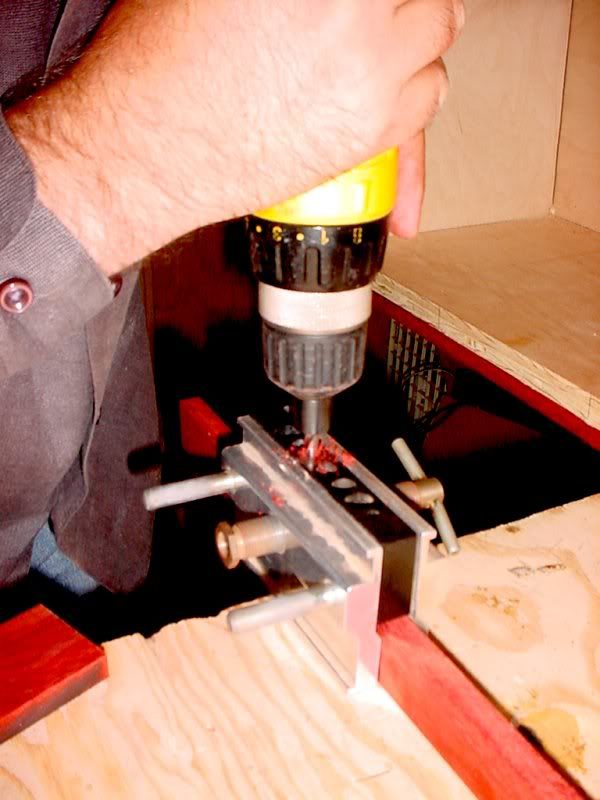
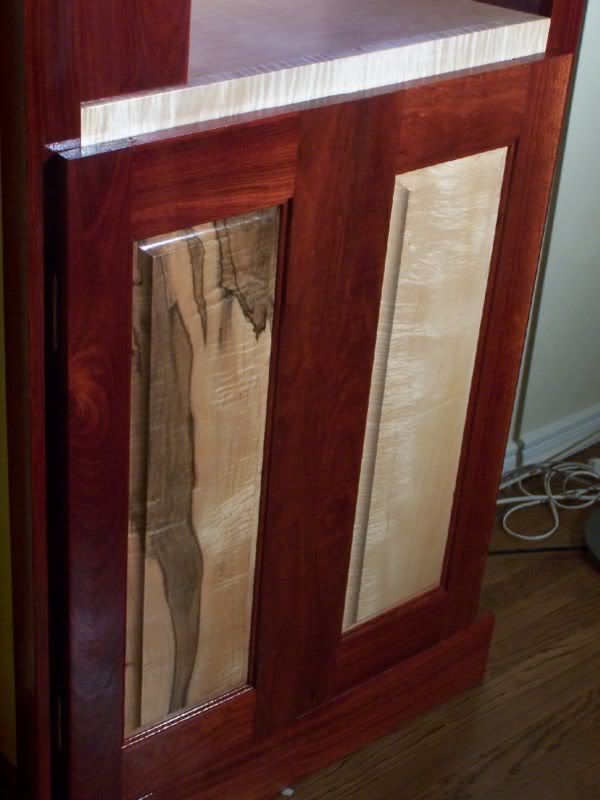
I usually use African mahogany, but I decided to go with a maple case with satine (bloodwood) trim.


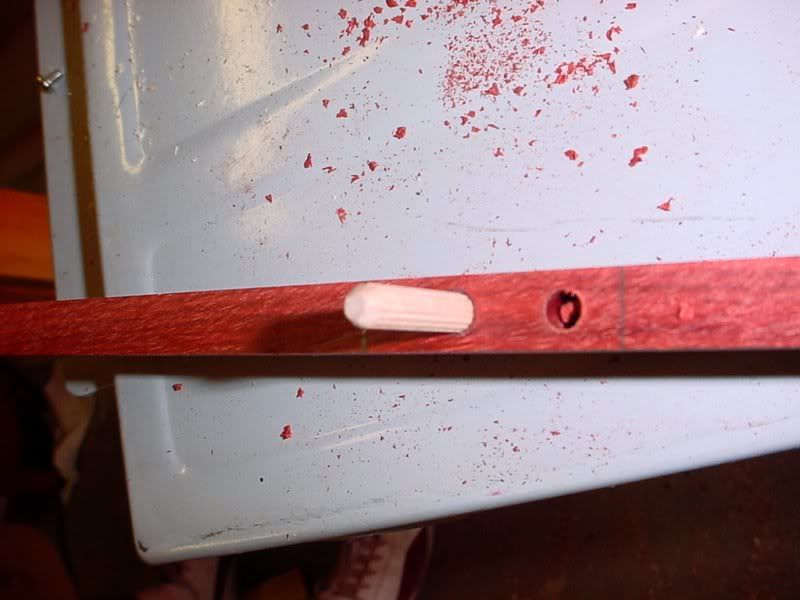
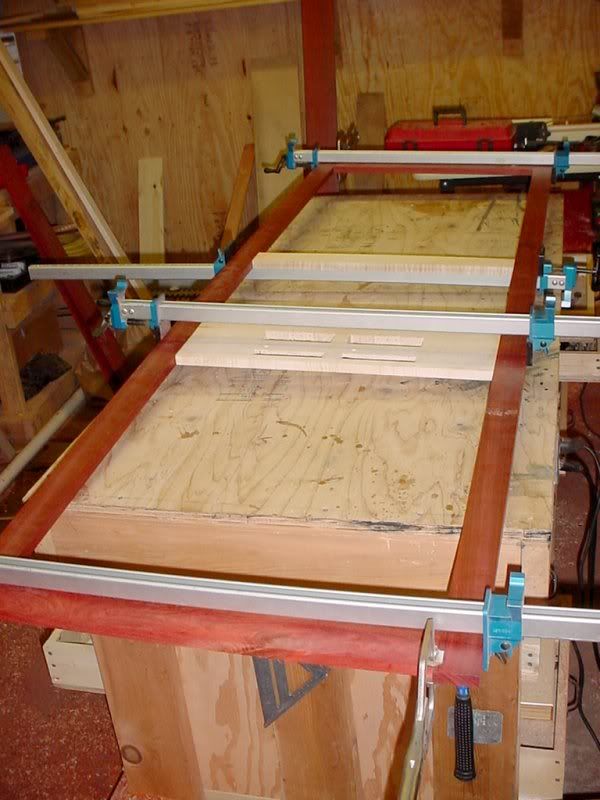
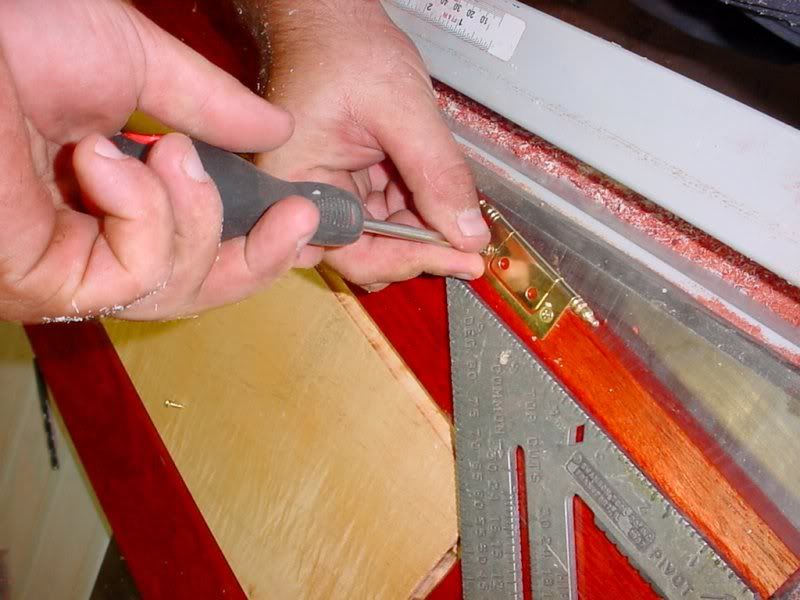
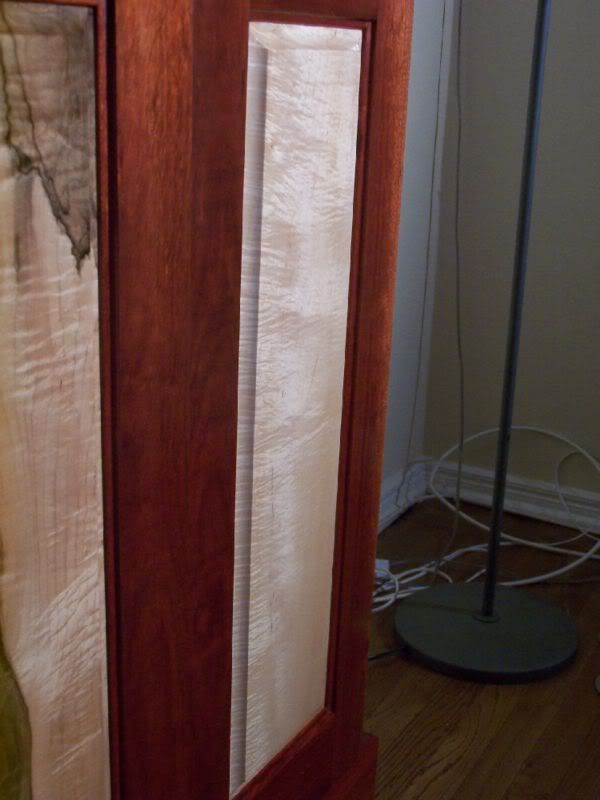
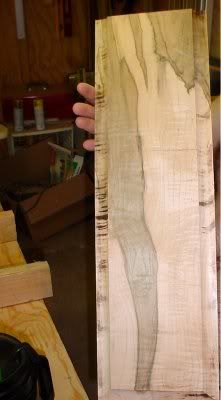
The satine. We found it fractured easily. It is difficult to work with, but I believe it will be worth it when I put the first coat of shellac on it.
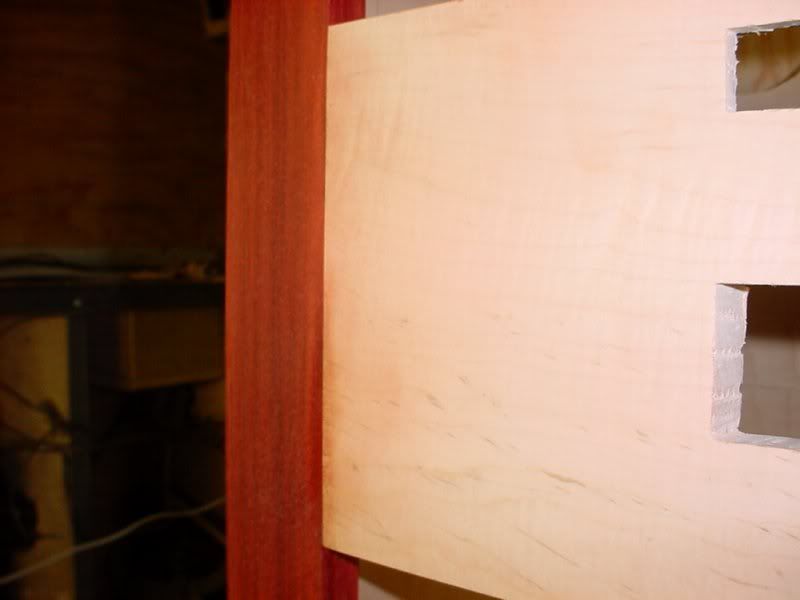
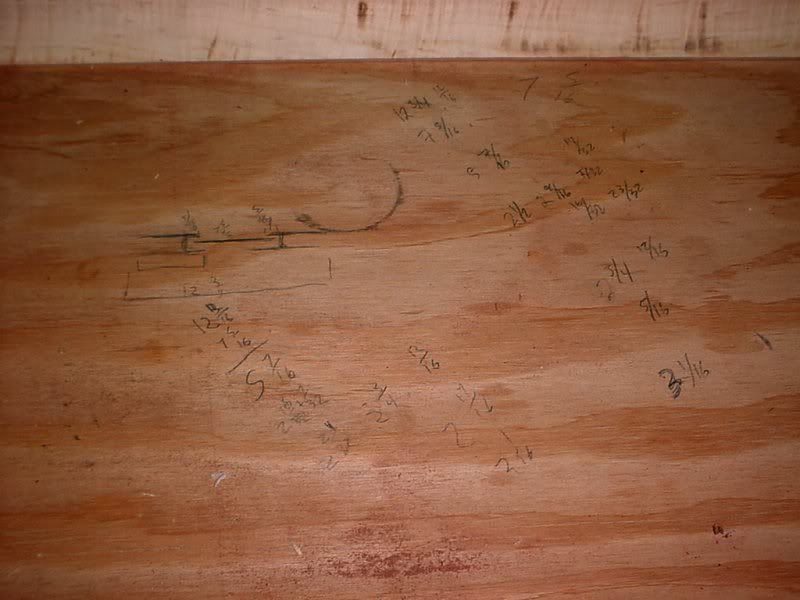
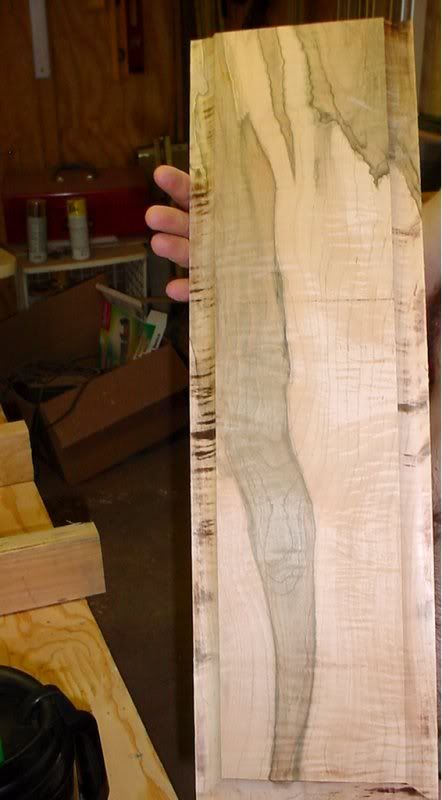
This is a piece of maple that when I saw it I wanted to use it as a raised panel on the cabinet doors. I'll have to build the door frame around the maple.


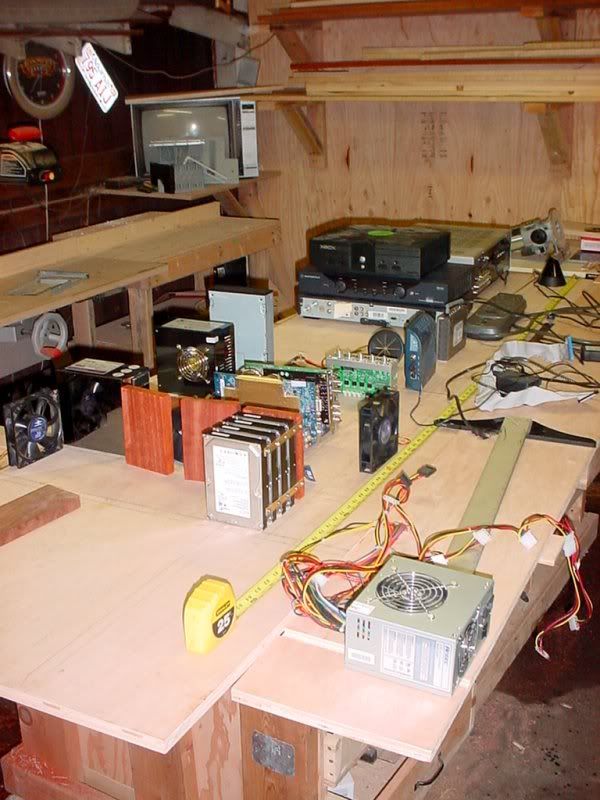
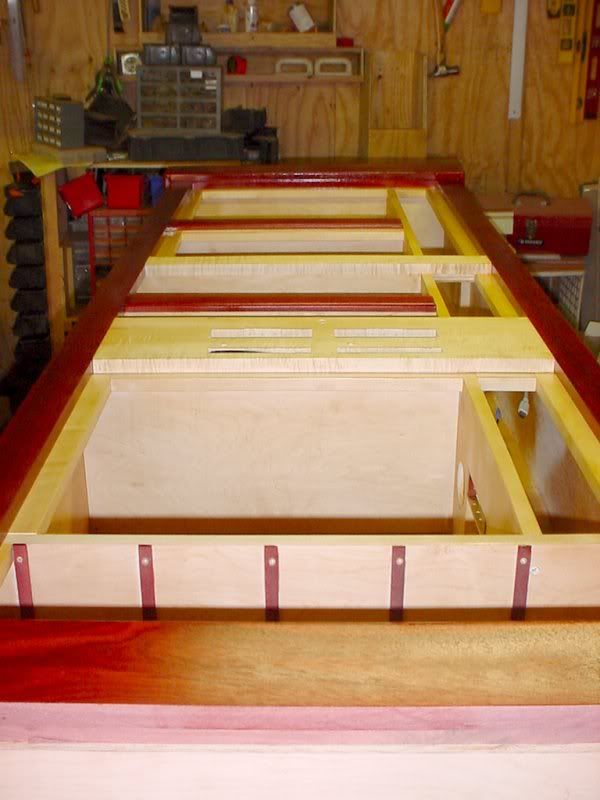
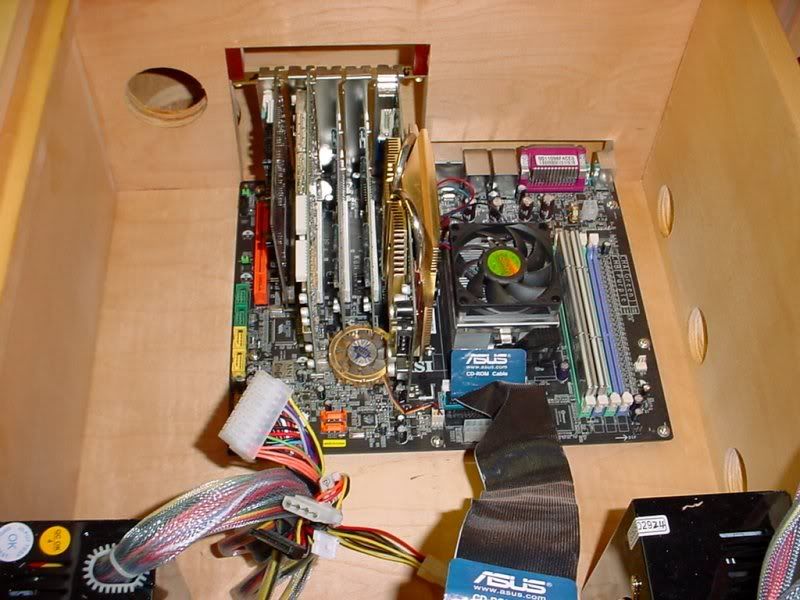
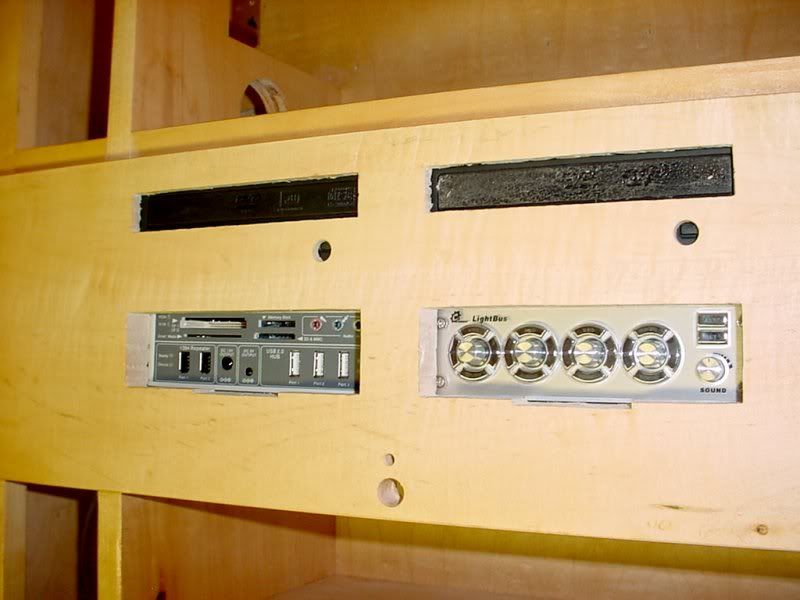
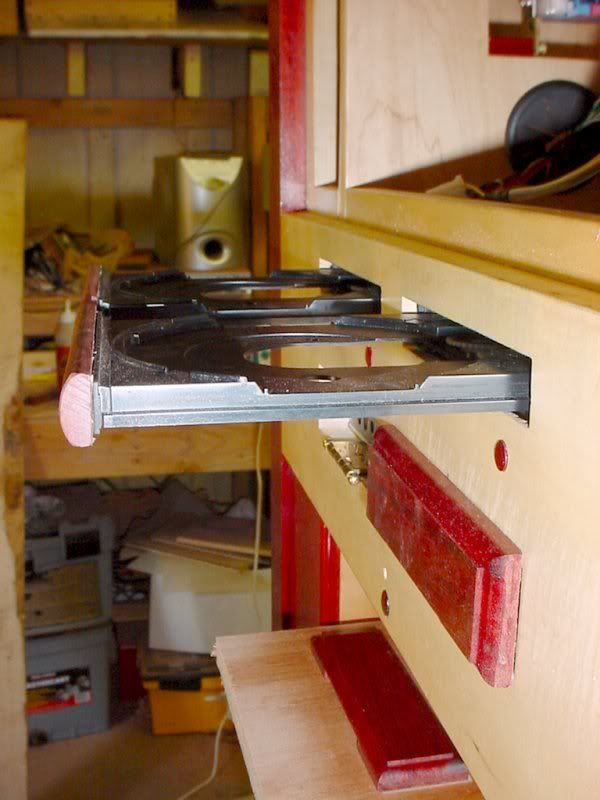
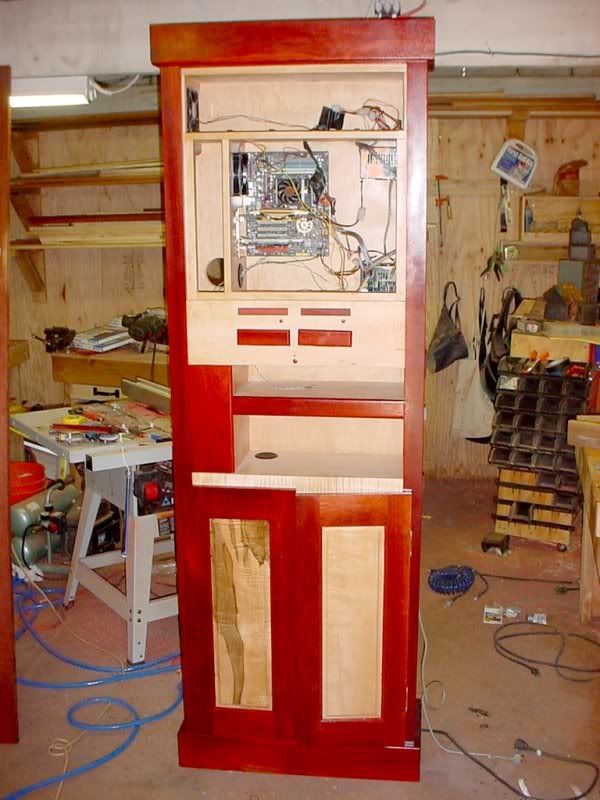
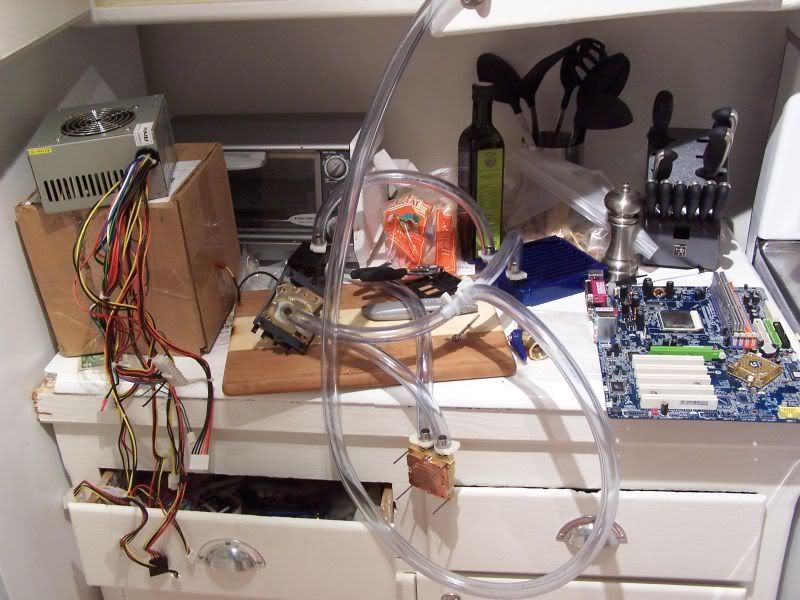
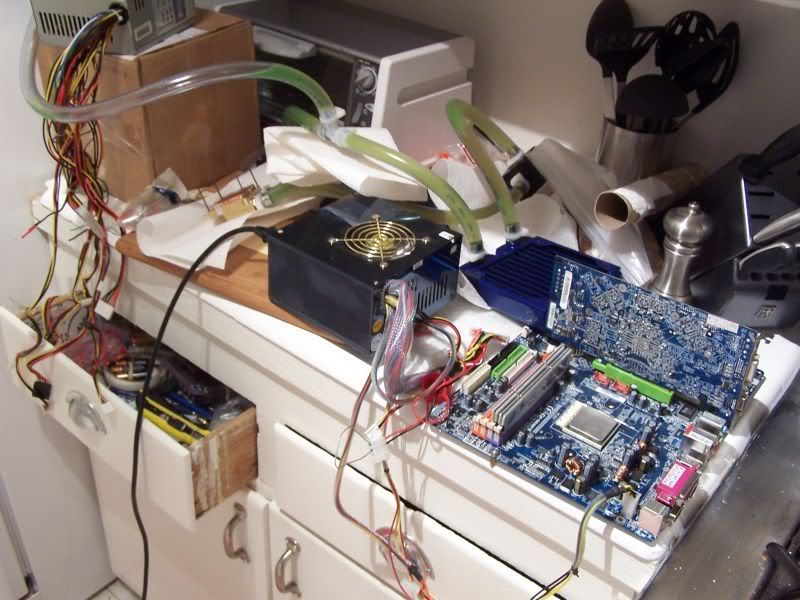
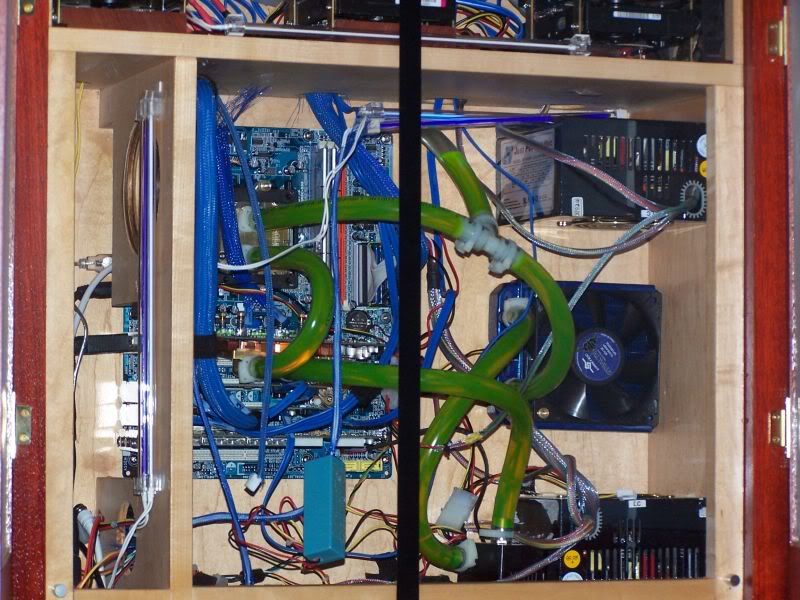
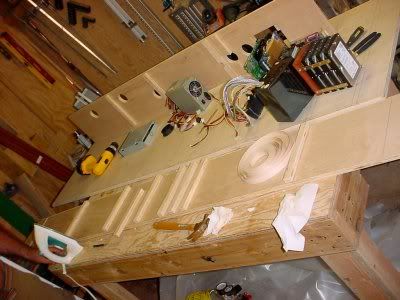
Here are all of the components we will be dealing with. The project is on its back. The bottom is farthest away. The bottom will hold the amplifier and cable boxes, then two shelves for keyboard storage, etc. Above the shelves is a light control panel and a card/USB/firewire input panel. Then the optical drives, then the motherboard and two power supplies. On top will be the stacks of hard drives. A channel on the left side will route all of the cables. The Xbox got scratched from the list as there wasn't enough room. It also would have been the only thing that didn't run through the computer which I tried to avoid.
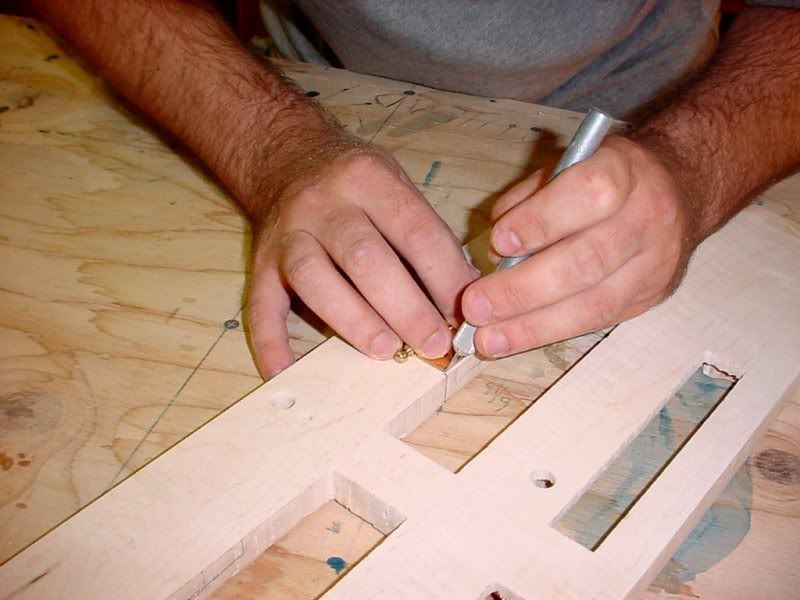
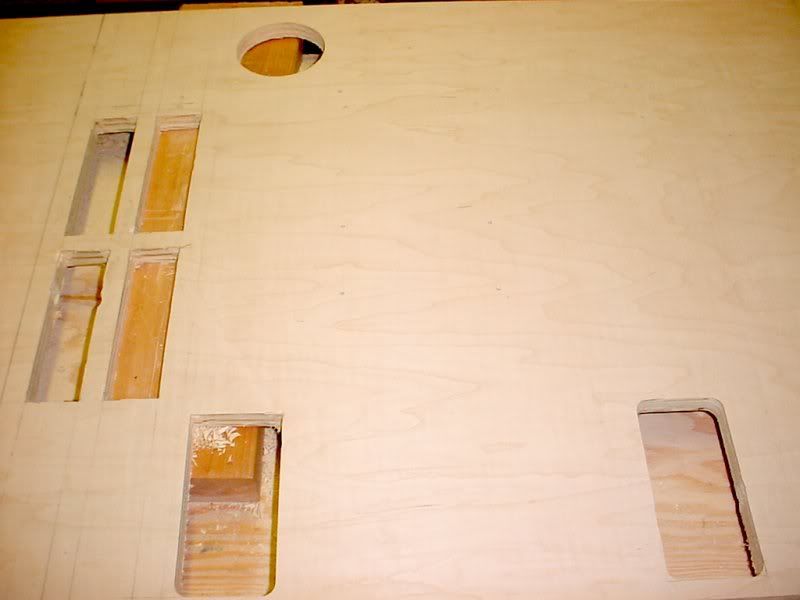
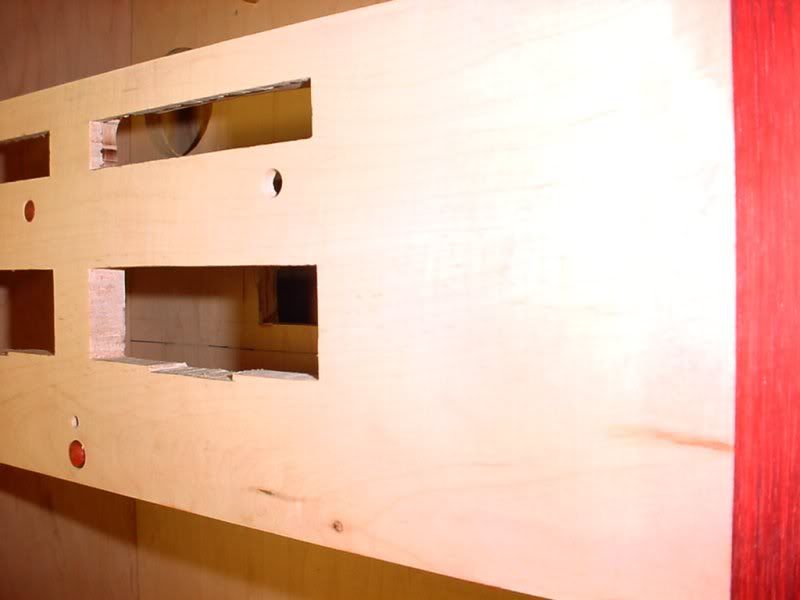
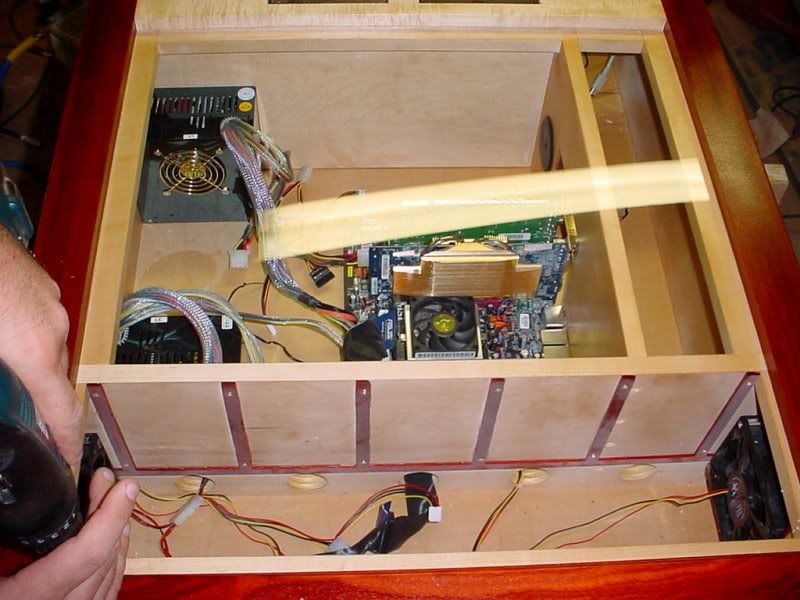
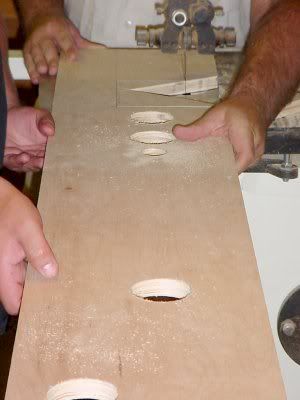
This will be the inside wall that will divide the cable channel from the rest of the unit. We are cutting the access area for the PCI cards. My arm is out of its sling for the first time.


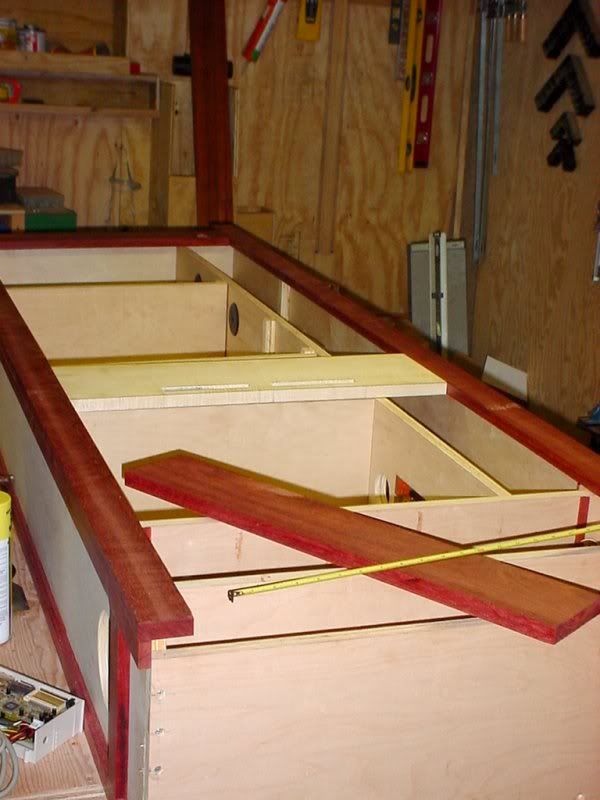
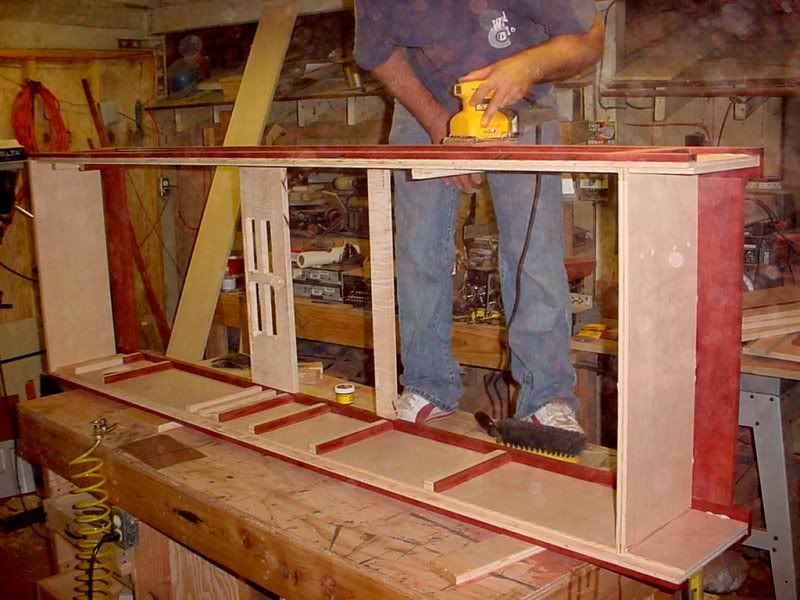
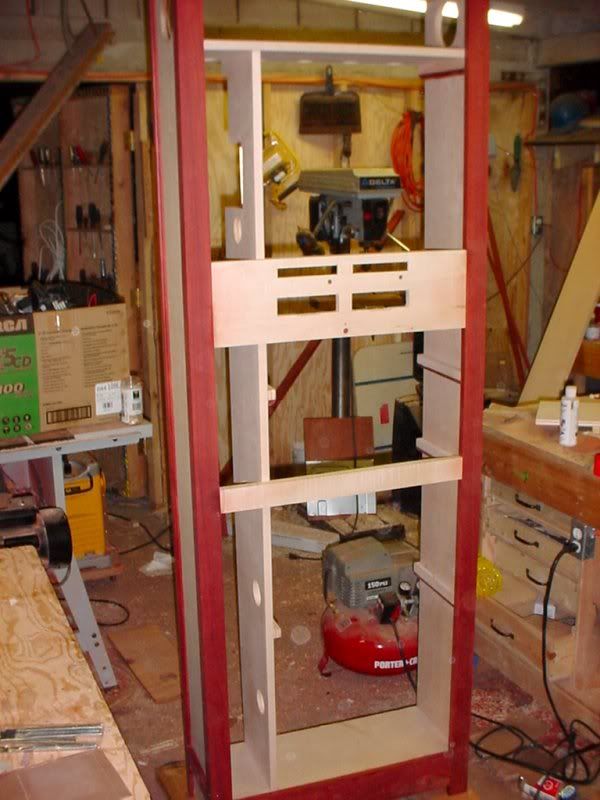
Here are the sides with the shelf supports attached to them. The supports will have satine trim underneath them to cover the plywood sides and to give highlights. I wanted to dado in the shelves but I was nervous that I would change my mind about something and wouldn't be able to adjust the heights. The iron is for iron-on veneer for the edges of the plywood that will be exposed to the eye such as the shelves and middle wall.
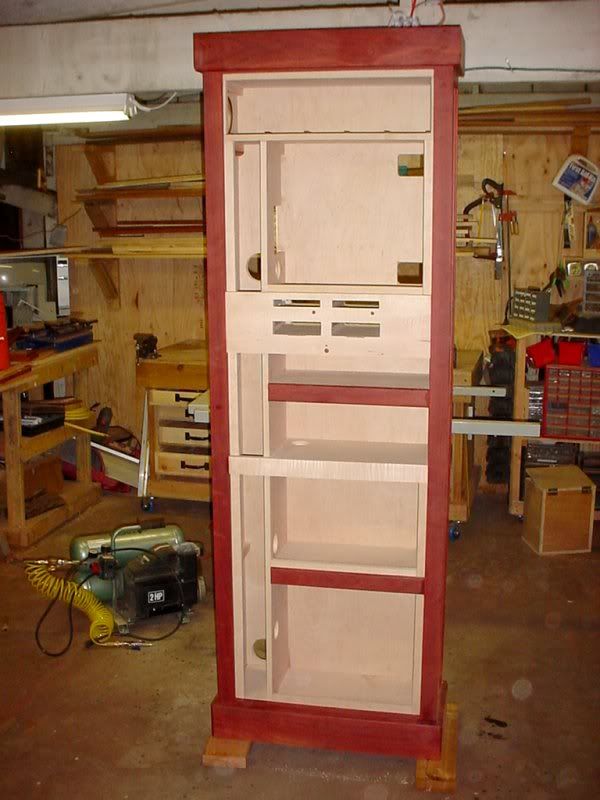
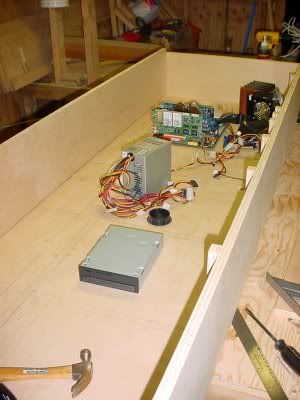
Here is the carcass put together.


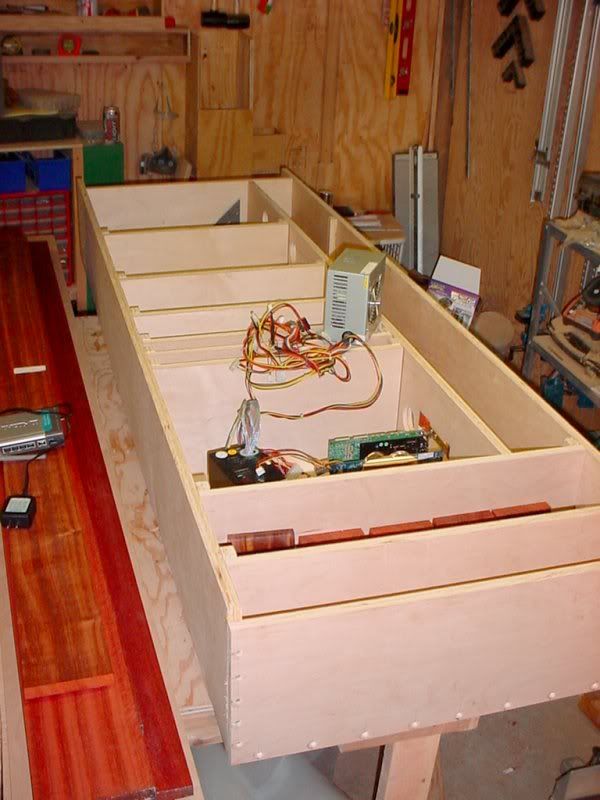
The risers are screwed into pilot holes directly into the back panel. This is one of the reasons that the back panel is thicker than 1/4".
The inside wall is secured with screws for now. Test fitting the shelves. So far so good.


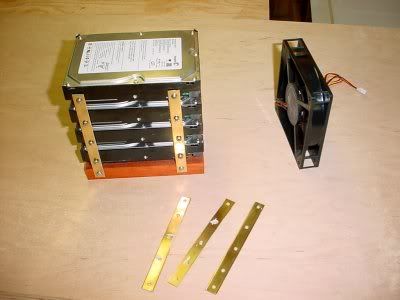
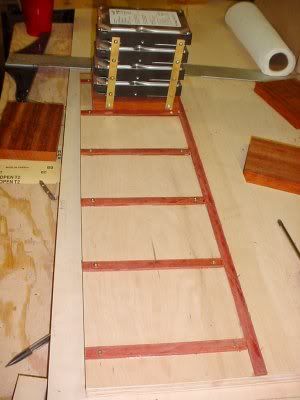
The hard drives are stacked with brass supports and a wood base.
The top shelf with rails to space the hard drive stacks.


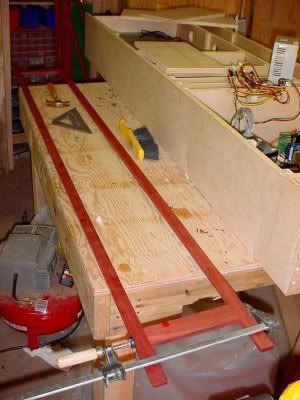
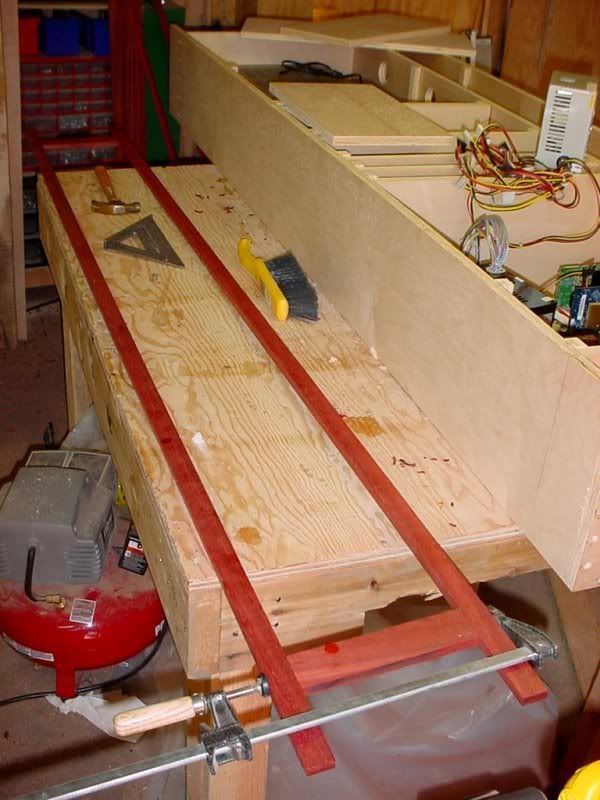
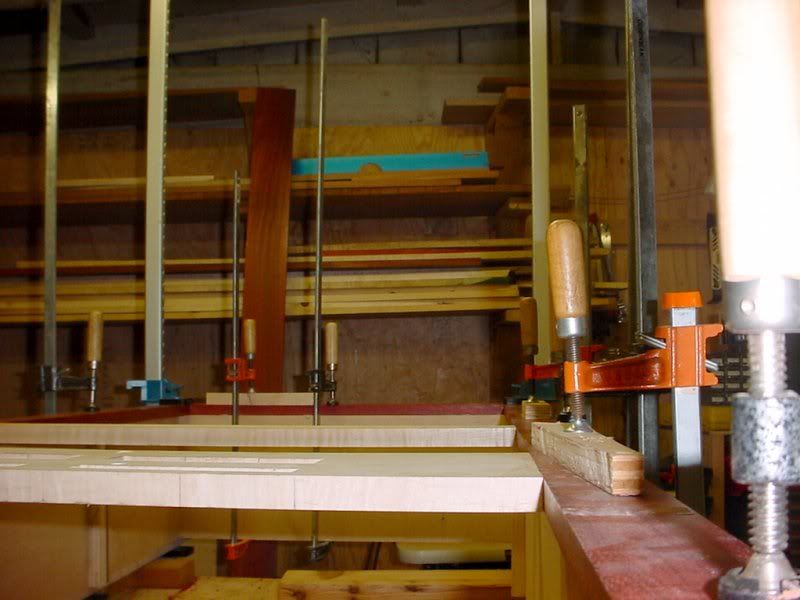
The side trim is being glued together.
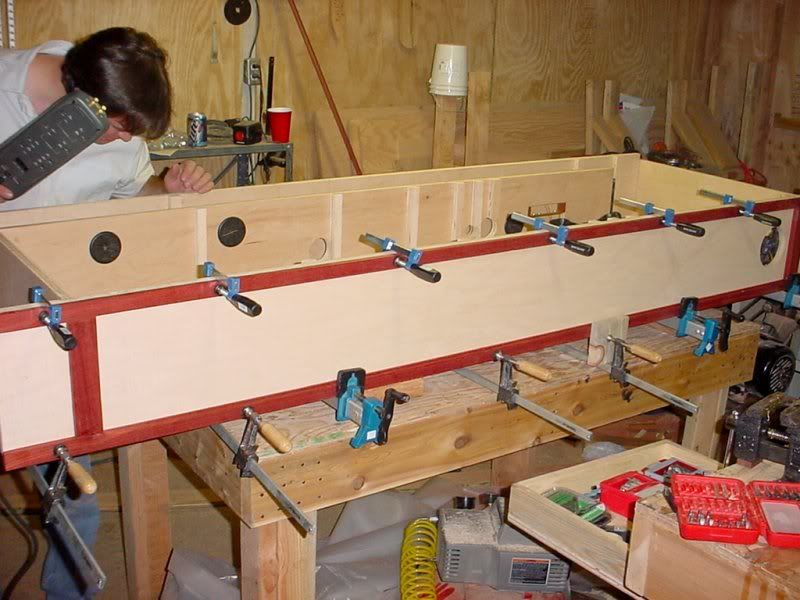
The joined side trim is being glued to the carcass.

That's all for now. Time to get back to work.​
 

This is a self-centering drilling jig. I used it to drill holes for dowels for the side trim. It's really quick and easy. I bought it at Rockler woodworking. It has four different sized holes for various sized dowels.
A side trim piece with a dowel inserted.


This will be face for the optical drives, lighting control panel and card reader panel. It will also house the power switch and the power light.


Test fitting the face trim. I used a biscuit jointer for this joint.
The face trim being glued to each other. I used dowels again for these joints.


The face trim being glued to the carcass.


Here are the cut-outs for the back access. In the foreground are the cut-outs for the power supply. On the left is the optical drives, lighting control and card reader bay openings. Farthest away is the access hole for the projector's power and video cables.
Endless, endless sanding. The round over trim is on the shelf supports.


When I sanded the face trim the satine bled onto the maple. I hand sanded it after the initial 60 grit sand and it came out fine.
After final sanding. I used satine for the buttons. I cut the buttons with a plug cutter. This allows the buttons to have a side grain, instead of end grain if dowels were used. I round the buttons over by putting them in my drill and shaped them by "drilling" them against sand paper. This kept the buttons evenly rounded.


Standing.​
 
cool, another fellow Rockler customer. ;)

very nice looking tower so far, I can't wait to see how this turns out.
 
[
The back and the last of the trim is on. It's all sanded and ready for the finish to be applied.
The back of one of the bottom doors.


The router bits used to make the raised panel doors.
This is only time I had to write out the math. It was to calculate the sizes of the dimensions of the boards for the doors.


Shellac sprayed on. After it dries, the electronics can begin being installed.​
 
** IDEA **

Have a single button that turns on everything at once and give the button some rediculous name and put warning signs around it. ;)

Looks good so far though. Hope all goes well with it.

 
So I burned out my sound on my mother board. Everything else works fine it. I got a sound card for it, and that works. So far I have the video card, sound card, 1 RAID controller and a hauppauge dual tuner card. I have an empty slot left, but when I plug in a second RAID controller, the system boots up. But, I have several problems, like none of my drives on my first RAID controller show up. I would like to get another motherboard with a working sound component on it so I can have another slot open for a third RAID controller card, but that won't be until I need it. I am, however, quickly filling up my last two drives and would like to get the second RAID controller working. Does anybody have any suggestions or can anybody point me in the right direction on where to look this up? Thanks in advance.
 
You could try switching which PCI slots they're in. It could be that you're putting the 2 RAID cards into slots that share an IRQ setting which may be causing conflicts.
 

Jason soldered an extension onto the 4-pin auxiliary power cable.
We decided to parallel split the power switch from the motherboard to both power supplies. We used a 4-pin Molex terminator for quick disconnections.


The main power switch and light. An extension will have to be soldered for this.
The motherboard and power supplies are mounted to unit. The cards will be held down with thumb screws after another trip to Fry's.


Acrylic is added to the top and bottom compartments. They are secured with thumbscrews. Another fan is installed on the bottom to suck out the amplifier's heat.


The optical drives and control bays are mounted.
Their doors are installed. We used double sided tape for the veneer for the optical drives and brass hinges for the bays covers.


The optical drive trays extended.
Putting hinges on the bottom doors. I don't know what's more annoying than brass screws. They are so soft and break so easily.


LowerDoorsInstalledBig.jpg

Here it is as finished as it will get in the shop. It's time to take it home and install the electronics. The top have will have glass doors soon. The wood will look a lot better out of the fluorescents and in incandescent lighting.​
 
Tower of Power... For a sec. there I thought someone made a tribute case to the jazz group..
 
Now this is what I call a wooden case :D

The satine trim is a great choice with the maple, by the way. How much does the whole construction weigh by now?
 
I love bloodwood (satine)... it's soo beautiful when finished and polished that I even turned a small block of it into a pen.
 
Thanks. The satine is really heavy. It's very dense. I had never used it before and was really happy with the final color under the shellac. I would say that it's about 125 pounds. I'm not a great judge of weight, though. The electronics are coming along great. Still having problems with the IRQ conflicts. Is there a system of logic to figure this out, or is this the definition of hacking?
 
michaelgildersleeve said:
Thanks. The satine is really heavy. It's very dense. I had never used it before and was really happy with the final color under the shellac. I would say that it's about 125 pounds. I'm not a great judge of weight, though.
It weighs as much as I do :eek: I assume you're moving it with two people?
The electronics are coming along great. Still having problems with the IRQ conflicts. Is there a system of logic to figure this out, or is this the definition of hacking?
What are the specs (and brand) of the mainboard and RAID cards? Which exact slots did you try (which configurations)?
 
What are the specs (and brand) of the mainboard and RAID cards? Which exact slots did you try (which configurations)?

Motherboard: MSI K8N neo 2 Platinum
RAID Cards: (2) Highpoint 1640 (4 channel SATA)
I also have a Hauppage 500 dual tuner and soundblaster audio card.

I can't put the tuner card into slots 1 or 2 because it won't fit because of the motherboard chipset fan. I've moved the cards around alot, but not every possible combination. The two main problems I get in various configs is no video signal or the first installed RAID card won't work when it did before. I currently have this config:

1 raid controller
2 sound blaster
3 hauppage
4 empty
5 empty

Also, slot five is flourescent orange. It the same as the others?

thanks
 
What if you do not install the Hauppage and soundcard?

AFAIK, HighPoint isn't exactly known as a top-quality brand. I'd much sooner go with LSI or similar.
 
Alright, things are coming to a finish nicely. The system is mostly complete. The only things left to do are to get the second RAID card working (haven't had time to process that problem to success yet but thanks for the input), get two tuners to work at once, put mesh up on the side fans, finish the cable management, plus any other little things that pop up. I tried putting in MCE, but it said my USB-UIRT device couldn't be detected. I decided to take it back off and keep my old XP OS and system:

Meedio for movies
Microsoft Media Player for Music
SageTV for TV.

I want to have only one program for all media access, but MCE didn't do what I want it to immediately. I will keep looking at it until I'm satisfied with it. As a new piece of software/shell, I'm sure it also needs tweaked as well.

I've got a few pics of the insides to post, but they're at work. I'll put them up tomorrow. Here's a few of the outside for now.


Here are the glass doors with front and back lighting. Inside the case are four UV lights that are on all the time. I bought a pair to fool around with UV responsive cable sleeves, but I found they made the purple in the stain glass light up, but the other colors are just barely affected. It's kind of neat to have that selective lighting effect on the glass in the dark. I couldn't get a picture of it to come out, though. I have four more blue lights that are controlled by a light control panel. They can be music responsive, so the glass has purple spots and then the rest light up to music. I usually just do that when friends come over or if I'm having a straight night of music, otherwise there all just on low.

As you can see, I still need mesh (or another cover, maybe a fabric) to cover the side fans. If anybody as any suggestions of items or vendors, please let me know. I'm considering putting in a rectangular mesh that covers the maple section on top or finding a plastic cylinder that will slide into the hole, then gluing a lip on one end and tacking fabric around the lip. I don't want to make any extra sound through turbulence. Has anybody come across any sound problems with mesh or anything else?


Here are the bottom doors.


Here's the project with the insides exposed. You can see there are still quite a few wild cables. The computer area's cables are almost done, but the cable channel running vertically on the left is a mess. Also, no, you cannot see the front of the components located in the bottom half. The only times I directly interface with them is to turn the amp on and off and adjust its maximum volume. I do this with a remote extender that has a relay stationed on top of my center speaker. It relays the remote control signal to a receiver which delivers the signal to my amp and to a USB-UIRT receiver. I have messed around with a harmony remote with Sage and Meedio, but I prefer the mouse.

I cut two pieces of Plexiglas and sanded them on both sides and taped them to the inside of the stain glass to defuse the lighting. It helped a lot, but I'm going to put a piece of lighting diffusion (frosted plastic film) between them to increase the diffusion. Hopefully this will evenly light the glass and get rid of the black lines where the inside wall and top shelf is.

There is room for two more stacks of hard drives on the top shelf. All in due time.

I also put in blue lights in the two middle shelves. I always keep them on the softest level. They are there to help me see what I'm doing and give atmosphere.

I have a piece of shinny black electrical tape taped down the middle of the top piece of acrylic to mask the light coming out between the top doors.

I have a few more pictures to post of the computer area and the audio and cable receiver area. There are still more hours of work. I have to say, the means are becoming more fun than the end.
 
Also, I'd like to put in a link of a small video to show the lighting effects, etc. Are there any free places to host video (like photobucket hosts pictures)?

Thanks
 
michaelgildersleeve said:
So I burned out my sound on my mother board. Everything else works fine it. I got a sound card for it, and that works. So far I have the video card, sound card, 1 RAID controller and a hauppauge dual tuner card. I have an empty slot left, but when I plug in a second RAID controller, the system boots up. But, I have several problems, like none of my drives on my first RAID controller show up. I would like to get another motherboard with a working sound component on it so I can have another slot open for a third RAID controller card, but that won't be until I need it. I am, however, quickly filling up my last two drives and would like to get the second RAID controller working. Does anybody have any suggestions or can anybody point me in the right direction on where to look this up? Thanks in advance.
Do the HighPoint cards in question support controller spanning? The RAID BIOSes on the HighPoint cards may be poorly coded, and not get along with multiple cards. Feel free to ask in Disk Storage Systems if you want some help getting your RAID array running. I would also like to extend to you, and anyone else with 1TB of HDD space in one system, an invitation to the [thread=943660][H]ard|Forum Terabyte Club[/thread].

Awesome looking box BTW, good work!
 
michaelgildersleeve said:
I want to have only one program for all media access, but MCE didn't do what I want it to immediately. I will keep looking at it until I'm satisfied with it. As a new piece of software/shell, I'm sure it also needs tweaked as well.
I'm working on a flash based interface for an HTPC of my own that'll automaticly open the appropriate programs to handle the files, all through a very simple GUI that even my father-in-law (a truck driver) can operate. Once I get the bugs worked out, I'll shoot you a PM.
 
It works! I decided to replace the motherboard, as the old one went through hardships (me). I got a Gigabyte GA-K8NSC-939. Although it only has 2 SATA connections on the motherboard, while the old one had 4, we got the second RAID controller working. The old motherboard's internal sound card burned out. The ethernet started acting up last night, so it was time for it to go.

So right now, the storage capacity adds up to roughly 2.3 TBs. I can put in one more SATA, then I have to put another card in. Can't wait.

I've misplaced the pictures of the installation of the electronics. They always show up eventually. I'll post them then.
 
just trying to figure out how the motherboard is grounded, since it looks mounted on wood, not metal. normally with most metal cases, the mobo mounted on the metal is grounded. any special way you decided to prevent anything bad happening since yours does not seem to be mounted to metal?
 

Thanks for this. I'll hopefully get to a video example by this weekend.


Not sure how much they would impede the airflow, but you could always try some speaker grill cloth to cover those fan holes.

Thanks for the link. I think I will go with this.

you could probably do a rediculously large water cooling in that case.

I ordered the parts tonight. I got a standard kit, but I'm sure I'll be modding it soon enough.

just trying to figure out how the motherboard is grounded, since it looks mounted on wood, not metal. normally with most metal cases, the mobo mounted on the metal is grounded. any special way you decided to prevent anything bad happening since yours does not seem to be mounted to metal?

I guess I don't have the mother board grounded, then. I figured it would have been grounded to the power supplies through one of power cables. I can attach a wire to a riser, but where would the other end go, to the ground coming in to one of the power supplies? Also, which riser? It doesn't have to be more than one, does it?

Thank you guys for the replies and input. It's very appreciated.
 
michaelgildersleeve said:
I guess I don't have the mother board grounded, then. I figured it would have been grounded to the power supplies through one of power cables. I can attach a wire to a riser, but where would the other end go, to the ground coming in to one of the power supplies? Also, which riser? It doesn't have to be more than one, does it?
Don't worry about it. I've mounted mobo's on wood before and never had any issues. The ground through the PSU is all that matters. The risers help to ground metal cases to prevent static buildup. With wood you don't have to worry about that.
 
yeah man... that's awesome. very nice and functional work. :)
 
DougLite said:
Do the HighPoint cards in question support controller spanning? The RAID BIOSes on the HighPoint cards may be poorly coded, and not get along with multiple cards. Feel free to ask in Disk Storage Systems if you want some help getting your RAID array running. I would also like to extend to you, and anyone else with 1TB of HDD space in one system, an invitation to the [thread=943660][H]ard|Forum Terabyte Club[/thread].

Awesome looking box BTW, good work!

Having owned a slightly ealier version of this card, the 1540 I don't believe they support controller spanning. At least on the 1540 each card conly see the drives connected to it. I think the 1640 is just a slightly newer rev of the HPT374 chipset.
 
Hey all. It's been a while since my last post. Been enjoying the new system and my friend Jason took my camera with him for a couple weeks while he was in New Orleans fighting the good fight. Here's a link to his blog that chronicles the events. He was able to do a variety of things including follow around a National Guard Unit (still to be posted). It's pretty interesting stuff. There's a lot more to come, but it is taking him time to work the photos and write the info.


Anyway, I've put in a water cooler, and here's the pics.


Here's the old heat sink. The small copper piece was broken off from the heat sink, so heat wasn't transferring well. This caused problems with higher intense gaming. If this was connected right, I might not have needed a water cooler.

I've found that researching water cooling was a lit hap-hazard. There are a lot of people with different thoughts on various matters. I liked the discussions as people worked things out.

One thing that I didn't see anywhere was advice on taking off old heat sinks. The copper piece connected to the GPU didn't budge at all for me. Jason got it off with some constant firm pressure. I was going to put a water block on the north bridge, but it got in the way of the GPU card. It was pretty difficult to get off, but it was also the easiest. I pulled on the CPU heat sink and it ripped the CPU for its socket, luckily nothing was hurt. Anybody know any good tricks on getting these things off a little more safe than I did?


Here's the rigging laid out. To test the 12vpump, I hooked the auxiliary power into the mother board and plugged the pump into a CPU fan outlet. I put paper towels underneath every item to test for any leaks. I let it go a full night and installed it in the morning. It's non-conductive coolant, so I wasn't too worried about a leak. I haven't seen any yet, and there's a black light installed and the leak detector fluid inside, so it should be pretty easy to spot.


Here's a couple of FYI type things:

The left nipple has been over tightened and has pushed the gasket out of place. the Right looks good.
There was a significant drop in the wark level of the T-line as the initial bubbles escaped. I made a little mark when there were little champagne bubbles coming out and took this picture the next morning to show how much air escaped between. Not much.


Here's the system mounted. Please excuse the mess. I love the green glow leak finder stuff. It makes the system look much more interesting.


I was monitoring the temperatures the first morning from work via gotomypc. The GPU temps weren't good, 240f. I went and tightened up the water block connection and the temp dropped almost instantaneously. I don't have any problems with it right now.

I need to clean up the appearance of the cables and that's about it. I'll post some pics of the entire room soon.

Here's my one big glitch, if anybody has a solution.

*If I am in my standard resolution sometimes my projector will flash to black, then come back with a bar at the bottom that is either a copy of what is right above it, or a blue bar. the rest of the image gets squeezed above it.

*If I turn the projector to another input and switch it back, it might fix the problem, it might not.

*If I let the problem go, it will eventually correct itself, then eventually go back to the bad screen.

*If I hook my laptop up to the projector I don't have any problems at the same resolution. My laptop is also a 6x9 screen.

*If I am playing a video game with different settings, I don't have any problems.

*The projector as hooked up with 3 10' long cables, it's now hooked up with 2 10' long cables. The projector doesn't have any problems when it's hooked up to the laptop with 3 10' long cables.

There aren't any visual cues I can see that makes the projector decide to do what it does, but it's very annoying. I can only imagine that the fault lies in the tower's video card. Maybe it isn't strong enough, but why does it always work when a video game is on? It's very weird. Any suggestions?

Thanks in advance.​
 
Back
Top