Tron 2600

JediKnight0

Limp Gawd
Joined
Jul 2, 2002
Messages
168
September, 2005 - Silicon Valley, CA

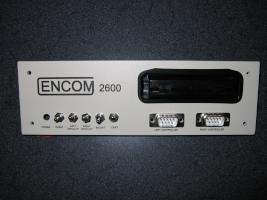
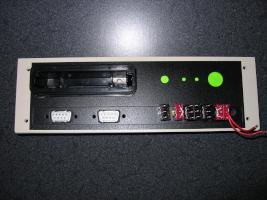
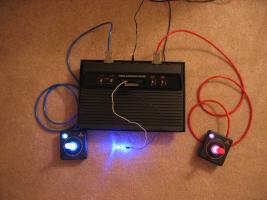
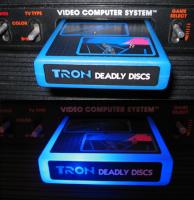
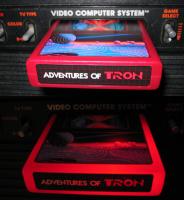
Today in a surprise move ENCOM corporation, known for the 80's hit videogames "Space Paranoids" and "Light Cycles", announced they would team up with ATARI Inc. to produce a new version of the 2600 home game system. The new system, as yet unnamed, will play the majority of the old 2600 game cartridges but will be based on more modern hardware and production techniques.

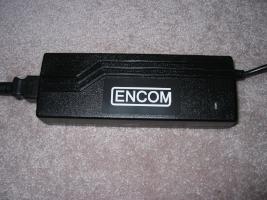
In an interview today ENCOM CEO John Dillenger proclaimed that the new game system would provide "simply the best retro gaming experience availble today thanks to our custom resource manager, known as the master control program." He went on the explain that this program would keep illegal cartrides from running amok in the system and provide a better experience for programers and users alike.


- End Of Line
 
OK, the fluff is out of the way.

I'm working on a new project based on TRON. The idea behind it is the new Atari Flashback console - basically it's a small Atari 2600 on a chip. With a few well-publicized mods you can even add a catridge port to the system. I'm planning on taking the system and putting the motherboard (along with a few circuits of my own) into another enclosure and try to "tronize" the system.

This mod will take some time as my funds and time are limited, but let's have some fun and see where this goes.

It's kind of funny - one of my motivations here (besides a cool 20-something year old movie and a cool 20-something year old videogame system) is that this mod will cost less than a computer mod. But in the end, I'll end up with a case that costs hundreds of dollars for a system that cost $30. :D
 
OK, time for pics.

tron02.jpg


The *new* Atari system that's the basis for the mod. Small, huh?

tron04.jpg


The motherboard. Lots of hacking to do here - move the switches and joystick ports, among other things.

tron05.jpg


Joystick broken down. I'm going to try and fabricate my own button & handle, possibly including lights.

tron08.jpg


Making molds of the orignal parts.

tron10.jpg


One of the original handles and one of my copies, with a light inside.

Lots of learning to do here. I know how to cast my own resin parts, but learning to use clear polyester resin without a vacum chamber is tricky (and gooey). I'll also be changing the colors of the handle/button to be red for one stick and blue for the other. I have some much brighter LEDs on order, and I also have to use less of the pearl dye in my new castings.

More to come next week.
 
Damn, I'm going to be watching this one! :cool:
Might even look into picking up a Flashback for myself- I didn't even know they were out.....
 
lamarth said:
Might even look into picking up a Flashback for myself- I didn't even know they were out.....

I suppose I should be clear here: I've seen three types of atari packages.

*) One is just a joystick with all the electronics stuffed in there. I havn't heard much about this one, good or bad.

*) One is a small, sleek system that has 7800-type joysticks (called the "Atari Flashback"). I've heard many, many bad things about this one.

*) One is the true 2600 on a chip system that can be hacked for a cartridge port and was designed by a retro-game enthusiest. This is the one I'm using. It's called the "Atari Flashback 2".
 
JediKnight0 said:
I suppose I should be clear here: I've seen three types of atari packages.

*) One is just a joystick with all the electronics stuffed in there. I havn't heard much about this one, good or bad.

*) One is a small, sleek system that has 7800-type joysticks (called the "Atari Flashback"). I've heard many, many bad things about this one.

*) One is the true 2600 on a chip system that can be hacked for a cartridge port and was designed by a retro-game enthusiest. This is the one I'm using. It's called the "Atari Flashback 2".

Hmm- now I'm confused. I was on the Atari website and I noticed both the Flashback and Flashback 2. So Atari is making a 7800 'Flashback 2' (which makes an excellent doorstop, apparently) and a third-party is making the 'Flashback 2' 2600-on-a-chip- the one you're planning on using, correct?

Thanks for the explaination, btw!
 
Thermite Paste said:
this looks like its going to be good. I still have an ORIGINAL 2600 :p


I should have kept mine. :( I also should have kept my Commodore 64 along with it's 1541 disk drive, and the hundreds of 5 1/4 floppies I had with tons of games, some downloaded from various "BBS Boards" using my trusty 1200 baud modem. :p Those were the days.............
 
lamarth said:
Hmm- now I'm confused. I was on the Atari website and I noticed both the Flashback and Flashback 2. So Atari is making a 7800 'Flashback 2' (which makes an excellent doorstop, apparently) and a third-party is making the 'Flashback 2' 2600-on-a-chip- the one you're planning on using, correct?

Thanks for the explaination, btw!

The original Atari Flashback is the 7800 doorstop thing.

The Atari Flashback 2 is the real deal. It was designed by an enthusiest, but he worked/works for Atari. :)
 
Well, I got some parts and experimated a bit but made no real progress except learning a few things.

I decided to make two different joysticks, a red and a blue joystick. I may end up making a clear/pearlescent one as well with lights that cycle between red/green/blue, but I'm not sure the combo LED would be bright enough.

Here's a mockup of the joysticks. I'm still not happy with the red color, need to make it darker.

tron12.jpg


A sample of my test runs. I'm really not very happy with the polyester resin I'm using - it's not fully curing on the outside. I've tried different temps, pre-heating the molds, different amount of catalyst, resin clearcoat spray, etc.

tron13.jpg


I even tried to leave the pieces in the sun for a couple days. The red pieces lighted just slightly, but look at this! These parts were the same color, but the one on the left was left in the sun for 2 days. I guess I need to try different pigment...

tron14.jpg


The color-coordinated cables for the joysticks.

tron15.jpg


I also started removing stuff from the motherboard in prep for putting it in the case.

tron16.jpg


I ordered a case to use as a canvas for the mod - the morex cubid 3688. That should be here next weekend, so maybe more updates then.
 
Some more progress, some more failures.

I have confirmed that the transparent blue dye I have is extremely sensitive to light - I made a "plug" of polyester resin about 1/4 inch deep and colored it with blue dye and another with red dye. I left them outside on the balcony and by noon the blue one was completly clear! The red one maintained it's color though. Time to look into finding another dye...

Also, I can't seem to get the polyester resin to cure fully. I managed (after going to 5 different stores) to find some epoxy resin and the first test I did (a completely clear piece) was successful. I'm waiting for some pieces with dye in them to cure now. The epoxy resin takes longer to cure and de-mold, but the results appear good so far...

In the process of all this, I managed to mess up my molds so I'm trying for the first time to make some 2-part molds. This takes more time and is somewhat harder...

tron17.jpg


On the bright side, my case arrived...

tron18.jpg


This faceplate will have to be replaced.

tron19.jpg


Here's a mockup of what I think the front will look like:

tron20.jpg


Those are toggle switches in the lower left, joystick ports in the lower right, and cartridge slot in the upper right.
 
Some more progress...

So far, the epoxy resin seems like it will work out. The dye does come out a little darker using epoxy resin (as opposed to polyester resin), and the drying time is well over a day before I can de-mold pieces, but the end result is harder and has less shrinkage <insert dirty joke here>.

The front panel is starting to take shape. Now a question for everyone:

tron21.jpg


Does the top version look better or the bottom one? The difference is I'm thinking of using a chome LED holder and a red LED as a power light above the switches. Or does that look too crowded?

The top of the case is coming along as well. I cutout the shape for the window...

tron22.jpg


And no, that's not a number "7". It's actually very similiar to some of the symbols on the walls of the light cycle arena.

Lastly, with all my projects I try to immerse myself in the subject matter. While you can find toy light cycles, or knock-offs, everywhere anything more is just about impossible to find.

But with some digging (and sending away to Japan, Hong Kong, etc.), I found these out-of-print TRON toys featuring the only toy Recognizers (a.k.a. Space Paranoids) and the Tanks (not to mention a couple well done light cycles).

tron23.jpg


Pretty neat, huh? I probably won't use them for anything, but they make a nice addition to my collection.
 
You have to use the tron hot rods! Those are to cool not to use. :D
 
I'm gonna have ot say the LEDs make it look crowded. Perhaps you can put the LEDs on the top of the case above the cartridge port.

And this thread makes me want to go out and try to find the Tron DVD along with the original Battlestar Galactica DVDs. Looks like it's time to head to the mall today. lol
 
The end of the weekend is here, but I managed to get a little more done.

Not pictured here my first attempts and a red & blue joystick handle & button (with embedded LEDs) using epoxy resin. The red will be hard enough to handle in a few days, but I just poured the blue so it will be even longer for that one. Hopefully they work out and can become the final ones (although I'm considering a white/perl joystick as well).

I did a lot of cutting to the case - I basically removed everything from the front of the metal case itself and some from the metal backing for the front acrylic. I forgot how hard steel is to cut - I've been spoiled by aluminum.

tron24.jpg


Now... those toys are too big to incorporate into this mod (but the lightcycle or tank would make one heck of a custom mouse...). But certain themes just have certain required elements. You couldn't have James Bond without cool gadgets or martini's shaken and not stired or hot and dangerous women. You also can't have a TRON theme without a lightcycle.

Here are some miniture lightcycles for use inside the case. I still have a lot of cleanup to do, not to mention painting (hmmm... UV paint & blacklights?) but this is a start...

tron25.jpg


FYI, the lightcycles are less than 5cm long.
 
You can bandsaw them in half lengthwise and use them for decoration? Have the trails wrap around the body and they meet in the front middle maybe?

Just a thought.

Cheers
 
JediKnight0 said:
...
Here are some miniture lightcycles for use inside the case. I still have a lot of cleanup to do, not to mention painting (hmmm... UV paint & blacklights?) but this is a start...

In Tron there has been a lot of colors very similar to UV colors ... Use them! :)

I remember one mod (can´t remember where I´ve seen it) ... there was used in-dark-glowing color to highlight contacts on one card (think it was graphic accelerator) ... it was very cool ...
 
Ice_Frog said:
In Tron there has been a lot of colors very similar to UV colors ... Use them! :)

I remember one mod (can´t remember where I´ve seen it) ... there was used in-dark-glowing color to highlight contacts on one card (think it was graphic accelerator) ... it was very cool ...
That's because for the computer world the movie was actually filmed in B&W then they were hand painted and hand colored.

<==Owns teh 20th Anniversary DVD and is currently watching it now. hehe

So where are the updates already. You managed to get me to watch Tron now gimme some freakin' updates. ;)
 
OK, another update :p

I've slowly been working on the front faceplate. The paint I'm using seems to take a while to dry between coats, making the sanding of it a little slow-going. [It seems almost perverse to be taking something that started out in a black & wood grain enclosure and moving it to a beige box].

The red joystick handle never worked out - I must have somehow measured the epoxy wrong and it stayed tacky, even after severl days. I tried to salvage the $2 LED from it, but it's dead Jim. I'm out of small disposable measuring cups and ALL the hobby stores around here are out as well. I tried to "fake" it using some eyedroppers to measure the amount of epoxy tonight, I'll see how that one turns out in a couple of days - but I'm not holding my breath. I have to find a new source for measuring cups.

But the blue handle came out well. Also, it turns out that Atari joysticks actually have a 5v line supplied to them (it's actually used for the paddles). That simplifies my joysticks - they should work even on a real Atari! Unfortunately, not much current is coming through. I can light an LED in the handle, but adding a light in the fire button is pushing it too much - that LED gets pretty dim.

The electronics/wires are a little crowded in there:
tron26.jpg


But put together, it looks pretty nice (note the color-coordinated cable):
tron27.jpg


Now turn down the lights a bit, and power the system up:
tron28.jpg


Question: should I add a switch to turn off the lighting inside the joystick?
 
JediKnight0 said:
Question: should I add a switch to turn off the lighting inside the joystick?
I wouldn't, unless you think the lights would get annoying after a while. You mentioned that it was getting pretty crowded in the joystick case, so it sounds like it'll be difficult to do. Maybe installing the switch in the case would be better/easier?

It's also something you can always do later on in the project, though.......or after the project is completed and you do decide that you need that switch....
 
huh nice :D this is very good, I`m sorry, I don`t speak english verry well. I`m from Bulgaria. My occupation is modding on pc cases, your project is verry good. Success
 
I'm brushing dust off of 20 year old memories here (the days of Quickshot 2 for the aged amongst us), but the Atari joysticks leads were Up, Down, Left, Right, Fire and Ground, surely? That leaves 3 left on a 9 pin D socket. Couldn't you pump the juice for the LEDs down those? That way your sticks will work on an Atari, and Atari sticks (or Quickshot 2s for that matter :D ) will work on yours. The only sticking (ho ho) point I can foresee is if the paddles use them. I don't know either way if this is the case or not.
 
This is so strange!
I was cleaning up my stuff in the crawl space and I came across my old Atari 2600 and all the games.

The only thing that was missing was the RCA connector, going to The Source to picked one up tonight. I was planing on playing it tonight, but now after read this thread I am FOR SURELY going to play on my old baby!
 
lamarth said:
I wouldn't, unless you think the lights would get annoying after a while. You mentioned that it was getting pretty crowded in the joystick case, so it sounds like it'll be difficult to do. Maybe installing the switch in the case would be better/easier?

The section of the joystick near the fire button is crowded, but the bas has plenty of unused space.

Unless I can find a small switch I like (I haven't yet), I guess I'll leave it out...
 
ColinR said:
I'm brushing dust off of 20 year old memories here (the days of Quickshot 2 for the aged amongst us), but the Atari joysticks leads were Up, Down, Left, Right, Fire and Ground, surely? That leaves 3 left on a 9 pin D socket. Couldn't you pump the juice for the LEDs down those? That way your sticks will work on an Atari, and Atari sticks (or Quickshot 2s for that matter :D ) will work on yours. The only sticking (ho ho) point I can foresee is if the paddles use them. I don't know either way if this is the case or not.

Hmmm... interesting thought.

The cables I'm using are have 8 wires inside - they are simply network cables. I chose them because they are easily available locally, somewhat cheap, and come in different colors.

Right now, I'm using the built-in 5v signal that is already available from the atari joystick port (it's used for the paddles but not the joystick) on pin 7 or pin 8. The problem is that there doesn't seem to be enough current available on that line. But I should be able to supply power to that line directly from my power supply (thus giving me all the current I want) and still enable it to work with paddle games, etc. The only difference would be the joystick wouldn't be as bright if it was plugged into a standard atari. Interesting...

I'll have to give this more thought when I start working on the internal electronics.
 
The joystick looks phenominal. I wouldn't put a switch in it. But then again, I'm all about LEDs.
 
JediKnight0 said:
The cables I'm using are have 8 wires inside - they are simply network cables. I chose them because they are easily available locally, somewhat cheap, and come in different colors.
Hmmm. I hadn't thought of the coreage of the cables, I must admit! You have 2 left...cutting it fine, unless you can use a common GND, without frying the Atari parts.

Good luck on this!
 
Been sick with a cold, so haven't had as much time to mod as I wanted. But I was able to get a little bit done...

I finally got a decent casting for the red joysick handle.

tron29.jpg


And of course, it has lights as well (and the same annoying dim fire button problem - at least it's consistent)

tron30.jpg


Here are a couple shots of both completed joysticks...

tron31.jpg
tron32.jpg


And I also finished the beige front panel, but it still needs decals and some clear-coat.

tron33.jpg


More to come soon!
 
what would be awsome if you had an led going out of the cord so it lights up too. just an idea
 
Well, one step forward but two steps back.

I went ahead and applied labels to the front panel, they came out OK. Not great, not terrible. Then I painted the back of it black (the inside of the case will be black). Somehow some specks of black paint made it onto the front (even though most of it was masked off). To add insult to injury, the black paint got some hairs and other bits of dirt embedded in it, and the flat black paint I bought must use some new definition of "flat" because I can see my reflection in it.

In the end, I spent a few hours today wet-sanding all the paint off to start over. The same applies to the metal support piece behind the front panel.

On the bright side, I'm 75% done with my third joystick now. It's similiar to the others, but is a different color - the color that gave me the original idea for the mod. Any guesses as to the color?

HINT: The embeded LED in the stick comes from LSDiodes and costs over $1 each...
 
OK, here's my latest effort - I'm calling it my "Limited Edition TRON joystick"

tron34.jpg


The basic joystick is pearl in color (with white cable), but when power is applied the joystick handle cycles through red, green, and blue. The fire button lights up white, but flashes in sequence with the joystick handle.

You can view a very quick video here
 
Very nice. Good job, LEDs are always fun to play with, imo. I wish I could have memories of that system, the only ones I can recall early at all are NES and SNES, and they aren't even that old. That's as far back as I go. I'm only 13 :rolleyes:

I could crack a joke about those joysticks.. But I won't becuase it's wouldn't be appropriate.

All in all nice effects.
 
incomudro said:
Nice job what else do you play ehh?

Back in the day, I was an Atari 5200 man (boy?). I also had an Atari 800xl, a Virtual Boy, a 3DO, and later an Atari 2600.

But my main system for many, many years was the Amiga 1000 (hey, I even was a registered developer and had some of my code re-integrated into the OS [ColorFonts]). I later replaced that with an Amiga 1200 (AGA rocks!).

After that, I went to the dark side and got a PC running Windows 3.1, then Win 95/98/98se and now XP. Obviously, with all the mods there have been many PCs since then.

I also bought a GameCube just for Rogue Leader 2.
 
This project is still on-track, just been busy a bit with work but I did manage some modding time this weekend.

tron36.jpg

All these leftover joystick parts from failed attempts to make the joysticks. A little hard to believe, but I'm happy with how the joysticks ultimately came out.

tron37.jpg
tron38.jpg

Front panel came out nice (paint + decals). Here's a mockup of how it will look when everything is attached. Also, here's a view of the back side with both the plastic front and metal support piece in place. Most of this won't be visable, but just in case I painted a bit of green UV reactive paint back there. I might decide to use UV lights in this thing.

tron39.jpg

I will need some *good* carts to run on this thing, so I won an EBay auction this weekend for both TRON games made for the 2600 - Adventures of TRON & TRON Deadly Discs. Here's a (cleaned up) advertisement I found for the games back in the day.

tron40.jpg
tron41.jpg

Hmmm... I wonder if this thing will have enough power to add an LED to the carts? I busted out an old crappy cart (Casino? Yuck!) and did a little surgery. Looks like it may work...

Oh... for higher res pics of the stuff so far, visit my site http://mods.xkill.net and click on "Current Project".

More updates in a week or two.
 
As part of this mod, I purchased the 2 TRON atari games - "TRON deadly disks" and "Adventures of TRON". Both worked fine, but lived in boring cartridge cases. An added complication was the fact that Mattel didn't use standard atari-sized ROMs (scrap plastic on left, atari ROM in middle, Mattel ROM on right):

tron42-0.jpg
tron42.jpg


A little work with a a photoshop wanna-be program, a color laser printer, some spray adhesive, and a soldering iron and I ended up with these:

tron44.jpg
tron46.jpg


Of course, these "glow" as any good TRON item should...

tron45.jpg
tron47.jpg


As long as I was playing around with labels and all, I thought the power-supply needed a little something...

tron48.jpg
 
Back
Top