Worklog: Trashed 28 oct 2005

Hal

Weaksauce
Joined
Oct 23, 2005
Messages
89
Good morning! I have been a visitor for a while lurking around watching a lot of mods come and go. just thought the people here would like to check out my project that i have been working on. i have posted elsewhere, just thought i could get a different perspective here! well without further... here is the modding!

I wanted to do something very slick and that would really stand out, so I knew I found my starting block when I was at Target and found this:
can.jpg

Hence the “trashed” part of the name.

Now… that would look awesome sitting on a desk all done up. So I got to work on plans. Since this was my first total conversion build, and I would have to make/fabricate a lot of parts, I needed a geed overall plan!

Don’t mind my bad drawing, but I am old school and do it by hand. Here are the first sketches
ResizeofTT1.jpg

ResizeofTT2.jpg


i could not help going all out on this beast.
Picture017.jpg


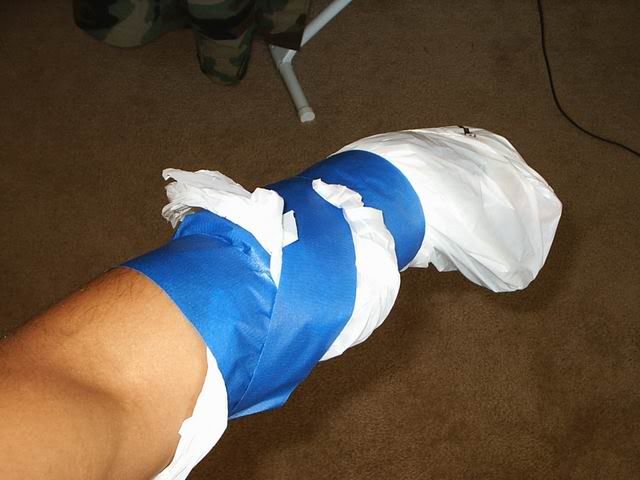
taped up and ready to freehand it!
Picture003.jpg


i traced the size to a plexi sheet as a guide for the new floor piece, fan mounts/mobo tray mount, and PSU mount.
Picture018.jpg


ooo, purtty,
Picture019.jpg


top and bottom off.
Picture021.jpg


read on the next post...
 
Ok, so here is some of the gear!
Picture015.jpg

Picture001.jpg


i had broke my hand down in Mississippi helping out beating some looters after Katrina hit. Hehe. so, it has been a slow mod. Its hard enough just trying to type with this damn thing on my hand!
Picture010.jpg


Sleeving the Tagan: and let me tell you what... sleeving with one hand is hard as CRAP!!!
Picture016.jpg

Picture014.jpg

Picture028.jpg


More…
 
Mobo tray time. I had one from a previous mod, that I found would fit just right with a few cuts.
Picture008.jpg

Picture009.jpg

Picture011.jpg


Line this up with the plexi bottom and you got something going on!
Picture012.jpg

Picture013.jpg


Add holes and you get some mounting/fan scews. Dual purpose.
Picture026.jpg


All ready to start the cuts! Still have to add some more patterns for cut-outs, likr the CD drive and rear cut-outs for the motherboard.

Picture004.jpg

Picture005.jpg

Picture006.jpg


front panel of tinted plexi
Picture007.jpg
 
Look at the Gimp cut!
S2010006.jpg


I cut out several CD faceplates (to account for mess-ups and mind-changes) a few front bezel plates, and the floor and mobo plate.
S2010008.jpg

S2010015.jpg


here is the plate mounted onto the mobo tray
S2010016.jpg

S2010017.jpg


I plan to also add one more bolt on the other side of the tray to add to the stability of the rack. Just to give me peace of mind.
S2010016r.jpg


Tell you what, modding with a broke hand is harder than I EVER imagined! I almost gave up a few times! It was just sooo awkward to hold, cut, anything! But I managed. When I was done with something, It just felt good to know that I still perservered!

Well on to the goodies. Ok, I got most of the cutting done to the outside of the case. Just a few small cuts (IE the cdrom drive and the rear mobo openings.)

Now just a small thing… I do not recommend using a dremel at high speed with a cutting attachment with the use of only one hand! Not only is it dangerous, but stupid… so naturally I promptly started cutting away. A few nicks on the cast later…

Picture039.jpg

Picture041.jpg

Picture047.jpg

Picture049.jpg


so it is looking real good for now, I have to clean up the cuts way more. Oh, one more thing… cutting stainless steel is hard work… and it is weird. The big reinforced cut-off wheels don’t work as well as the small dinky dremel cut-off wheels. Don’t know, the big ones just heated up the metal and cut slow, the small ones really kicked ass and bit right into the metal like a hot knife through butter!
 
Next I wanted to get to work on making some headway with the bottom stand and the chassis. A lot more to do but I got a nice chunk done.
I wanted to have fans on the bottom drawing air from the bottom to the top of the case, like a continuous flow, from cool to warm.
So do this, I needed to make a few cuts, and figure a way to make this happen without having the airflow all stopped from the base stand itself. So I will have to construct something like legs that actually hold this base off the deck a bit so air can be sucked in.

This is what I came up with so far in the baseplate.
Picture029.jpg

Picture030.jpg

Picture033.jpg

Picture034.jpg

Picture038.jpg


A few things will be changed, but this is the basic mock-up. On top of this, the PSU will sit, then on top of the PSU will be the MOBO, and up. So it creates a chassis that is sort of like a tower. All of this will be fabricated from frosted red and clear plexi. There will be several 1” plexi posts that will separate the different plexi “levels”. Soon, I will unveil this, so that you all are not confused! Haha.

So, just thought you might like to see, how a modder with a broken hand cuts, paints and takes showers all without getting metal, paint, and water in his cast!
Well, first it takes a bit of modding itself! You have to attach proper amounts of “Wal-mart” bags to cast and then secure and seal them with blue tape… just enough, and not too much to stick to your arm hair and hurt when coming off!
Picture587.jpg


Next to add a bit of flair, you have to have a new modding “buddy”! so just get your trusty sharpie and hook it up!
Picture592.jpg

Picture591.jpg


There! Modding buddy and fully functional, all-weather, all-modding, cast cover!
 
I took a new Logitech keyboard and Logitech MX 510. I wanted to match these to the color scheme of the trashcan case.

Soooooo, on to modding.
Picture058.jpg

took this all apart, had to take a ton of pictures so that I would be able to put it back together!

Picture059.jpg

Picture062.jpg

the donor

how I got off the logo without marring up the face of the mouse:
Picture068.jpg

Picture069.jpg

Picture070.jpg

Picture071.jpg

OFF! Yeah!

Sand everything down to get a better adhesion with the paint.
Picture072.jpg

Picture073.jpg

Picture074.jpg


After this, I have decided to try out some really cool paint: House of Kolor rattle cans! Wal-Mart sells them. I think they are very expensive for what they are, but I decided that I wanted to see how good they were and if they lived up to the name.
Picture076.jpg


It’s a three part system and first is the silver base coat. Let me tell you something… holy crap! The silver looked like a sparkle trip! When I was spraying I got so much sparkles all over me I felt like a “My Pony” toy! Haha. Here is the first coat.
Picture082.jpg

Picture084.jpg


after a few coats of this, you had the base for the translucent red candy color coat. It is very very thin paint. Don’t over apply this stuff. It will run all over the place. Super thin coats are only way to go. Here is the first coat:

Picture089.jpg

looks more pink… I was almost scared that it would turn out too light and not really deep red… boy way I wrong!

Final coats and clear coats!
Picture093.jpg

Picture096.jpg

Picture097.jpg

Picture100.jpg

Picture104.jpg

WOW!!! That looks nice! I love it!
 
Also, did a few things to do for the motherboard tray and tray plexi plate:
Picture105.jpg

painted

Picture106.jpg


Too an RCA connector plate and decided to place this on the plexi plate so that I can have some modular power throughout the system for various applications.
Picture110.jpg

Picture111.jpg

Picture113.jpg

Picture117.jpg

Ceaned it all up after I sanded the corners down and painted it all nice.
. I should be done in a few more days. I have to still route some LEDs, drill some holes, and add the support rods. That’s about it for the chassis. I don’t think it will need too much more. Maybe a bit of polishing and sanding.

As you can see I made a sort of bracket out of plexi for the PSU to sit on. This allows the PSU to sit up from the fan and also not move around inside the case. this was my first time using #4 cement; tell you what its really cool. Great stuff, I don’t know how I got around not using it before! I was so excited that I forgot that I wanted to sand down the sides of the plexi blocks and make them more smooth and to get out the machining marks. It sucked, so in true form, I decided to flame polish in-place and get all I could without breaking it all off and starting over. Well, it came out nice. I am satisfied, it kind of gives it character! Haha.
Picture152.jpg

Picture158.jpg

Picture153.jpg

Picture164.jpg

Picture169.jpg

Picture175.jpg

Picture177.jpg

Picture178.jpg


I also finished up the cuts on the outside cowling. I have a few more cuts to do, but I can not do them until I finish the chassis to get the spacing and measurements correct. The flames came out nice. Tons of sanding, filing and grinding helped! I still want to hit a few tiny areas. But for the most part, the flames are done. Its so hard to take a picture of this stuff, so here is the best I could do.
Picture131.jpg

Picture133.jpg

Picture138.jpg
 
I test fit the mesh for the flames also. I think they look quite nice. Nicer than I had hoped for. Really slick. Keep in mind, this is just a test fit and later they will be fully molded into the cowling and bent to fit. As it is, I just used clamps to hold the mesh in. its kind of thick so you have to bend it kind of hard to get it in there. But for a few pics, it worked.
Picture154.jpg

Picture148.jpg

Picture146.jpg


Got the MOBO tray finished painted and set the plexi cover. Set it up on the plexi bottom with the modular power bus. Not too much more with that. Just have to wire up the plugs and attach the fan to the bottom.
Picture120.jpg

Picture125.jpg


AND! Got the keyboard painted fully! Just a bit more polishing and touch ups, but for the most part done. Looks quite nice if I say so myself and will complement the case really nice.
Picture130.jpg

Picture127.jpg

Picture126.jpg


My only issue that I am not fully decided on is how to mount the mesh to the inside of the stainless steel case cowling. Any ideas? Any kick ass epoxy that would stick to both? Anything that would not come off under pressure? Let me know if anyone has used something this tough. thanks

so, lookout for more updates soon! i have been working hard on the chassis and it is coming out nice! thanks for watching!
 
wow, thats awsome, deffinatly going to be watching this one, That cutting is REAL good, even with your hand in it's condition!

Picture592.jpg


LOL.
You have also done a nice job on the paint, what specs will me involved in this mod, or did i not see them in all them lovely pictures lol
 
Very very awesome. Definetly subscribing to this one :cool: What'd you name your modding buddy :p

Again very cool.
 
I was skeptical at first with the drawings of the tribal flames, but I'm sold now. Great work so far!
 
looks very nice, i'm looking forward to seeing the end result. One way you could mount the mesh is by welding it on if you can get in there and not heat up the other side too much. got a tig setup? haha could also try just soldering it in a lot of places and see if that works.
 
I really like the trash can idea. It's definitely going to make a really sweet looking case.
Maybe I missed it in reading, but are you going to be painting the outside? Just wondering because I saw the finish got a little scuffed up from the flame cutting and refining.
 
Maybe I missed it, but where did you get such a big roll of mesh?
I have been looking for some like that.

And more on point.. great mod.
I am looking forward to the end product.

D.
 
One of the best ideas for a mod ive ever seen.... Heck I might steal it someday. Anyways, for the mesh I would reccomend using JB Weld. As the name suggests this stuff is as tough as steel. You can usually find it at any small hardware store, its not at Wal-Mart. Not sure about Home Depot. Use it sparingly of course cuz sanding wont be fun (dremel more like it).

Do you plan to cut out a section of the back for your face plate? I really dont like the idea of you dropping an entire chassis in there...
 
Waffles730 said:
I really like the trash can idea. It's definitely going to make a really sweet looking case.
Maybe I missed it in reading, but are you going to be painting the outside? Just wondering because I saw the finish got a little scuffed up from the flame cutting and refining.

It says in the initial concept art that it will be "Powder Coated" candy apple red. Perhapse he meant it will just be painted, I didnt know you could powder coat with candy? *boggle*
 
Wow, excellent workmanship...I bet it wasn't easy to make those cuts on the rounded trash can. I would imagine that a dremel would easily get stuck and the disc would fly off...

Very original, and I like it.
 
So who won the post-Katrina looter fight? :D

Looking good man, I might have to get one of the cans myself, would look good with my Antec P180.
 
i think i will use some modders mesh in my upcoming project. keep up the awesome log. very detailed.
 
This is looking good, I like how the keyboard and mouse turned out.

I might have to paint my case with that stuff :)
 
Your work looked really messy at the beginning, but as a scrolled down more, you proved me wrong! Great job for only having 1 fully functional hand- I can tell this one is going to turn out beautifully :)
 
At first I was going to give you shit for apparently punching someone with the wrong part of your fist but then I saw the handpuppet and laughed, so I'll let you go :D


Nice work, how much were the rattle cans at walmart? or were you fighting off a looter in walmart while trying to loot the rattle cans? :D heheh.......I keed I keed.
 
Picture591.jpg


That is the best picture I've seen all week. :p I sense some photochopping coming on.

Great work so far. Good luck with the rest.
 
That pic of you and Modding Buddy in the mirror made me LOL for 2 mins straight.. I loved it!


I really like that case (or should I say can). I think this is going to turn out awesome.
I'm gonna be checking this one for sure.
 
sac_tagg said:
So who won the post-Katrina looter fight? :D

haha, i am just kidding with the whole looter thing. i was down in MS stopping looters, but kicking ones ass did dot do this too me. it was crushed between a Hummer and a generator light cart. crushed the metacarpals in my hand. sucked, but back in action now.

ralfyboy said:
great work, but was beating a katrina looter really neccessary?

oh, absolutely! dont take what aint yours, especially if (take for example) a casino is smashed, what happens to all that loot that is in there? people go to take it! well, in all honesty, who wouldnt like to get a few extra bucks, but its against the law. so, i was there to stop that and back up the police officers.


but i have a small update for yous!
-------------

ok, sorry for not being to update much, i have been actually doing a lot of work on it. but i have not been posting. i will try to get a lot of picture posting done soon!

i went back and re-did a lot of things, and smoothed out some ideas. i loved the plexi chassis that i made for the hardware, but it was so rough around the edges, it just did not work for me. i had to make it better, it felt as if i was trying to cover up too many "mess-ups" on it. it was my first time working with plexi that extensively and i wanted it to look nice. so, back to the basics. i have chalked up the first chassis as practice! good practice at that. i have already pre-planned and reworked the layout of the chassis. this second revision will fit better and be way better suited for this setup. i have already cut and prepped the pieces for assembly. i am still waiting on a piece of plexi rod that i need for the construction.

i have also, done a few things that will be a direct nod to a few of the top/pro modders of the forums.

in all everything is starting to come together. i would say it is about 45% done right now, being that i have to still have a few major things to be done:
-cut out the back mobo tray opening
-construct a mounting bracket for that mobo tray
-clean up the top blow-holes
-construct a few fan-guards
-assemble the chassis
-wire the chassis
-make a bottom stand with feet

so as you can see, that is a laundry list of things to do, and those are just the big ones! well, sorry for the long read of an update. i promise pictures soon.
:D :D
 
Well, I said, I would have an update finally. Been really busy with work and I have not been able to upload pictures.


The largest thing is the chassis. I built it then I destroyed it! Haha. Read on to see what I mean.


I finally got the chassis completed but did not like the whole design and construction. It was kind of sloppy being my first time doing something like this, and it was not up to my standards, so I made it my practice prototype! So, all was not lost! Check it out now…


1” plexi rod for support colums in the chassis. Nice!

Picture191.jpg


how high I want the mobo piece.

Picture194.jpg


Picture196.jpg


Picture197.jpg


Picture198.jpg


Picture202.jpg


Picture206.jpg


Then I decided, it did not look right, and the set up was all wrong. I was doing too much to make it look right. So I did what needed to be done:

HULK SMASH!!!!

Picture213.jpg
 
I then planned out the chassis a lot better and made a smoother, slimmed down and smaller version that would do everything I needed without extra crap.

Sooooooo, this new one came… its not completed yet, but it fits a lot better and looks Waaaayyyyy better.

If you notice, different placement of the RCA power plugs size and color.

Picture210.jpg


Picture238.jpg


Picture239.jpg


Picture242.jpg


Picture243.jpg


new colored rods. I still have to polish and clean up some. After this, all the parts have to be put together and cemented. Also, there is a small part that I have yet to reveal on the chassis, I will tomorrow.

Picture244.jpg


Picture247.jpg


Picture250.jpg


Picture251.jpg
 
took a piece of plexi and cut out the inside for a bracket for the rear mobo opening.

Picture219.jpg


Picture215.jpg


Picture222.jpg


then I did something stupid… and forced the plexi too much before it was hot enough… boooooooo

Picture223.jpg


well that sucked. So I made another and did it right this time.

Picture226.jpg


Picture227.jpg


Picture230.jpg


Picture233.jpg


good to go!


Also got a new cooler for my vid card since the one on the card sounds like a damn huey helicopter! First thing to do is take off the sticker. Next will be make a red plexi cover to match or just add red LEDs to match the overall theme.

Picture231.jpg


Picture232.jpg


and one final shot of my room now that I did all that stuff! Holy crap, I need a work area! My wife was going to kill me! Haha! Don’t worry, I cleaned it up!

Picture214.jpg
 
good job man keep it up but remember to take your time it isn't a race the only one you can beat is yourself and that is something you should do in private without a camera. :D
 
yeah, i agree, i should have taken my time. but i am glad i got to practice. so all is good. nothing to complain about. i am not pressed for time, and frankly i did not know how all this would pan out. now i know exactlly how it will look and go! thanks!
 
Back
Top