Project Spitfire

KikBox

Weaksauce
Joined
Dec 7, 2005
Messages
91
It's time to do another full case mod. The last full project I did was last summer and with the official start of spring (and the warming of my workshop) it's time to get back to the good stuff. Over the winter I spent my time working on finishing techniques, filling out my web site and accumulating some new tools. After a break it will be nice to back into the swing of things.

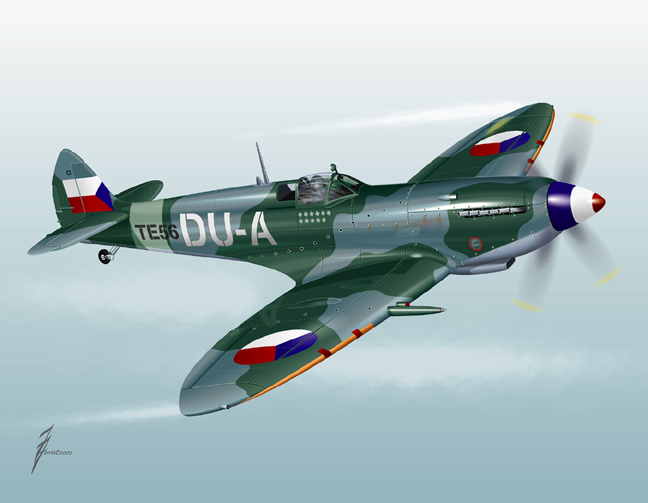
I am calling this project "Spitfire" and taking my inspiration from the RAF Spitfires that defended London during WWII. I am pretty pumped about this project as it will feature a number of exciting techniques is painting and fabrication all designed to resurrect the spirit of WWII. This should be a fun mod for those of you who are into Battlefield 1942 or just history buffs.

spitfiretf.jpg


So let’s get down to it! I am starting this mod with a Lian Li P7. I love Lian Li cases because they are a blank slate and we need a nice big canvas for this project. Lian Li cases are also 100% aluminum making them light as a feather, durable and easy to mod. I like the P7 model in particular because of its 120mm intake and exhaust fans. For this project I have acquired a turbine fan from MNPCtech.com that will definitely further our theme with its distinctive nose cone. After the paintjob is complete the system should be ready to take flight.

Pic11.jpg


120TurbineWb.jpg


The real highlight of this case will be the paint job. Everything else I do will be designed to simply compliment the custom finish. The goal is to recreate the drama of a WWII dog fight with a full case mural. The case will feature a scene that wraps around the case from side to side including both side panels and the top panel. I will be doing no cutting on the panels so we don't muck up the artwork, I will however be completely rebuilding the front bezel of the chassis.

My buddy Adam and I are teaming up on this one. Adam is a fantastic painter and a pleasure to work with. Adam is a great addition to the kikboxes team and regular at our LAN events. I have passed off the chassis to him for the first part of this mod. While Adam works his magic I am going to finish my planning and gather my stuff for the fabrication.

Primer
Adam starts by masking the front and back of the system so we hit nothing but the panels. We are using a self etching primer just to make sure the final finish is as durable as possible. The stuff stinks but priming is the most important part of the process. There is no point in taking the time to do a great paintjob if it just going to peel. This primer is designed for metals.

Pic12.jpg
 
Thanks for all the comments!

The next step is to create a backdrop for the dogfight. Adam has decided that rather than creating a stark grey background for the dogfight is he going to use a wide range of vibrant colors to set the scene. The setting will be a sunset dogfight with a partly cloudy sky. This setting allows for bright orange and gold tones as well as the range of blues from light to dark and even grey and black for smoke and flack.

The palette is a dream for me because it means I will be able to use a wide range of colored lights and parts and everything will still look good. That reminds me, I have been selecting many of the parts I will be using, I will try to post a current parts list tomorrow.

Airbrushing is done in layers. To create the illusion of depth you can put down color in layers so that as you build, previous layers show through. Adam starts with white to create the sweeping cloudscape that will back the mural.

Pic13.jpg


Pic14.jpg


The additional colors are added finish out the sky. The sweeping strokes create the high cirrus clouds and layers of blue, yellow, gold and orange illustrate the light from the setting sun reflected off the clouds.

Pic8.jpg


In the foreground we have deeper colors for lower clouds darkened by shadows and smoke. I think the RAF and German planes will look pretty sweet flying through this cloudscape! Oh yeah, did I mention we are making German planes too?

Pic10.jpg


Can't forget the top of the case! The idea is to carry the mural around the entire case so the top get the treatment too.

Pic9.jpg


The background is basically finished. The planes will be added over this backdrop and then highlights will be added to make our fighters appear to be flying through the clouds and smoke.
 
As promised, here is a rundown of the first batch of parts I will be using in the Spitfire. There are many elements of this design that have not been decided yet. The Mural is the most important aspect of this case so I am going to wait on many of the decisions until the paint job is complete.

Intake Fan
We painted the nose cone on the fan and here is the finished product. We elected not to paint the blades as the chrome finish will match nicely with other parts of our design. The other reason is that while the nose cone conjures the idea of a fighter plane prop, the rest of the fan looks nothing like a prop. Rather than trying to make it into something it's not we elected to stick with the stock finish.

Turbine_Painted.jpg


Blowhole
Pretty standard 80mm fan. Not many will actually see this guy. I am not planning to cut a hole for it on top of the case. Instead I will just use the fan vents that are already there. It is blue to fit with the design and the LEDs will give us a nice subtle lighting effect through the vents.

BlowHole.jpg


Fan Control
This is a very simple Sunbeam fan controller. It has 4 channels with uber bright LEDs that change from red to blue as you dial up fan speed. I am going to be taking this apart and doing a custom mount for it. I hope to replace the knobs with some that are either more period looking or more in fitting with the design.

FanControl.jpg


Toggle Switch
Okay, here is the toggle switch. Nice metallic red cover with a blue LED in the switch. Any of you who have done much computer wiring know that the typical toggle switch does not work well for power. PC power wants a momentary switch. In other words, the button is not "off" or "on" but rather is depressed momentarily and moves back to its original position when the power is on. This toggle WILL work but not in the most convenient manner. I know a guy who mods these switches so they can be used as momentary so I may look into his stock and see if I can swap out the cover...I really dig this shiny metallic cover.

ToggleSwitch.jpg


Hardware
Here is all the hardware for the new front bezel of the case. I have piece of 1/8" thick aluminum diamond plate with a very high polish. In fact, in the picture below you can see the case paint job reflected in the plate. Okay, this stuff is sweet! It reflects light like a crystal...even light from my shop spotlights is reflected all over the room off the diamonds. It's also super heavy duty at 1/8" thick. The thickness will make it a bit more difficult to work with but it needs to be beefy in order to fit with the image I am going for. A thin piece of veneer would just look cheesy.

DiamondPlate.jpg


The plate will be held in place with these nickel plated cap head machine screws. They guys are expensive but they are worth it. I think it's all going to look really boss mounted to the front of this case. The shine should setoff our mural in a big way. When Adam is finished with this paint job we will be clear coating the whole thing in high gloss. Don't stand too close or you'll get a sunburn!

PlatedScrews.jpg
 
Looking good man. I'm a history buff so I can't wait to see what you come up with. Good luck!
 
Here's an idea, you should paint a mouth and teeth on the "nose cone" of that fan, just like the fighters did back then.
 
joshmxpx said:
Here's an idea, you should paint a mouth and teeth on the "nose cone" of that fan, just like the fighters did back then.

You are on the right track dude! We are using a model for our planes that includes the classic shark teeth. That plane also features a red nose cone with white stripe just like we have done with our fan. :D
 
joshmxpx said:
Here's an idea, you should paint a mouth and teeth on the "nose cone" of that fan, just like the fighters did back then.

Spitfire's didn't have the teeth. The teeth were an American thing that started with the P-40. The Brits aren't quite as...aggressive as we Yanks.
 
Fenris_Ulf said:
Spitfire's didn't have the teeth. The teeth were an American thing that started with the P-40. The Brits aren't quite as...aggressive as we Yanks.

Fenris_ulf is mostly correct. There were some Spitfires in the RAF that did have the classic shark teeth but most of them were in the pacific theatre. Some of the MK VIII's introduced into the Far East in 1944 had the Shark theme going.

spit_mkviii.jpg


Even though there were probably no Spitfires in the Battle of Britain that sported the Shark theme we chose to use it for this project because it is so recognizable and because it makes for very dramatic art work. We also wanted to feature these planes duking it out with German Messerschmitts.
 
For your next case it would be cool to do a mural representing the Battle of Britain on one side and the other side with a Jap Zero/Spitfire mural for the Pacific campaigns! :cool:

Either way an ME262 mural would be cool also, but that was really late in the war.
 
That is a sweet idea. I have a vision of a perpective from the tail of a F6F Hellcat as it dives down on a Zero or even attacking an Japanese battleship. :cool: That slate blue fighter with the big stars on the wings would be very cool.
 
KikBox said:
Even though there were probably no Spitfires in the Battle of Britain that sported the Shark theme we chose to use it for this project because it is so recognizable and because it makes for very dramatic art work. We also wanted to feature these planes duking it out with German Messerschmitts.

Based on the painted nose cone I assumed you were going for a BoB theme, where the teeth would have been historically innacurate. Just the historical purist in me coming out.
 
Fenris_Ulf said:
Based on the painted nose cone I assumed you were going for a BoB theme, where the teeth would have been historically innacurate. Just the historical purist in me coming out.

This is true...but now that I think of it, there is going to be nothing in the mural to specifically link the painting to BoB. Unless you count the presence of German Messerschmitts. ;)
 
I guess the next step is to create our spitfires. Adam starts by framing the basic shapes he wants with masking tape. Running the airbrush along the mask creates the sharp lines the will define the outside edges of our planes.

Pic4.jpg


Once the basic shapes have been established he creates the rest of the details by hand filling in colors, highlights and shadows until the finished war birds start to take shape.

Pic6.jpg


Pic5.jpg


Details and effects are added in layers to create the finished painting. Here we can see the addition of the camo green, guns are added, the prop is painted red and the markings are being added.

Pic7.jpg


The last step is to create the effects that will give the entire scene a sense of movement. Adam is able to use blurring to bring life to the prop and muzzle flashed on the guns intensifying the drama. At this point additional cloud effects are added to give the painting even more depth. Planes appear to be plunging in and out of the cloud banks. I love how the German planes trail ribbons of smoke a roll out of control.

Pic1.jpg


Pic2.jpg


Pic3.jpg


The final step in the painting process is to add the clear coat that will give everything depth, shine and an added layer of protection. I will post the final mural pics after clear coating tomorrow.
 
croquet hustler said:
yea man!

that looks totally dope!

but, where did the fan with the nosecone go?

I have not installed it yet. That is going in after the case has been painted. In order for Adam to paint the mural he needed the panels attached to the chassis so the painting would flow over the top of the case. I am waiting to do my fabrication until he is finished with the paint. Once that is done I will remove the panels, tape off the top of the case and start cutting.

Very soon...
 
HOLY HELL! That is honestly one of the best paint jobs I have ever seen. And you're right, the props and the guns give the mural a sense of motion. Crazy!
 
KikBox said:
I have not installed it yet. That is going in after the case has been painted. In order for Adam to paint the mural he needed the panels attached to the chassis so the painting would flow over the top of the case. I am waiting to do my fabrication until he is finished with the paint. Once that is done I will remove the panels, tape off the top of the case and start cutting.

Very soon...

so your not going to incorporate the nose cone of the fan as the prop to one of the painted aircraft?

it might give it more of a three dimensional look.

cheers!
 
croquet hustler said:
so your not going to incorporate the nose cone of the fan as the prop to one of the painted aircraft?

it might give it more of a three dimensional look.

cheers!

No I will not be doing that. The fan will go in the front of the case.
 
you need to post some bigger pics of the paint job...

great job with the paint so far.

the black knight always triumphs!
 
Okay all, I will just shut my mouth and let the pictures do the talking on this one...

IMG_0860.jpg


IMG_0861.jpg


IMG_0862.jpg


IMG_0863.jpg


IMG_0864.jpg


IMG_0870.jpg
 
While I hate the theme it is some of the best work ive seen done ever. Ever, cant deny that.
 
[H]Opterown said:
Awesome mod man, I love WWII.

Nice heater in the background too, I have 2 of those lol.

I have 2 of those heaters as well. They are essential if you are going to work in your garage in MN. Maybe I should mod them! :D
 
Just watches Tora! Tora! Tora! last night. Ironic ;)

Great job on the case thus far, very interested to see the final project.
 
Now it's time to start work on the front of the system. As good as it looks just like this; we can make it look even better. I started by removing the panels and putting them very far away from where I am working! I am taping off the top to protect it during fabrication. The front bezel comes off easily. Four screws and four plastic clips and we are good to go.

IMG_0905.jpg


The intake fan hole has grill of sorts stamped into the frame. Some quick dremel work and that is gone. I want to open this up so there is an unobstructed view through the fan blades to the interior of the system. I cleaned up the edges a bit with the Dremel and I have some "U" channel that I will eventually use to finish the hole.

IMG_0908.jpg


Once the front bezel is removed it's very easy to work with. I used a 4.5" hole saw on my drill press to punch a hole in it. A little clean up with the Dremel and our fan hole is done.

IMG_0911.jpg


The whole idea here is that I am going to attach a piece of polished diamond plate to the front of the case. In order for this to work I will need to cut holes in it for drive bays and the intake fan. In order to get everything right I am going to use the bezel as a template to mark my holes.

The first step is to mark the 6 holes I will use to attach the plate. I marked the holes and drilled them out on the drill press. Then I attached the plate to the bezel using my nickel plated machine screws. Once the plate was firmly in place I flipped it over and used a marker to make my holes.

After marking my holes I take out the screws and detach it from the bezel. Now I know exactly where I need to cut and I can be certain it will all match up when I put it back together.

IMG_0915.jpg


I started with the fan hole. Using a 4.5" hole saw on the drill press I cut the hole for the intake fan. It takes a little time and some 3 in 1 oil to cut 1/8" aluminum plate but in the end I get the nice clean cut I am looking for. It's important to be patient with this, you don't want to overheat the piece or you will get unattractive burn marks. Take your time and use plenty of oil or cutting fluid. A little clean up and it's done.

IMG_0918.jpg
 
Next step is to cut out the spaces for the 5.25" and 3.5" bays. I have marked where my holes need to be by using the bezel as my template. Next I cut holes in 2 of the 4 corners in each of the spaces making room for my jig saw. I am using a variable speed jig saw with bi-metal blades.

I am planning to eyeball these cuts. I have the piece clamped down to the work bench so it won’t move. The plan is to run the blade right down the outside edges of my lines. This should get me very close to the width and height I need for the bay covers and components to properly fit. You just have to take your time with this stuff. If you feel like it could be going off track you just stop and re-group. When you stop the saw in mid cut make sure you do not pull the saw out of the cut as its running. Just let the blade stop moving before you pull the tool free or you will make the blade catch. I want clean cuts so a jumping blade is not good.

I make a cut and along my line and then stop the saw and approach from the other direction. In order to keep the corners nice and square I slow way down as I reach the end of my cut. I want a nice corner...not cross cut marks!

IMG_0937.jpg


You have probably noticed that I am only cutting out 3 of the 4 5.25" bays. I am planning to mount my fan controller right through the diamond plate in the bottom bay making it a permanent fixture in this mod. I will be doing some custom work with the dials that I think will look pretty cool.

IMG_0938.jpg


After I cut out the holes I clean them up and get them down to the finished size using a file. The worst thing I could do here is to make the holes too big. While working with the file is slow, the end product is very clean. I work with the file for a bit and then do a fitting with a bay cover and keep up the process until I have the right fit.

IMG_0940.jpg


IMG_0941.jpg


IMG_0942.jpg


I am using flat files to get a nice clean edge and a nice square corner. When I finished with the file the edges were smooth as silk.
 
It's time for a test fitting. I have taken some measurements I think that the bezel is deep enough that I can mount the intake fan on the front of the frame instead of the inside. I like this idea because it will put my fan blades right up against the hole and push the nose cone through the opening. It also makes the inside look nice and clean. There is a chance that I may be doing a water cooled system and this would leave only the radiator on the inside.

IMG_0943.jpg


IMG_0944.jpg


The P7 case some standard with the fan mounted on the inside but here is on the outside. It appears that the depth of the front bezel is very close to the depth I need for the fan's frame. In the end, it was close that I re-cut the fan hole in the front bezel so it was a square big enough for the whole frame to fit through. This got be another 1/16" of an inch or so and it was all the room I needed.

Here are a couple of shots I took during the test fitting. I put the side panels back on so you can see the full effect. :)

IMG_0945.jpg


IMG_0946.jpg


With the fan up against the back of my diamond plate I don't need to worry about that gap created by the bezel. I also give the nose cone the prominence I am looking for. I will need to take this all apart again so that I can install my fan control mod and apply paint to the bezel and the inside of the case.

IMG_0948.jpg
 
Super work! Maybe some nice analog guages on the front panel to go along with the overall theme and era?
 
Back
Top