Project: Gr1zz

WarMace

Gawd
Joined
Aug 25, 2004
Messages
963
Most worklogs have a set theme, a name that fits in well with the theme, seemingly unlimited budget, and a workshop.

I, have none of those.

What I do have is a tired PC in need of an upgrade, big plans, my ever knowledgeable friends at HardOCP, and the wifes O.K. Mix that together with a little bit of elbow grease, and this may come out looking pretty cool.

The big plan:
  • Upgrade my gaming PC to last me another 2 years.
  • Finally join the elite overclockers.
  • Watercool (the right way this time)
  • Fix everything I hate about my case.
  • To have all this done in time to show off what might be the baddest looking PC at Noreaster next month.

A little background.
DSCN2549.JPG

This is my current PC. Sadly lacking any flair to represent the awesome components inside it for the last 2 1/2 years. Radion x800Pro; Gig of Crucial Ballistix; Amd64; Raptor 74; Asus A8V Deluxe.

DSCN2546.JPG

This image is not to show you my lousy wiring, its to show the items I hate the most about the CMStacker Case.
  • The drive bay blanks require a steak knife to remove.
  • The tooless drive retention stuff has too much play and needs to go.
  • Primer gray is as bad as beige and needs to go.
  • My cat left permanent white paw marks on the top when she knocked over a fish bowl and walked across the bare metal top.
  • I hate the plastic cap on the top-front.
  • I hate the stock front panel thingy with the power button and USB ports.
  • The top blow hole blows no air.
  • No matter how much someone mods a CMStacker case, it ends up looking just like a modded CMStacker case.


Now for the new components.
coreParts.JPG

  • Mobo: EVGA 122-CK-NF68-A1 680i ATX
  • CPU: Intel Core 2 Duo E6600 Conroe 2.4GHz
  • RAM: CORSAIR Dominator (2 x 1GB) DDR2 1066
  • GPU: EVGA 8800GTS 640MB Superclocked
  • PSU: Silverstone ST85ZF

Sadly, the case is not done (its not even started), and i cannot wait to start tasting the raw power of my new computer. Plus i need to test for DOA stuff. So where does one place $1600 worth of computer guts while waiting for the new case to be completed.....
DumpPC.JPG

In a computer case found at the dump of course.

DumpPC3.JPG

Goodbye 400Mhz, hello 3Ghz!

BirdTurd.JPG

Cool things you learn every time you rebuild a PC.
Like applying bird-turd' (AS5) is that you want to wipe it around on the heat sink and CPU then gently wipe it off. This fills the pitts. Then you apply a thin line across both cores and let the heat sink spread it with even pressure. I think I added too thick of a bead, Ill redo it when the water cooling stuff is installed.
Comments? Suggestions?

PSUTest.JPG

PSU Checks out.

BigRam.JPG

Man these things are bigger in real life!

GhettoCase.JPG

I feel so ashamed! This will be my inspiration to work fast to complete this mod on time.


Now onto the stuff you've been waiting for, the modding!

tearApart1.JPG

First things first is to tear apart the old PC.

stripped_CMStacker1.JPG

All the way apart.

stripped_CMStacker2.JPG

Completely Naked and ready for cutting.
 
finally someone who "mods" like me! lol!

Good luck on the new hardware!
 
What are your plans for the case then? Your components are nice but you did not actually say what you intend to do.
 
The Big Plan:

bigPlan.JPG

Large Version

I want to cut the top front corner clean off!!

I hate how PC's are always square, and i would like to break the mold, if just a little bit. I would love to make the top corner rounded but, alas, i have no idea how to make a piece of lexan round like that. So if i cant figure out a way to round Lexan come cutting time, i will just make it a straight corner. (ala' Battlestar Galactcia)

Also I want to get rid of blank drive bay plates all together and replace it with one piece of billet grille. That way the radiator for the water cooling gets plenty of airflow.

I want to place a window on the top of my case rather than the side, I think it will look cooler, especially with a 8800GTS staring straight back at you. This will mean i need to mount the PSU on the bottom which will make hiding wires a challenge, but i really haven't thought that far, I'm sure ill figure it out.

I also want to paint the entire case when I'm done modding. I walked around a couple dealerships looking at new cars and absolutely love a "Gunmetal" color on the new Dodge Magnum, but i plan on tweaking the color a little. I also want to paint the entire interior flat black to better show off the components.

Another little mod is I want to take the bottom mesh plate inside the case and flip it so rather than "poping up" it is "poping down". You will see this in pictures Very Soon.
 
seems cool. I guess to solve your problem of the PSU on the bottom you could mod the case by starting with it upside down. It may work but hey thought I would throw it out there. I see you have plans for a possible LCD built into the side panel? I have an old dell 15" monitor if you want it. $45 shipped. looks to be a nice mod. Just keep a look around for ideas. There are some fantastic modders around here.
 
for the lexan piece you could make a wooden form (cheap) and then just heat the lexan and bend it :)
 
Thank you for the offer of the LCD, I have a old notebook i saved from the dump that may work well, if I cannot manage to get it to display, than I might reconsider.

I was also thinking about using a old HP iPaq pda my wife nolonger wants as well.

As for the rounded top. I spent a couple hours on the road thinking about my options. And i think your right, a wooden "mold" or a reinforced stove pipe would get me the curve i wanted, and a hairdryer or better, a heat gun should get me the curve i need for the top front.

As this is a work in progress I thought up a cool idea. If i make the curved part hinged and I can hide the buttons and bank of USB ports under it...maby place the PDA screen there, and the LCD for the water temp under it. (My layout for the watercooling is finished, and should be posted tonight.)

coverbq8.jpg
Kinda reminds me of darth vadors cockpit, this is not the color scheme I will be using of course. =-)
 
Watercooling_layout.jpg


For the water cooling I plan to start with a basic CPU loop and slowly expand.

For the LAN party I just want the CPU water cooled, and over time i will add the TEC chilled block you see in the lower right, as well as the GPU water block. Sadly a GPU water block and/or a second video card would have put this project over budget. So planning ahead I purchased components that would work well with a second GPU down the road. As well as a pump with enough flow to add a second rad' down the road(or dual loop, who knows).


Some things that still need work are the location of the ROM, I dont know if i like it between the flip lid and the grille. Plus I have never liked how the T-Line fill port looks so i would like to hide it under the lid, but it may not work well there with all the buttons and electronics, so i will look into other places to hide it.

Edit typo: In the picture it should read "Remove PSU bay", not HDD.
 
I was going to do the same thing as you with the peltier. I ran out of money though :(

If you need help with the palm mod, let me know. I already did all the work for it on the mod I'm working on now (completely gutted Thermaltake Matrix w/ watercooling and a bunch of other shit), I can link you to some resources for the palm output. I got mine outputting Winamp info, score in CS 1.6, and all sorts of other useless, but cool, stuff. The Winamp plugin is cool, I can control my music from it :cool:

I'm putting an LCD on the side of my case too-- remember that most have depth too, you will have to have it elevated off the surface to mount properly. The best way to do that is to bend some plexi and make some sort of housing for it that attaches to the left panel. You won't be able to get that laptop panel working, unless you are a God or unless you have tons of experience with LCDs and a controller board handy, or maybe if you are REALLY lucky. The 15" LCD offer is a REALLY good deal. I spent $65 on the 12.1" LCD I am putting on my case, so $45 shipped for a bigger, better screen is one hell of a deal.

The curved top will look awesome! Good luck, I'll be watching this one :)
 
This looks interesting. I have an old Dell Inspiron 7500 that has a screen I'd really like to use, and this gives me an idea or two. I'm in the poor sector so I have to be excessively creative with my abilities :D . I'll keep checking back, this looks promising :) .
 
39 Days till deadline.

I e-mailed the guy who made the billet grille for my truck, but may call him to get the ball rolling faster.
UPDATE: he quoted me 57$ for the part, ouch! Time to look elsewhere.

Went to the local Lowe's last night to look at materials, specifically Lexan and I may consider getting thick plexi' because they do not stock Lexan in the thickness I need. I will check Home Depot after work today.


Anyone know where I can mail order Smoked (tinted) Lexan pieces just a little bit less than a quarter inch thick?
UPDATE: After calling around and eBay surfing, I found a plastics supplier that sells "grey" lexan, but the smallest piece they sell is 4' x 8' and $187+tax Double Ouch!!
 
/You might be able to find some on good old home depot.
 
yeah, i almost went for one of these cases. wish i had. *subscirbed anyway :) i love projects and yours looks pretty killer.
 
Well after the setback with the expensive parts I wanted [read above], I decided to move forward anyway.


hardwareSupply.JPG

Picked up some critical modding supplies.
  • Sheet of clear Lexan - Its not tinted as I wanted, ill work on that after its together and see what looks good.
  • PVC Bucket for molding said Lexan - I want a 6" radius curve for the top cutout, this bucked should suffice. (Then I can return it for my 5$ back. :D )
  • My first Dremel - always wanted one
  • Flat black paint - The interior will be flat black, i have had good success with this brand on computers in the past.
  • 600grit wet sanding paper - The finest grit found in Home Depot and Lows, if you ask for anything finer they look at you like you have 2 heads.
  • Dust Mask - I’m too cheap to spring for the good ones made for painting, good thing im painting outdoors.
  • 20 Pack of reinforced fiber cutting bits - I flew through the 4 free cutting disks in the kit in seconds testing out my dremel, this disk worked the best so i stocked up!
  • Mothers Aluminum Polish - I don't want to keep the stock Aluminum bars on my case but may have to as a last resort. This can polish these bars and the Billet grille if I can get one.


topDesignAJ.JPG


The best way to get spending approved in my place is to involve the wife in the decision making. She helped out last night by sketching a cool technical looking design on the top for a window (see the mini template in the center), as well as pointing out a couple flaws in my planning. After seeing the Project:Typhoon I decided rather than having triangles in the middle (like /\), I would flatten the tops (like / \ ). Other than that, the similarity's in our project top openings and paint choices is purely coincidental.

After that we made the first cut in the Lexan. I wish I had pictures, it was awesome. I scored a line in the Lexan and clamped it to my counter top. Hoping to snap it along the edge, it would only flex. So AJ got up on the counter and kneeled on the top part as we both pressed down on the bottom part until it snapped. Man that stuff is tough as glass, and sharp too! The piece broke perfectly, and no one was injured in the process.

Next step is molding the curved lid piece, I cant start measuring my cuts until its done.
 
More pics! I was wanting a stacker as a server, dont like the looks for my main PC, and i dont know why. Maybe the fact it looks plain??? I dont know?
 
Well I spent most of my evening tonight working on bending a 15"x9" sheet of XL10 lexan. You want pictures, you got pictures.

Heres how it went.

Bend01GettingStarted.JPG

All the tools ready for a hair dryer bonanza!

Bend03HairDryer.JPG

Sadly, no matter what we tried, the hair dryer just wouldn't make it stay bent.

Do not attempt this without a expert and/or adult supervision, for all I know I could have inhaled poisons today:( .
Bend05InOven.JPG

Plan B: After all my research in the perfect plastic, i knew that this material can be vacuum molded at 350-400 degrees F. So I started slow. I placed a dampened towel neatly on a cookie sheet to provide even heating (in theory). Preheated the oven to 250 degrees and tried bending after the sheet was in the oven for 10 min.

Bend06overBucketNoGood.JPG

The temp was not high enough, the lexan regained its flat surface every time after bending it by hand.

Bend07InBucketNoGood.JPG

Raising the temp 50 degrees each time I was seeing little results. Pull it out, attempt to bend, place back in oven. Around 300 degrees the ends would start to keep their curl but the center was doing nothing, Even when over curling inside the bucket.

Bend08InBucketIcing.JPG

350 degrees. We tried cooling it when in the bucket mold to see if it would retain its shape, but it did not.

Bend09StartingToCurl.JPG

At 425 degrees we started to see results. The edges would grow soft, and the plastic coating was peeling off on my mitts. I knew the evaporative cooling was keeping the material from reaching the desired temp. Once i could get it to arch I knew i was on the home stretch. The center was finally getting hot and softening away from the cool towel. The edges were growing lumpy from my constant handling.

Bend10CurlInOven.JPG

Once I discovered the above, getting the plastic pliable was a breeze, and i learned my second tip. The plastic only stays pliable for about 4-5 seconds out of the oven before it grows rigid again. When i was peeling it from the towel in previous attempts i was loosing seconds. Working fast pays off big. In this photo you can see why you want to remove the other racks from the oven if your planning something big.

Bend11CurledOnBucket.JPG

Once i got it to retain a curl tighter than what i desired i heated it up one last time and literally dropped it over the bucket where it took the perfect curve.

Sadly in the dozens of repeated attempts at bending the plastic I may have flawed the material. The protective plastic sheath has melted in spots, and i worry it may have bonded with the lexan, or worse the lexan may have taken on the texture of my oven mitts like fingerprints on chocolate. Tomorrow I will cut the best piece out of it and see what damage has been done.

Bend12TowelInSink.JPG

By the end almost all the water has evaporated out, and our "Guest towel" looks damaged from being cooked at 400 degrees for almost an hour. (see the steam, and freshly made brown spots where it touched the cookie sheet)

If I were to do it all again, which I may to make a better curved piece, I would change a couple things.
  • Use 2 rolled hand towels on ether side of the lexan to form a bridge.
  • Heat to 400 degrees f. If the material boils (bubbled form in the lexan) then you over heated it, try a lower temp next time.
  • Keeping a very close eye on the dip in the center, pull it out right before it touches the cookie sheet.
  • You have 3-4 seconds to make your bend before it cools, so make it count!
  • If i discover tomorrow that the protective plastic wont come off, then i know to peel it off before starting to heat it.
  • Bend away from you in case it shatters for whatever reason...
  • Keep chemical fire extinguisher in case you screw up big time.

Hopefully the next few days I will get a lot more cutting done, I expected this to be a slow part, just not this slow...
 
why don't you just buy a heat gun? I've seens tons of modders use them for bending plexi and lexan. Seems to me you could control the process much better than the oven method. I don't think they're that expensive either.

Edit: oh btw, loving the thought process so far, can't wait for more updates!
 
why don't you just buy a heat gun? ...Seems to me you could control the process much better than the oven method....loving the thought process so far, can't wait for more updates!

I agree it would be easier to have used a heat gun, but I couldn't validate spending $30 on a tool I would only use once. (Hell, I'm returning the $5 bucket tomorrow once I'm positive I don’t need to make another lid.):)

I also really appriciate the feedback, I dont know many people who appriciate modding a PC, so everyones appriciation goes a long way!;)

This morning I could not wait to see if this piece was ruined or not so I decided to try to peel the plastic before work.

Bend13clean.JPG


Much to my amazement the plastic peeled off! And it looks damn fine too!

Bend14clean.JPG


You can see one wobbly edge, and one nice edge. I made this piece oversized on purpose expecting to cut a nice piece out of the center.

Bend15clean.JPG


Looks like it’s going to snow/rain this evening, but that won’t stop me from getting more work done. Due to my lack of a workshop, all my Dremel cutting and grinding have to be done on the back porch. That will put a kink in my painting though.;)

36 Days untill the Storm

New Idea – Tell me what you think about cutting a hole out of the plate the motherboard screws onto, so I can add and remove a back plate if needed without having to remove the motherboard? It would be a small opening behind the CPU just large enough to allow for changes in the heatsink.
 
I agree it would be easier to have used a heat gun, but I couldn't validate spending $30 on a tool I would only use once.

you can probably get one from harbor freight for around $10 Link. And it has more uses than just bending plexi. They're good if you do anything with heatshrinking too.. works a lot better than trying to use a lighter. :)


New Idea – Tell me what you think about cutting a hole out of the plate the motherboard screws onto, so I can add and remove a back plate if needed without having to remove the motherboard? It would be a small opening behind the CPU just large enough to allow for changes in the heatsink.


This is actually a pretty good idea. would save a lot of effort if you know you're going to have a HSF that fastens that way. I don't see why it would be a bad idea.
 
Good point on the heat gun, although you could return that too after you used it!

However it looks like it won't be necessary! That lexan looks much better than I was expecting based on the pics above.

Cutting that hole for the backplate sounds like a killer idea! That's one of those "oh hey why didn't I think of that" ideas.
 
Meinzorn, Thats a nice price for a heat gun, thanks, Ill have to check them out next time i need to buy tools.

RAA-Kr1cH, A lot of my little ideas I'm sure I'm not the first person to think of them. Like how I want to run wire loom over the hoses for the water cooling, because black tubing was hard to find. But thats something that may not come to light, but who knows...

topDesign.JPG

I did not get much work done today, but here is a picture of my cat.
It was pouring and sleeting outside all day today, killing any chances of cutting metal.

Bend16LongMeasure.JPG

But I owe you some progress, so we measured how much of the long edge needed to be removed, using a SATA cable to provide a straight line.

Bend17preppedForLongCut.JPG

My indoor fabrication station! :cool:

Bend18waitingToCutMore.JPG

With the long edge cut, I would rather start cutting the case a little before i accidentally cut too much off the ends of the lid. ;)

Hopefully tomorrows 30% precipitation means cuttin'time!


Another note. I guess the quote I got on the Billite Grille was pretty good, but its too much for a piece to this case mod, so here is where I have to sacrifice a little to get things close to what i wanted. I have been eyeballing the grille on my truck, because that is just what i need, but i cant bring myself to cannibalizing it. So I have been looking at long forced hot air vents, plastics, and other materials to make a "Grille" look on the front. Suggestions are greatly appreciated.
 
how about spray painted gutter mesh from home cheapo for the billet look?

Thats something im looking into, i just don't like many of the patterns. British Jack does look cool.

Hey war, look at what iiiii got today ;)

This means War!!

peltier%20and%20volcano.JPG

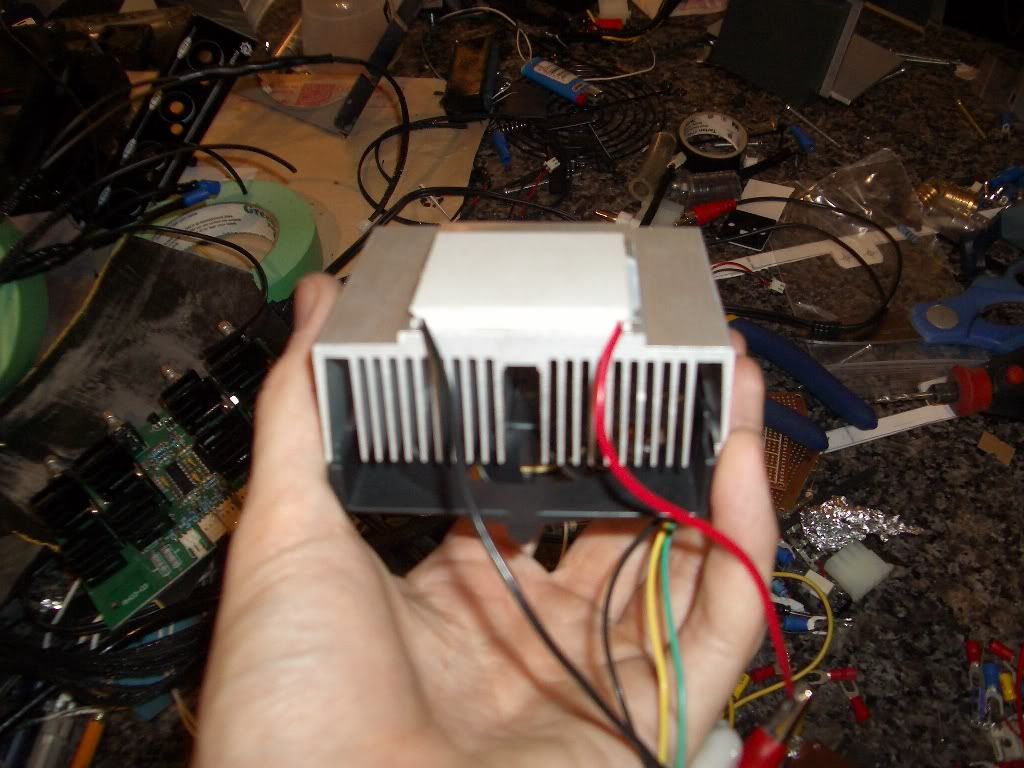
This is my Peltier and Thermaltake Volcano with copper core for my setup. Ill discuss it in more detail once I'm ready to start the water cooling part.

Huge update coming tonight! Stay tuned...
 
Warning, the following post is not for the faint of modding.
case%20modding%20023.JPG


The skies parted today, and I'm not waiting around for it to start raining again this weekend.
Yeah my deck is dirty, i cant sweep or vacuum it because it tears up the crap carpet that my landlord said he was going to replace years ago.:( Se we just let the wind and rain clean it as we watch the moss grow.


case%20modding%20001.JPG

This is my first time using a dremel style tool, so for practice i started my cutting on something insignificant, and easily hidable in case i screw up.

case%20modding%20002.JPG

There are some things not in the instructions and you just have to learn on your own...like don't dremel with a hoodie with drawstrings! :eek:

case%20modding%20004.JPG

Before

case%20modding%20005.JPG

After. The cage/vent at the bottum "popped into" the case, i fliped it to point outward. Not much space gained, but plenty of experience.

case%20modding%20006.JPG

Before.

case%20modding%20007.JPG

After. With that pesky PSU bay out of the way, i will have a nice view of internal components from the top window.

case%20modding%20008.JPG

The cut you have all been waiting for. After a last minute triple check of my measurements i dig in.

case%20modding%20010.JPG

No turning back now.

case%20modding%20011.JPG

Nice cut but its not as easy as it looks. Cooler master curls back all sharp edges (see final pic) and reinforces the crap out of this case. It was built like a tonka truck and is about as tough to cut.

case%20modding%20018.JPG

My ears are still ringing from all the cutting. The entire process took me from 4:30 to 7:30pm with a 1/2 hour dinner break.

case%20modding%20020.JPG

After cutting all the way around, just the front bars came off, now i have to cut it free from the inside.

case%20modding%20025.JPG

Bending it back to cut some more. The brushed metal let out a little cry as i pealed it back. I took a moment to remorse, then i cut deeper.

case%20modding%20027.JPG

You can see here how well it was reinforced. There are double walls here. The inner steel drive bay walls (cut straight for instrument panel), and the outside brushed aluminum wall (cut rounded for lid).

case%20modding%20032.JPG

All done cutting due to the fact that my eye protection are cheap sunglasses and I cant see in the dark. I cut a total of 2.9Lbs out of her tonight.

case%20modding%20034.JPG

My wife chuckles at me as she can see im grinning ear to ear, my case design is coming to light.:D


case%20modding%20036.JPG

Here you can see my Über technical layout. We got some blinky lights, some lcd showing randomly changing data with no pattern. All we need is a reel-to-reel in there and we got ourselves a 80's movie missile command.


I forgot to put the fillport on the instrument panel in the diagram.
II don't like how the danger den fillport looks on top of cases, they remind me of nose or lip rings. Their just screaming "He look at me and my water cooling". If thats what your going for, then it looks good, but that is not what I'm going for here, so I'm hiding it under the lid. What I'm really trying to say, is i want people to notice my hardware, not my connectors.

Phew, that was a lot of work, and I will be back at it sanding the burrs tomorrow, and possibly cutting more metal off if it looks good. Like i cut the front bars kind of high just in case, i will probably take more off the front there.

35 days until the free RedBull!
 
Hey, lookin real good. Are you going to reinforcing the front piece of the curve? Might I suggest some aluminum flat-bar stock bent to shape?

That way you could really JB weld it into place, and make sure your case isn't going to move around one bit.

And I need a copper core HSF for my pelt too :p This one barely keeps up with my 60w load resistor bank :(. What wattage is yours?
 
looks like your wife/gf was doing alot of the modding too, especially molding the plexi. You guys doing this as a team? wish i had a cool gf to do modding with.
 
All done cutting due to the fact that my eye protection are cheap sunglasses and I cant see in the dark. I cut a total of 2.9Lbs out of her tonight.


Really would invest in a pair of goggles....as somone who has had upwards of 30 foriegn objects removed from my eyes I finally learned.....glasses are not much better than no protection at all......I wear hardend lens glasses all the time and I've even got steel in my eye with glasses and a full face shield. Invest in a pair of goggles that seal to your face.......:cool:...they are enormously cheaper than having a foriegn object removed form your eye......which has run me $90.00 to $350.00
 
Yep, I've actually got a piece of steel (was wearing glasses at the time) lodged in my eye. It's even been healed over, so I'd need massive surgery to remove it.

I can't get MRI's now, and I can't afford the surgery :p.

I used to be such a stupid 14 year old.
 
Hey, lookin real good. Are you going to reinforcing the front piece of the curve? Might I suggest some aluminum flat-bar stock bent to shape?

And I need a copper core HSF for my pelt too :p This one barely keeps up with my 60w load resistor bank :(. What wattage is yours?

The Optical drive is mandatory for stability, and I think that will do it, if it needs more, i will add it. You definitely cant stand on the case anymore.(It was that tough)
I have no idea, its unlabeled. I asked in the electronics sub-forum.


looks like your wife/gf was doing alot of the modding too, especially molding the plexi. You guys doing this as a team? wish i had a cool gf to do modding with.

She claims she is just assisting, and still thinks modding is "Dorky". But when she see's me working on it i can see the desire in her eyes to create, then she wants to jump right in. So far she has been offering a lot of constructive ideas, and holding stuff, I hope to involve her more, especially since she enjoys wiring.

You don't have to tell me twice! :) Ill dig mine out of storage.
 
Yep, I've actually got a piece of steel (was wearing glasses at the time) lodged in my eye. It's even been healed over, so I'd need massive surgery to remove it.

I can't get MRI's now, and I can't afford the surgery :p.

I used to be such a stupid 14 year old.


I'd have thought about shooting myself If I had to wait for a piece of steel to heal in my eye.......damn.....you must have some serious tolerance for pain.......
 
I'd have thought about shooting myself If I had to wait for a piece of steel to heal in my eye.......damn.....you must have some serious tolerance for pain.......

I used to have bad allergies. It didn't hurt, it was just "abrasive." The same sensation I always get (for weeks mind you) during hayfever season!

Warmace, I could never let my wife/gf help me with modding. I feel so defeated when I screw up, I'd never want my significant other to share in that feeling.
 
Back
Top