Bombproof Builders Desk.....Build

My new power supply showed up today :D 
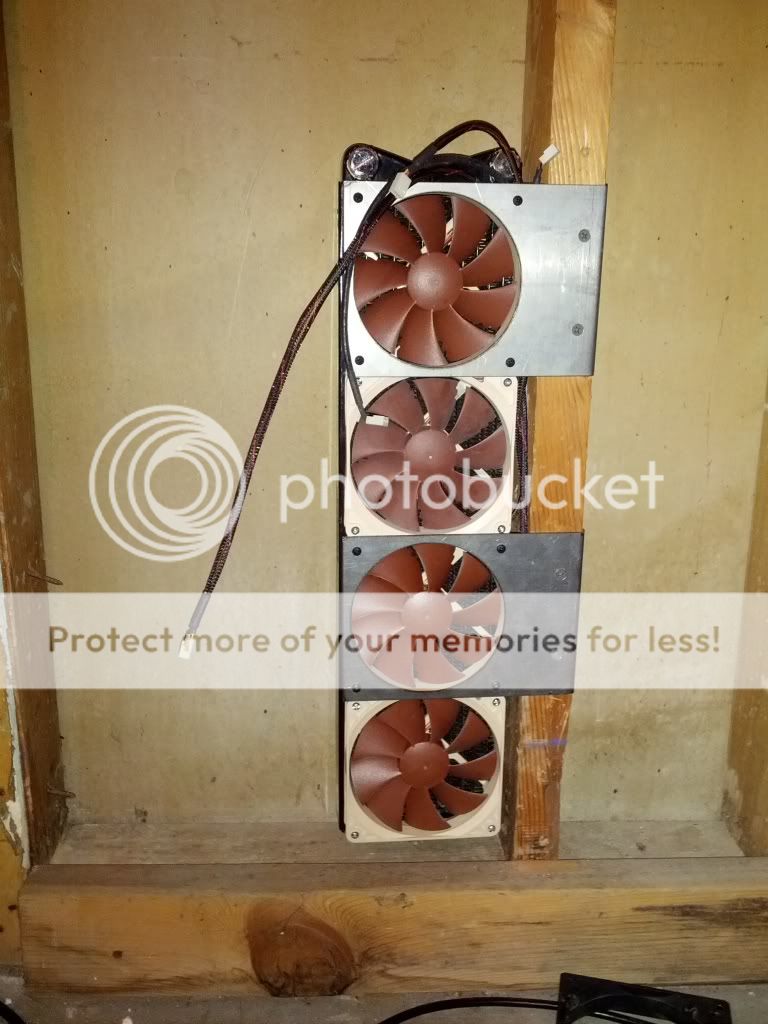
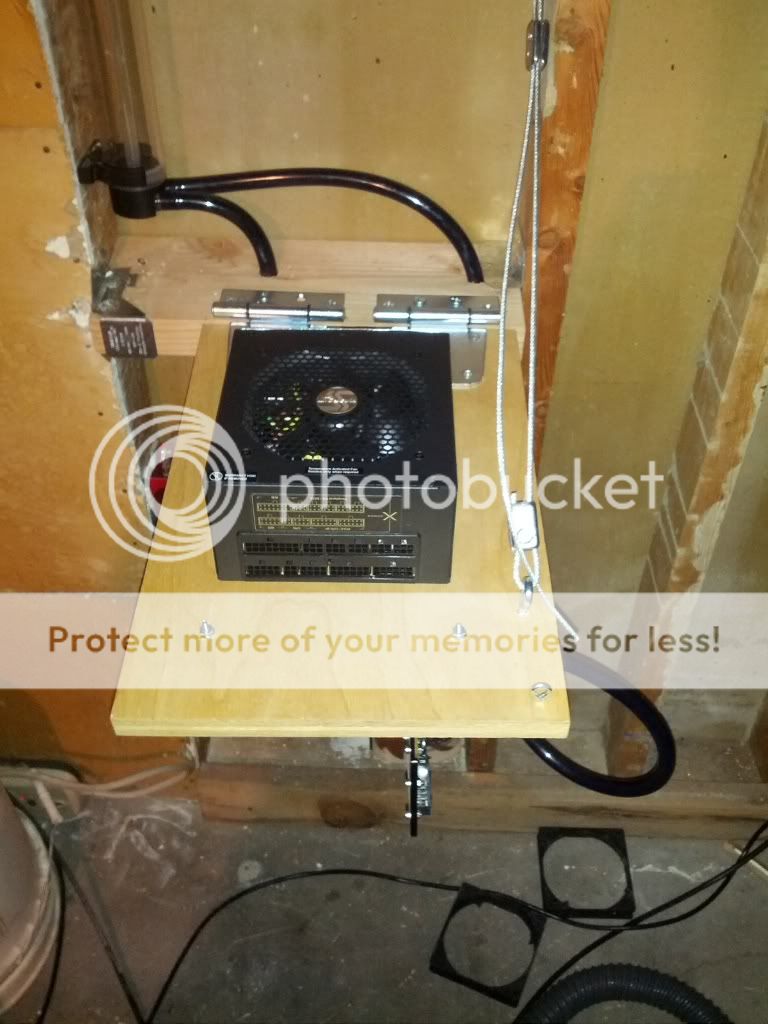
Seasonic 1000w Platinum

IMG_20121220_200840.jpg


IMG_20121220_201010.jpg


This will be the PSU for the Trapdoor PC with the 750w Seasonic for the wall PC I will be Sleeving both of these PSU's and it will be my first time doing so. Thanks again for reading!
 
Last edited:
hey guys, sorry for the break in updates. However my finger is pretty much healed up and over the last 2 days pretty much all of the parts for the wall build have showed up in the mail. I am only waiting on the screws to mount the radiator.

IMG_20130105_192614.jpg


I am having a hard time deciding which res to use for this build thoughts?

Also over the new year I managed to score a 1080P Viewsonic Projector for really cheap and with 0% financing for 18 months :)

IMG_20130105_192624.jpg


I also upgraded to a Motorized 100 inch screen which means I can run everything from my desk, double :) :)

As soon as the screws come in I will start fitting everything and moving forward however I am in need of some 45 and 90 degree adapters for my compression fittings and I am pretty much out of budget until next month so I will have to source some through trade or whatever. Anywho thanks for reading as always, my next update will be a video of me explaining the full wall PC setup.
 
Ok guys, time for a fairly large update. I was going to make a video of me explaingin how the wall pc was going to work and the purpose of it but I came home from work today feeling angry for no good reason so I decided to take it out on some modding. So here are the fruits of my labor for the afternoon.

First off I cut the Screws i had ordered from frozen CPU to leagnth so I could mount the rad.

IMG_20130118_175018.jpg


Next up I needed to remove a bit of pipe from the area I would be working in as it was no longer in use.

IMG_20130118_175040.jpg


IMG_20130118_175046.jpg


Then vacuum and mount the rad

IMG_20130118_175822.jpg


Next up is the pump

IMG_20130118_182658.jpg


Then the Res.

IMG_20130118_183647.jpg


After that i needed to get the 2x6 I would be using to mount the hinges to level and secure.

IMG_20130118_184412.jpg


After that it was time to make the plank I would be using to mount all of my hardware. There are 4 holes in the lian li trade that make good mounting points.

IMG_20130118_192728.jpg


IMG_20130118_192928.jpg


And just my luck the Seasonic PSU fits perfectly between the nuts :)

IMG_20130118_195520.jpg


IMG_20130118_195530.jpg


IMG_20130118_195540.jpg


next up was mounting the hinges and testing out the concept.

IMG_20130118_205006.jpg


Woo Hoo, all looks well. Time to start running some tubing. Unfortunately the danger den res. I am using will not allow me to us compression fittings, so I am going to have to use barbs on the res (eww :( )

IMG_20130118_210737.jpg


IMG_20130118_213127.jpg


IMG_20130118_213135.jpg


CPU heatsink installed

IMG_20130118_221936.jpg


and the video card next.

IMG_20130118_223949.jpg


And here is a mockup, the tubes are too long atm but I wanted them that way till I am finished so I have some play room. Now I just need to get a bracket for the PSU and a couple other things and this thing is ready to rock! As always thanks for reading.

IMG_20130118_224928.jpg
 
Love the unique concept.

Why not use a bitspower extension on the res so you can use the compression fitting?
 
Mainly because I dont have any at the moment, and this build has been out of spare parts for the most part.
 
Just read thru all 7 pages of this awesome thread and I have to post to subscribe for the rest of it. :) Awesome job man!
 
I usually have a very low opinion of the "super high power computer in a desk" concept (I'm also prejudiced against "hey i stuffed a bunch of lights and windows in my computer case lol" mods)...

This, however, is something different entirely. This doesn't just take the cake. This takes the whole damn bakery.

Subscribed.

Also, diesel, when you get a minute -- I sent you a PM; I may be able to help ya with that retro gaming build you mention somewhere in this thread ;)
 
Ok a slightly smaller update today. I am still waiting on some parts to arrive (A huge thanks to deadlift1 you are truly [H]ard!) He offered me some free extensions so I can use compression fittings on my reservoir. However I did swing back by Bryans shop to have a PSU Bracket mad up yesterday and I got the rest of the mounting hardware for the tray installed.

First off is the Latch to hold it in the upright position, nothing fancy but it works like a charm.

IMG_20130121_194603-1.jpg


Then we have a tensioning cable to reduce stress on the wood the hinges are mounted to and prevent sag. I mounted a adjustable hook on one end so I can adjust sould the cable stetch out or I need to alter the position.

IMG_20130121_194620-1.jpg


IMG_20130121_194625.jpg


Then off to the plasma cutter again.

IMG_20130121_1749411.jpg


And viola a PSU bracket.

IMG_20130121_194647.jpg


Mounted.

IMG_20130121_195512.jpg


And we now have a place to slap in the Seasonic 750w PSU

IMG_20130121_200742.jpg


IMG_20130121_200750.jpg


You can see here the PSU has plenty of room to breathe and there is only a slight gap between the wood which I will address when I do cable management.

IMG_20130121_200808.jpg


Hopefully another update and maybe a video by the weekend. As always thanks for reading!
 
Ok guys, I am getting close to being done, last night though I decided I needed to re work a bunch of stuff to get the Wall PC right, so I ended up working until 3am on it then spent the next 3 hours after that ordering more parts. So much for this being a ultra cheap build ( Facepalm) Anywho on with the update.


First off is wiring up the power and restart buttons, I am using a run of cat5 wire so that if I decide to get LED buttons later on I can use the extra 2 pairs for the LED's, Green is Power, Orange is Reset.

IMG_20130122_155312.jpg


IMG_20130122_160522.jpg


IMG_20130122_162536.jpg


Side note I found a great new way to use the little LED flashlight in my mini leatherman :)

IMG_20130122_162529.jpg


Now that gets passed through the wall and that brings us to the wall side wiring.

First off the Fans, I am using a Phobya fan splitter.

IMG_20130125_001227.jpg


Now Cables you see here from left to right, Pump Cables,Power Switch Cat5 Cable then the Fan Power cable.

IMG_20130125_005437.jpg


Here is what its shaping up like on top, please ignore the terrible wire sleeving as I realized the stuff I have it just terrible and I have just ordered Paracord this morning. I also will be sleeving all of the Seasonic PSU cables as well, which will be a first for me.

IMG_20130125_005529.jpg


IMG_20130125_005516.jpg


Now I also decided to replace of of the tubing with Tygon tubing as the Flexability will come in handy plus I get to use Mayhems Deep red Dye for a better color scheme :)

IMG_20130125_005429.jpg


IMG_20130125_005521.jpg


IMG_20130125_005544.jpg


Next up is test fitting my hard drive mounting solution, a Syba Dual Slot 2.5 caddy.

IMG_20130125_005448.jpg


IMG_20130125_005501.jpg


IMG_20130125_005457.jpg


Its quite light and should suite my needs quite nicely, I have a 1tb Spinner and a Intel 160gb SSD in the mail. I also have the wall pass through and a USB slim housing for a disk drive as well as a couple other things on their way. As always thanks for reading!
 
great work -- keep it up!

I dunno about anyone else I wanna see more Gary the Emu! he's awesome.
 
Ok guys, another big update.

I had a bunch of stuff show up today including my paracord

IMG_20130128_210251.jpg


I will be using the 3 colors on the left.

My 160gb Intel SSD and Samsung 1 Tb Spinner for storage.

IMG_20130128_210451.jpg


I also got more heat shrink, ordered a Crimp setup from MDPC. I also got deadlift1's Extensions for the DD res in.

IMG_20130126_164427.jpg


Thanks again man they did the trick perfectly!

So with those, I had everything I needed to get this setup wet. I was super stoked so I started wiring up and sleeving the power and reset switches.

IMG_20130128_203736.jpg


Then disaster, as I was measuring out a wire length and I bumped the latch holding the tray up and slamming it down. The heavy water blocked video card ripped the PCIE 16x Slot right from the motherboard :eek:

IMG_20130128_210113.jpg


IMG_20130128_210126.jpg


Now while this is frustrating, it is also entirely my fault, I had considered a better more secure latch but opted for the simpler setup. I am sad to see this mobo die before it even had a chance, I rather liked how basic the bios was and I also liked the built in buttons and display, however I picked this board cause it was on sale and I got it for a good price. I am undeterred however because I really do want to see the effects of cooling a CPU upside down and you can't try something that hasn't been done before without some risk ;) 
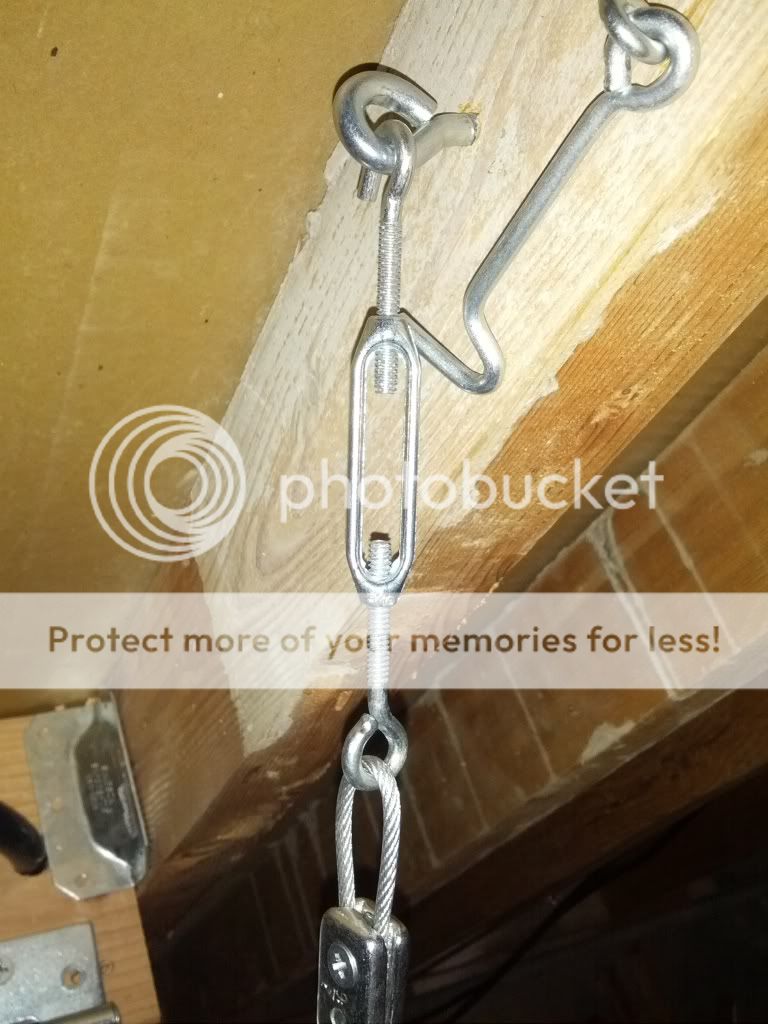
. First priority obviously is a MUCH better latch and then a new motherboard, any suggestions that will go with black, red and grey and are fairly affordable please let me know.


Well instead of posting a video of getting my system topped off with water and leak checked I leave you with pictures of a ruined motherboard but thats modding, some times it all goes terribly wrong and thats what makes it exciting :D . Now if you will excuse me I am gonna go to the gym and take my pent up rage at myself and take it out on some weights then have several pints spiked with whiskey.
 
Im guessing you cant re-attach the pci-e slot to the pins? Doesn't look like the plastic broke, just popped out.
 
That sucks. Are you sure its ruined? Why not slam that plastic back down and try the card in the other slot (you might have already done this). Never know it might still work??
 
Pay shipping to and from me and I'll put the slot back on properly and take pics while I'm doing it. No charge.
 
It may be a little late now, but if you've got the computer mounted between the wall studs, why not have it hinged out sideways (out to the left/right) rather than up and down? It would mean that your water blocks/reservoirs don't rotate in such a manner that could move air bubbles around, and it would be much less prone to slamming.

Failing that, if you're keen on the hing down idea, maybe look at incorporating a shock absorb-er to help prevent slamming up/down. Think of the shocks used for tail gates on cars. It might mean that even if the latch should fail (or if you somehow fail at lowering the shelf) it would be able to lower itself safely.
 
Sorry I haven't updated lately guys, I received a few pm's last month about the thread on an update and wanted to let you guys know whats going on. I have been busy with real life (Raising a new puppy for search and rescue and lots of search and rescue training and missions have eaten up all my spare time and money.) The project is not abandoned and as winter approaches I will have more time to resume work on it. I am currently looking for a Sandy bridge i5 processor and a 6950 or GTX 580 or better vid card for this project so if anyone wants to donate or sponsor feel free to PM me. Other wise I have to wait till I have more money and time. Thanks though for the interest and comments guys it really keeps me going through the long periods between updates!
 
Back
Top