jmroberts70
2[H]4U
- Joined
- Oct 15, 2002
- Messages
- 2,953
First of all, Id like to acknowledge all of the people that have inspired me to even think of doing this myself
Persimmon Gauges blog post one of the first articles I found online about DIY monitor stands
DrFish at the TechReport.com forum first got me thinking of doing this entirely out of 3/4″ pipe
loki_racer right [H]ere! also helped getting the juices flowing
seven9st surfer at Overclock.nets forum he may have been one of the first to post a project like this
There are quite a few other projects out there that Ive seen but these stand out to me as leading the way for my own project. Also, lets not forget that Im not exactly unfamiliar with mounting monitors with 3/4″ pipe My own post done a few years ago really got me comfortable with custom monitor mounts using galvanized pipe for this sort of work. BTW, I'm still driving around with that 15" touchscreen in my car and I can't imagine being without it!!
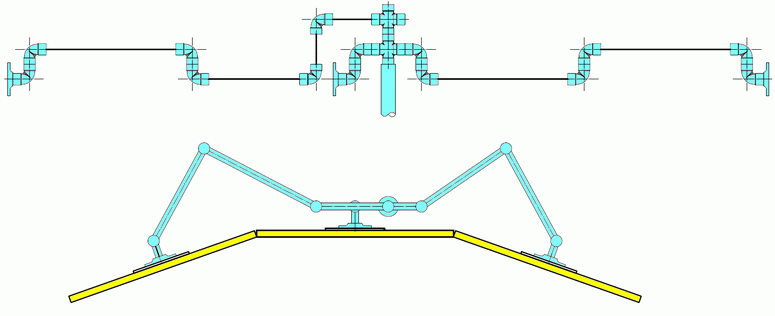
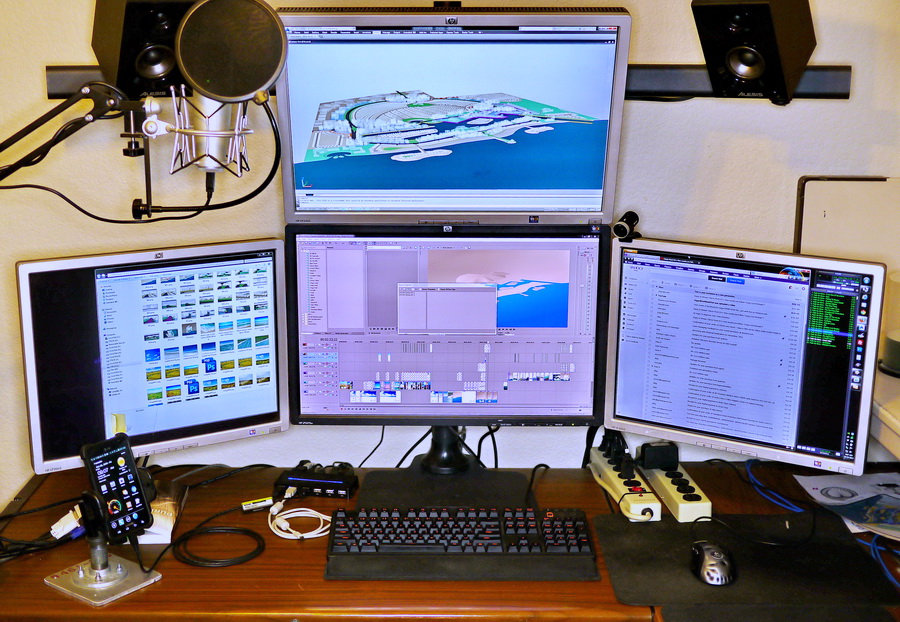
Next, lets understand my personal situation: I presently work in the CAD Drafting / Design field where monitor real estate is king. The more space you have to work with, the more productive you can become. I have been slowly purchasing used 20″ LCDs from eBay over the last year for this very project. I wanted to get the monitor stands off the desk so that I would have more space for papers, equipment, keyboard, etc. I also prefer non-widescreen displays as I get more screen space vertically. 1600×1200 is a must for a 20″ display. 1920×1200 for a 24″ display. I can get pretty good deals on these screens when you buy them without their original stands and Im not going to need them eventually so that works out fine for me! Id like whatever stand I build to have a certain amount of adjustability as I hope to eventually graduate to 24″ screens (or at least add one or two) and sometimes I like to move the display around a bit for better viewing from different angles. This rules out some of the systems listed above that have not only a fixed spacing but a fixed angle. Ideally Im looking for a DIY version of a monitor stand based on the design shown below

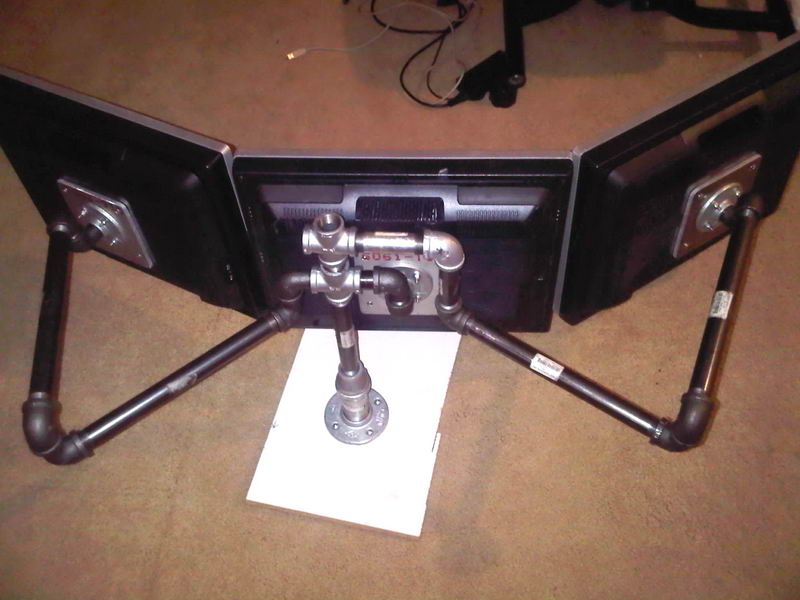
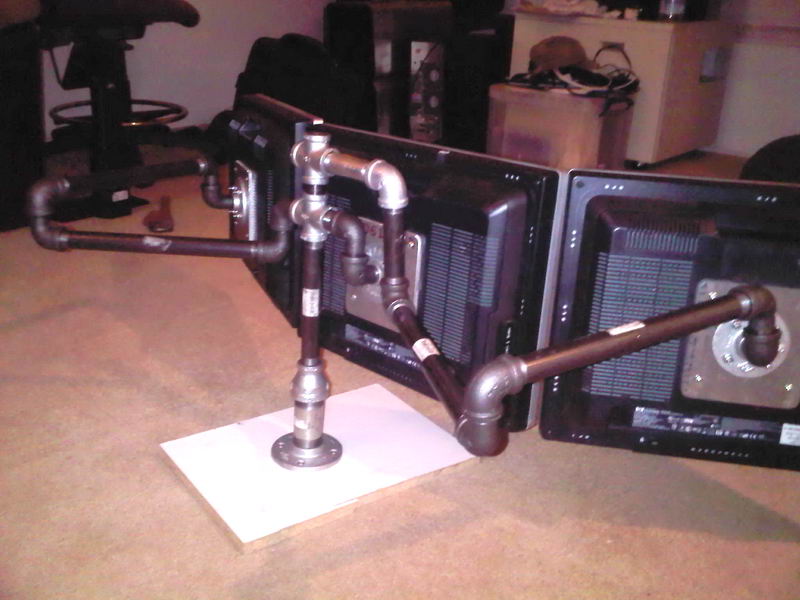
With pivoting arms behind the monitor, I will be able to adjust the angle between each display as well as add wider displays in the future without another trip to the hardware store for a few longer pipe sections! Im hoping to accomplish the pivot joints with a couple of elbows (an old plumbers trick to create adjustability).
So, in this first article, Im going to build the custom VESA mounts for my monitors. Since Im going to be connecting to a 3/4″ pipe flange, it doesnt do me any good to start with an existing VESA bracket as there isnt one that would work so I head on down to my local scrap metal shop (National Metals and Surplus) for a nice thick 1/4″ aluminum plate. I have to do it quickly because if I spend too much time at that place Ill buy everything there!! Anyways, I lucked out with one of the HP LP2065 monitors I purchased this past year as it came with the metal adapter to mount it to their stock stand. It turned out to be the PERFECT template for building my custom VESA brackets!
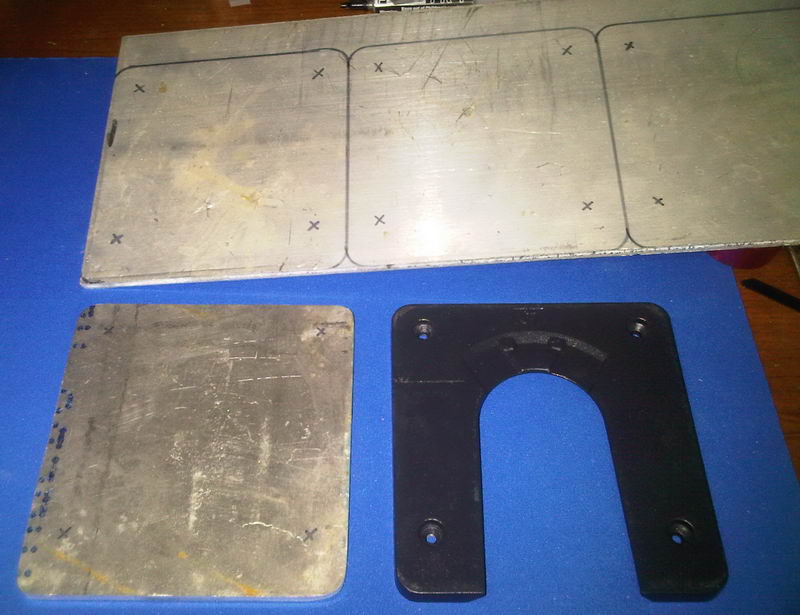
Here you can see Ive already cut and trimmed one of the four brackets Im planning on building this time. Ive already gone ahead and marked out the next three on the $6 aluminum plate I just grabbed from the scrap metal yard
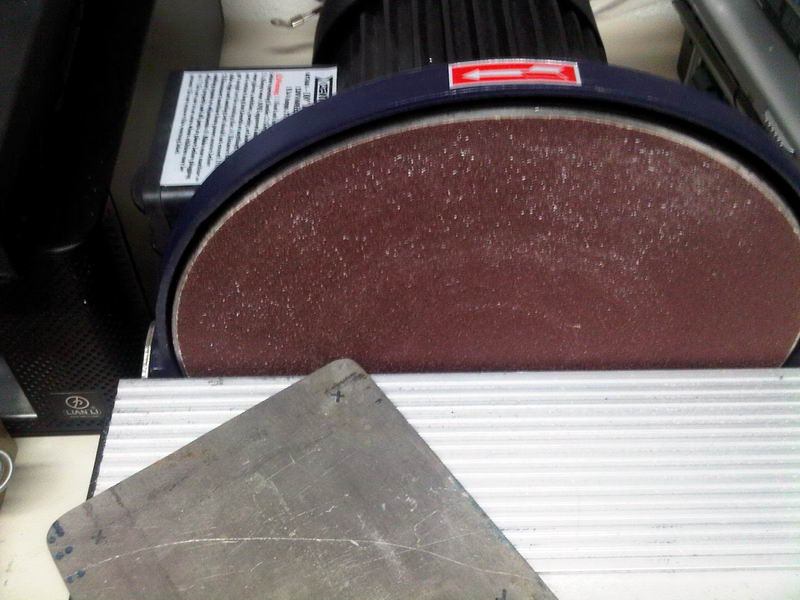
A little bit of time on the disk grinder smooths over the sharp edges and ensures my jagged cuts from the jigsaw are nice and straight. I then round off the corners just because!

With the 4 mounting holes located from the template, I can draw an X and locate the 3/4″ pipe flange and mark their holes for drilling.
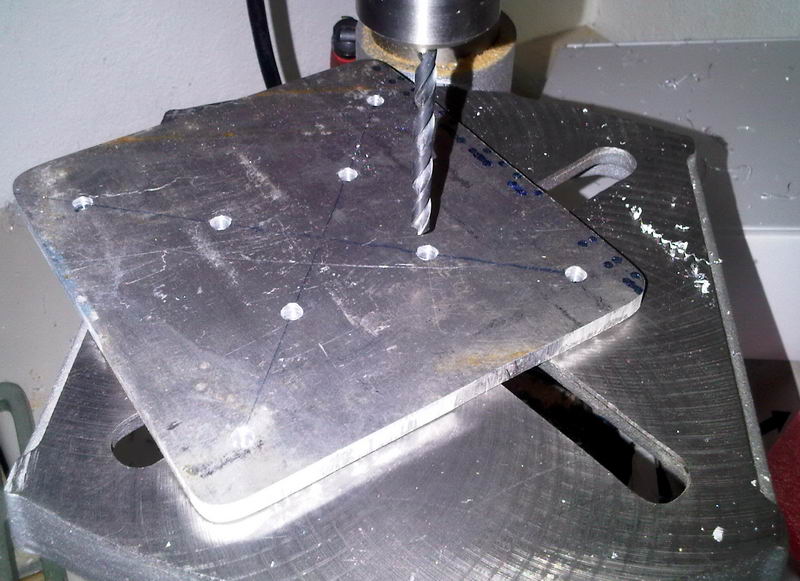
Now the drill press goes to work! Id say what size drill bit Im using but I just dont think it matters too much. Size your hole to the fasteners youre using yourself. I like to make the holes just a slight amount larger so that there is some play in the event that my holes arent exactly in the right place.
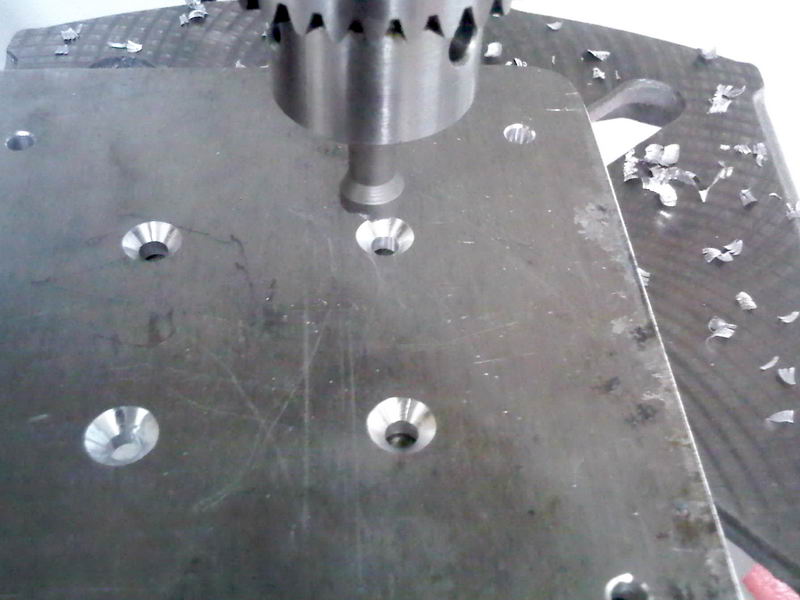
I countersink the mounting holes for the pipe flange as the fasteners will be behind the plate and directly against the monitor backing. This is why its important to use a nice think 1/4″ plate for this job. Youll have plenty of material to work with when countersinking your holes. Sure, I could have gotten away with a thinner material but better to play it safe!
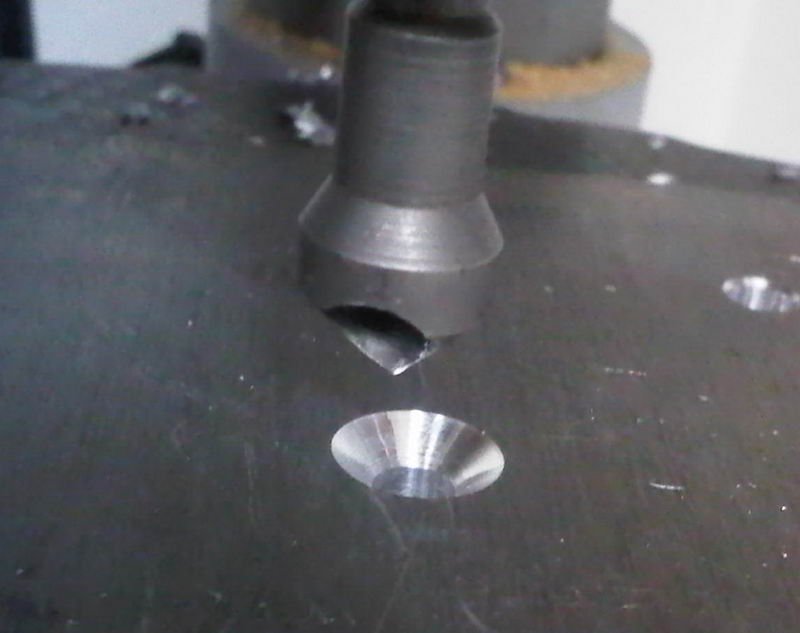
Heres the countersink drill bit I use. Its designed for aluminum so it makes the work MUCH easier to do. Many countersinking bits Ive used that were designed to work with steel will clog with aluminum fragments. In a pinch, you can do this with a very large drill bit (I have) but you have to be very careful! Ive had this bit for over 15 years now and I cant possibly remember where I got it.

Now comes the mounting hardware. In my case, Im using a nice phillips-head countersunk machine screw with a washer and locknut at the other end. I dont think you need to use locknuts in most instances but I just happened to have this hardware from my previous automotive installation layout around so I figured Id use it! Here you can see the head of the machine screw mounting flush against the aluminum plate.
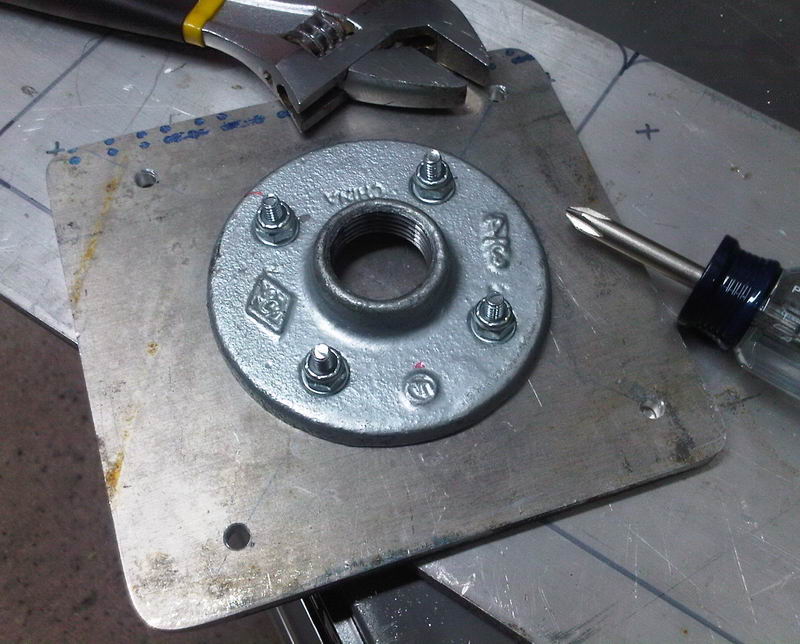
Now with the pipe flange securely fastened, you can see why I needed to use washers. The pipe flange holes are also countersunk! I thought of cleaning up the aluminum plate but then realized that it will NEVER be seen so why bother!

Now mounted to my first 20″ monitor with button-head phillips screws. I managed to find a fairly wide head so I didnt feel there was too much need for washers here. Note that the VESA standard for screw hardware on many monitors use a fine-threaded metric size. Make sure you take a sample with you when going to the hardware store for longer screws!
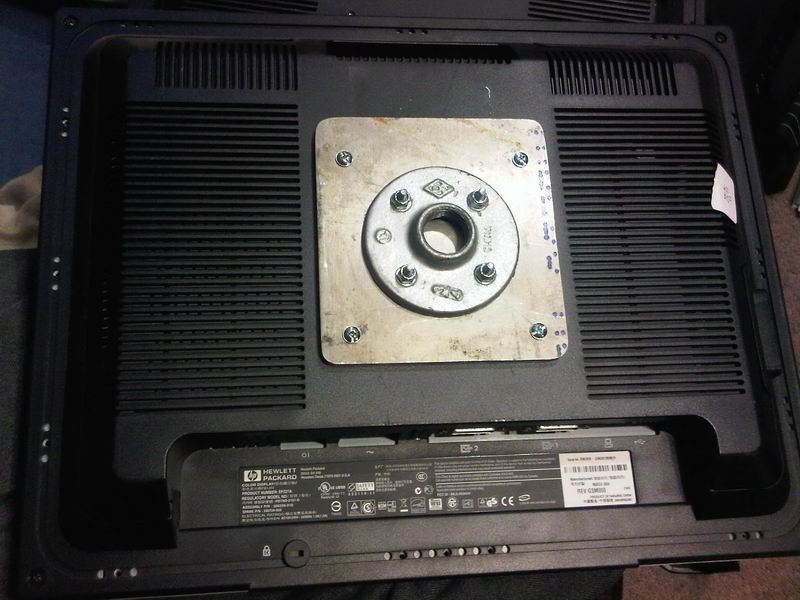
One display mounted and ready to go! I cant wait to get the rest of them done and mounted!
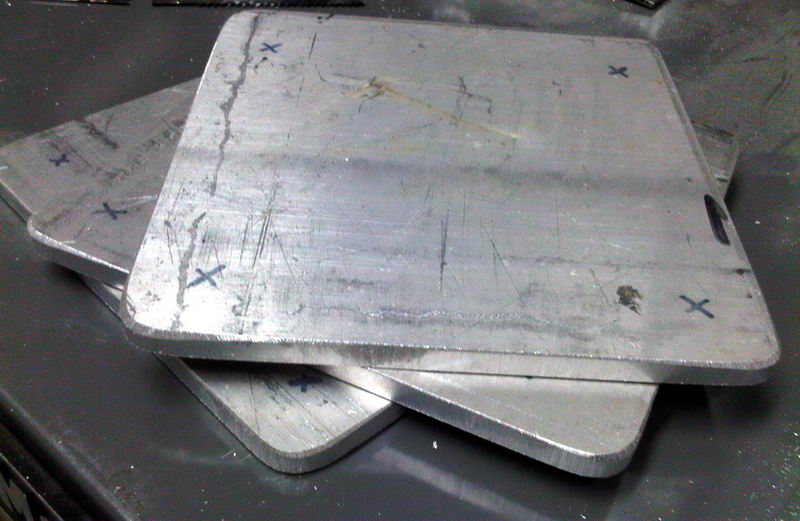
Rinse, lather, repeat More to come!!
Persimmon Gauges blog post one of the first articles I found online about DIY monitor stands
DrFish at the TechReport.com forum first got me thinking of doing this entirely out of 3/4″ pipe
loki_racer right [H]ere! also helped getting the juices flowing
seven9st surfer at Overclock.nets forum he may have been one of the first to post a project like this
There are quite a few other projects out there that Ive seen but these stand out to me as leading the way for my own project. Also, lets not forget that Im not exactly unfamiliar with mounting monitors with 3/4″ pipe My own post done a few years ago really got me comfortable with custom monitor mounts using galvanized pipe for this sort of work. BTW, I'm still driving around with that 15" touchscreen in my car and I can't imagine being without it!!
Next, lets understand my personal situation: I presently work in the CAD Drafting / Design field where monitor real estate is king. The more space you have to work with, the more productive you can become. I have been slowly purchasing used 20″ LCDs from eBay over the last year for this very project. I wanted to get the monitor stands off the desk so that I would have more space for papers, equipment, keyboard, etc. I also prefer non-widescreen displays as I get more screen space vertically. 1600×1200 is a must for a 20″ display. 1920×1200 for a 24″ display. I can get pretty good deals on these screens when you buy them without their original stands and Im not going to need them eventually so that works out fine for me! Id like whatever stand I build to have a certain amount of adjustability as I hope to eventually graduate to 24″ screens (or at least add one or two) and sometimes I like to move the display around a bit for better viewing from different angles. This rules out some of the systems listed above that have not only a fixed spacing but a fixed angle. Ideally Im looking for a DIY version of a monitor stand based on the design shown below

With pivoting arms behind the monitor, I will be able to adjust the angle between each display as well as add wider displays in the future without another trip to the hardware store for a few longer pipe sections! Im hoping to accomplish the pivot joints with a couple of elbows (an old plumbers trick to create adjustability).
So, in this first article, Im going to build the custom VESA mounts for my monitors. Since Im going to be connecting to a 3/4″ pipe flange, it doesnt do me any good to start with an existing VESA bracket as there isnt one that would work so I head on down to my local scrap metal shop (National Metals and Surplus) for a nice thick 1/4″ aluminum plate. I have to do it quickly because if I spend too much time at that place Ill buy everything there!! Anyways, I lucked out with one of the HP LP2065 monitors I purchased this past year as it came with the metal adapter to mount it to their stock stand. It turned out to be the PERFECT template for building my custom VESA brackets!

Here you can see Ive already cut and trimmed one of the four brackets Im planning on building this time. Ive already gone ahead and marked out the next three on the $6 aluminum plate I just grabbed from the scrap metal yard

A little bit of time on the disk grinder smooths over the sharp edges and ensures my jagged cuts from the jigsaw are nice and straight. I then round off the corners just because!

With the 4 mounting holes located from the template, I can draw an X and locate the 3/4″ pipe flange and mark their holes for drilling.

Now the drill press goes to work! Id say what size drill bit Im using but I just dont think it matters too much. Size your hole to the fasteners youre using yourself. I like to make the holes just a slight amount larger so that there is some play in the event that my holes arent exactly in the right place.

I countersink the mounting holes for the pipe flange as the fasteners will be behind the plate and directly against the monitor backing. This is why its important to use a nice think 1/4″ plate for this job. Youll have plenty of material to work with when countersinking your holes. Sure, I could have gotten away with a thinner material but better to play it safe!

Heres the countersink drill bit I use. Its designed for aluminum so it makes the work MUCH easier to do. Many countersinking bits Ive used that were designed to work with steel will clog with aluminum fragments. In a pinch, you can do this with a very large drill bit (I have) but you have to be very careful! Ive had this bit for over 15 years now and I cant possibly remember where I got it.

Now comes the mounting hardware. In my case, Im using a nice phillips-head countersunk machine screw with a washer and locknut at the other end. I dont think you need to use locknuts in most instances but I just happened to have this hardware from my previous automotive installation layout around so I figured Id use it! Here you can see the head of the machine screw mounting flush against the aluminum plate.

Now with the pipe flange securely fastened, you can see why I needed to use washers. The pipe flange holes are also countersunk! I thought of cleaning up the aluminum plate but then realized that it will NEVER be seen so why bother!

Now mounted to my first 20″ monitor with button-head phillips screws. I managed to find a fairly wide head so I didnt feel there was too much need for washers here. Note that the VESA standard for screw hardware on many monitors use a fine-threaded metric size. Make sure you take a sample with you when going to the hardware store for longer screws!

One display mounted and ready to go! I cant wait to get the rest of them done and mounted!

Rinse, lather, repeat More to come!!
![[H]ard|Forum](/styles/hardforum/xenforo/logo_dark.png)
