PC-V1000B

ATLPIMP

[H]ard|Gawd
Joined
Jun 27, 2002
Messages
1,125
Just finished putting my new case together after a couple days of modding. This is my second v1000, shoulda never sold my first but sdgserv wanted it more than me at the time.:D The 9800GTX sli is really working the 650w CoolerMaster I have now, so I'll pick up a 1000HX Friday; excuse the mess at the bottom. I didn't want to waist more zip ties than I had to.

Thinking about getting some green cathodes and the OG green/orange power/hdd leds up front. Anyone know what size they are?

Tell me what you think.

Project1.jpg


inside.jpg


reflection3.jpg


reflection.jpg


reflection1.jpg
 
is that flat black or powdercoat?
It looks good!
I would swap the heatsink fan for black and maybe tuck the wires that are peaking out of the lower area 5.25 bays

The polished floor plate looks nice, and is tempting...
 
Flat black paint.

I originally painted gloss black, but the third coat of clear caused some very bad lifting, so everything was glass blasted and I just went with something simple. The heatsink I just bought!:D Working good so far. The wires at the bottom have to be run through that cut out since I didn't make any cuts to the case, the side panel won't fit clean any other way.

Going to send the side panel out for some water jet cutting sometime soon. Then I'll get started on the window (going smoked), and trying to get it to sit flush (the side panels are ~3mm thick).

btw, you can see some blurry-ness in the floor plate due to the media blasting and me not being able to get that deepinto the allu with out some really weird/wacko defects coming out (kinda like little craters getting bigger and bigger the more I sanded).
 
Please let me know about the side panel. I have a v1010 that has completely smooth panels and I'm thinking of ways to mount cleanly right now too.
 
I'm thinking along the lines of a large(r) piece and smaller, cut to window, piece sandwiched on top somehow....

...I also don't like the look of bolts/rivets in the window...
 
How about having a thicker piece rounted around the edge to have a ledge, a little more than needed for the side panel (which you say is 3mm) and use a good double sided adhesive.

I'm thinking of doing this to mine, though I haven't ran it by my plastics or tape/adhesive guy. (for work I deal with a lot of acrylics, tapes, sign substrates, etc) If this sounds interesting, let me know and I'll inform you of my findings.
 
PM me (if the thread's dead by then :D ) and I'd be interested to see it regardless.

What's bothering me is how not to see the adhesive through the window, and have no rivets/bolts.

The other option I'm thinking is to use bumper tape (3m stuff heh) for the window and polish the edges of the case, accenting the cut.... however this is not what I really wanted so I'll probably be dissapointed with it in the long run.

...then I'll sell the case and all the hardware break my phone and do something stupid(er) probably... you know how it goes.:rolleyes:
 
Bumper tape?
picture or link would be nice.
I really do not think that would look good though. The sleeker the transition, the better IMO, especially on nicer cases.
 
Bumper tape?
picture or link would be nice.
I really do not think that would look good though. The sleeker the transition, the better IMO, especially on nicer cases.

The tape would be on the overlaying edges of acrylic, so not visible.

I'm referring the the run-of-the-mill 3m double sided tape.
 
oh.......no.

I could send a small roll of some thinner (better) double sided tape to you before you use that junk.
 
The paint job on that 5.25" cage looks really good man.

Some tips...

On the left side panel, right where the 5.25" cage mount meets the subfloor of the case, you can cut that part of the metal away to allow you to route ALL your cables behind the 5.25" cage... That way you can route the 24p ATX cable through that little cut out in the angeled part... Yknow, the

Code:
_
  \_

part :)

I'd also order/make some 6 pin cables custom... And wire them behind the motherboard tray. You can even orient them so they go along the side of the card, towards the PCI slot openings, down that side of the case, jammed in beside the rear case fan, and down towards the PSU through the cutout there.
 
Arcygenical, thats a good idea... (I'm following because the interior is slightly similar to my case.

The HX would have been nice, but I bought a TX version on a whim, so I'm not too sure where to go from there. I *may* put it in the old box but I really hate to waste that much on a psu...
 
Thanks for the tips! ..you may recognize the case pretty well. After my snafu with the gloss black (3rd coat of clear lifting), I kept looking at your thread talking my self in to the flat. I'm happy with it. But, to be honest, it wasn't until after I decided to polish the floor that I actually saw you tried the same... but I think mine came out a little better.:p

/ass :D

I think the case will stay as it is for now, except the window cut... or until I get reallllllllly bored.

The paint job on that 5.25" cage looks really good man.

Some tips...

On the left side panel, right where the 5.25" cage mount meets the subfloor of the case, you can cut that part of the metal away to allow you to route ALL your cables behind the 5.25" cage... That way you can route the 24p ATX cable through that little cut out in the angeled part... Yknow, the

Code:
_
  \_

part :)

I'd also order/make some 6 pin cables custom... And wire them behind the motherboard tray. You can even orient them so they go along the side of the card, towards the PCI slot openings, down that side of the case, jammed in beside the rear case fan, and down towards the PSU through the cutout there.
 
Made 50 hours at work last week, so I got a really...really nice check today!:D

BTW, the HX is in...$300 later...:(

bigpower.jpg


...and here's the blingin' 8/32 bolts I got from work for reassembly

bolts.jpg


and here's the back side...

otherside.jpg


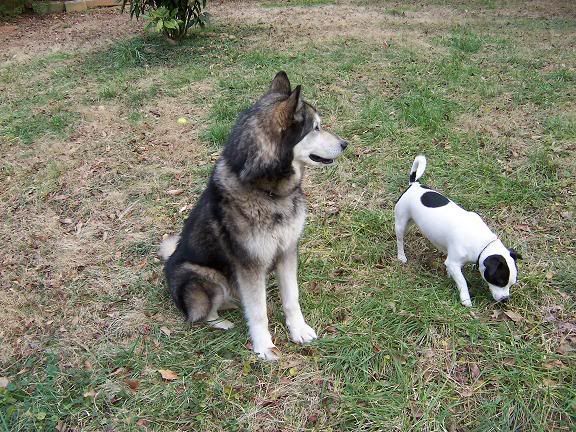
just saw the cherry coke can.... by boxer must have knocked it off her cage today. she's learning her power now, and she really hates the cage.... but not as much as I hate cleaning up all the toys/anything in the trash/what she can destroy that she makes a mess of.

She's really sweet (only 8 mos)...

didi.jpg


but when they get together (usually around 2~3am when they say it's go time), all bets are off.

puppies.jpg
 
Damn good looking Boxer, I didn't notice her before. Amazing dogs, just take care of them. Mine was put down last summer.... :(
 
Thanks! Both are still puppies, she (boxer) is ~8 mos and 40lbs, he (griffon) is ~9 mos and 60lbs.

You don't get to see my 'hefty' 3 y/o 25lb jack russel mix... but he'll bite ya anyways!:eek:

Smallest dog of the bunch, but the first to destroy an ankle (or finger(s) - don't ask)

The boxer I traded for working on a Harley, the other two are strays that stayed/pound puppies.

I had to put my Malamute timberwolf (read: 110lb big sissy) hybrid down in January - she was poisoned. After six years of company, that proved to be a pretty bad week for me.

dogs1.jpg


and the jack russel, patch

dogs2.jpg
 
Sold some of the hardware in this case, and will order a new motherboard tomorrow. While everything was out, I made a small, but drastic change. I think, in the near future, I'm going to sleeve the front port cables. Before it wasn't an issue because of the SLI, but I sold one of the cards and traded the other one for a GTX 260 216 that should be back from EVGA next week... about the same time the board gets here.

I'm really struggling with the idea of water cooling this now... but I'm not sure the parts that would function and look the best would do much better than a TRUE. Of course it will look cooler, but there's my dillema... but there's something else about these big coolers I'm not liking in my case. All the polishing I did on my divider is covered by the huges sink. At least on the 780i, the cooler protruded too far off the top (or bottom) of the board to fit in this case like that. I can only hope that the Rampage Formula may locate the cpu a little further south (or north). Otherwise, I'll probably end up buying another heat sink just because...

Anyways, here's what I did.

cut the divider, this should make a nice impact on cable management. Should have done this before.

S5001716.jpg


Mounted a switch for lights... lighting will be changed from ccfl to LED strips.

S5001719.jpg


Another pass on the divider, took it all the way to 2500 grit this time.

S5001722.jpg
 
Little update... did some sleeving, gotta get more.

I've used heatshrink on the front ports, to make the less visible.

wires2.jpg


wires.jpg


Anybody know a secret store that this stuff can be bought locally, maybe for something other than computers?
 
Heres how i fitted the radiator into my v1000b.

IMG_0021.jpg


Heres a crappy pic of how it is now with the xspc razor block on my 4850.

loop.jpg


That is very nice ATLPIMP :D that psu is massive.
 
PSU is very big next to an 'average' unit... but I was having issues with the 650W Coolermaster and 9800GTX SLI, so I splurged on the much larger, modular 1000HX. It's very nice IMO.

To be honest, and I don't want to be insulting, but I really don't care for the radiator where you've mounted it. In all aspects, the v1000 just does not lend it's self to water cooling. There's no where to put a large (2X120+) radiator without losing some serious aspects like hard drives, 5.25 bays, or sli/xfire. The one that I have seen is the Koolance shroud. That fits the above criteria, but I can't get past the looks and what it does to the v1000
 
With the side on,my case looks pretty much stock.I did it like this coz i did not want it on the top,i want to add a second 4850 at some point.I have fitted a window and a matching cut out on the side panel for the rad.I also have the option of a second 240mm rad on the other side.I still have room for my hdd's which are cooled by the bottom fan,the pump is cooled by the top radiator fan.Also my pc is very quiet now as it only has 3 fans in it.

Thanks for your thoughts on it though :D
 
Still not finished, but a working pc now. I'll do the front cables tomorrow, or some time in the near future. Need to do something about lighting as well. Now, all four of my Sunbeam ccfl's are dead.

bigcables.jpg


now-3.jpg


frontconn.jpg


reflection4.jpg


backswitch.jpg
 
Why waste your time polishing the bottom and painting the rest of the interior black.
 
'Mitron' feet. I think the SilverStone feet are to large a radius and distracting. These are nice (and cheap) and compliment any other high-end audio equipment you may use. They came reccomended by Arcygenical, who also has a nice work log on a black/black V1000... to be honest I took some ques from him. Very hasy to install via the original boss' for the hideous casters, and some longe(er) case screws I already had. So no modification was made and if need be I can reinstall the casters.

http://www.performance-pcs.com/catalog/index.php?main_page=product_info&cPath=133&products_id=21103

Don't mind the dust, I just cleaned yesterday... but three dogs make it hard to keep everything dust-free.

dustyfeet.jpg


Here you can see the end of the case bolt threaded through an original boss (towards the rear)... and also see the scratches on my psu. After that, I started installing the PSU from the inside. Dang thing's HUGE!:D

dustyfeetinstalled.jpg


Did that help?
 
Yes, thanks. I have the v1000z and want to get rid of those casters also. I e-mailed Performance-PCs if they could get a hold of the original Lian-Li feet that come with the PC-X500 or even a set from other models. They said they would check into it. I hope they can get them. If not I'll get the ones from Mitron.

Are those the shiny silver or brush aluminum? They look like the shiny silver from the pics but your link goes to the brush aluminum.
 
Fusion, those are the 'brushed' case feet.

The topic came up while at work last week, and with a friend now doing some powder coating, I'm going to have him do my case for me. He'll do it free as long as I buy the powder (~$10-$20). This got me thinking wether I want to make this interesting and do a color other than black. After I see how it turns out on the interior, I may have him due the outside too. Does anyoe have any suggestions or ideas for neat colors that may go well with my current setup?

BTW, I'll be getting the materials from www.powderbuythepound.com . Thanks
 
i route my cables exactly like yours.i have been using 92mm towers like the tr ultima 90 and now the xig sd964 in order to be able to orient them vertically. but i see you got the noctua mounted vertically, finally. is your hdd cage moved back towards the psu about an inch or 2 from the stock position? i dont seem to have the amount of room that you have between the front fan and the cage. also, do you have the plus 2 w? if so, how do you have your fans set up? i have the front and back fans intake, and the side fan exhausting. but i rarely seem to have the side panel on (6 mobo, 14 cpu's and 8 video cards since march.) i have the fan on my hs on the same side as yours, sucking. thinking about cutting a blow hole or 2 in the top panel. could you tell me/link me to the process you used for polishing the bottom panel? after you polished it, does it still get the really bad oxidizing that the stock floor panel gets? if so, how do you keep it shining?


btw i got the black anodized wheels from p pc and they look much better. and the perforated, filtered, bay covers.
 
ATLPIMP-> very nice. I love it. SOOOO clean!! If it were mine, which it isnt.. sadly ;) is maybe.. color/dye the 20+4pin cables black so that they blend in more, and so the same thing to the 2x 6pin for the graphics card... Those are the only 2 things that i would change
 
You can only do so much to help hide wires, and i think that it looks fine how it is:cool:

My connectors are black... unless he's talking about the board connectors, and that's surely out of the question.:confused:

vanilla_guerilla, The hard drive cage may be moved. I didn't really take note of the original position (for refference), so I can't say one way or the other.
The is not the Plus case. However, this is my second V1000 and the first case was a Plus. While I had the plus I did find that the best temps all around were from using the front and rear fans as intakes, while the top, side fan was an exhaust. With the amount of holes in this case, it is my opinion - from my findings that the case does best with positive airflow, and no the case does not have an exhaust fan.
I will be mounting a thin radiator and 20 mm fans at the top in the near future, so I think it will benefit the small amount of air that does get trapped above the video card... I think it's a good idea.
How did I polish the bottom panel? I first started with 400 grit sand pape to get rid of the rough grain, the went to 600 -> 800 -> 1200. After the sanding, I used a high RPM pneumatic polishing tool with two different types of rouge to polish. The rouge actually seals the alluminum (to an extent). So, being the case is not exposed to the elements, it does not/will not need any future polishing. ...the sad part is it will be covered very soon, probably by this color:

http://www.powderbuythepound.com/catalog/product_info.php?products_id=162

Still thinking about this one. A friend owes me a few favors, so I'll be getting it coated. Thinking about copper inside, and gloss black case...
 
i really wanna paint the interior of my v1200 black but i just dont feel like tearing out all the water cooling. Maybe when i get new motherboard and cpu.
 
Back
Top