Project CM 690 Swap

DJS2

Limp Gawd
Joined
Aug 25, 2005
Messages
344
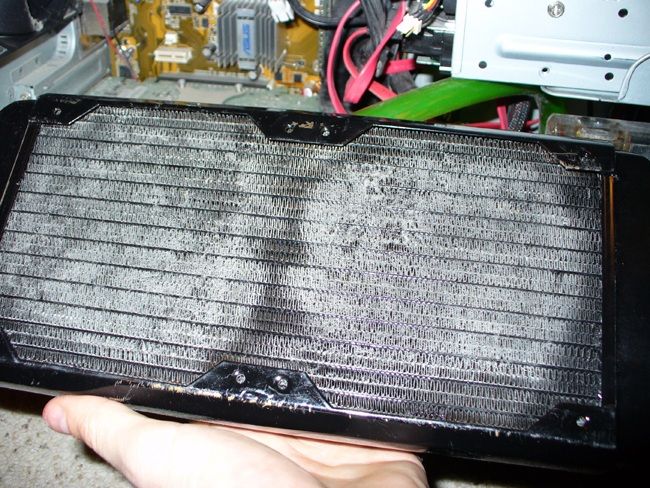
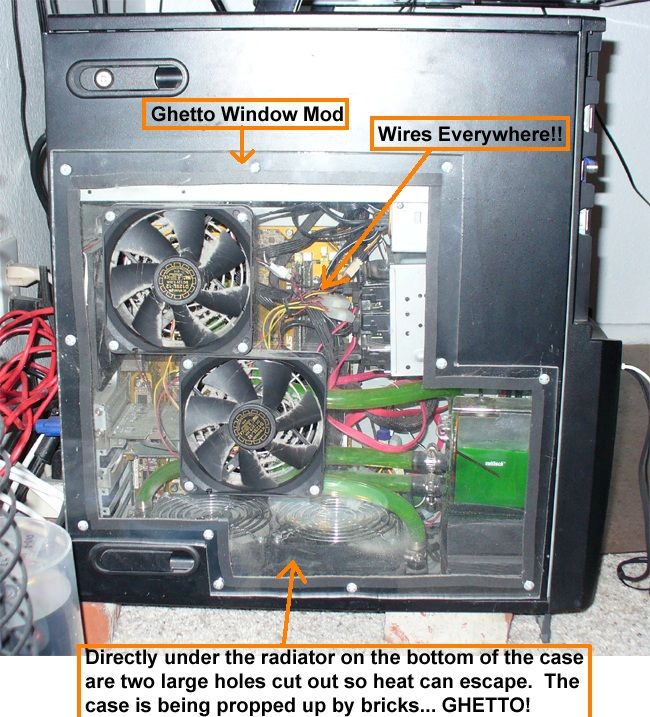
It's that time again! I haven't cleaned my watercooling loop in a long time so I figure now is as good of a time as any. If I'm going to be taking apart my watercooling loop I might as well make it interesting, right? Since I have an excuse to tinker with hardware and mods I'm going to take full advantage of it. I have always told myself I'm going to build a really clean/classy case with good cooling (this means no wires and crap everywhere!).

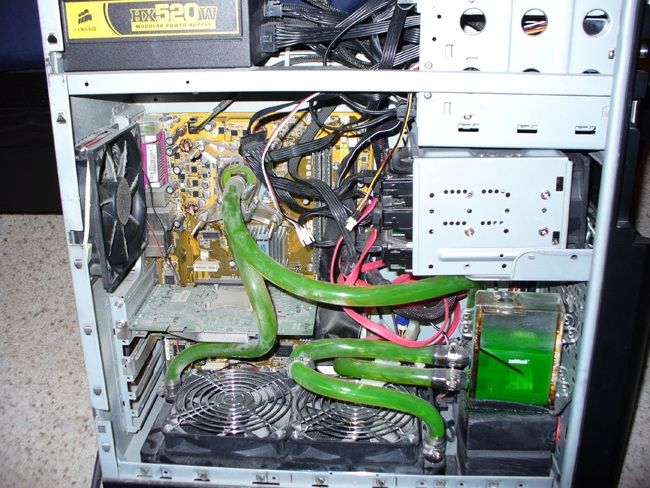
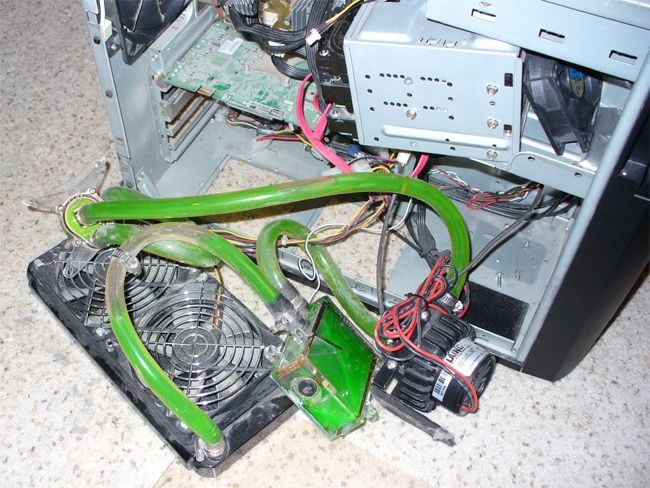
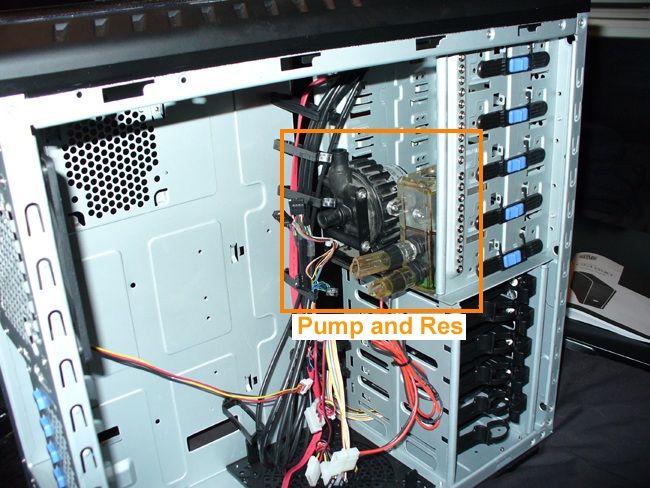
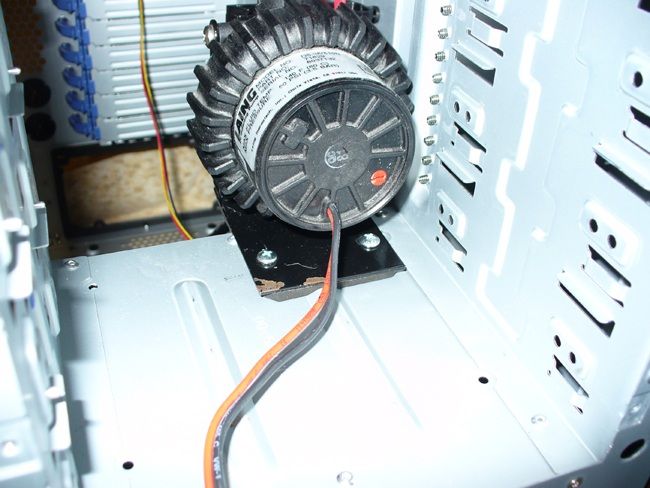
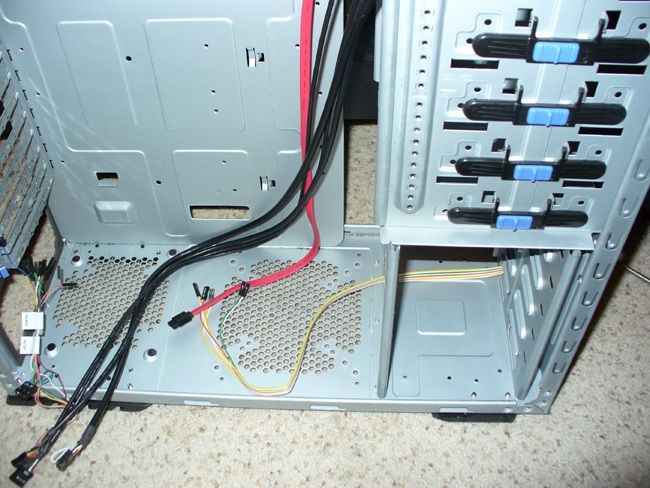
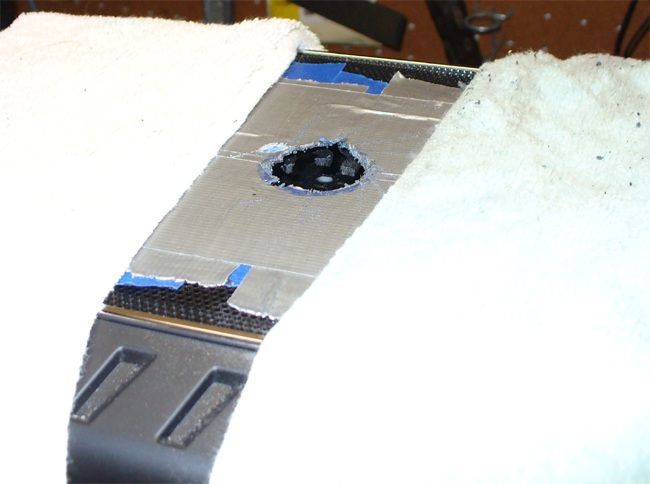
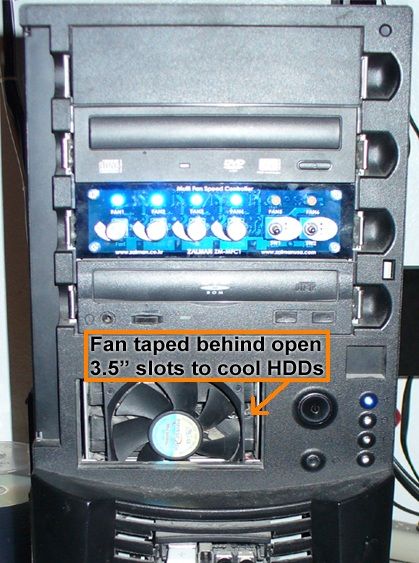
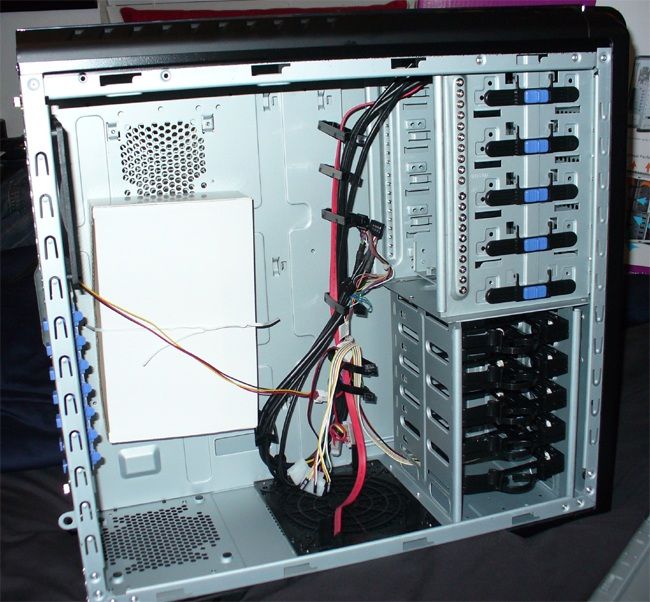
My current case isn't exactly "clean," let me show you what I mean...

currentcase1.jpg


currentcase2.jpg


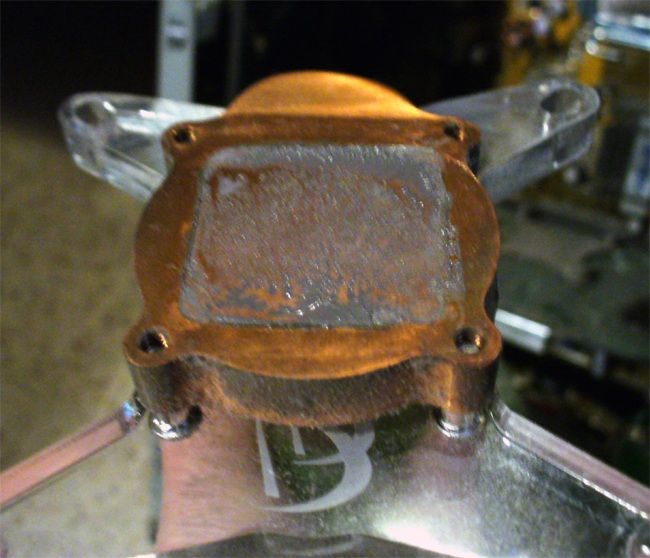
So why the worklog? I will be swapping out all of the current hardware into a new case, slightly modifying the case, possibly lapping my cpu/waterblock, and setting up the watercooling. Sound a bit dull? Perhaps this isn't going to be the most exciting worklog but I will post as many pictures as I can in an attempt to make it interesting :). I plan on modding as much as I can, and making it as clean as possible (so if you have any suggestions let me hear them!).

My plans as far as the watercooling goes:

planned_cm_case.jpg


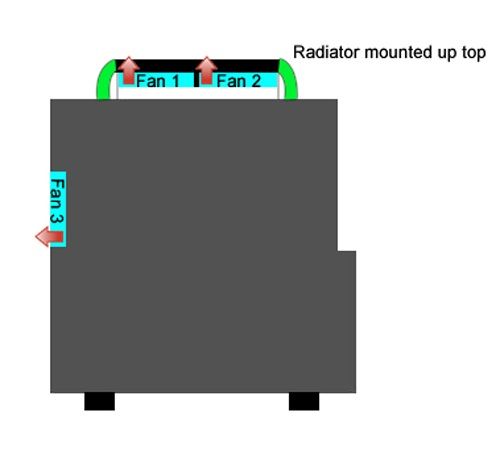
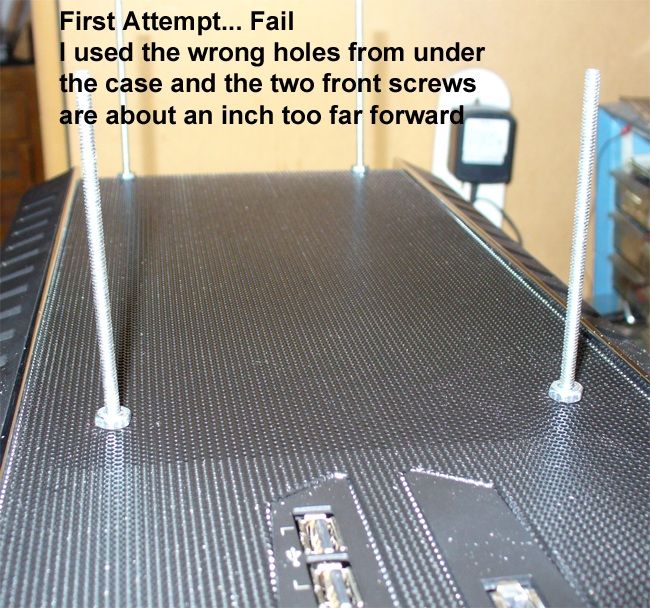
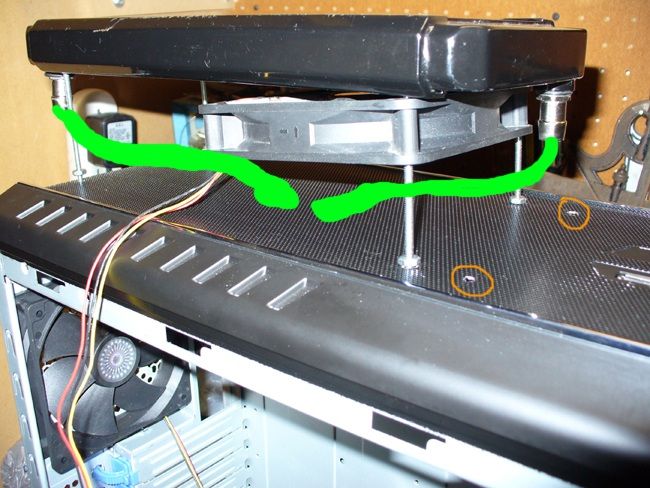
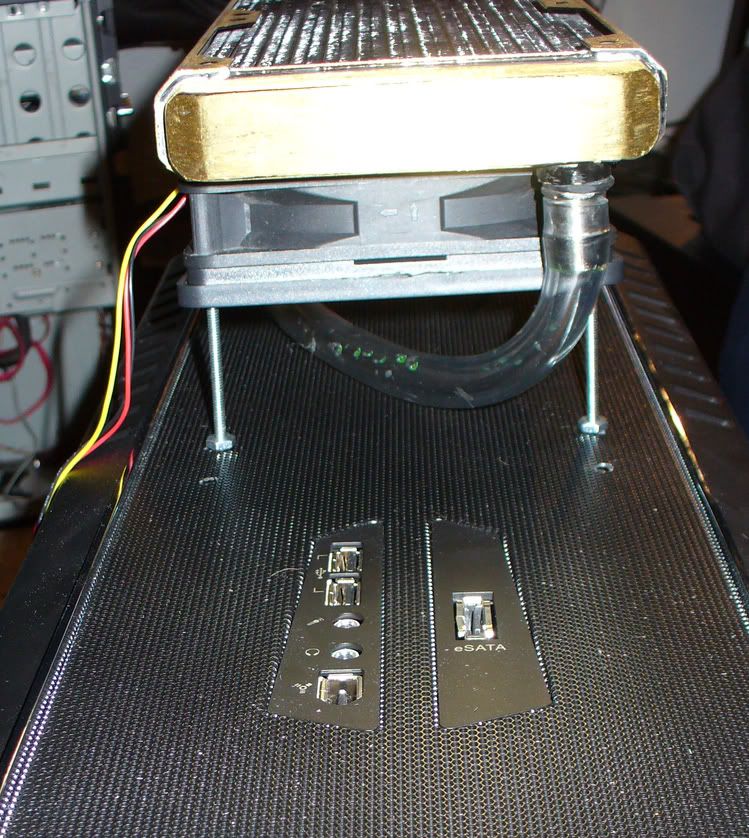
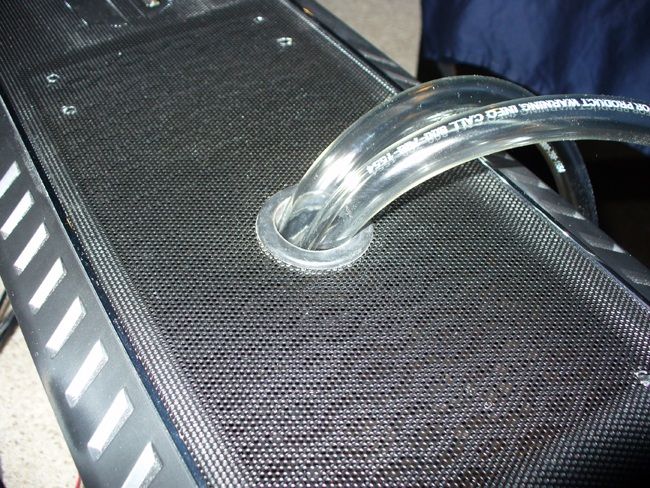
This means I will have to drill holes on the top of the case for the screws mounting the radiator AND the tubing.

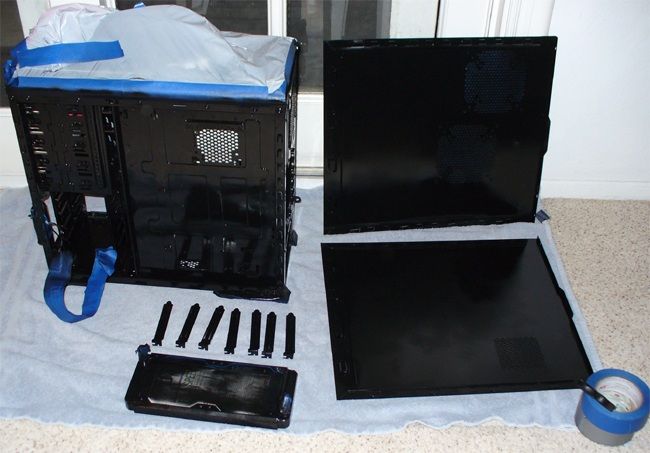
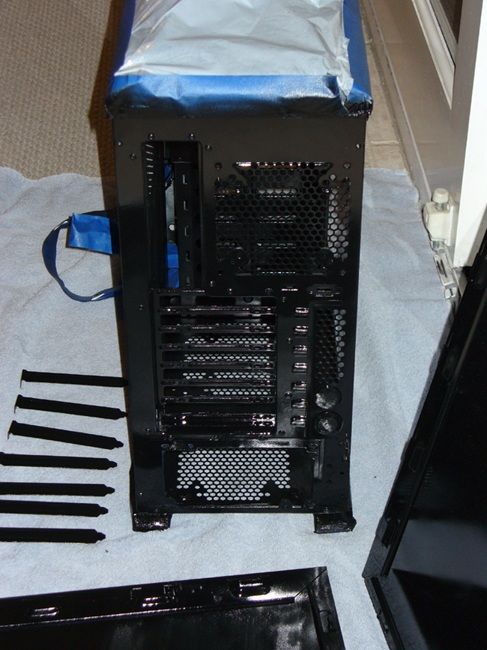
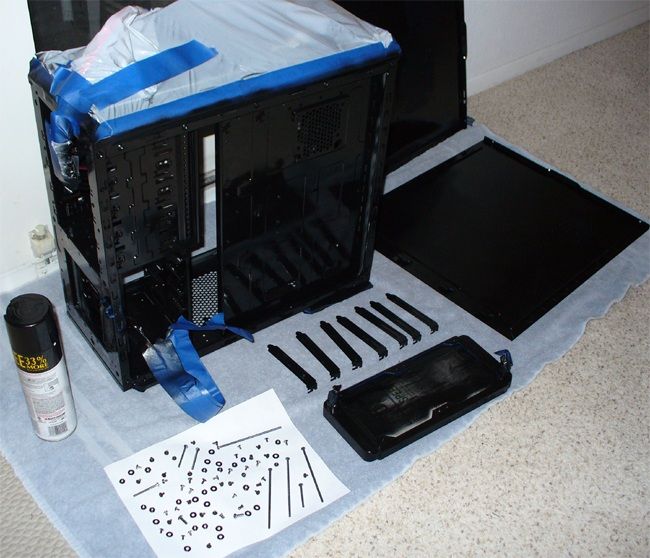
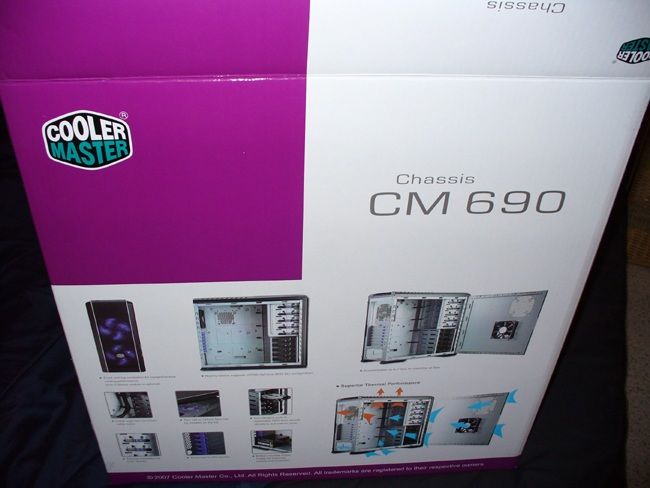
What case am I going to use for this swap? Well, I wanted to keep this whole thing pretty cheap, so a $100+ case was out of the question. I got a few great suggestions here on [H] and was told to give a refurbished cooler master a try, so that's exactly what I did. I didn't even realize how close cooler master is located to me (15 minute drive) so I placed an order on their website for a refurbished 690 for $50. I picked it up and was pleasantly surprised.

new690-1.jpg

(pic below isn't great)
new690-4.jpg


new690-3.jpg


new690-5.jpg


new690-2.jpg


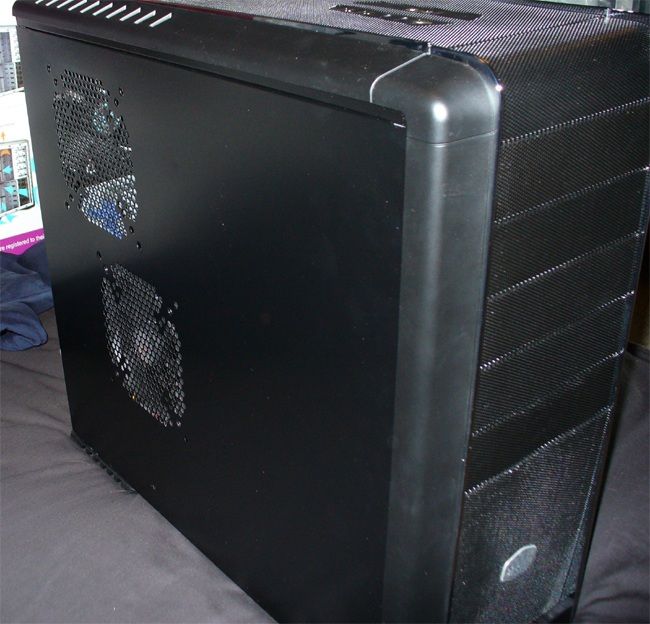
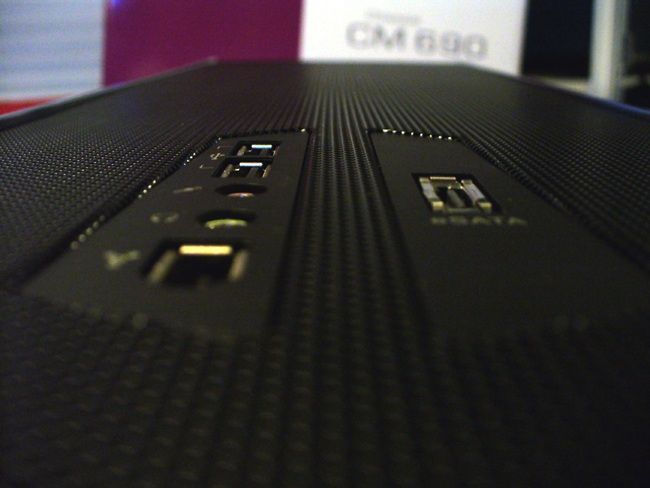
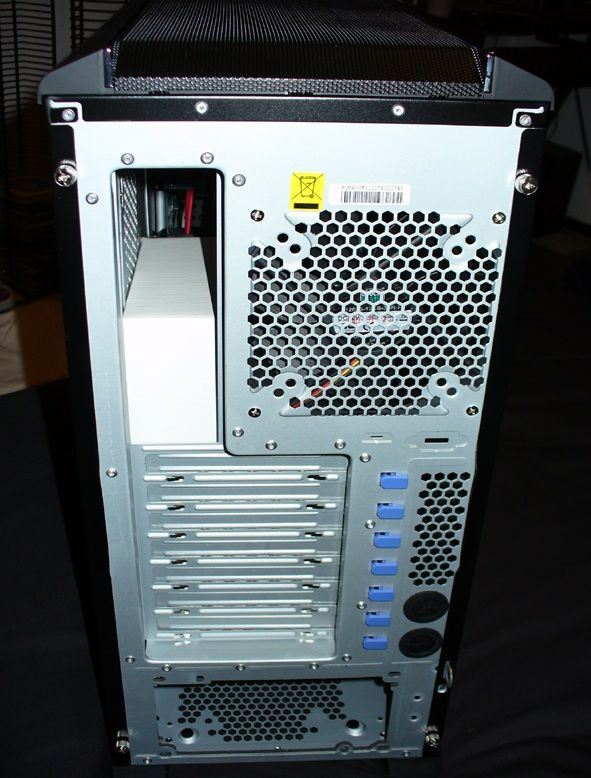
All parts and the case looks BRAND NEW. I would never be able to tell that this thing is refurbished.


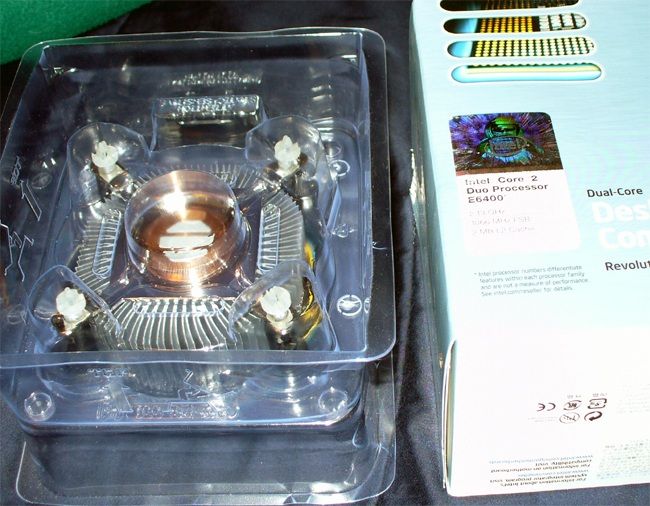
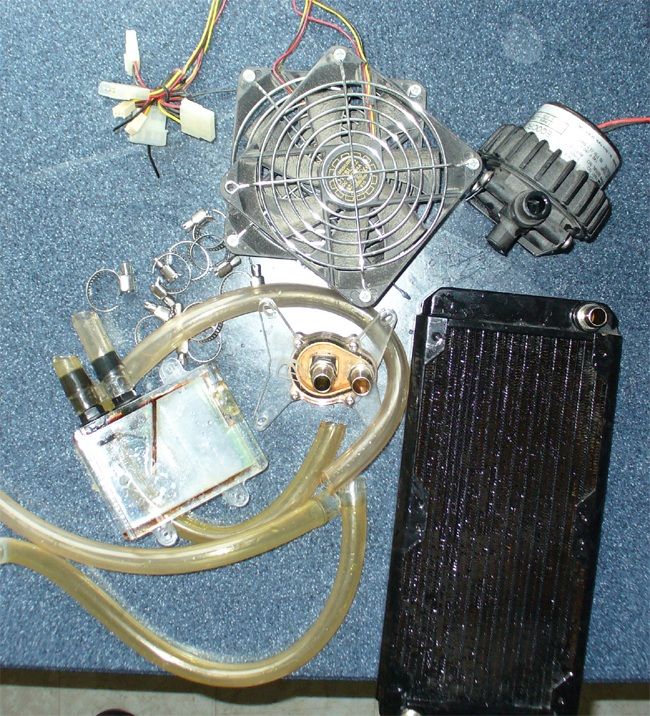
Here are a few things Ive picked up in preparation for this project:
CurrentProducts.jpg

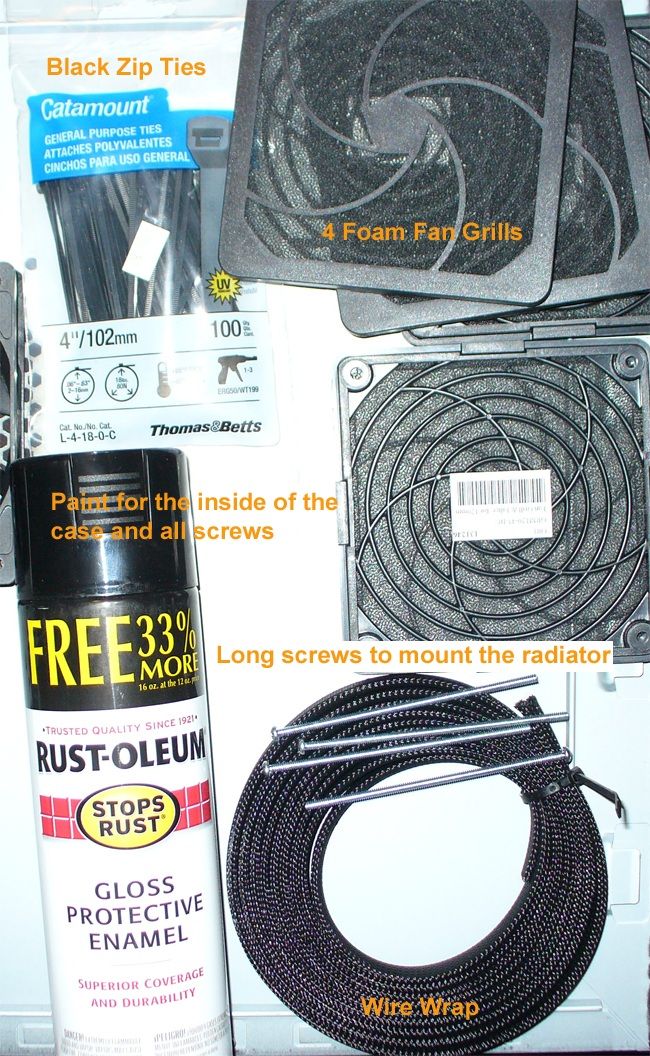
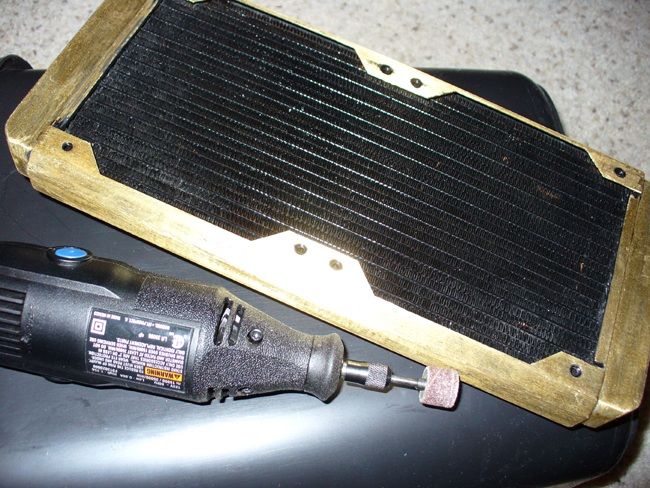
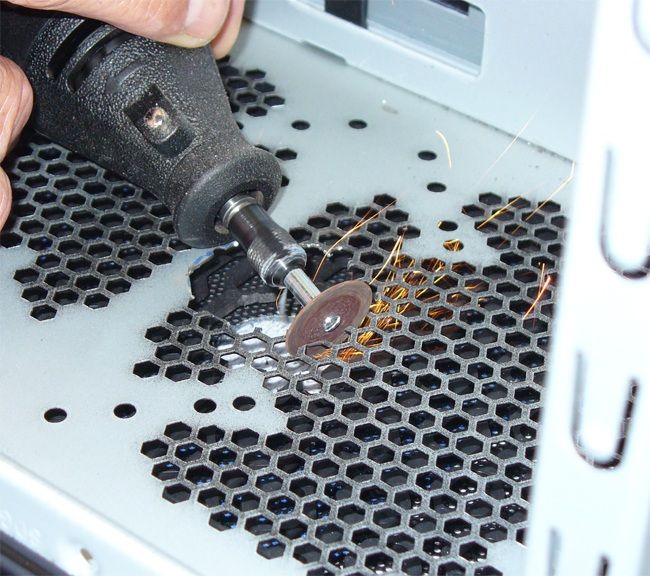
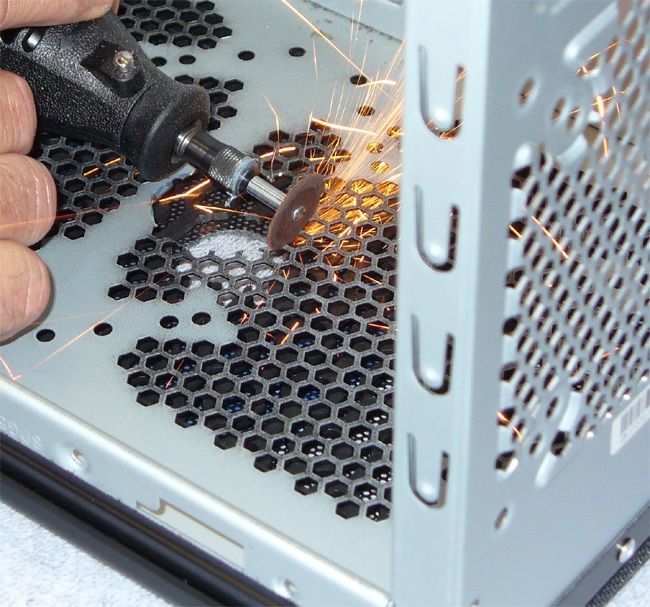
Today I also bought a 200 series Dremel. I have always wanted one since they are so versatile and I can't wait to use it with this project.

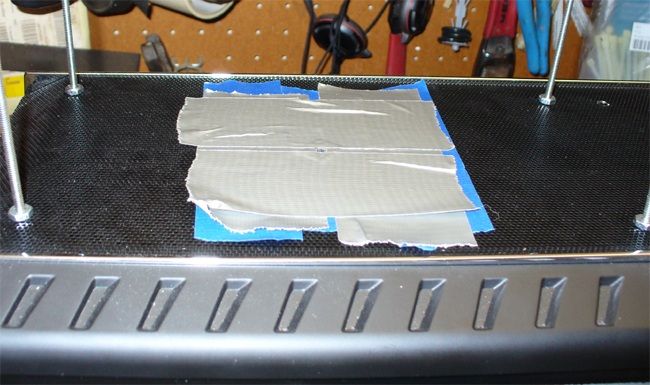
The very first thing I plan on doing is some cutting. I will make some cuts to make mounting the watercooling stuff easier. After doing all of the cutting I plan on spray painting the inside and back of the case. Updates coming soon.
 
I feel sorry for your first case :( It's like the kid who's mother sent him to school wearing culottes. But anyways, good luck with the mod
 
I feel sorry for your first case :( It's like the kid who's mother sent him to school wearing culottes. But anyways, good luck with the mod

Haha I purchased the case on 8/31/2005! :eek: Thanks for the good wishes.


Update:

As I have said before, I definitely want to take my time with this project. Since watercooling is involved it would be hard to prepare the new case without having the radiator, res, pump, ect. out of my current case so I can do measurements and such on the new case (while still being able to use my computer). What does this all mean? For the first time ever my e6400 C2D is going to be air cooled!

Time to get out my never-used heatsink. I knew it would come in handy some time. :p

airheatsink.jpg


Say good bye to the water cooling!
computer.jpg


wcout.jpg


waterblock-1.jpg


cpu.jpg


radiator.jpg


Just in case anyone is wondering about specs/temps. My CPU is currently OCed to a moderate 2.8GHz. The left screenshot is watercooling at idle (both cores were at 33 the other day... kind of odd) and the right screenshot is the air heatsink that I just put in at idle (working better than expected).

Pre_Diagnostics_WCIdle.jpg
Pre_Diagnostics_AirIdle.jpg


Soon To Come:
Draining/Cleaning watercooling loop (probably will repaint the scratched up radiator as well).
Start Mapping out how the loop will go in my new case. After this is done I can start cutting. And after the cutting I can spray paint everything.

I REALLY wanted to keep this project cheap... but the more I think about it the more I want a new video card to replace my 7600gt. Everything works fine with my current rig and the only games that I play right now are warcraft 3/team fortress 2 (which play fine). Decisions decisions....
 
*chases after the dust bunnies* :D

Looks like that case hasn't been opened/cleaned in 4 years ;)
 
*chases after the dust bunnies* :D

Looks like that case hasn't been opened/cleaned in 4 years ;)

lol sadly it has. I try to clean it every 6-8 months. Unfortunately with the setup (with the radiator sitting on the bottom of the case) dust collected very easily. This is part of the reason why I am re-designing everything and using foam fan guards. Brb cleaning out my watercooling stuff :) Ill return with an update most likely tomorrow.
 
Took my watercooling loop apart, still have to clean everything:

wcstuff.jpg


Now... where to place my pump and reservoir. I have 2 cd/dvd drives which will be put in the top two bays but Im going to attempt to put my pump and micro res under the 2nd optical drive. Im either going to use a 90 degree fitting for the outlet (since an optical drive will be RIGHT above it and I dont want to bend the tubing to such an extent) or I will have it hanging over halfway and just screw it in there.

pump_res.jpg


Tomorrow I am going to put a drive in the 2nd bay and see how the pump fits. If it doesn't fit well I will most likely move the pump to the bottom of the case. Once I have the pump and res mounted I will then attempt to mount my radiator up top above the case (using long screws). Once everything is drill/mounted I will take everything out and do some spray painting :D My plan is to have just about everything in black.

If anyone has any suggestions as to where to mount my WC stuff im open to everything!
 
Is it me or are the res and tubing a bit... uhm, brown-coloured? :)

Don't forget to dust off the pump ;)
 
Haha im loving this log.

That reminds me of cleaning my pc, i was gonna do it last night, but i just wrote my name in the front meshes dust and went to bed.
 
Is it me or are the res and tubing a bit... uhm, brown-coloured? :)

Don't forget to dust off the pump ;)

Its old! All that watercooling stuff is about 2 1/2 years old. Im surprised at how well its all working still actually (specifically the pump). I will be buying new tubing for sure, and since the res may be hiding inside where the drive bays go I just may keep that.


Haha im loving this log.

That reminds me of cleaning my pc, i was gonna do it last night, but i just wrote my name in the front meshes dust and went to bed.

LOL you're probably kind of like me. If my computer and everything is runnig good I wont bother until I get bored or something.
 
I take the duster to my systems once in a while ;) Inside they stay pretty clean since all my systems are at a height of 70 cm (desk height) or more, so the most dust entering the cases ends up on fans. Cleaning them every 1-2 years is more than enough to keep them spotless inside.

Good luck with the project :D
 
Update:

So I decided to use my new dremel and start cutting to mount the water cooling stuff.

The pump and micro reservoir will fit perfectly under my second optical drive. I drilled two holes to have the pump mounted and the micro res will be mounted by velcro right next to it.

pump_mounted.jpg


Now, drilling the holes for the radiator. For those of you who don't know, the CM 690 has two layers on top of the case. The first inner layer is a bunch of holes for fans to be mounted and the second layer is the part that is visible from the outside. Unfortunately I had a brain fart and used the pre-existing holes on the inside layer which were for 140mm fans (instead of 120mm). Ya... I drilled two extra holes in the top of my case... :(

fail_radiator.jpg


Here is the top of the case, with the radiator mounted using the CORRECT screws. This was just a test to see if everything is in the right place.

radiator_mounted.jpg


I circled the two holes that I messed up. To fix this I am going to put a screw through the bottom and a nut on the top of the case to cover the hole. Everything (nuts, washers, screws, ect) will be painted black. I will also be cutting down the screws a little bit so the radiator doesnt sit so high. It wont be TOO low though because the tubing is going to meet in the middle and I cant have it bending too much to avoid kinks.

So far everything is going good.

My soon to-do list is:
Sand and re-paint radiator.
Buy new tubing.
Disassemble all case fans/screws and prep for painting.
 
][V][AGIC;1033735913 said:
fugly w/ that rad up top like that.
That rad would have fit inside easily.

Yes the radiator would have fit inside quite easily. A long while back I saw a few clean rigs with the radiator up top (like the way I am going to have it) and Ive always wanted to build a rig like it ever since. Don't judge it until it's done! ;)

Subscribed in hopes of more MS paint.

Haha unfortunately I doubt there will be more MS paint.


Update:

I've been real busy with school but I have gotten some stuff done.

  • Ordered 10' of masterkleer tubing
  • Sanded radiator with dremel
  • Removed all fans/screws from case to prep for paint
  • Drilled out holes on the fan shrouds so they fit onto the screws

Will be spray painted black:
sanded_rad.jpg


After taping everything and getting the wiring out of the way this will be ready for some paint!:
case_almostready_paint.jpg


Test fit (using left over masterkleer tubing from last build). There isnt too much bending at all. There will be a hole drilled into the top of the case directly under the middle of where the radiator is mounted (with rubber grommet) and the tubing from both sides of the radiator (and fan wiring) will go through there into the case.
test_mount.jpg


Once the hole in the top of the case is drilled everything will be ready for paint.
 
Update:

Sorry it's been a while for those of you actually following along. I have been very busy with school lately.

Today I cut the top hole in the case for the water cooling tubing and fan wiring. It came out very good.

Prepping:
prepping_top.jpg


In the process of cutting:
tophole_partialcut.jpg


Cutting the second under layer of metal:
cutting_underside.jpg


cutting_underside2.jpg


Top inside of the case finished:
underside_finished-1.jpg


Top outside of the case finished:
topside_finished.jpg


I used a rubber grommet so it looks pretty clean. My next step is to paint EVERYTHING black (including all screws and such). Once I do this than I can start putting the thing together :)
 
Update:

Yesterday I figured out that I am not very good at spray painting. I was having a tough time as it was windy outside (just my luck). Eventually I got a decent first coating over the radiator, case, and screws.

side_view2.jpg


butt_shot.jpg


side_view.jpg


I still have to get full coverage on all the screws, nuts, washers, ect. and am debating between a a complete 2nd coat. The current coat the case has on it right now is pretty thick and since I wont be messing with it too much (once it is built) I wouldnt imagine its durability needs to be absurdly good. I'm going to let it dry for another day and see how it feels. I plan on swapping in the hardware and setting up the watercooling next friday or saturday when I have a whole day to finish it.
 
Sorry for anyone who was actually following along but since there didnt seem to be too much enthusiasm I figured I could take my time. Since I am now on spring break I spent the whole day finishing it. Personally I think it came out nicely.

My apologies for the bandwidth exceeded for the pictures above.

finished2.jpg


finished3u.jpg
 
Back
Top