Navigation
Install the app
How to install the app on iOS
Follow along with the video below to see how to install our site as a web app on your home screen.
Note: This feature may not be available in some browsers.
More options
You are using an out of date browser. It may not display this or other websites correctly.
You should upgrade or use an alternative browser.
You should upgrade or use an alternative browser.
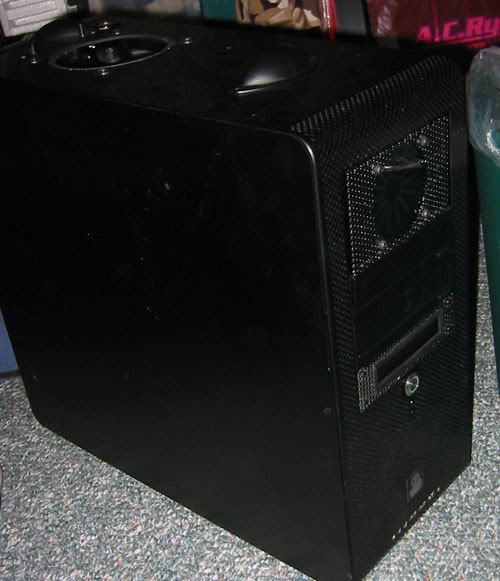
Project: NoNamed WCd Meshed up Lian Li V1000B
- Thread starter tbonem91
- Start date
so long story short, I got it up and running and was getting ready to post and then... just now.... a cap in my PS exploded. Looks like there is a tiny leak in the rad fitting directly above it... and I found another leak or two that have slowly appeared in the last week.
This sucks soooo bad - I am very quickly regretting ever starting this project. I just hope I didnt fry everything in my box.
Most expensive experiment ever...
This sucks soooo bad - I am very quickly regretting ever starting this project. I just hope I didnt fry everything in my box.
Most expensive experiment ever...
omegatotal
Gawd
- Joined
- Mar 15, 2002
- Messages
- 672
sorry to hear that man :/ hope you get it running!
DarkenReaper57
2[H]4U
- Joined
- Oct 2, 2003
- Messages
- 2,173
That sucks man .
This time run the pump on an external PSU if you can. Put paper towels all over, and leak test for 24 hours. It is a lot safer this way.
I hope you didn't fry anything .
.This time run the pump on an external PSU if you can. Put paper towels all over, and leak test for 24 hours. It is a lot safer this way.
I hope you didn't fry anything
.Great looking mod, I like the tone-in-tone looks and the extra mile you´re going to make everything look uniform. Don´t worry about your "rat´s nest", everyone has some dirty secret hidden somewhere in his case
What´s irritating me is that everyone in the US seems to favor 10/12mm tubing although it is quite clear that above a certain threshhold an added flow volume has almost zero impact on cooling performance. Also, this big tubing is quite hard to integrate in some cases plus a lot of people seem to have problems on getting it not to leak (or all the unlucky ones post in modding forums on the net )
Over here in Germany, we mostly use 6/8mm tubing and we have no problems whatsoever with either cooling performance or flow, I have 3 rads 3 cooling blocks and a harddrive cooler for 2 drives in my loop and an Eheim1048 is all I need to create a nice fountain in my reservoir. Plus, the screw-connections are really leak-safe (the plug&cool ones are a bit picky about the kind of tubing you´re using).
So what benefits do you get from the big tubing? Is it easier to come by where you live (including the connections to the waterblocks)?
Just curious
What´s irritating me is that everyone in the US seems to favor 10/12mm tubing although it is quite clear that above a certain threshhold an added flow volume has almost zero impact on cooling performance. Also, this big tubing is quite hard to integrate in some cases plus a lot of people seem to have problems on getting it not to leak (or all the unlucky ones post in modding forums on the net
)Over here in Germany, we mostly use 6/8mm tubing and we have no problems whatsoever with either cooling performance or flow, I have 3 rads 3 cooling blocks and a harddrive cooler for 2 drives in my loop and an Eheim1048 is all I need to create a nice fountain in my reservoir. Plus, the screw-connections are really leak-safe (the plug&cool ones are a bit picky about the kind of tubing you´re using).
So what benefits do you get from the big tubing? Is it easier to come by where you live (including the connections to the waterblocks)?
Just curious
Electric Boogaloo
Weaksauce
- Joined
- Apr 17, 2005
- Messages
- 85
We like things bigger here in the US of A.
Maybe just something to do with the metric/imperial system?
I always thought we went by 1/4'', 1/2'', etc...
Maybe just something to do with the metric/imperial system?
I always thought we went by 1/4'', 1/2'', etc...
brasherman
Gawd
- Joined
- Sep 10, 2004
- Messages
- 715
jackknife said:So what benefits do you get from the big tubing? Is it easier to come by where you live (including the connections to the waterblocks)?
Just curious
I think there are people here who would argue vehemently with both sides. There are/were some Aqua Computer bashers and all. I figure if it does the job, does size matter?
P.S. Don't get discouraged. Keep leak testing with another power supply to get rid of the leaks. Never want to test with live hardware if you have a choice. Sorry about your luck.
NukeULater
Gawd
- Joined
- Sep 12, 2006
- Messages
- 917
That sucks that you are having so many leaks Other than that the mod looks really cool. I am planning to make a mod like that to, but with the V2100B.
Other than that the mod looks really cool. I am planning to make a mod like that to, but with the V2100B.yay! another update.
I'll just use the many pictures as a story board and won't bore you from the get-go
So here is what it looked like prior to my last post: all set up and leak tested (or so I thought):

Here's a pic of my first hurdle: Took me about an hour or so before I realized that the fix was removing the CMOS battery - not sure why it wouldn't POST out of the box tho...

Yay! Installing Windows - meet hurdle number 2. I had never installed on a RAID before and the information I was reading was all conflicting - the Motherboard manual listed drivers to use that didn't exist on the disc so it was quite the process of trial and error before I could get it to see my drives
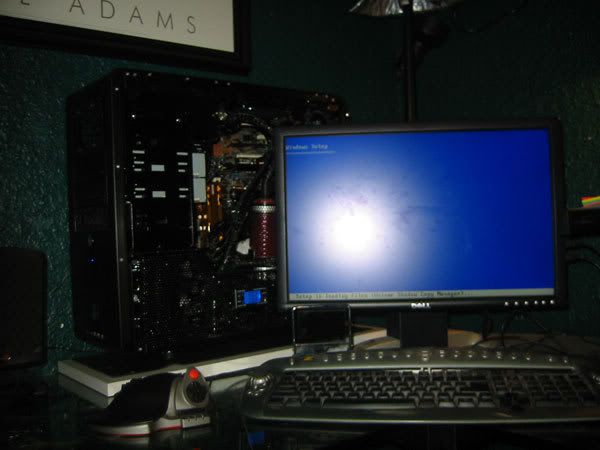
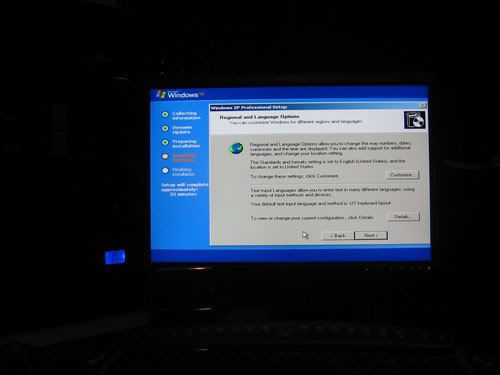
About 4 hours or so after I had brought it into my room, I was finally on my way installing Windows - this process took roughly 15 minutes and updating it once installed was blazing fast too.
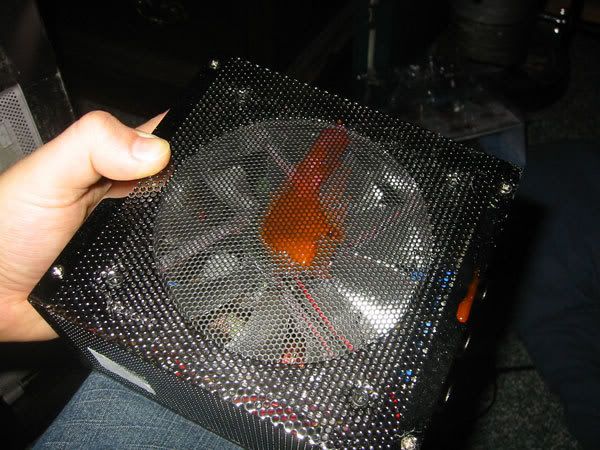
I had fun for about 4 days installing software and playing Company of Heroes - the machine rocked. Then it exploded. Here is a picture of what I found once I took things apart... apparently my choice in coolant wasn't as nonconductive as I was lead to believe... but this was a fair bit of liquid on and in my PS.
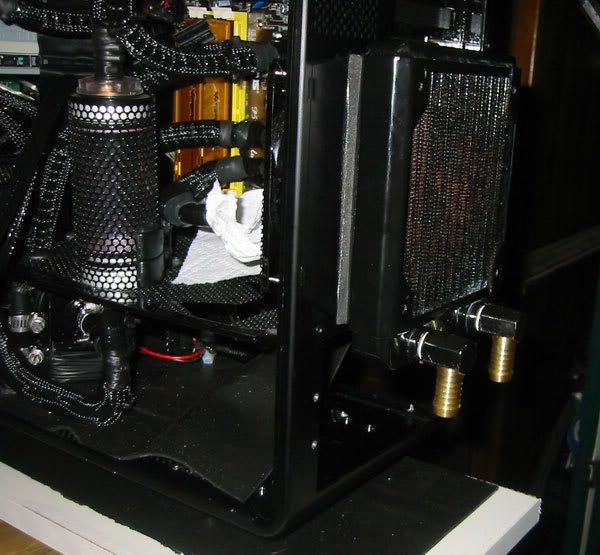
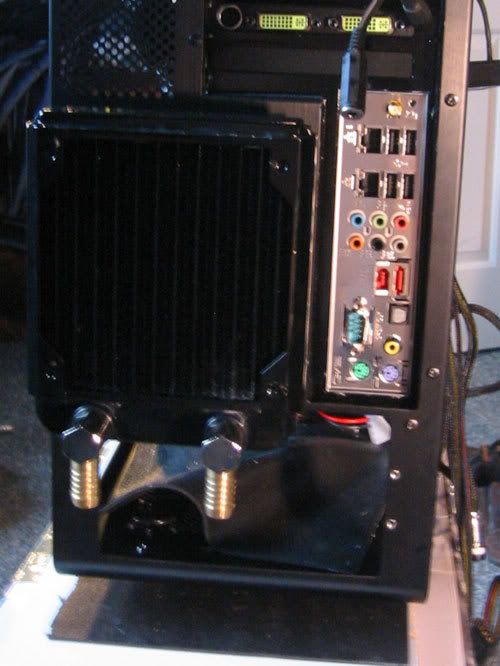
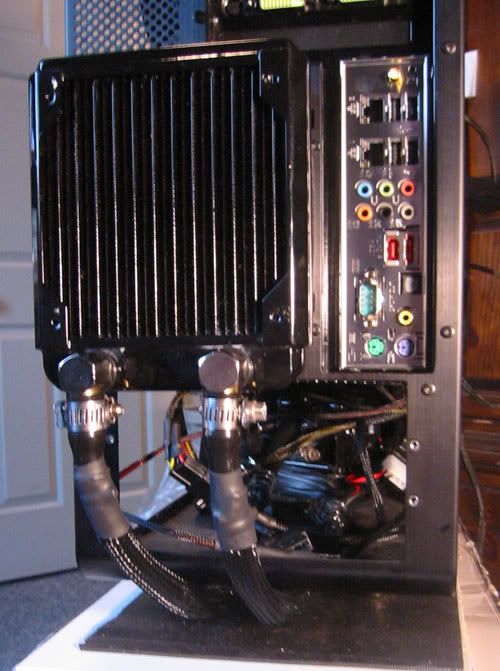
A buddy of mine I work with gave me a great idea: break my clean look a little and move the Rad outside of the box - this will remove the fixtures above the PS and open up the inside a ton for air flow. So I did.
Picked up a couple brass 1/2" elbows to stretch my 3/8" tubing over as well.
The solid tubing in the lower section was also causing issues so I trashed it and replaced it with regular tubing.
Couple more shots of the rad
So I had to cut holes in the bottom...
... to run the tubing through...
A leftover remnant of my original plan... I'm not 100% sure what to do with this (I later cut it a little but need to do more)
Filled up and ready to leak test again - this time for an entire week!

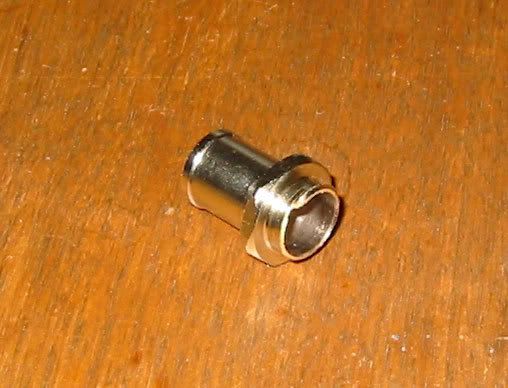
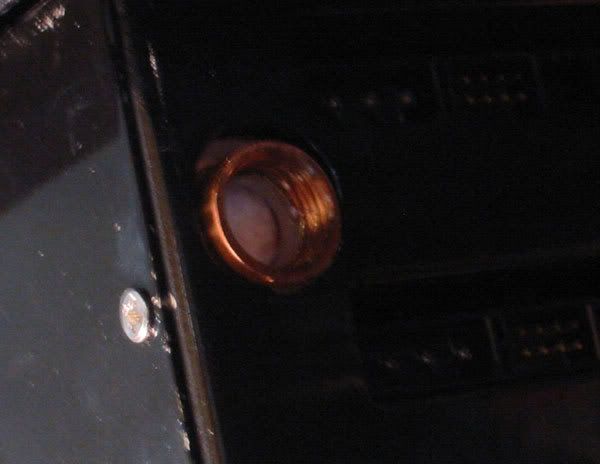
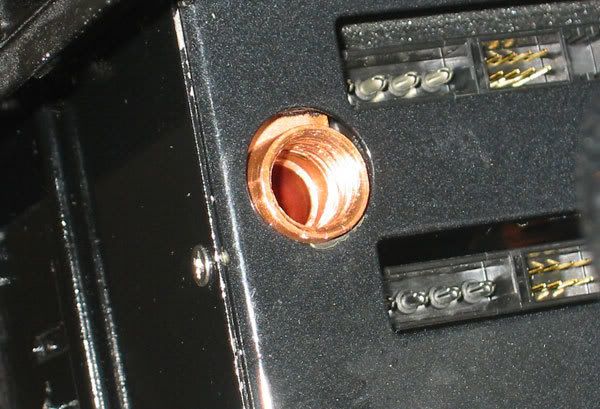
After a day, I found a couple more leaks (of course) which only required a little tightening of my clamps. Except for one... It was leaking between the fitting and the HD waterblock, NOT out the tubing... so I tightened the fitting a little.... only instead of tightening, it SPUN in the waterblock. So I drained the system again, disconnected the tubing going to the HD block and lo and behold, the fitting FELL OUT! The threads had separated from it inside the copper.
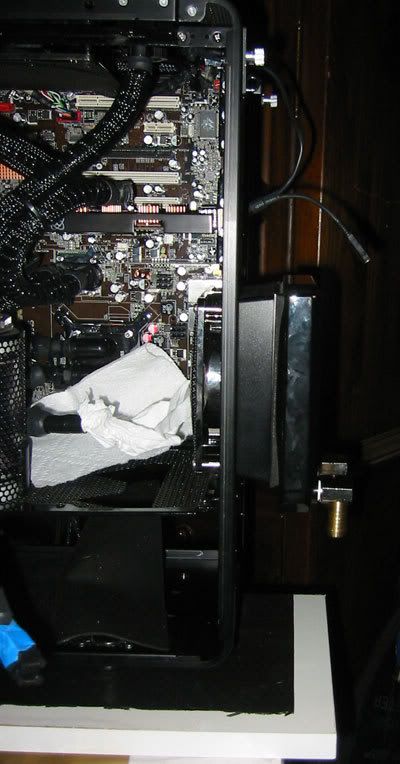
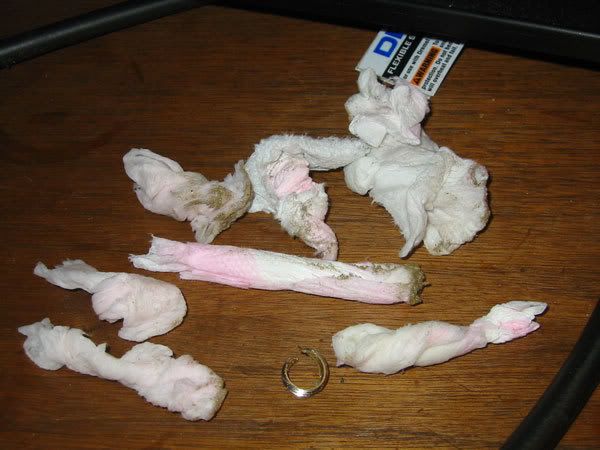
Heres the threads - inside you can see a piece of paper towel in preparation for getting them out...
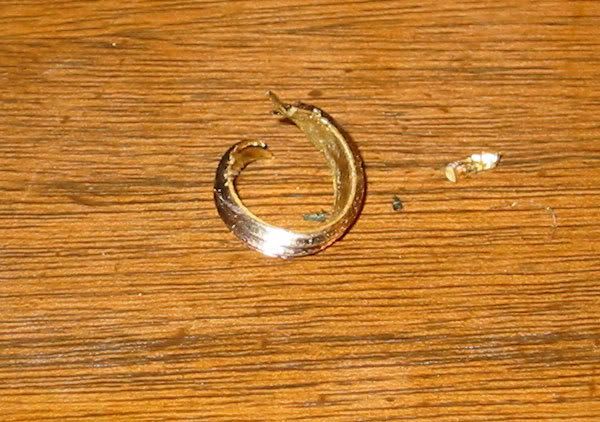
I was left in a bit of a quandry... how the hell do you get brass threads out of a copper fitting without destroying the copper? My solution ended up being my dremel, the extendo-swivel-arm-thingum, a super sharp, tapered metal filing bit and extreme patience. I got it out eventually (after covering EVERYTHING to keep metal shavings from destroying anything) and made sure to completely clean out the threads of all the brass dust.
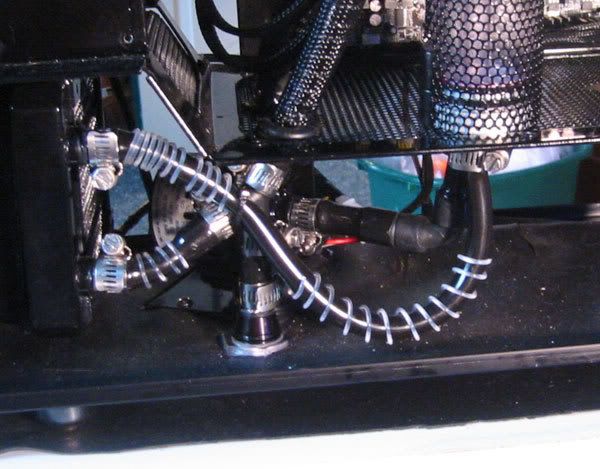
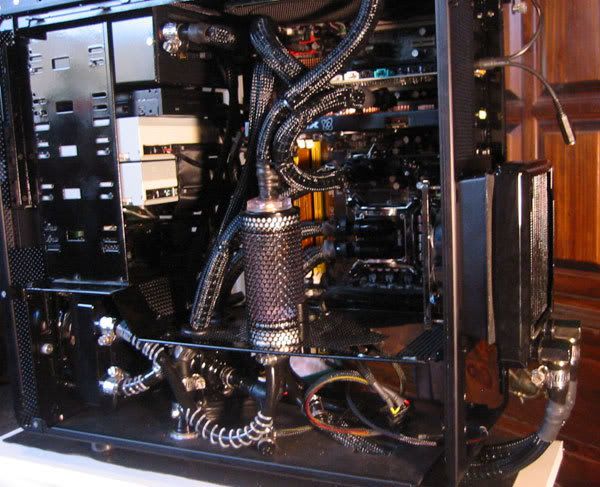
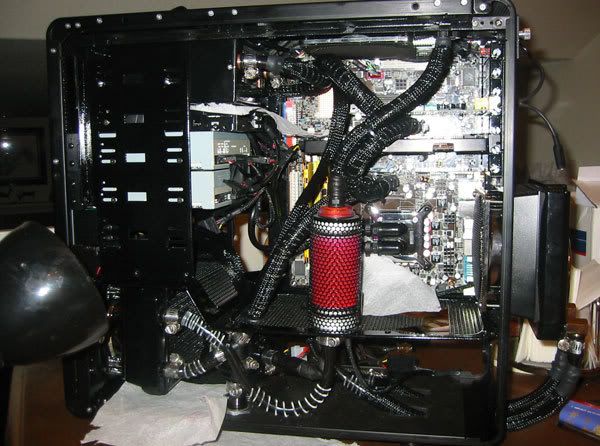
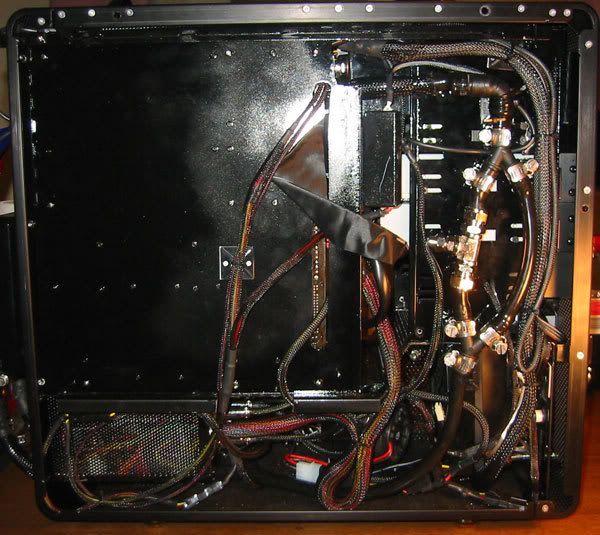
Updated picture of the rat's nest after I put it all back together:
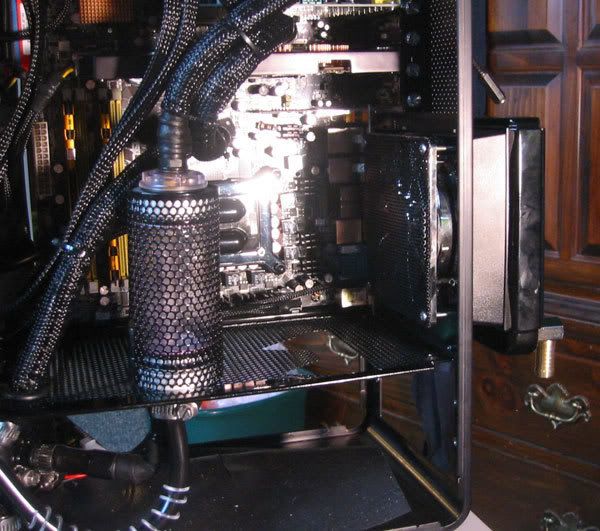
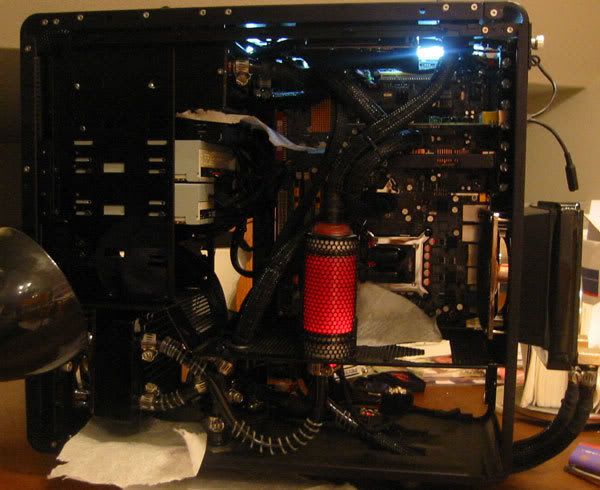
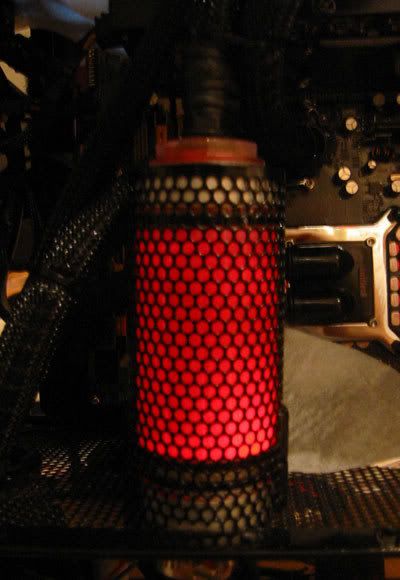
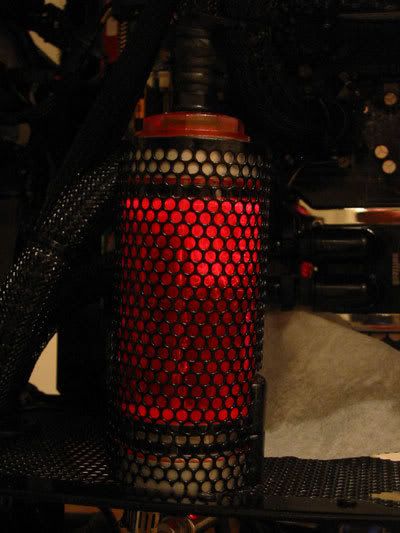
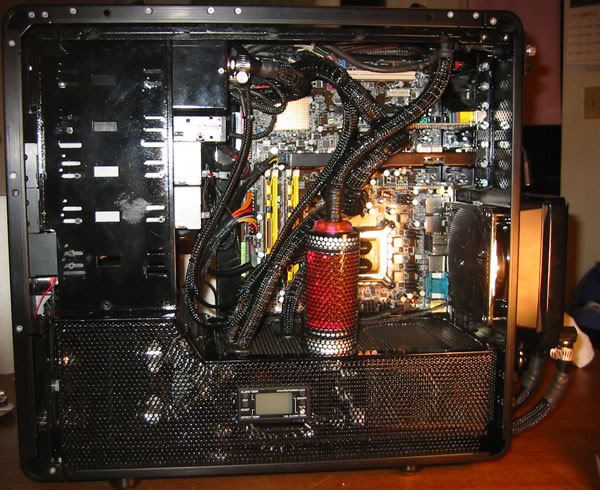
Full shot while leak testing:
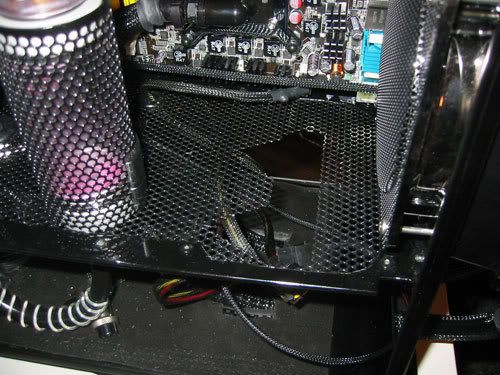
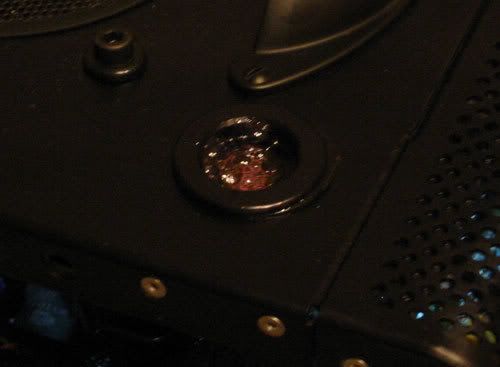
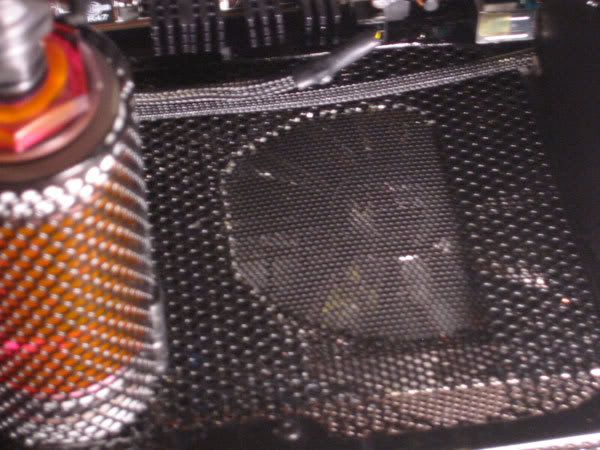
What I did to the mesh hole: I'm not done here - this bit is on my "list of things to finish"
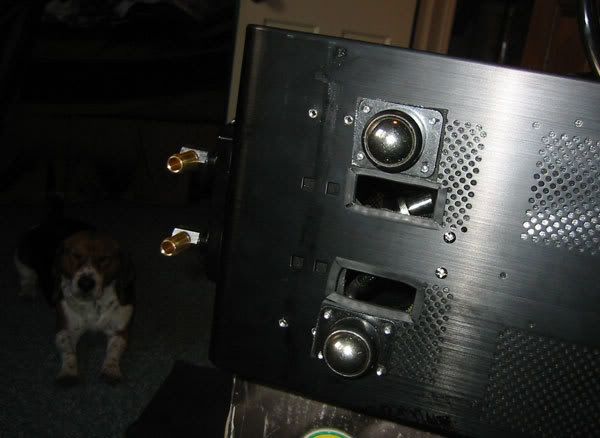
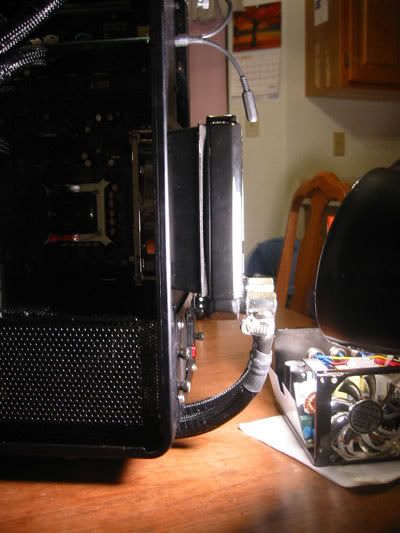
'nother shot of the back, and destroyed PS in the background
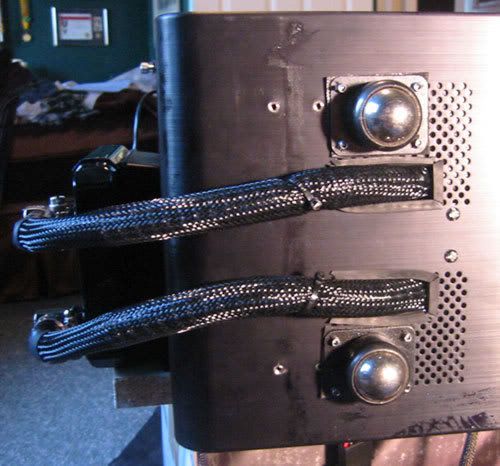
Shot with the back side on:
And that's the end.... The machine has been back up and running, 100% leak free now for a couple days after leak testing for the better part of an entire week. I will get some more pictures of my setup soon so people can see how it looks.
Benchmarks and overclocking will be much later as I want everything completely stable before venturing down that road.
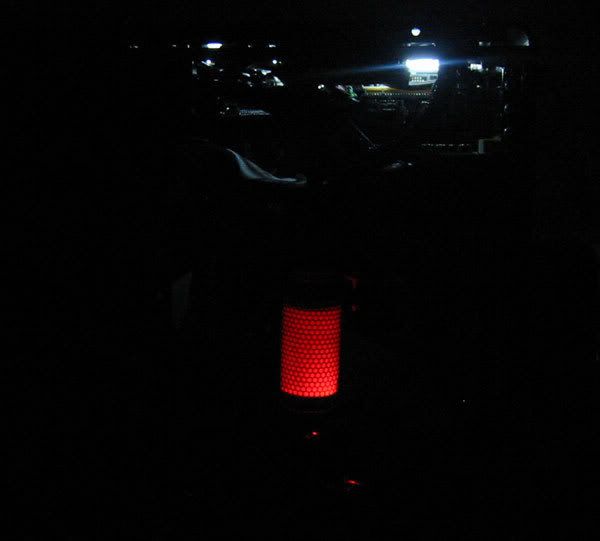
Also during this time, I fixed the switch going to the red LED for the res and removed one of the CCFLs because it was burned out or something. I also accidentally destroyed my top blow hole fan and need to get a new one - if you look closely in the last pic, you can see it missing.
My "List of things to finish"
- The ugly mesh hole - make it a circle to match the fan below it and touch up the paint
- Replace the top blow hole fan
- Touch up all the nicks with paint (lots at this point) and paint the visible side of the optical drives that show through the holes in the rack.
- Pick up another CCFL, wrap it and put it where the broked one was.
- Create the shield/cover thing for the optical drives and the spaces above and below them - I bought a small sheet of plexi that I might use here and dye the inside black.
I think that's really it - not too much more to do but now that it is up and running, it might be hard for me to finish
On a side note, my last order with Performance-pcs was messed up - that makes 3 bad orders out of 5 or 6 I think... not too good there. I didn't even tell them this time because the small things I ordered I decided to not even use (regardless of not actually recieving the parts I ordered) and it wasn't worth the headache to get to the post office and send back the $3 in parts. I am debating on ordering my replacement fan through them at this point...
Anywho, thanks for reading and I really appreciate the feedback!
I'll just use the many pictures as a story board and won't bore you from the get-go
So here is what it looked like prior to my last post: all set up and leak tested (or so I thought):
Here's a pic of my first hurdle: Took me about an hour or so before I realized that the fix was removing the CMOS battery - not sure why it wouldn't POST out of the box tho...
Yay! Installing Windows - meet hurdle number 2. I had never installed on a RAID before and the information I was reading was all conflicting - the Motherboard manual listed drivers to use that didn't exist on the disc so it was quite the process of trial and error before I could get it to see my drives
About 4 hours or so after I had brought it into my room, I was finally on my way installing Windows - this process took roughly 15 minutes and updating it once installed was blazing fast too.
I had fun for about 4 days installing software and playing Company of Heroes - the machine rocked. Then it exploded. Here is a picture of what I found once I took things apart... apparently my choice in coolant wasn't as nonconductive as I was lead to believe... but this was a fair bit of liquid on and in my PS.
A buddy of mine I work with gave me a great idea: break my clean look a little and move the Rad outside of the box - this will remove the fixtures above the PS and open up the inside a ton for air flow. So I did.
Picked up a couple brass 1/2" elbows to stretch my 3/8" tubing over as well.
The solid tubing in the lower section was also causing issues so I trashed it and replaced it with regular tubing.
Couple more shots of the rad
So I had to cut holes in the bottom...
... to run the tubing through...
A leftover remnant of my original plan... I'm not 100% sure what to do with this (I later cut it a little but need to do more)
Filled up and ready to leak test again - this time for an entire week!
After a day, I found a couple more leaks (of course) which only required a little tightening of my clamps. Except for one... It was leaking between the fitting and the HD waterblock, NOT out the tubing... so I tightened the fitting a little.... only instead of tightening, it SPUN in the waterblock. So I drained the system again, disconnected the tubing going to the HD block and lo and behold, the fitting FELL OUT! The threads had separated from it inside the copper.
Heres the threads - inside you can see a piece of paper towel in preparation for getting them out...
I was left in a bit of a quandry... how the hell do you get brass threads out of a copper fitting without destroying the copper? My solution ended up being my dremel, the extendo-swivel-arm-thingum, a super sharp, tapered metal filing bit and extreme patience. I got it out eventually (after covering EVERYTHING to keep metal shavings from destroying anything) and made sure to completely clean out the threads of all the brass dust.
Updated picture of the rat's nest after I put it all back together:
Full shot while leak testing:
What I did to the mesh hole: I'm not done here - this bit is on my "list of things to finish"
'nother shot of the back, and destroyed PS in the background
Shot with the back side on:
And that's the end.... The machine has been back up and running, 100% leak free now for a couple days after leak testing for the better part of an entire week. I will get some more pictures of my setup soon so people can see how it looks.
Benchmarks and overclocking will be much later as I want everything completely stable before venturing down that road.
Also during this time, I fixed the switch going to the red LED for the res and removed one of the CCFLs because it was burned out or something. I also accidentally destroyed my top blow hole fan and need to get a new one - if you look closely in the last pic, you can see it missing.
My "List of things to finish"
- The ugly mesh hole - make it a circle to match the fan below it and touch up the paint
- Replace the top blow hole fan
- Touch up all the nicks with paint (lots at this point) and paint the visible side of the optical drives that show through the holes in the rack.
- Pick up another CCFL, wrap it and put it where the broked one was.
- Create the shield/cover thing for the optical drives and the spaces above and below them - I bought a small sheet of plexi that I might use here and dye the inside black.
I think that's really it - not too much more to do but now that it is up and running, it might be hard for me to finish
On a side note, my last order with Performance-pcs was messed up - that makes 3 bad orders out of 5 or 6 I think... not too good there. I didn't even tell them this time because the small things I ordered I decided to not even use (regardless of not actually recieving the parts I ordered) and it wasn't worth the headache to get to the post office and send back the $3 in parts. I am debating on ordering my replacement fan through them at this point...
Anywho, thanks for reading and I really appreciate the feedback!
omegatotal
Gawd
- Joined
- Mar 15, 2002
- Messages
- 672
god job man!
i like it!
i like it!
DarkenReaper57
2[H]4U
- Joined
- Oct 2, 2003
- Messages
- 2,173
I love the mod man. It looks like it took a lot of time to complete, especially with the unforeseen problems. I'm glad to see you stuck with it.
Just make sure you leak test 100% another time just in case.
Just make sure you leak test 100% another time just in case
.Adidas4275
Supreme [H]ardness
- Joined
- Mar 11, 2006
- Messages
- 5,986
you have had really bad luck on this one man.. sorry to hear about it. It looks great.
windmiller
n00b
- Joined
- Mar 17, 2007
- Messages
- 12
I just bought a V1000b and love the mesh look! This is my favorite modded case to date, great job!
Next time you do a WC project, or add stuff/remove from your loop, i'd recommend you use 7/16th tubing on 1/2 inch barbs. Theres no leaks, and hell, I can't even remove the tubing from the barbs without some extreme force or a knife. No clamps needed, and extremely watertight.
lekyiscool
Weaksauce
- Joined
- Apr 8, 2007
- Messages
- 99
man that looks awsome
2bad so many water leaks
what kind of tubing is that or is it regular tubing covered in cable sleeving
2bad so many water leaks
what kind of tubing is that or is it regular tubing covered in cable sleeving
woa, didn't think anyone was posting in here
thanks again for the compliments - I've been working hard on my sister's PC and just got it done this weekend.
The tubing I used was black tubing from HD, wrapped with coil stuff, then 1/2" black wire sleeving.
Here soon, this week or this weekend, I'll post pictures of both my sister's finished PC and some final shots of mine.
Also, when I upgrade my video card here in a year or two, I plan on redoing the entire loop with smaller tubing - the 7/16 stuff that a lot of people have success with - will probably alter a few other things then too and resurrect this thread properly