Project: Vapo Li PC-7A/B

officermartinez

[H]ard|Gawd
Joined
Jan 21, 2006
Messages
2,012
This is the start of a new project for me. This is my first time, stepping into the world of phase change. So, as a result, I will do my best to keep my Vapochill experience as easy as possible. Understandably, there are several mods that a Vapochill owner can do. For purposes of this project, I intend to keep the Vapochill LightSpeed stock (it's under warranty).

Let me run through to a list of items that I intend to use during my build. This list is not all inclusive as I may or may not list every single screw, bolt, washer, etc. However, with that said, I will do my best to document my work.

1. Vapochill LightSpeed Unit.
2. Lian Li PC-7A.
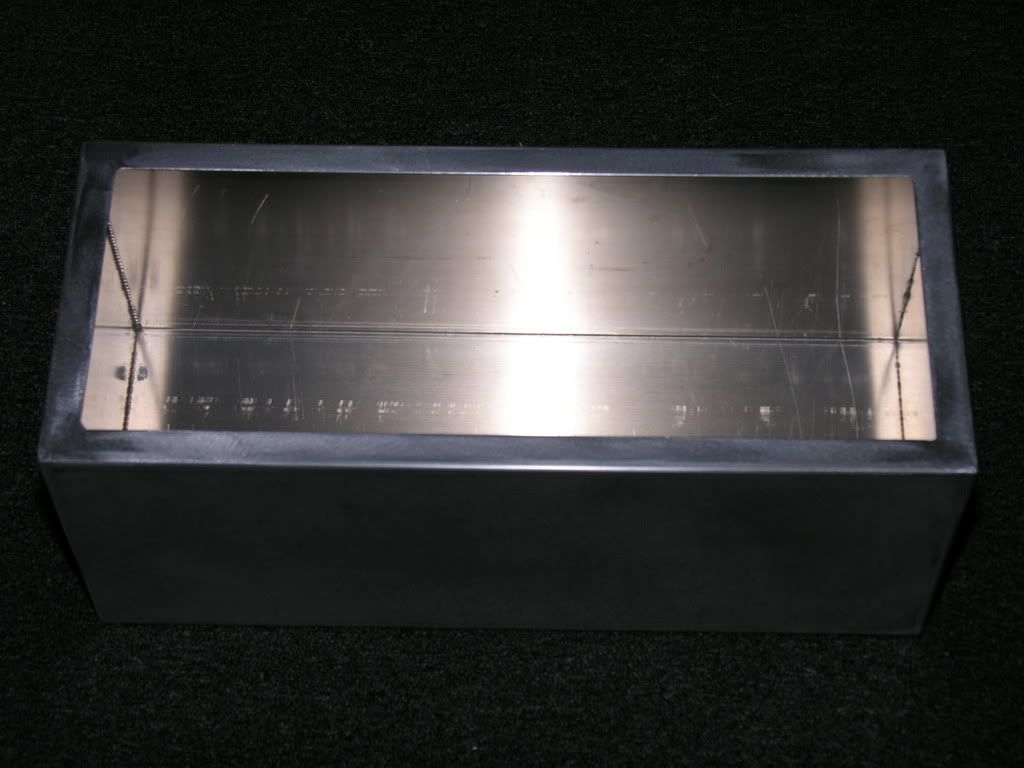
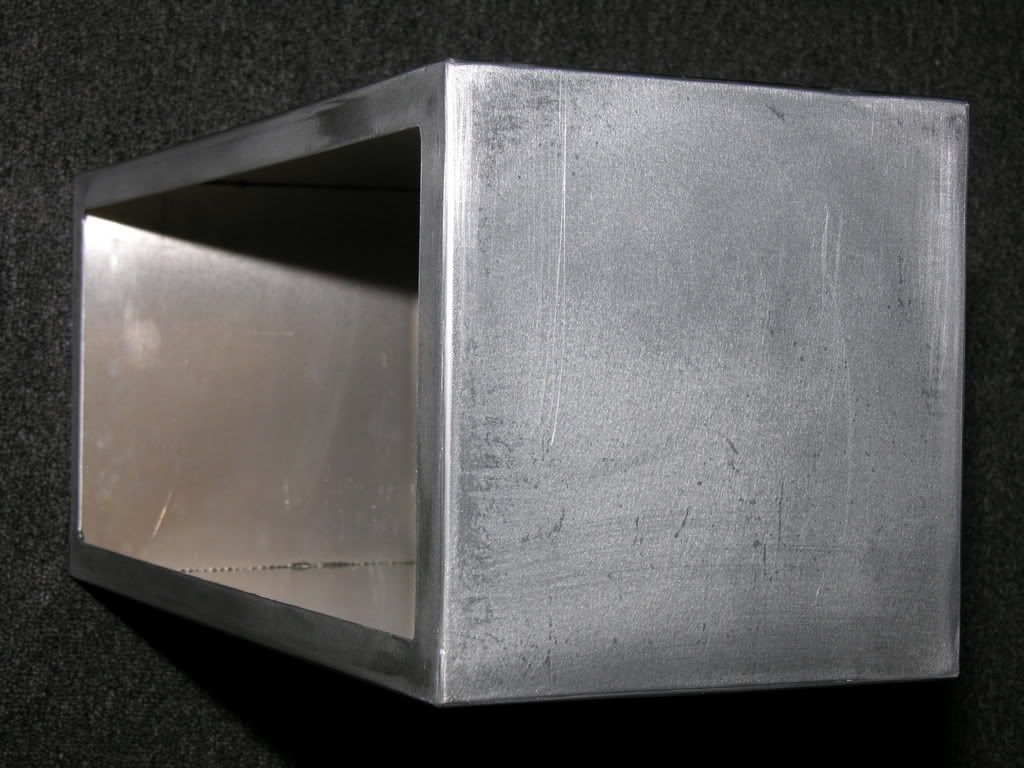
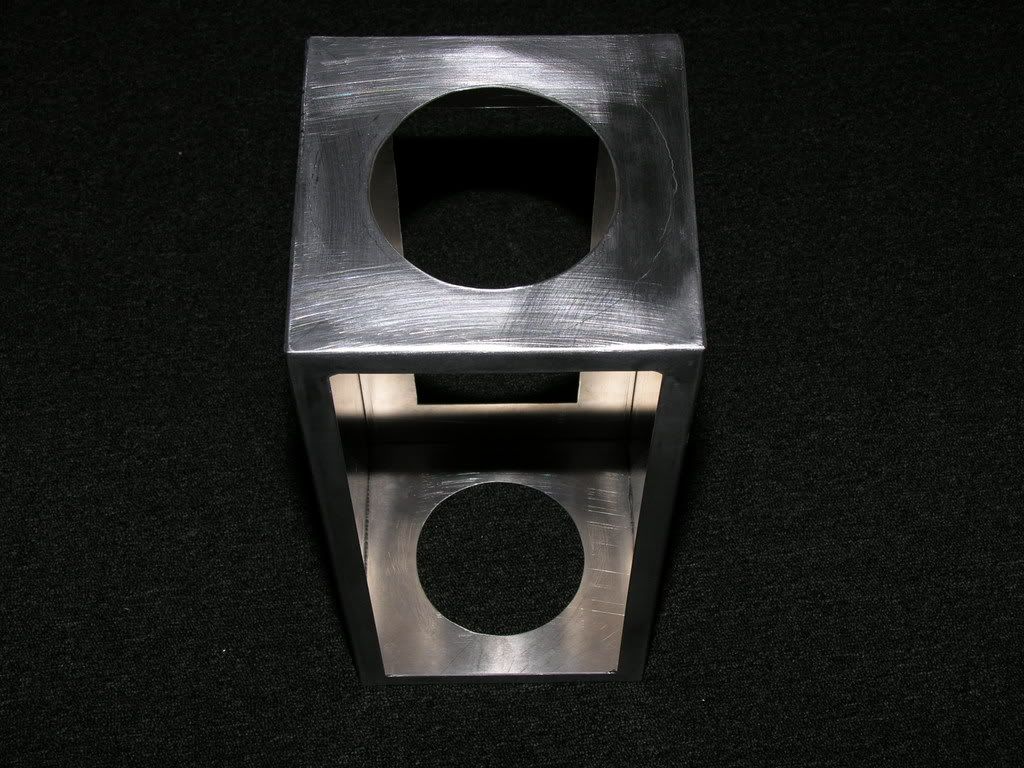
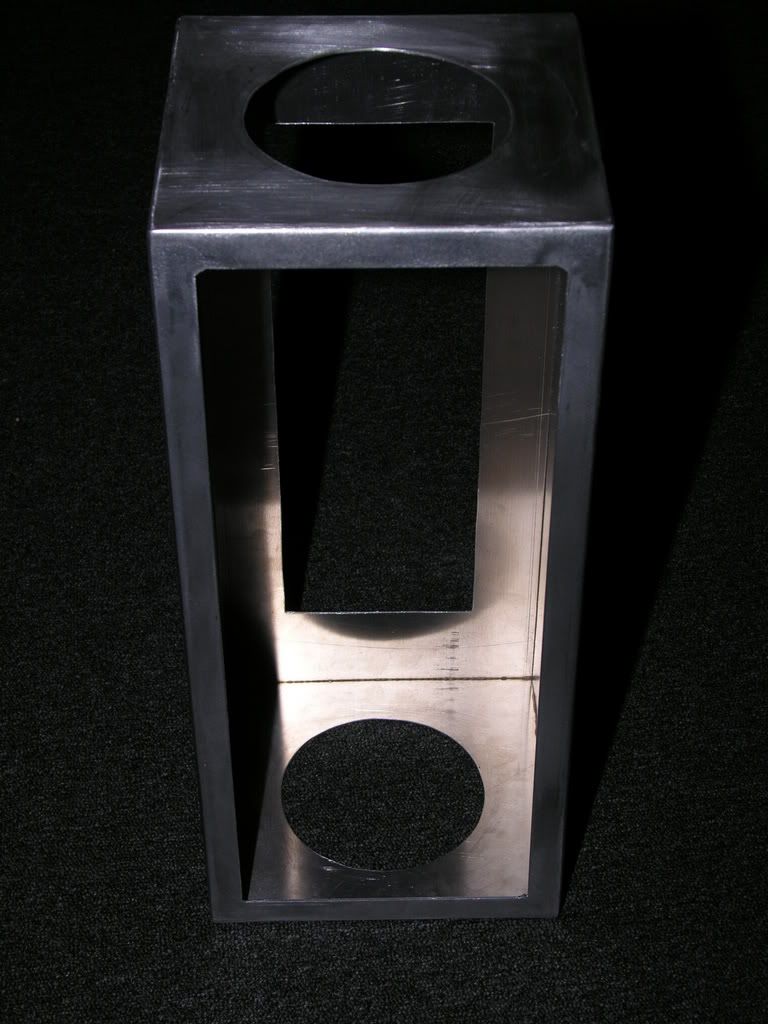
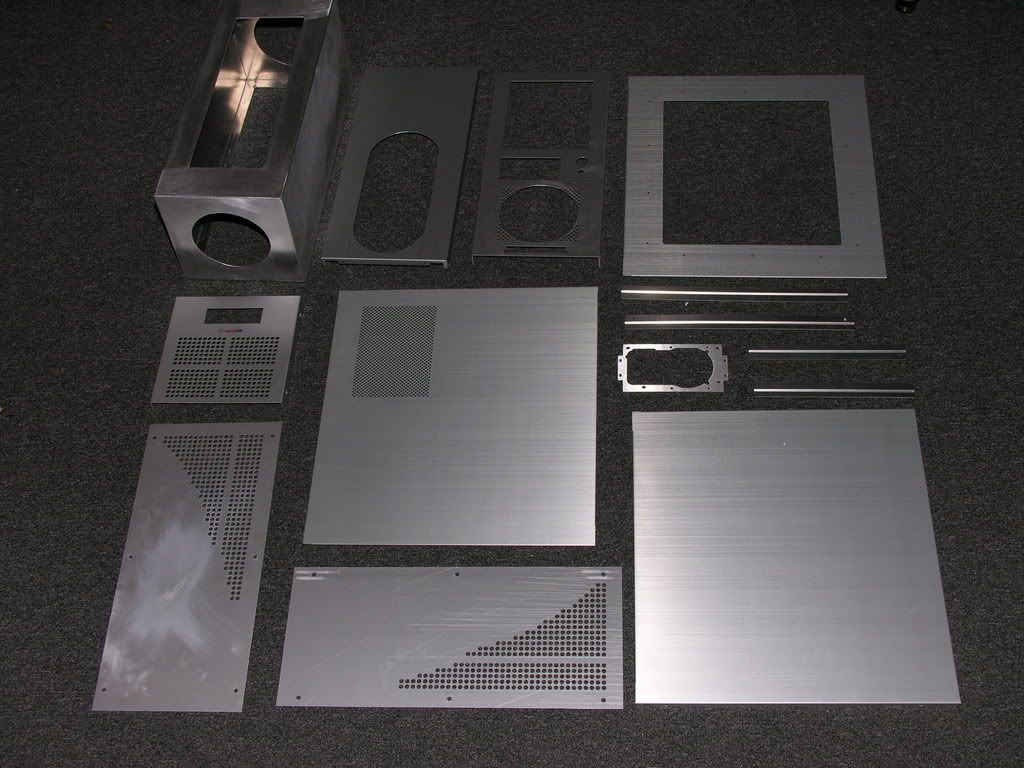
3. A radiator box that was designed from my specs at a local CAD shop.
4. Scrap Lian Li aluminum (purchased from Performance-PC's).
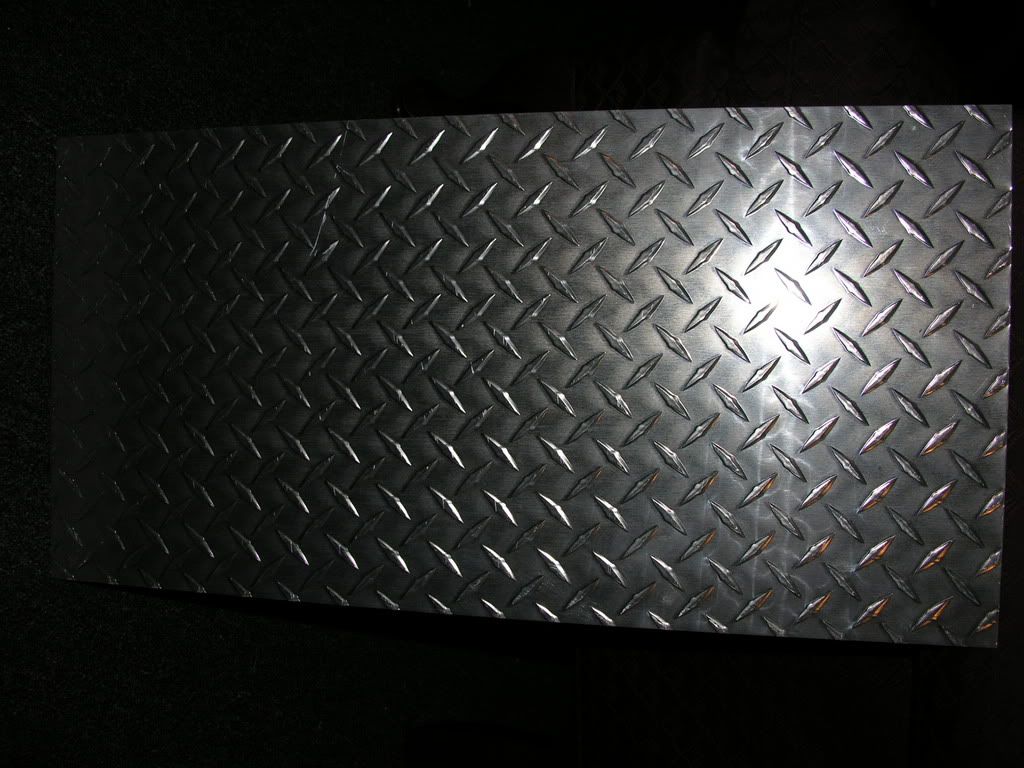
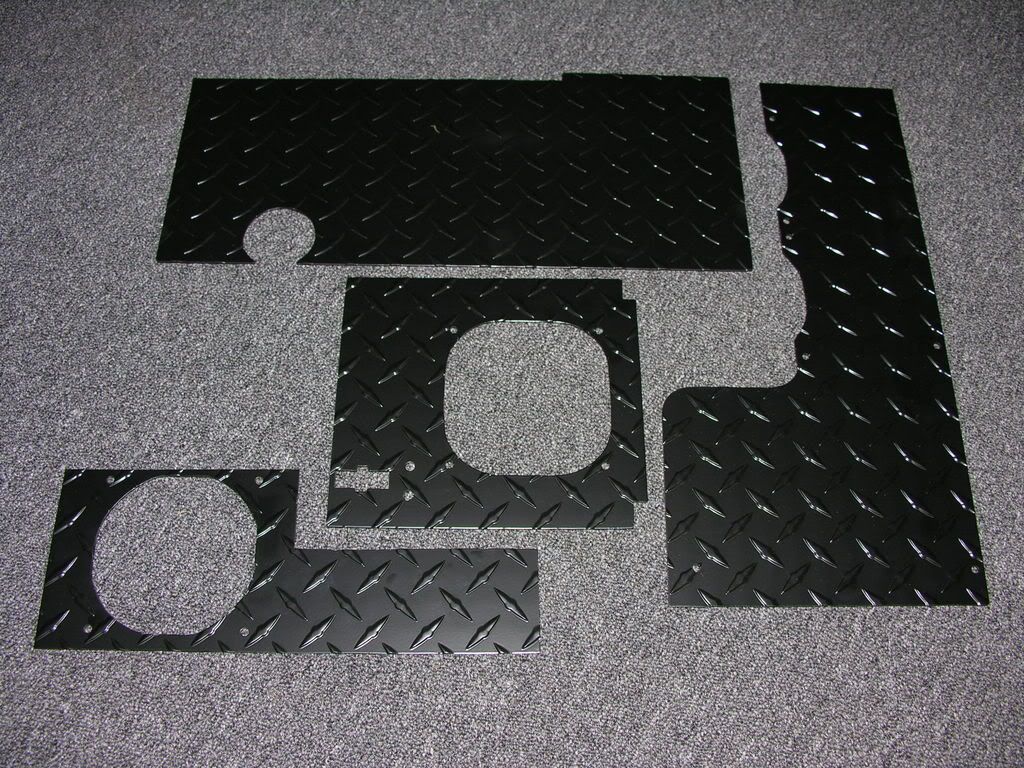
5. Diamond Plate aluminum (purchased from my local Home Depot).
6. Various screws, bolts, nuts, washers and trimming.
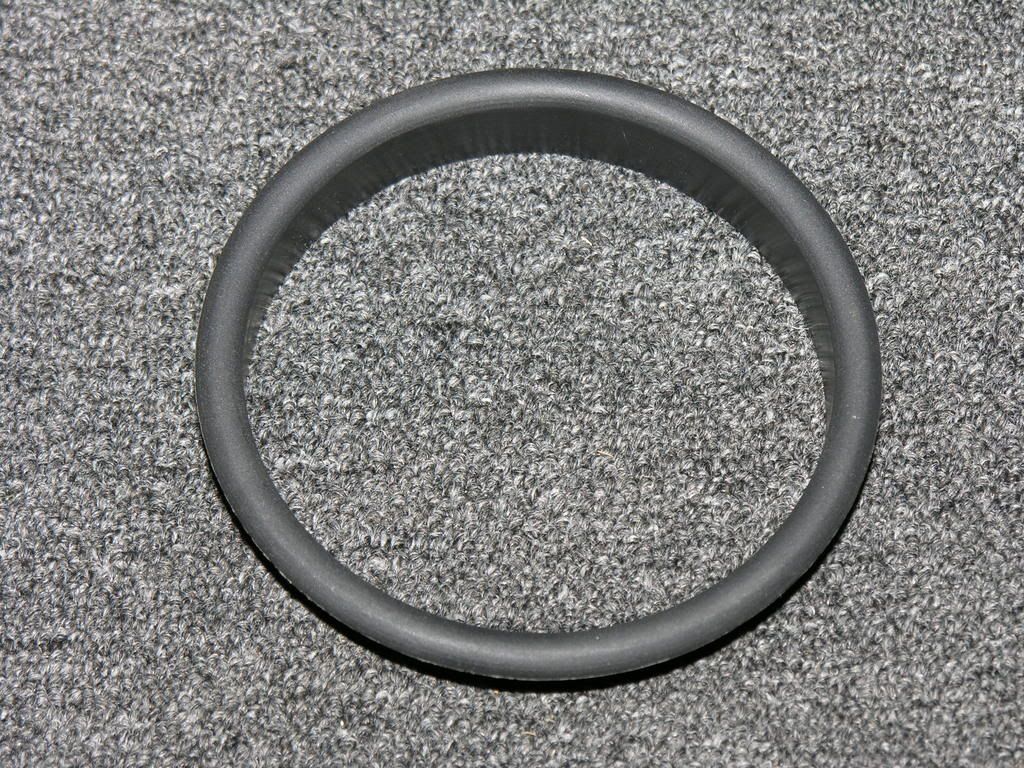
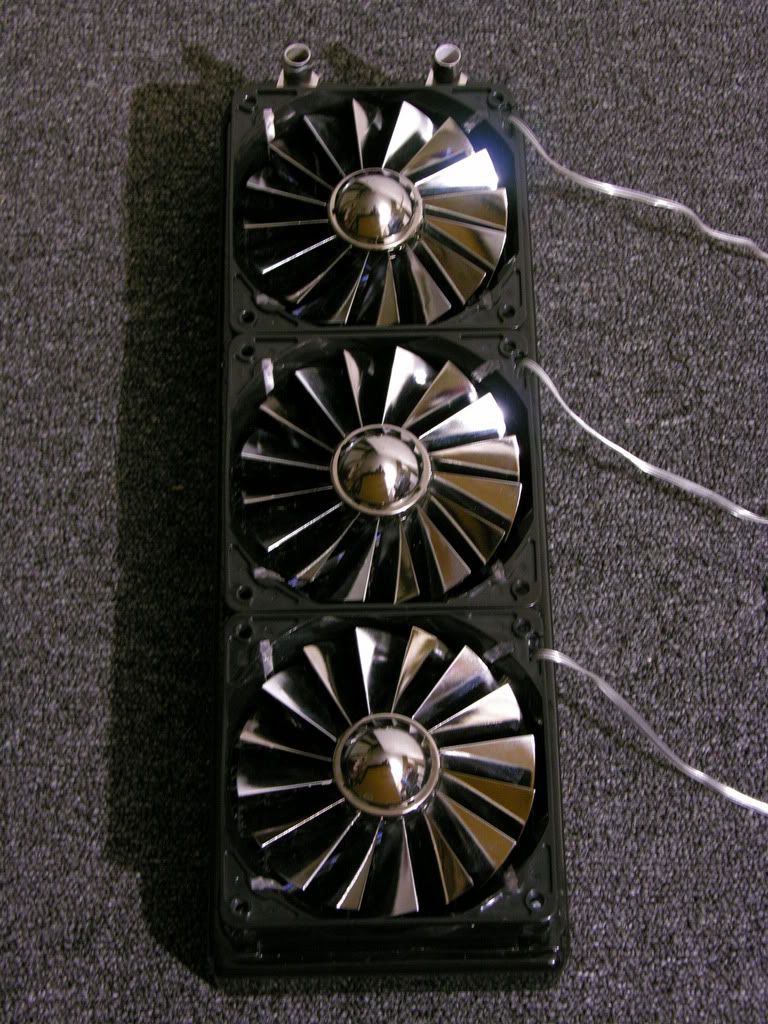
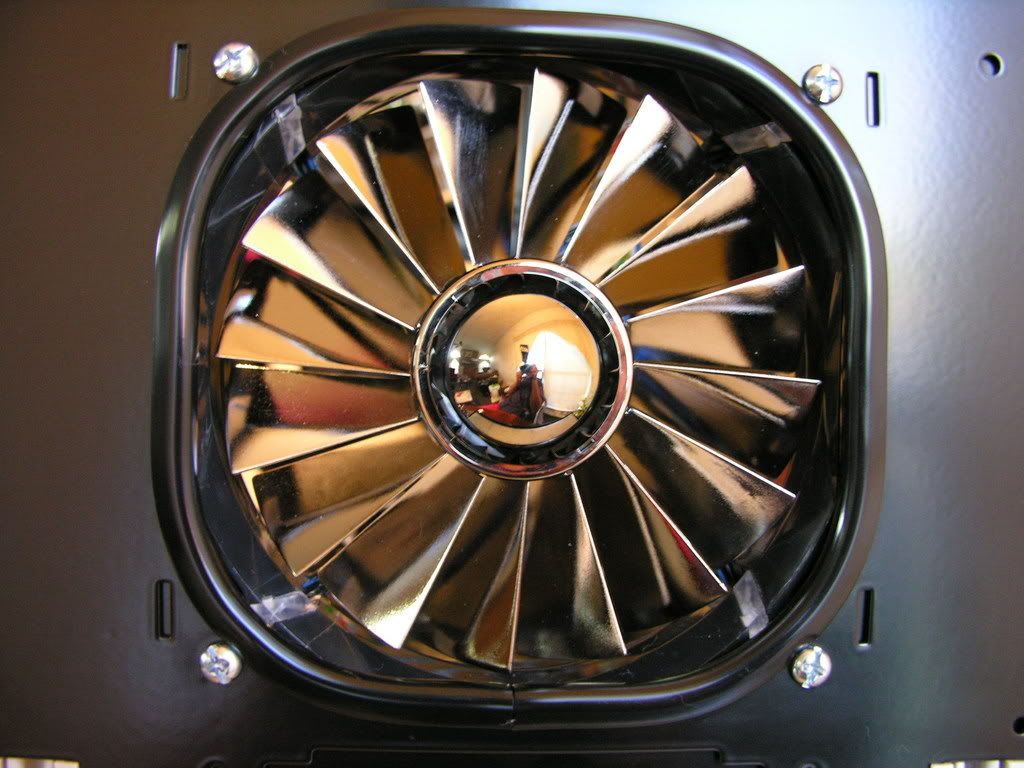
7. An A.C. Ryan 3x120mm radiator grill.
8. (3) 5" speaker box bass ports.


The components that I have chosen for this installation are listed below:

1. QX6700 quadcore processor
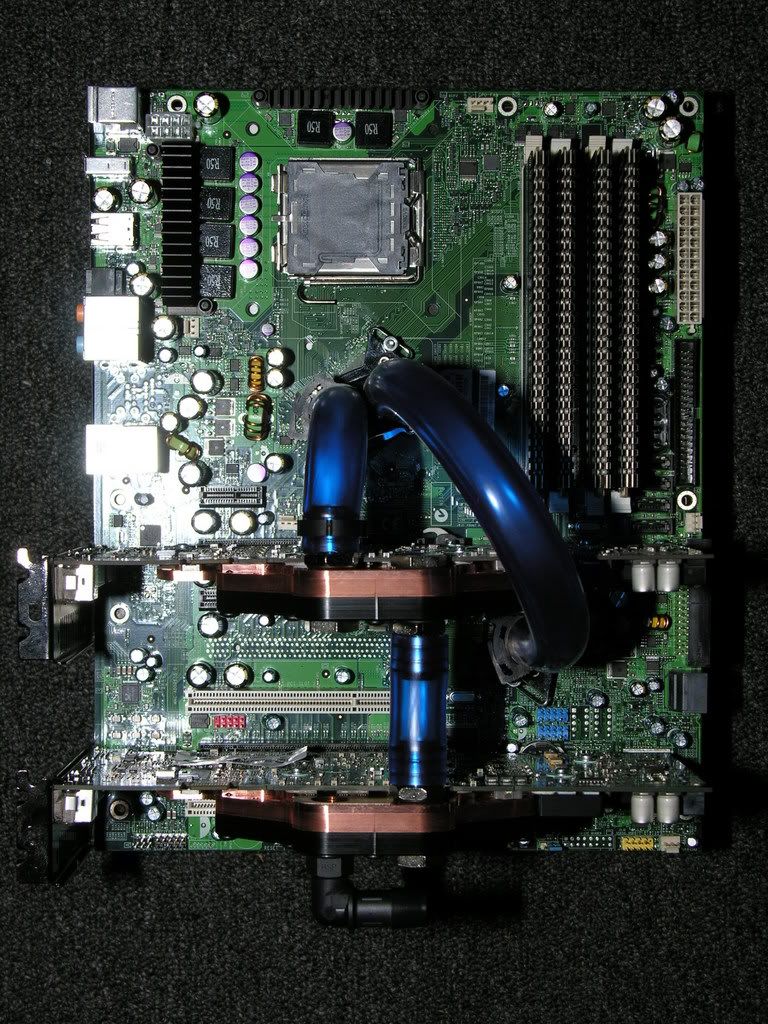
2. XFX 680i LT motherboard
3. (4) gigabytes of Corsair Dominator Ram - DDR2-1066 (8500C5D)
4. (2) eVGA 8800GTS 640mb video cards (in SLi)
5. Enermax Galaxy 1000w PSU
6. Seagate Barracuda 7200.10 / 500gb HDD
7. Samsung CD/DVD-RW drive (model SH-S182)
8. Pro-Gear XM-4U card reader
9. Swiftech MCP655 water pump
10. Triple 120mm radiator
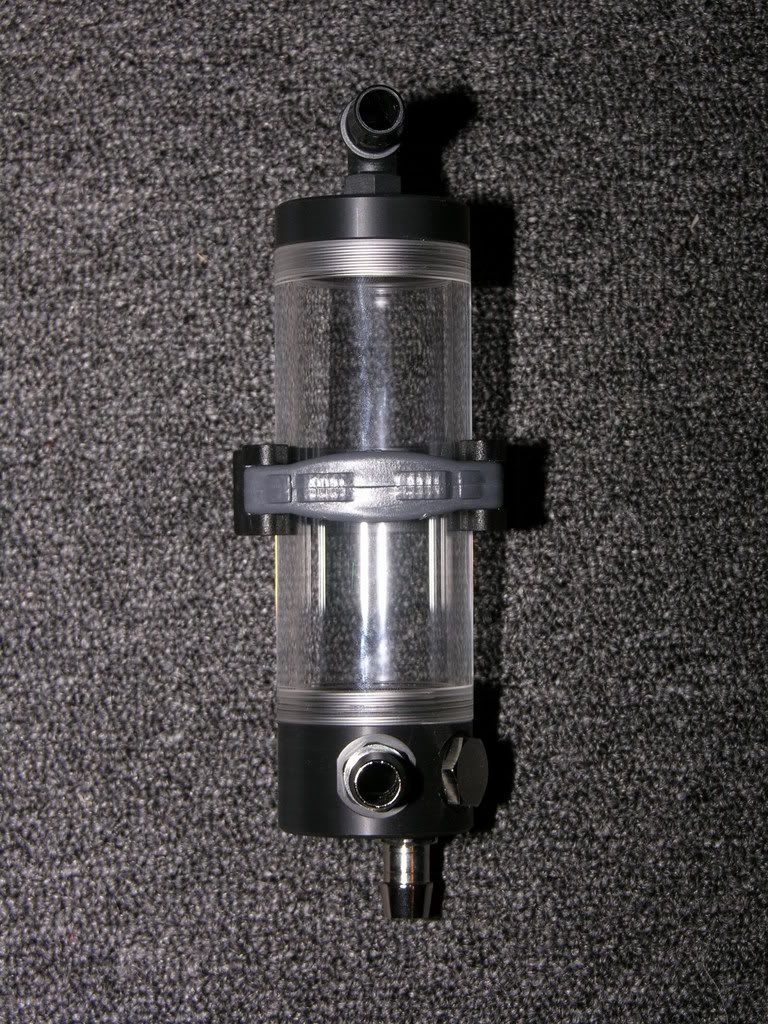
11. EK reservoir (model EK-RES-150)
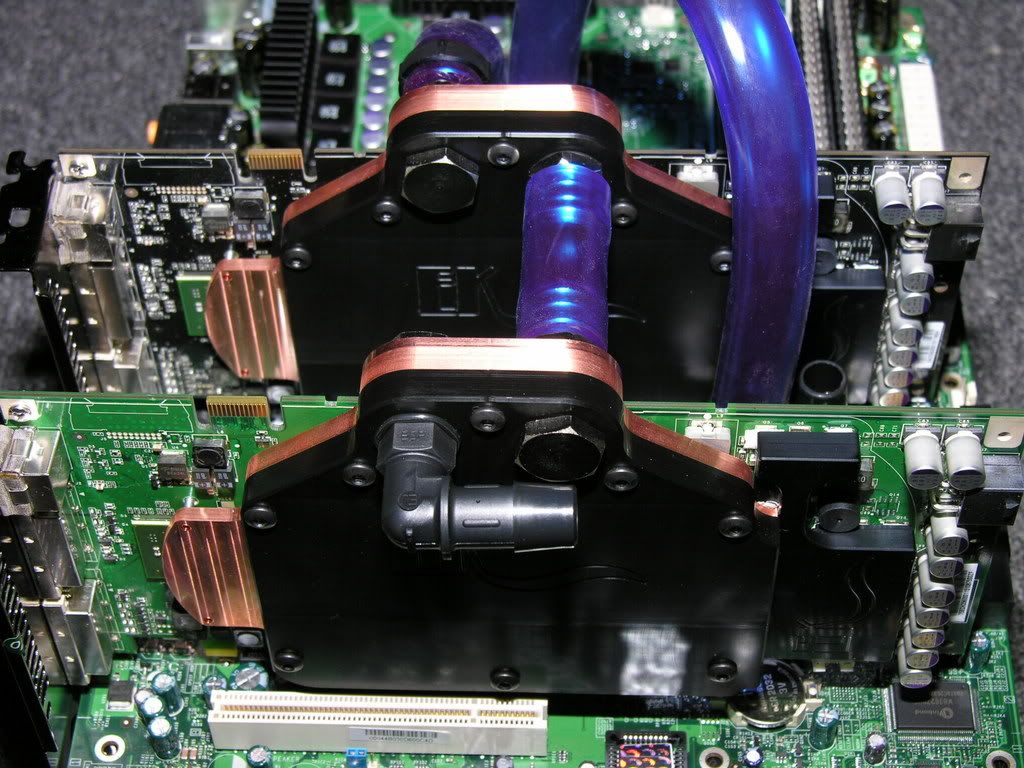
12. Swiftech MCW30 waterblocks x 2 for my NB and SB chipsets
13. EK waterblocks x 2 for my 8800GTS video cards (model EK-FC8800GTS-ACETAL)
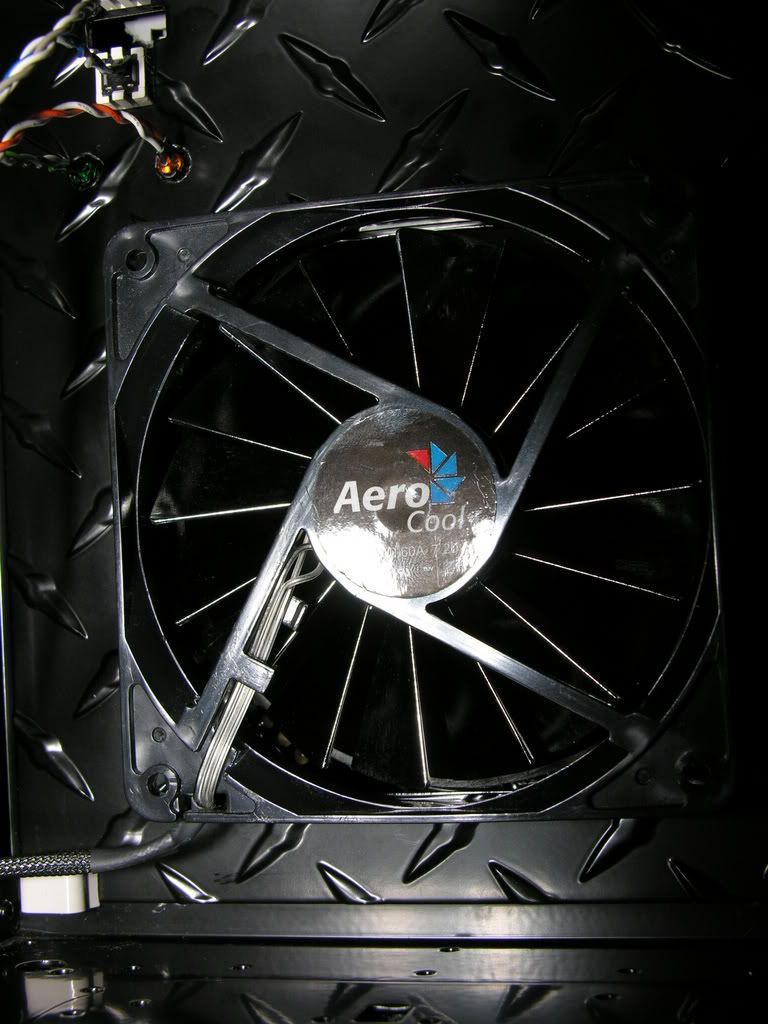
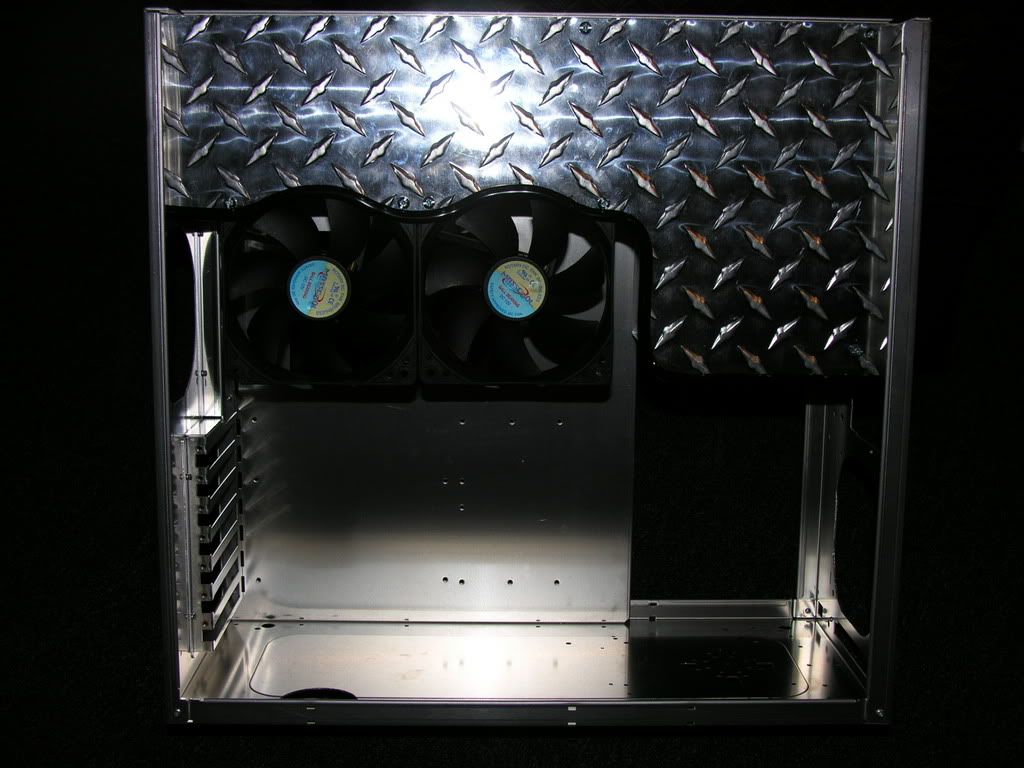
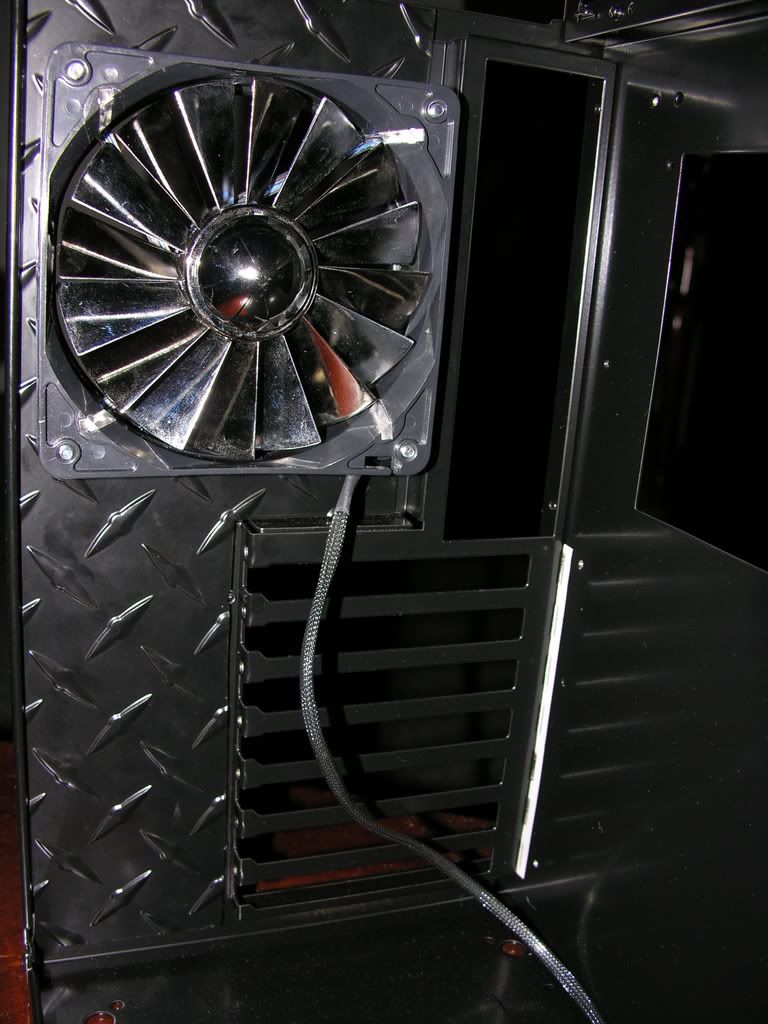
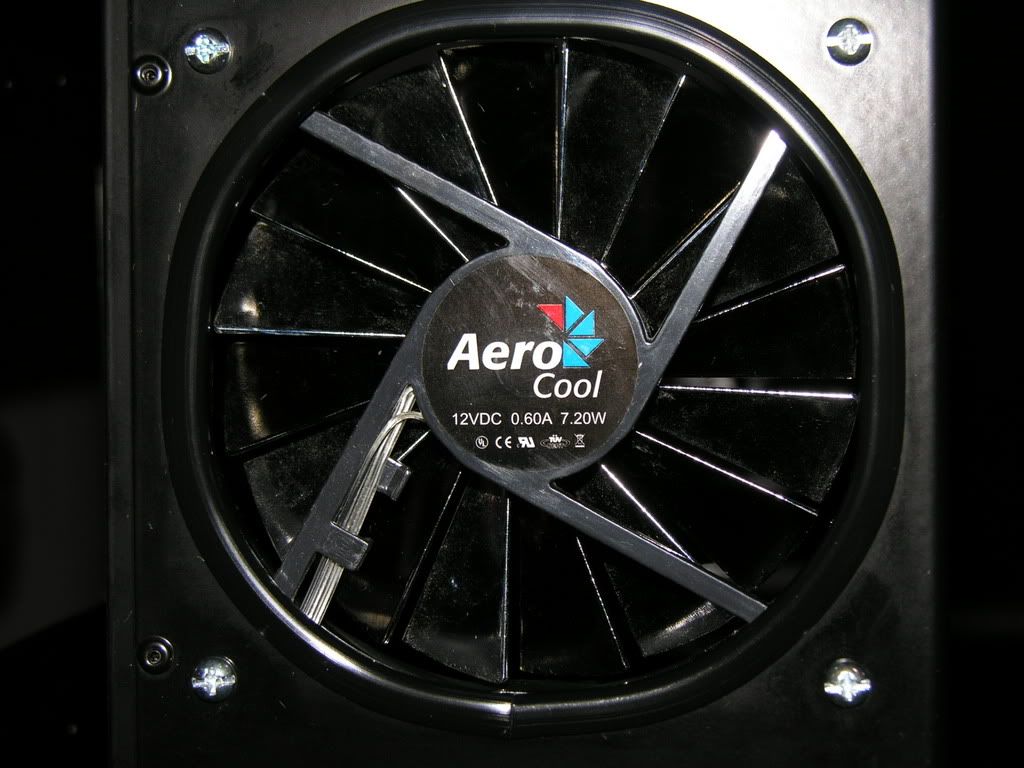
14. (7) Aerocool 89cfm 120mm Blue LED fans
15. Lian Li CD-ROM bezel
16. Lian Li 5 1/4" to 3 1/2" bay converter.
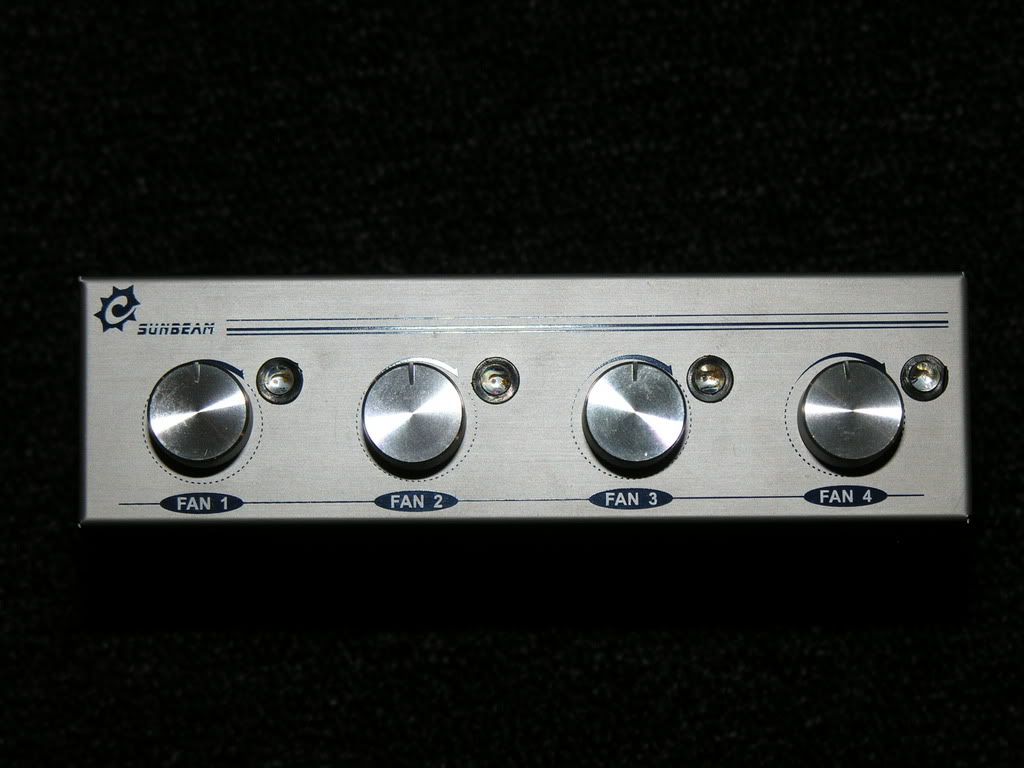
17. Sunbeam (4) switch fan controller
18. Luxurae HDSS Silent Hard Drive Mount


Services that were performed by someone other than me:

Fabrications LTD in Haltom City, Texas. From a 17 ton press to delicate CAD work, this company really helped me achieve a nice finished product.

Top Koat Powder Coating in Kennedale, Texas. The new owner, Joe, really takes his job seriously. The finished product is always perfect. I use his services ALOT!


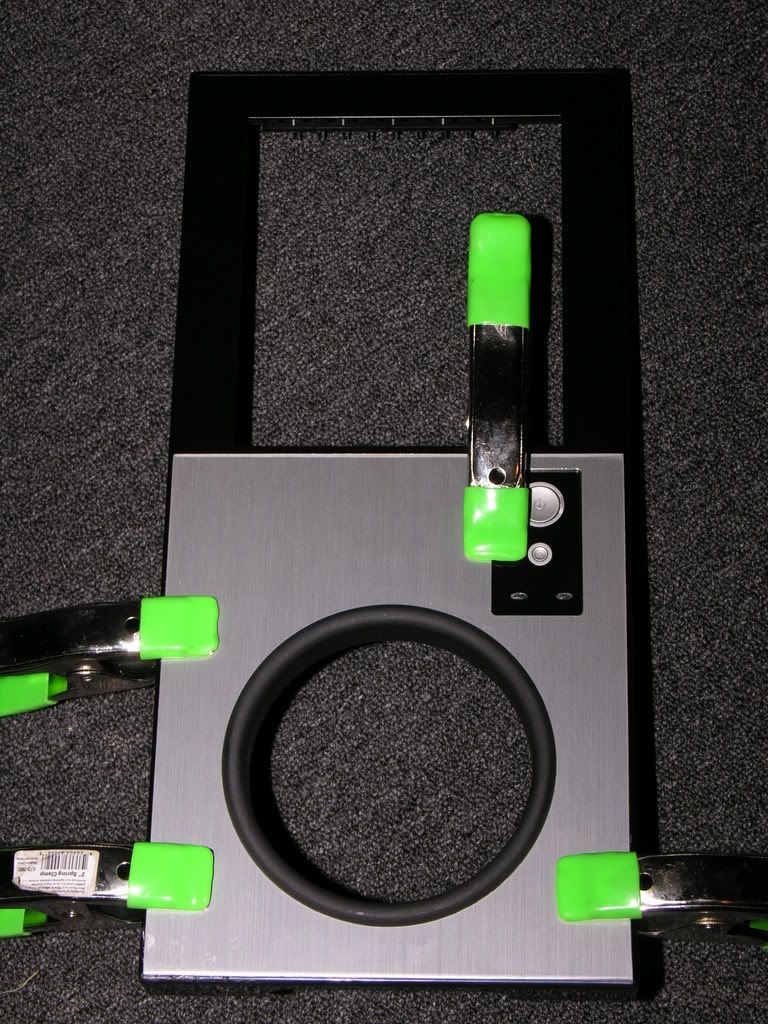
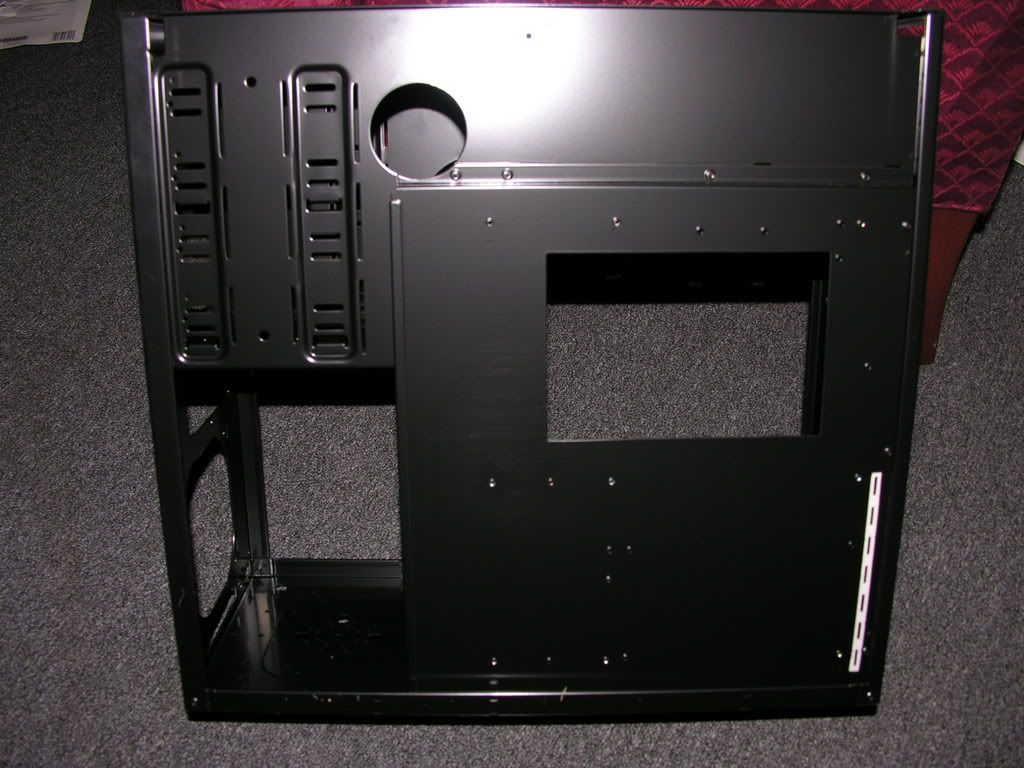
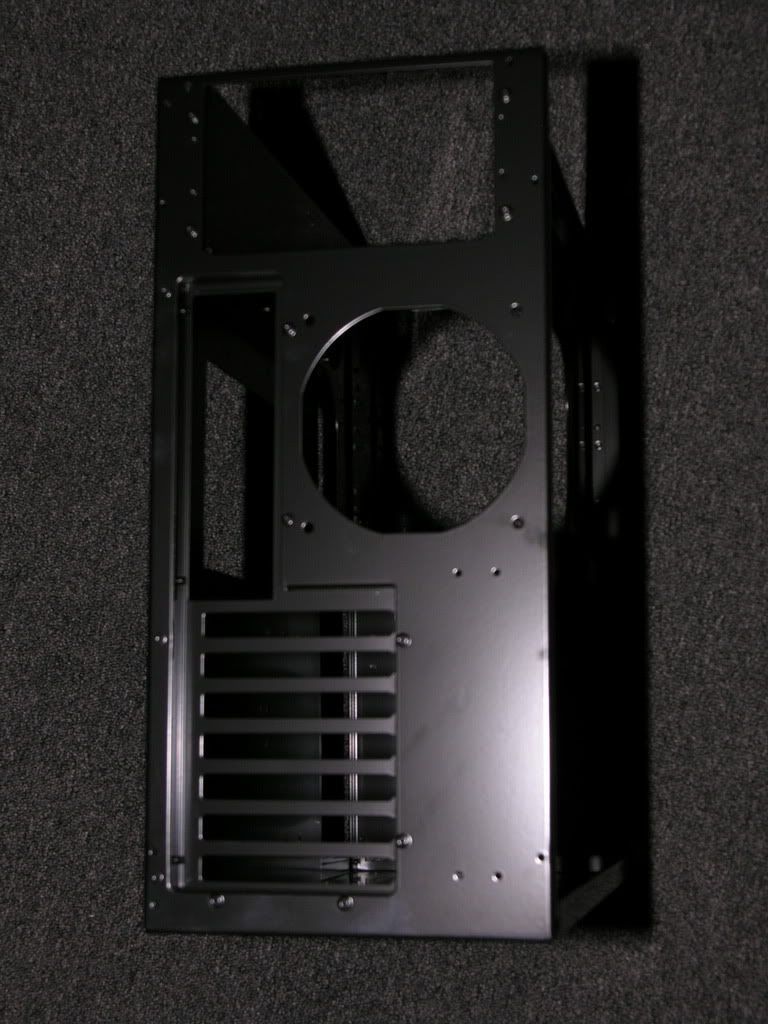
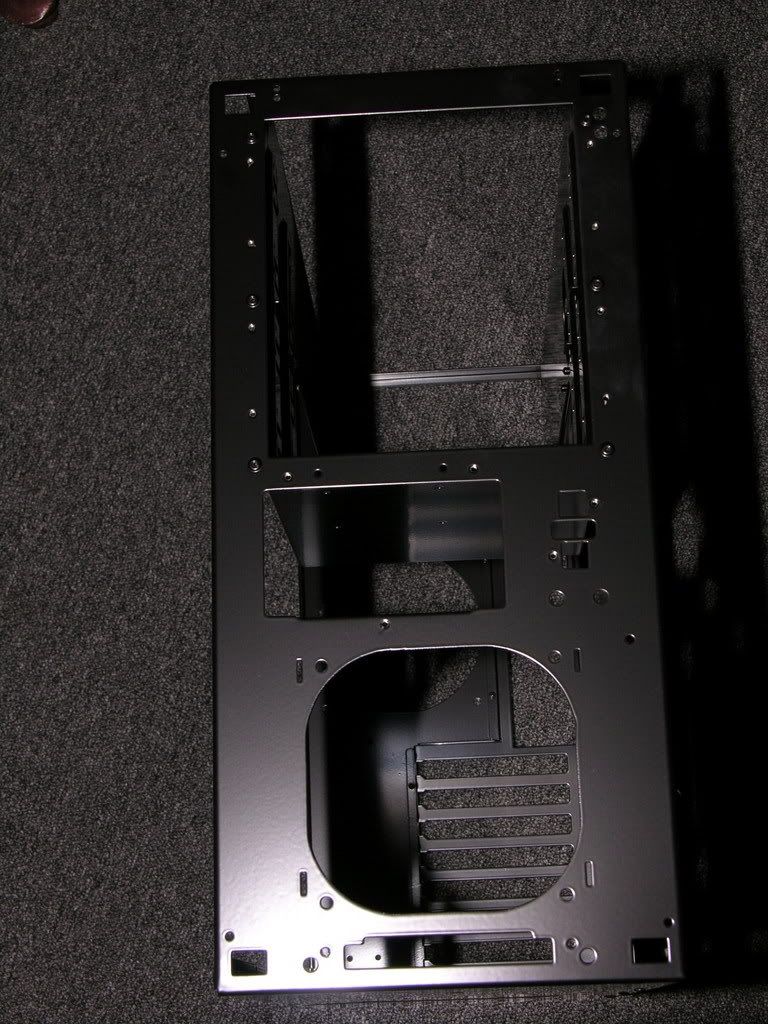
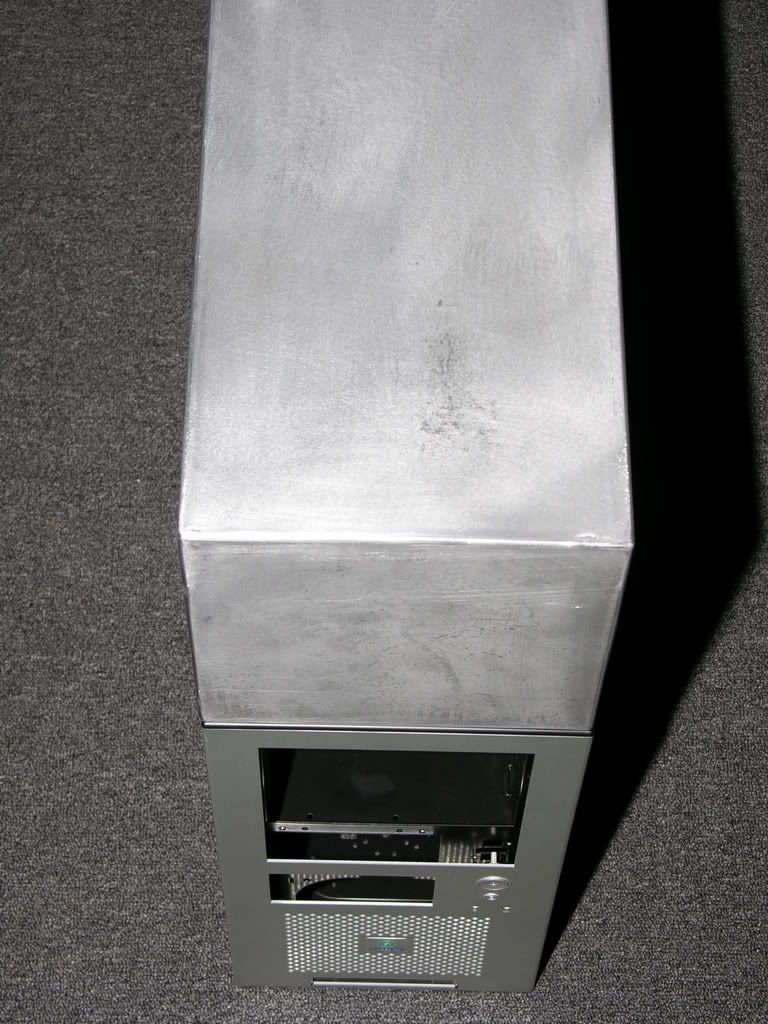
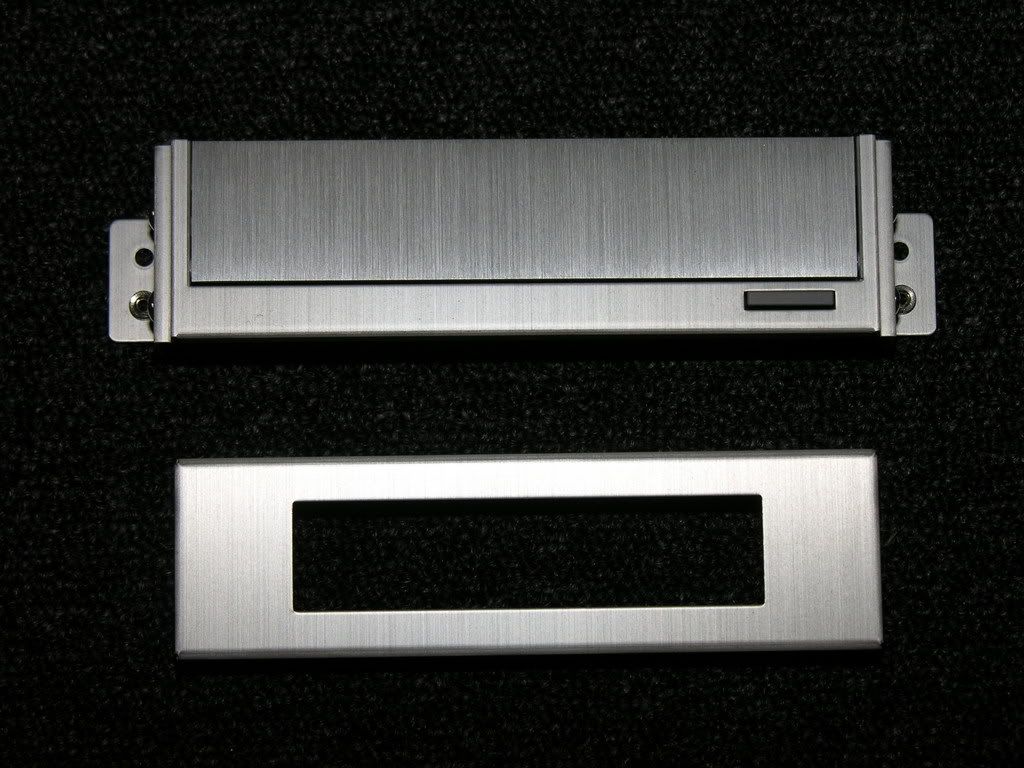
Let's start. I purchased a Lian Li PC-7A. It is completely silver (aluminum). It makes for a very nice mid-sized case. At the time of purchase, I thought to myself that a nice see though window would compliment the interior of my build. So, for a little more than $25 dollars, I bought the optional see through side panel. Nice and pretty. Since I knew from the very beginning, I would need to purchase the Lian Li CDROM bezel (for that clean look), a 5 1/4" bay HDD mount and a bay converter for my card reader. In less than a week, my supplies came in. After inspecting things over, within 30 minutes of my parts arriving, I was already measuring, removing everything out of the case, taping things off, drilling out rivets and prepping for my first cut with my jigsaw.


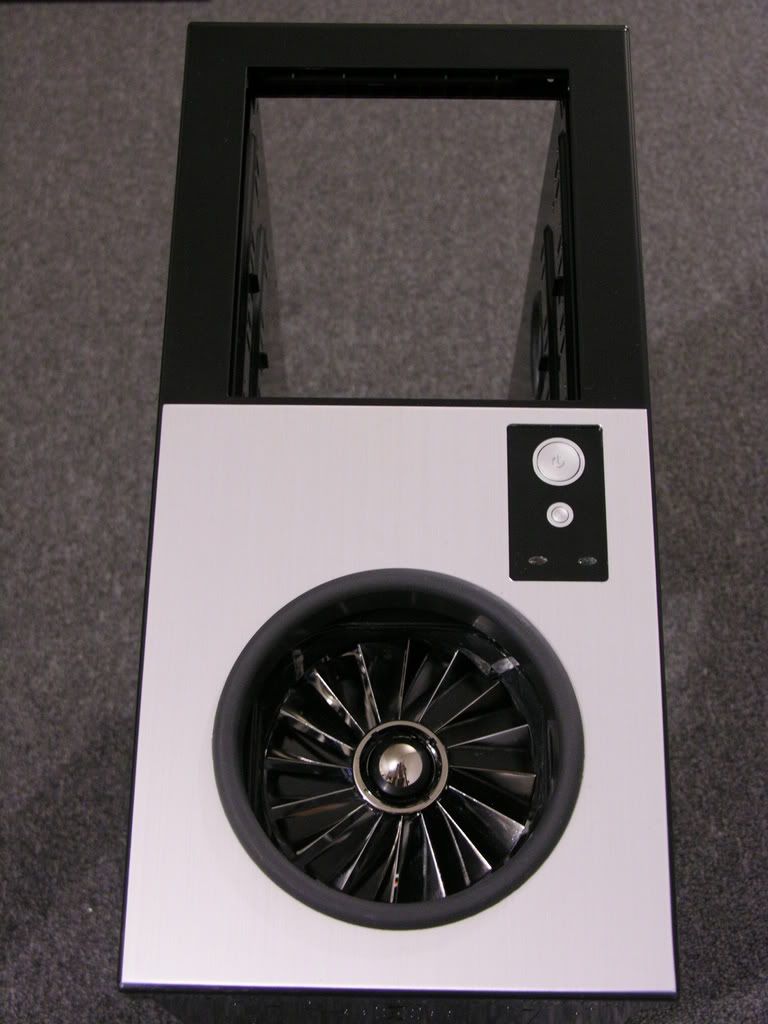
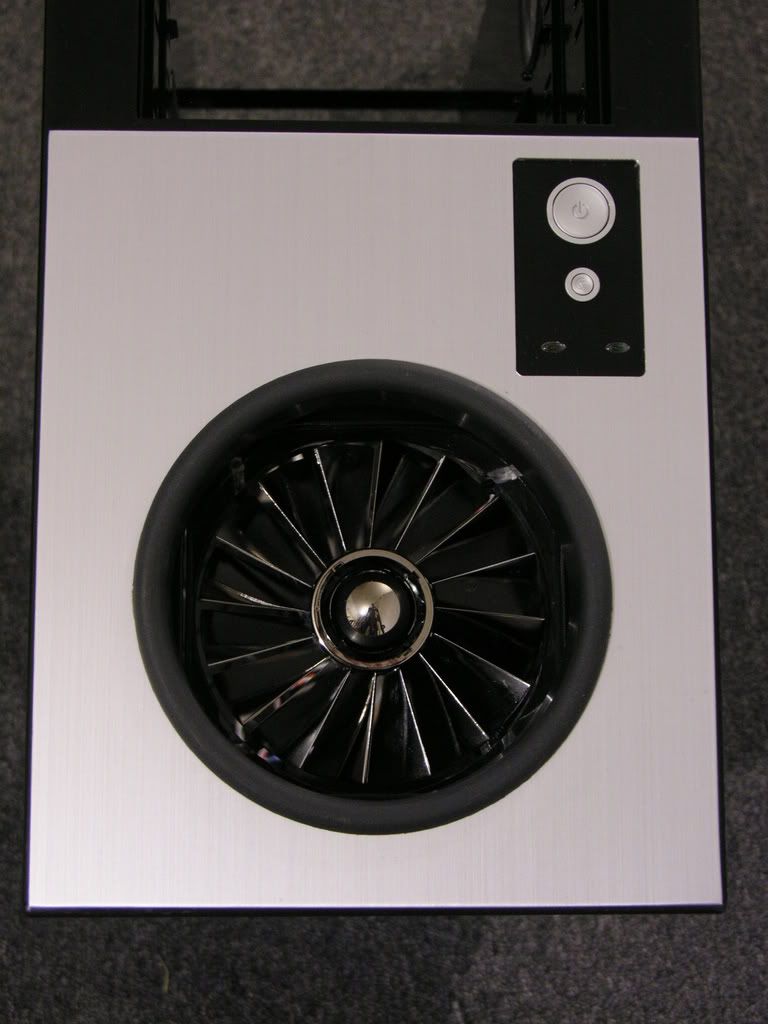
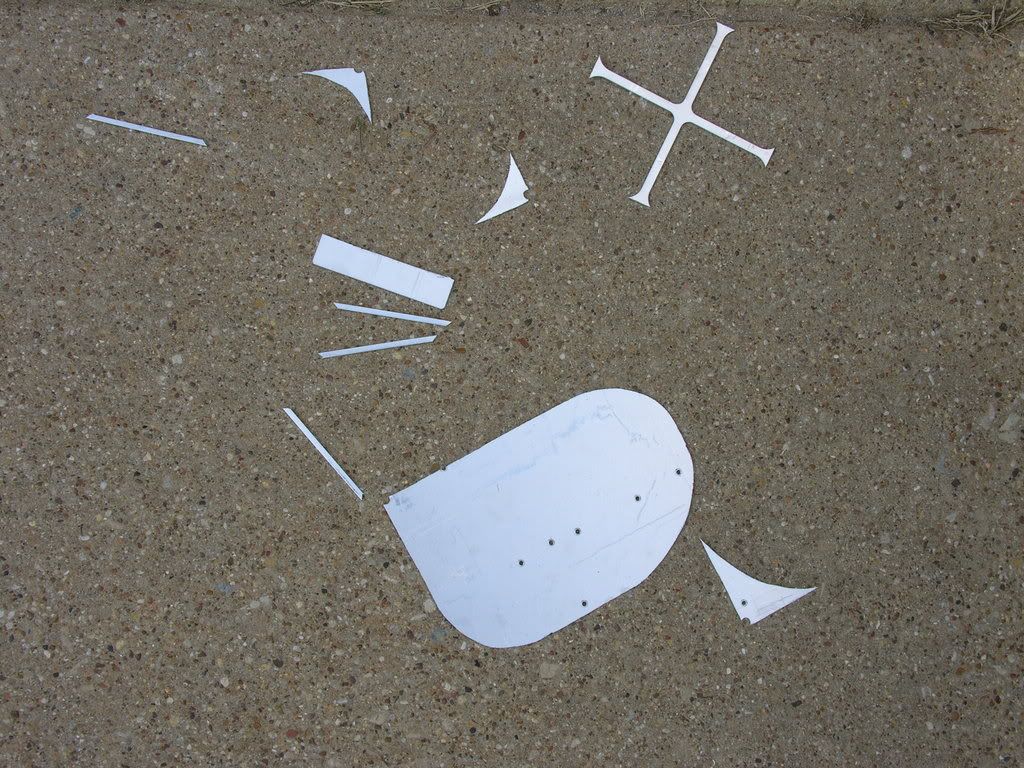
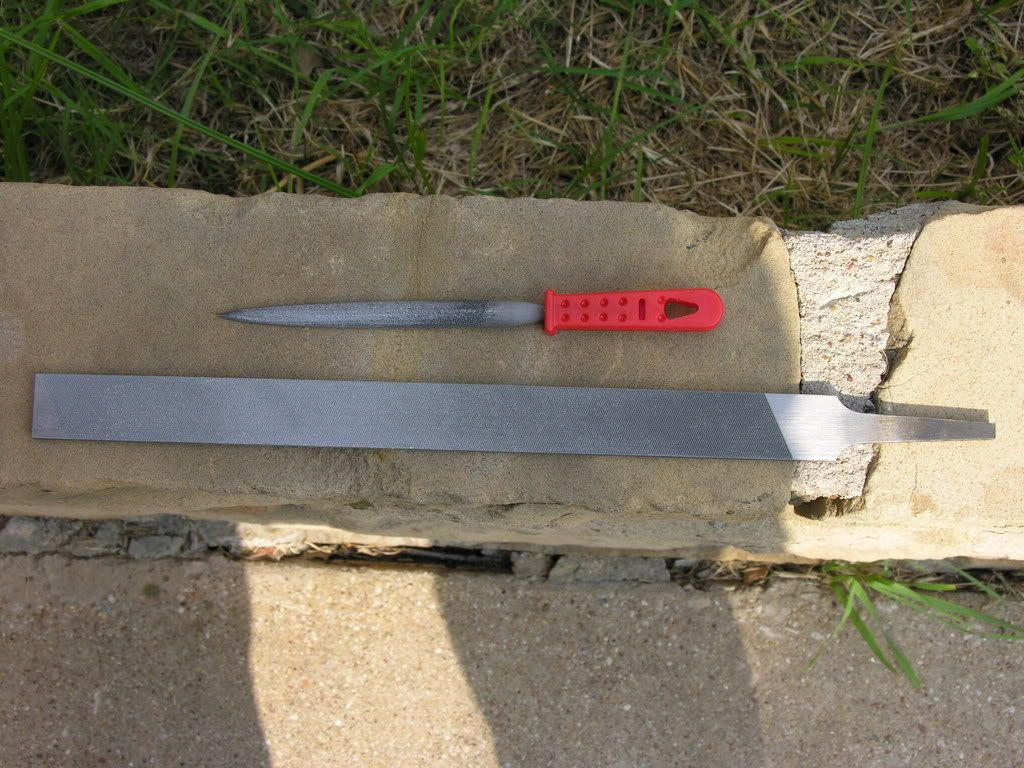
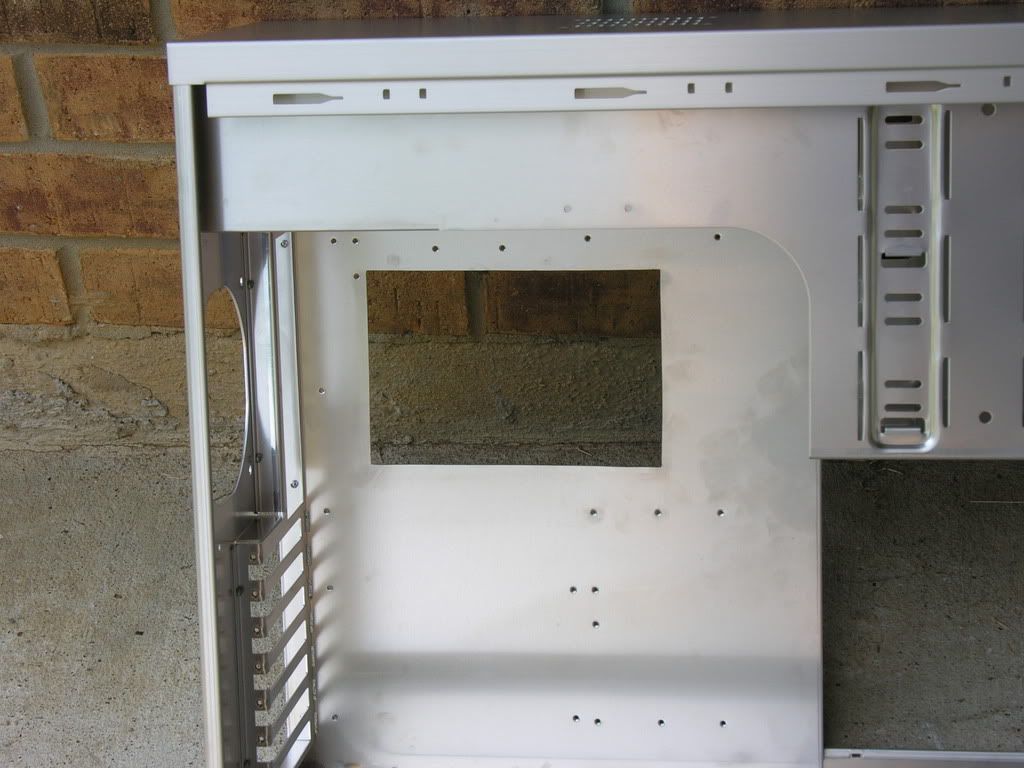
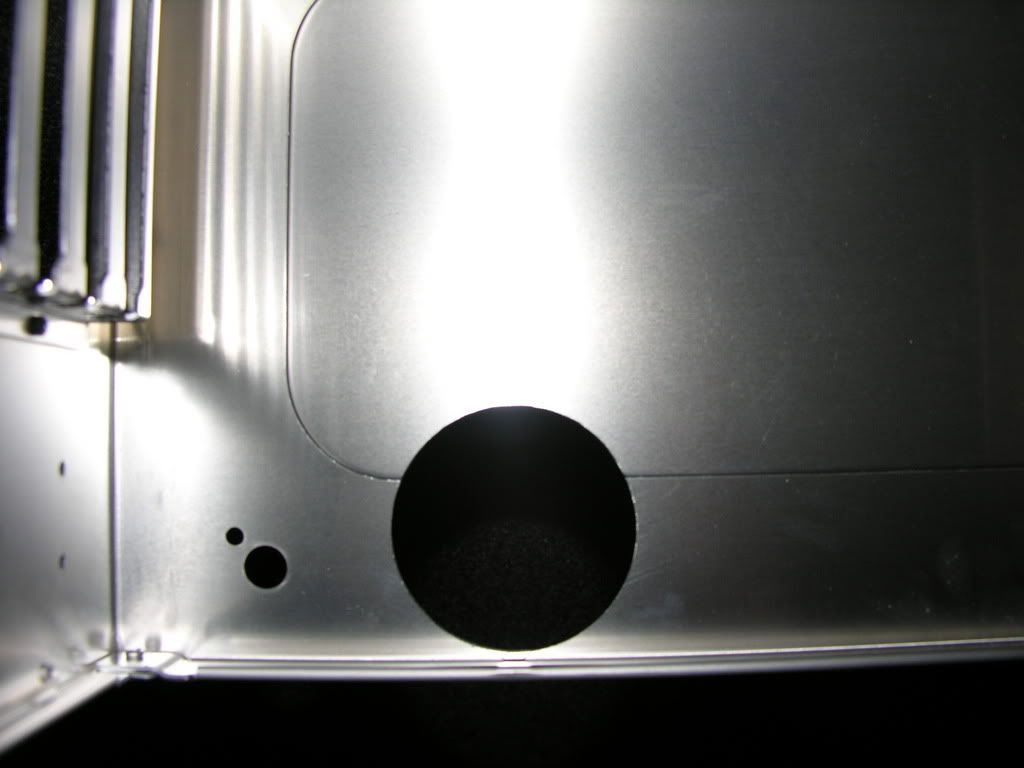
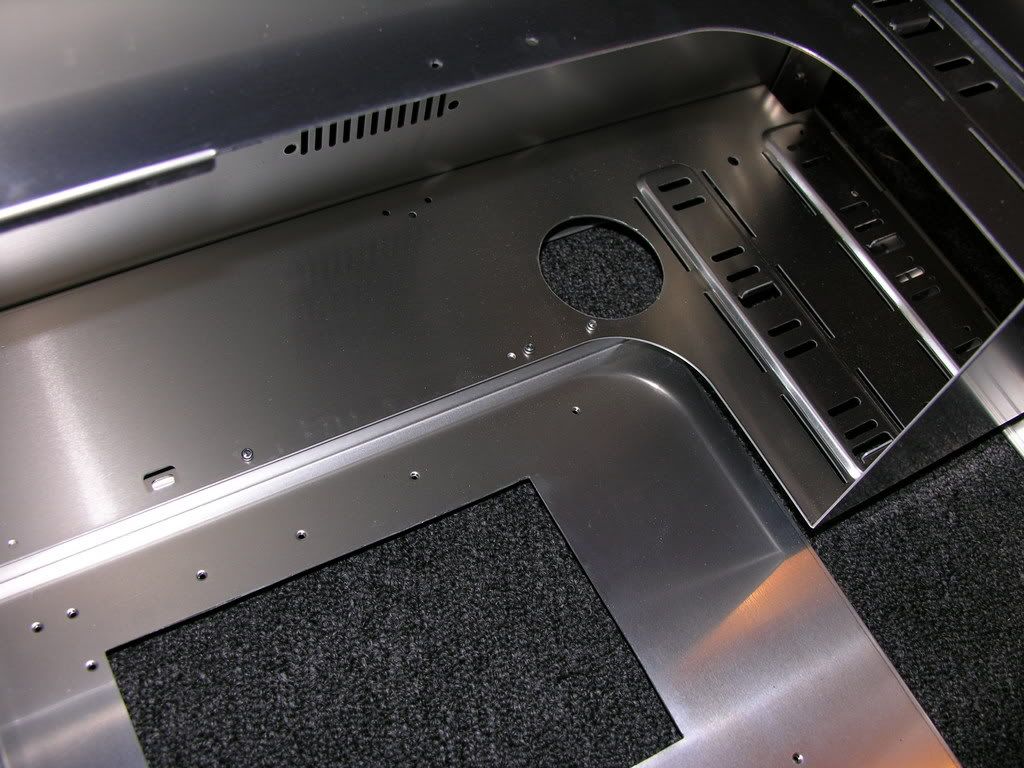
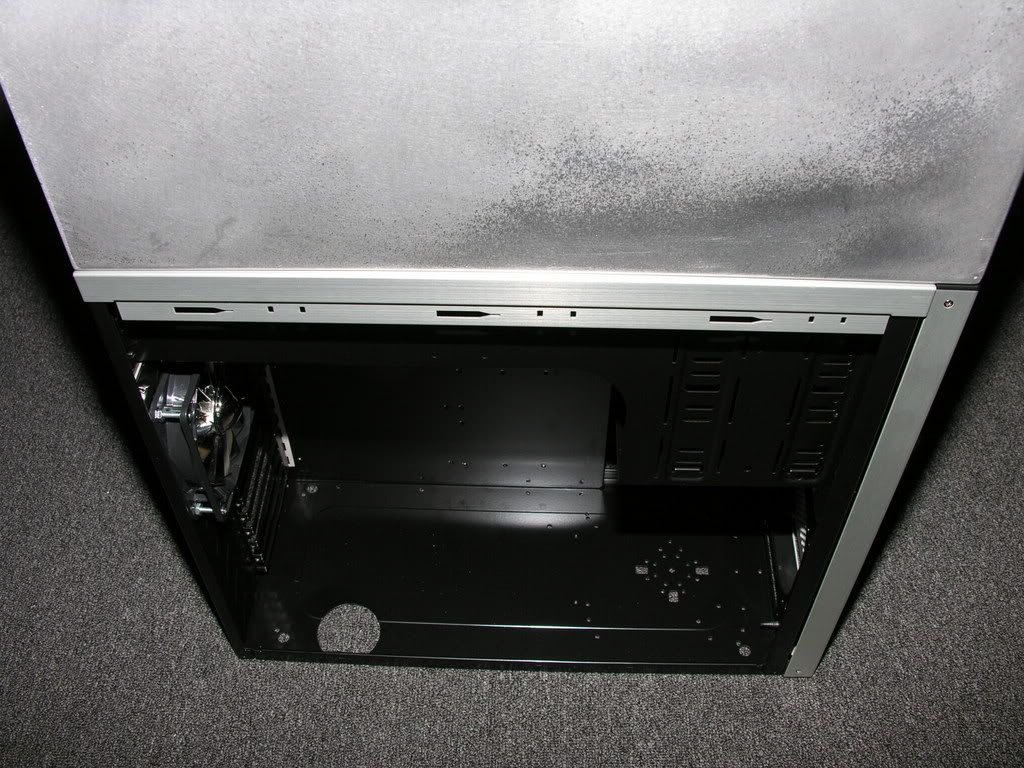
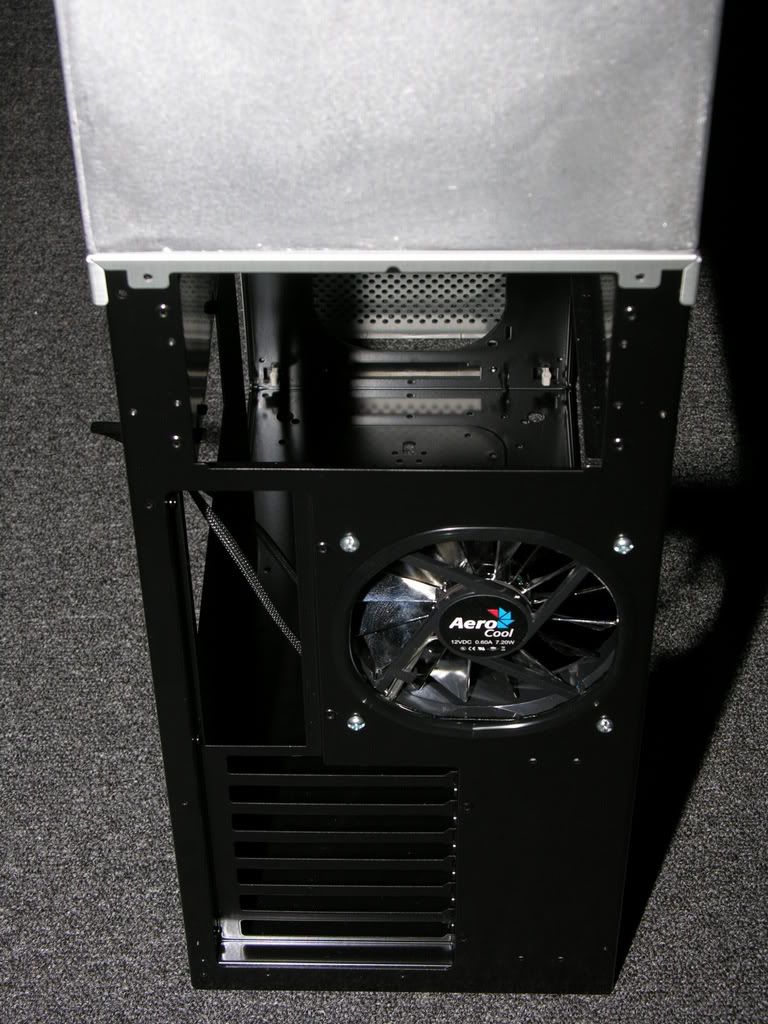
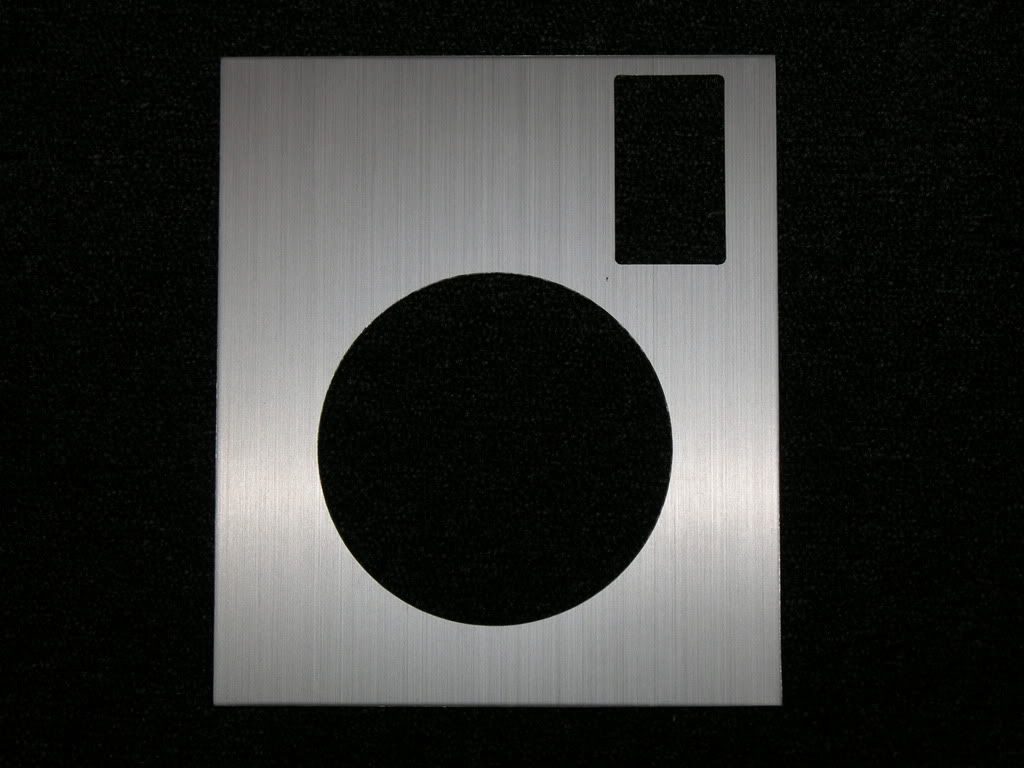
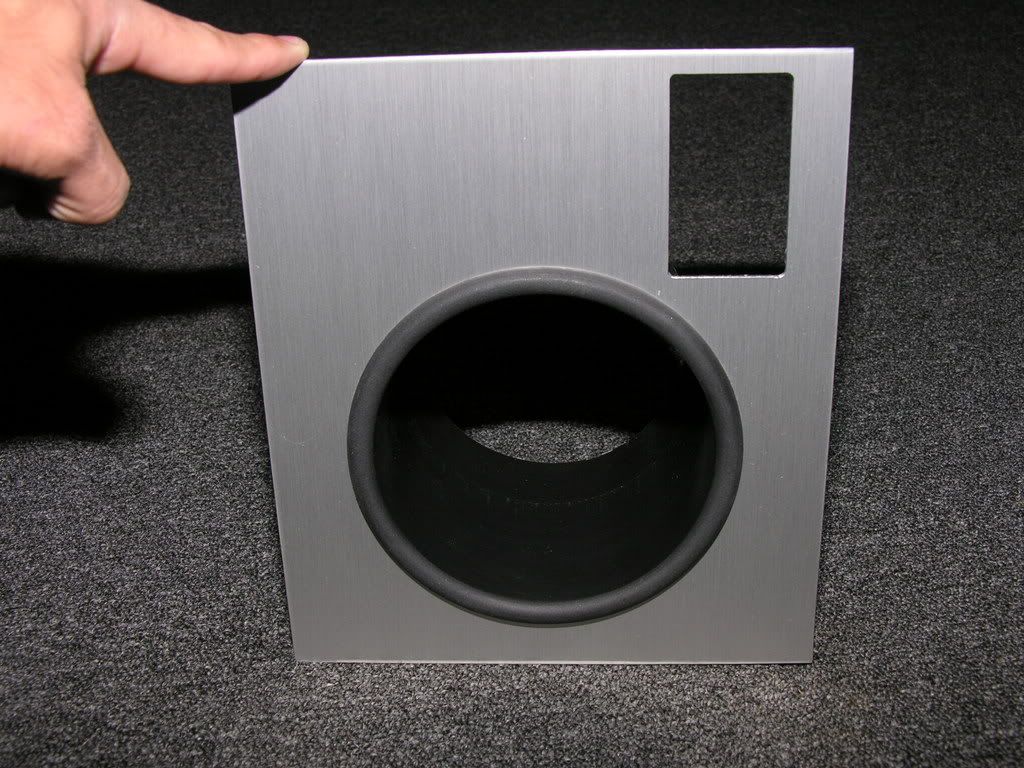
First, I drilled out the rivets which allowed me to remove the top portion of my Lian Li case. Once the rivets were removed, I measured my cuts twice, taped off the top of the case, and began cutting.


DSCN8551.jpg


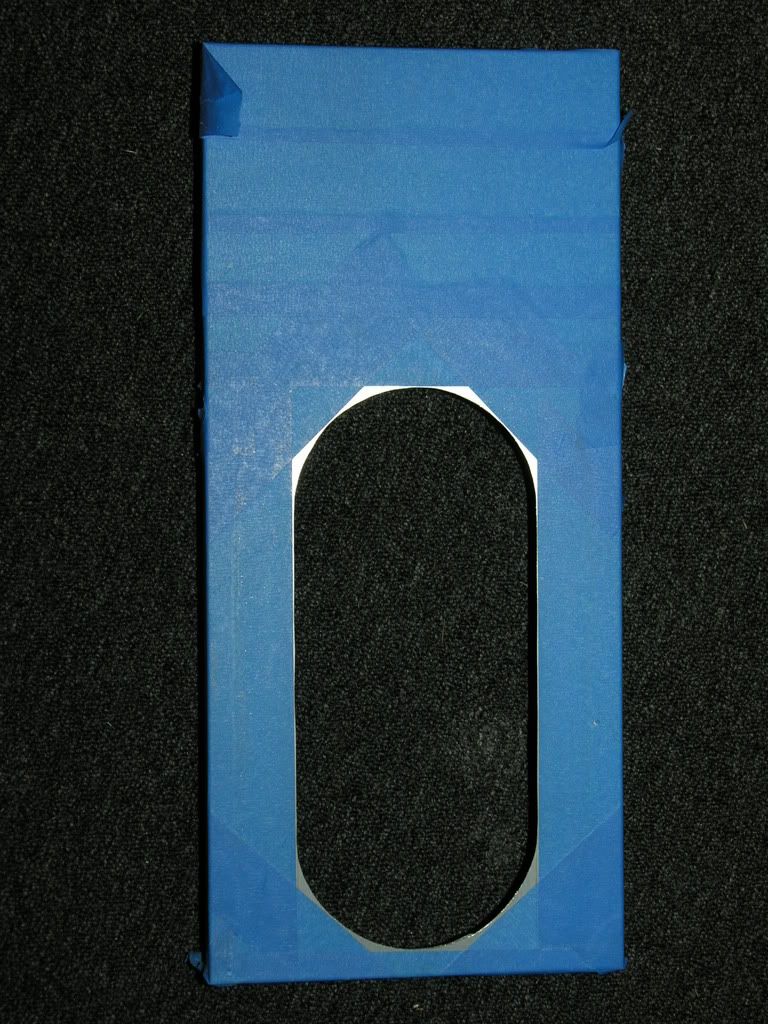
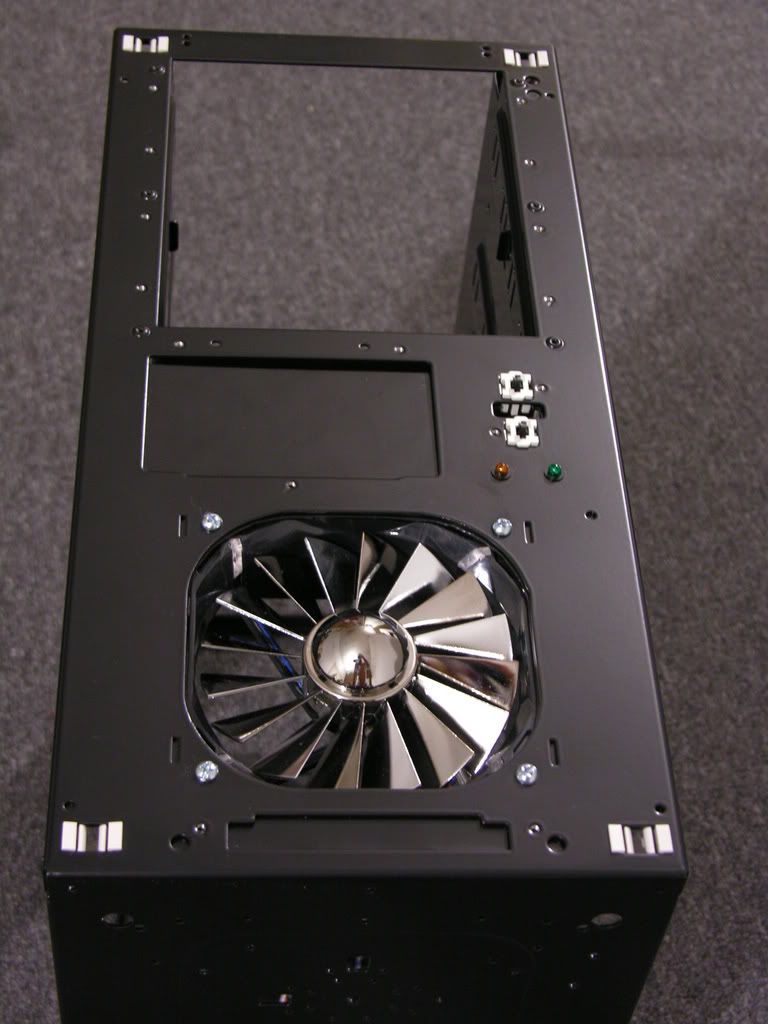
I then removed the 3M tape and after a little file work, here is the finished product:


DSCN8555.jpg
 
Next, I started on the case.. I removed everything from the case, exposing the bare frame. I cut out the 120mm fan area. The result was a clean, obstruction free mount for a 120mm fan.


DSCN8196.jpg


DSCN8197.jpg


A little file work and it was on to the next round of things..


DSCN8198.jpg
 
Let's talk about the motherboard mount area on the Lian Li PC-7A. It's a very solid, well put together design. Too solid? I need to be able to visually see the area behind the CPU socket. The lack of a removable motherboard tray is a PRO or CON depending on who you talk to. For me, it matters not. I will say that I have owned both kinds and as far as ease of installation, the removable tray cannot be beat. But this isn't an easy build. My intention on this build is to have a very clean finished product. Since I need a little access to the rear of the motherboard, I cut a little access area for my motherboard (keeping in mind that I will have vapochill head mounted to the processor/socket area).


DSCN8195.jpg


After measuring the area a few times, I saw the enclosed template for cutting a Lian Li case (provided by Vapochill when I puchased my Vapochill LS). Although it is very straight forward, I wasn't too happy with the finished look after the cut. So, having a hole saw laying around, I cut a hole where the Vapochill head would come through the floor of the Lian Li case. Again, I follow up every cut with a little file work. Here is the finished cut:


DSCN8204.jpg
 
Routing of wires: Since I know routing wires can be a pain, with the help of the hole saw again, I cut a small hole to help with wire management:


DSCN8200.jpg


Next comes the diamond plate aluminum that I purchased from my local Home Depot. I intend to cut this aluminum and fit it purely for astetics. After having seen a few builds here on [H] with people who have worked with it, I just thought it looked cool. Then I got an idea. If I could keep some active cooling on my NB waterblock, my ram, my PWM area and keeping the air moving around the head of my Vapo mount, it would really help with minimizing my temperatures...


DSCN8207.jpg


So, a little cut here.. a little cut there.. Measuring this, measuring that.. I decided on mounting (2) 120mm fans on the diamond plate aluminum, pointing directly at the motherboard. About 180cfm should just about do the trick.. LOL.


DSCN8209.jpg


DSCN8211.jpg


(note: those aren't the actual fans I intend to use. Those are just there for visual purposes to give you an idea how my Aerocool fans will mount to the diamond plate).
 
Now comes the first round of powder coating. Insuring the cuts all mount up and everything mounts just as it should, with parts in hand, I drive about 10 minutes away to my local powder coating shop (Top Koat). I have used this shop exclusively for roughly the past 4 years. A few days later, I get a phone call. Joe says, "your parts are ready". So with the quickness, I drive down to the shop to pick up my stuff. After inspecting the parts, I am very happy with the finished product.


DSCN8230.jpg


As you can tell from the picture, I decided to completely line the interior of the Lian Li case in diamond plating. The orginal side piece, a new piece cut for the front part of the interior of the case with a 120mm hole cut in it (and smaller holes cut for the power and reset buttons), a rear piece cut for the rear section of the interior of the case and a brand new floor piece for the bottom of the case. I have essentially turned my PC-7A into a PC-7B ...LOL. Here is the case:


DSCN8231.jpg


DSCN8232.jpg
 
Next, I started on the case.. I removed everything from the case, exposing the bare frame. I cut out the 120mm fan area. The result was a clean, obstruction free mount for a 120mm fan.


DSCN8196.jpg


If you noticed in POST #2, I completely removed the 3 1/4" drive bay(s) and the hard drive rack. The hard drive rack was pretty easy as it only had (2) rivets holding it in. The 3 1/4" drive bay was just as easy to remove however, the use of a dremel was required to remove a little aluminum "lip". This little lip helps support the weight of the drive bay(s). This will allow me to really clean up the front portion of the interior of this case. Now that everything is powder coated, you will NOT see the little factory cut for the access door to the USB/Audio Ports anymore. I simply will delete this option and no one will ever be the wiser that the little flip down door ever existed.
 
Here are a few shots of the interior / exterior of the case to give you an idea of how things look in place.. Darn sweaty / greasy hands leaving smudge marks everywhere.. LOL.


DSCN8286.jpg


DSCN8293.jpg
 
I will be watercooling my video cards and my NB / SB. I have a Coolrad 32-T triple 120mm radiator laying around so no need to buy another radiator. It worked really well when I had my quadcore heavily overclocked on it. So, what-the-heck! I thought of every which way to mount this big thing. Nothing really tickled my fancy so I decided to fabricate a box to house the radiator. The problem is, I went though $100 dollars in good aluminum to fabricate a rad box. All three times, I felt disappointed with the final product. Although it looked "OK" or "pretty good", I wasn't going to spend a large amount of money on my project only to have the final product look, "OK". So, I began my search for a company that offered what I was looking for. A week later, I was no closer to buying a rad box that fit my dimensions.. I went to various forums and even considered the idea of finding a "shell" to an old vapochill box. The dimensions would be perfect I thought. Heck, I even contacted Vapochill but left the conversation disappointed. It just so happened that I was in the right place at the right time.

On my way into work, I noticed a company sitting off of the freeway in Haltom City, Texas. The big letters on the front of the business said, FAB LTD. I thought to myself... Hmmmm, I wonder if they do custom metal fabrications. So, once I got to work, I went straight to the computer and googled the name. Poof.. A phone number. I called them up and asked them if they did custom fabrication work. They said, "YEP". Great.. I decided that in a few days, I would go over and talk to them. So, two days pass and I find myself entering the business. I talk to the owner. He says that if I can imagine it, they can probably build it. He went on to say they were in the process of outfitting the local Fire Department trucks with heavy gauge diamond plated aluminum boxes / storage areas. He even mentioned that they build huge trailers!

I told him that I had something MUCH smaller in mind. Having wrote down the dimensions to the vapochill LS box, I told him that I would need an aluminum box built with pretty much the same basic dimensions in mind. He sat down for about 2 minutes drawing out a rudimentary design on paper of what I wanted. He then showed me the paper and asked if that's what I had in mind and I was surprised. WOW! It was exactly what I had in mind. He simply asked for me to come back in a week to pick it up. Being busy at work, just under 2 weeks pass and I go back up there to pick up my newly designed aluminum box. He hands it to me and I was VERY impressed with its construction. From one single piece of aluminum, I am now holding this box and I thought, MAN! This thing is SOLID! For his efforts, time and materials, he simply asked me for basically $115 dollars. A deal indeed.

Here is the box:


DSCN8312.jpg


DSCN8315.jpg


DSCN8316.jpg
 
Once I got home, I started by measuring and cutting the top of the box to fit the triple radiator. I also purchased some 5" speaker box ports from eBay. Since the radiator needs to have fresh air sucked in from outside of the box / case, I cut (1) 5" hole in the front and (1) 5" inch hole in the rear of the box to keep a constant fresh supply of air coming in. I would then trim out the front and rear 5" holes with the speaker box ports. The unfinished aluminum box, as you can tell, has "fine scratches" in the aluminum from being sanded on, etc.. It won't matter in the end.. As long as its not a deep scratch (and they aren't), the powder coating process will completely fill in the surface abrasions and leave it looking PERFECT!


DSCN8546.jpg


DSCN8547.jpg
 
Powder coating, ROUND TWO:

As you can see, when I received my Vapochill LS, it had, what appeared to be a dent on the side of the case (I assume it was from shipping). Since I knew it wasn't going to void my warranty to remove the side panels, I called Vapochill and asked them if it would be acceptable to take the panel off, hammer out the small dent, sand it down and then powder coat the panels. They didn't have a problem with that. My warranty would only come into consideration if I began touching / modding the internal workings of the Vapochill unit itself. So, here is a shot of all of the extra parts that are at the powder coater right now.

If you can see it, the front of the Lian Li case has a 5" round hole cut in it. That's exactly where the 120mm fan sucks in air. So, just as you imagine, I will add a 5" speaker box port to the front of the Lian Li case, to match the rad box. This will blend the theme well and make it all look uniformed and "stock like" in appearance.


DSCN8558.jpg
 
With the parts at the powder coater, I removed the plastic fan shroud and heat pipe assembly off of my 8800GTS's. Just arrived, my new EK water blocks! Very pretty.. LOL. So, I decided to mount them up.. 2 1/2 hours later, this gives you an idea of what it will look like inside the case..


DSCN8329.jpg


DSCN8324.jpg
 
wow i like the diamond plate stuff looks nice in black. also would have looked good with the case in black and the diamond plate in a dark black chrome (might be time to mod my case.lol)
 
Here are a couple of shots of the bezel(s).. Straight forward on the installation..


DSCN8566.jpg


This is some scrap aluminum that was cut to fit the front of the case. It has a 5" hole cut and a small hole was cut to allow access to the power switches. I decided that it would be a little different take on mounting the stock switches back in their stock position. The silver (Lian Li aluminum) will contrast with the black and hopefully, everything will look cool!


DSCN8561.jpg


A glance of what the intake area will look like when its all mounted up to the front part of the case..


DSCN8564.jpg
 
I will be water cooling my NB, SB and (2) 8800GTS's. I will be freezing my processor with a Vapochill Unit.
 
I didn't get much accomplished today. I have a sun beam rheobus fan controller. I am not very fond of the blue writing on the aluminum face. So, after soaking it for a few ours in some Acetone based nail polish remover, the blue wiped off nicely. I still have to re-assemble the rheobus, but here is a picture of it, BEFORE I poured nail polish remover (now with Aloe and Vitamin E) all over it.. hahaha.


DSCN8567.jpg
 
OK. Just found my camera.. Here is a picture of the Sunbeam Rheobus fan controller without the blue ink.. Now all I have to do is put it back together and now its finish looks sooo much better!


DSCN8671.jpg
 
I've been working on the speaker box ports for the past few hours.. I a total of (3) of them, all of which needed to be trimmed. So, I pulled out my hacksaw and went to work..

First, I started with a brand new speaker box port..


DSCN8678.jpg


Here is some of the work in progress..


DSCN8680.jpg


After some touch up work with a razer blade, the port is at the lenth that I need it. Perfect clean cut and ready to be mounted..


DSCN8685.jpg
 
Just applied JB Weld to the two pieces of metal which will adhere the silver aluminum piece to the front part of the Lian Li Case.. The center port will allow the intake fan to suck in fresh air with NO obstructions!

I will let this set til tomorrow but in the mean time, it's back to work on the case!


DSCN8689.jpg
 
Thanks guys! I've reached a stopping point for the evening but to give you a little better idea of the front of the case, I assembled it and snapped a few pictures. Prior to being powder coated, the biggest pain was cutting those little holes to fit the power / reset switches, LEDs and the two case mounts in each bottom corner of the aluminum diamond plate..


DSCN8700.jpg


DSCN8714.jpg


DSCN8704.jpg


DSCN8707.jpg
 
Not much time to work on this project today as I have to be at my job in a few hours.. However, I will mount the side panels to the Vapochill and do a few misc little things (assemble the hdd adapter, mount the card reader inside its adapter, etc)..
 
I do like this project. Personally, I would have tried a glossy paint to match the cut speaker port with the powder coat of the case. Just me but also a suggestion. I'll be keeping an eye on this mod.:)
 
I really thought about painting the port.. I'm just not really big on spray painting stuff. If it's metal, it gets powder coated. If its plastic, all I can really do is get close with my colors.. I even looked into "metalizing" a few plastic pieces. I found one place in Dallas, Texas and another in Oakland, California that does metalizing of plastics. Very pricey.. looks cool, but pricey. Although I like to K.I.S.S. (Keep It Simple Stupid), my wife would tell you I am far from that! She's obviously not a modder.. LOL. That's what she has a husband for.. (POST #539 - #542 is her computer that I re-built and modded just for her) http://www.hardforum.com/showthread.php?t=908610&page=27

I am off tomorrow (Friday) as my brand new Westinghouse 42" 1080P should be delivered. It is going to be the monitor that I use for this project. I will be sure to take pictures when I buy my new desk and have it all setup. My little Logitech Z-2300's came in yesterday. After the monitor comes in, I can't think of any other large purchases that I need to make (aside from the new desk). My desk that I currently have is an awesome corner desk but simply it's too small for a 42" LCD monitor. I have my eye on a "L" desk sold at Staples and its just under $100! That would be more than ample for a 42" monitor and a huge Vapo / Lian Li / Radiator Box setup!
 
My camera ran out of juice but I was able to atleast begin installing the drives and actually mounted the Vapochill to the Lian Li case (Ooops, I forgot to drill holes in the bottom of the case prior to powder coating).. No biggie. The holes were perfectly drilled and everything lined right up. However.... LOL, the supplied screws that came with the Vapochill, which actually bolt the bottom of the floor of the case to the Vapo unit, were NOT long enough. I used 1/8th inch foam padding between the diamond plate aluminum floor and the actual floor of the Lian Li case to prevent metal on metal vibrations / rattling.

Its a good thing I am a pack rat when it comes to screws / bolts / nuts / washers.. I was able to find (4) good allen wrench screws that will replace the (4) Vapo screws. I measured the case with everything mounted up and WHOAH, it's a monster.. It's a whopping 34" inches from top to bottom. Oh, also my Westy 42" 1080P LCD monitor came in today.. That thing is huge too. One could get a bad impression that I am possibly compensating for something.. LOL. Pics are soon to follow!
 
Just wanted to post an update on those screws that I had laying around. The short little stubby one is the screw that is supplied by Vapochill. I was forced to find a bigger screw and luckily I didn't have to go any further than my garage. As described in the post above, these screws will hold the floor of my Lian Li against the Vapochill unit. I must say the bigger sized screws makes it pretty sturdy..


DSCN8724.jpg


Yesterday, I also focused some attention on my water cooling setup. Again, I am water cooling both of my video cards (SLi) along with my northbridge and southbridge. I must say, mounting the 120mm Aerocool fans to the Coolrad 32T triple radiator was a 45 minute pain. I decided to use a screw, nut and lock washer to hold the fans on instead of the supplied pointed metal screws.


DSCN8737.jpg


I also bought a new Swiftech 150 reservoir. It will be mounted out of sight to help keep the interior of the Lian Li case "uncluttered".


DSCN8726.jpg
 
Also, a little touch up on the front intake fan.. I have a spare PSU laying around and was testing each fan prior to mounting it up. I ended up trimming out the front intake fan with some plastic automotive trim.


DSCN8721.jpg
 
Back
Top