Built-in Office

Status
Not open for further replies.
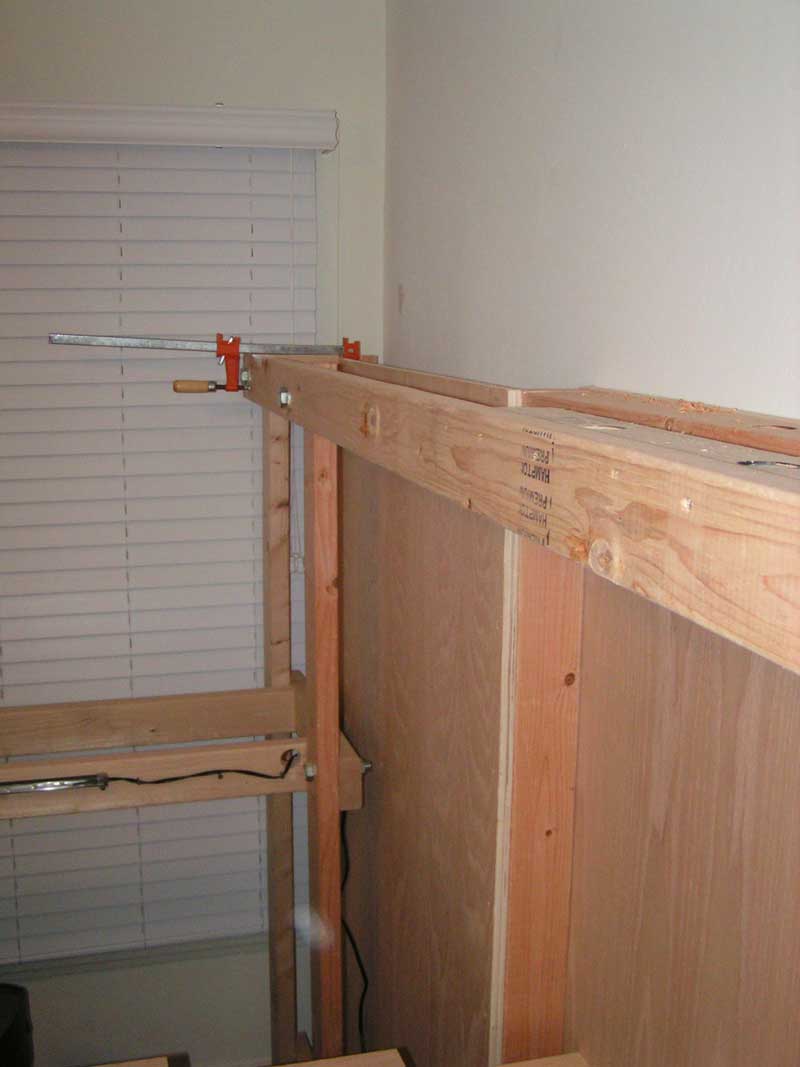
Made some progress over the last day or two...

PICT7757.jpg


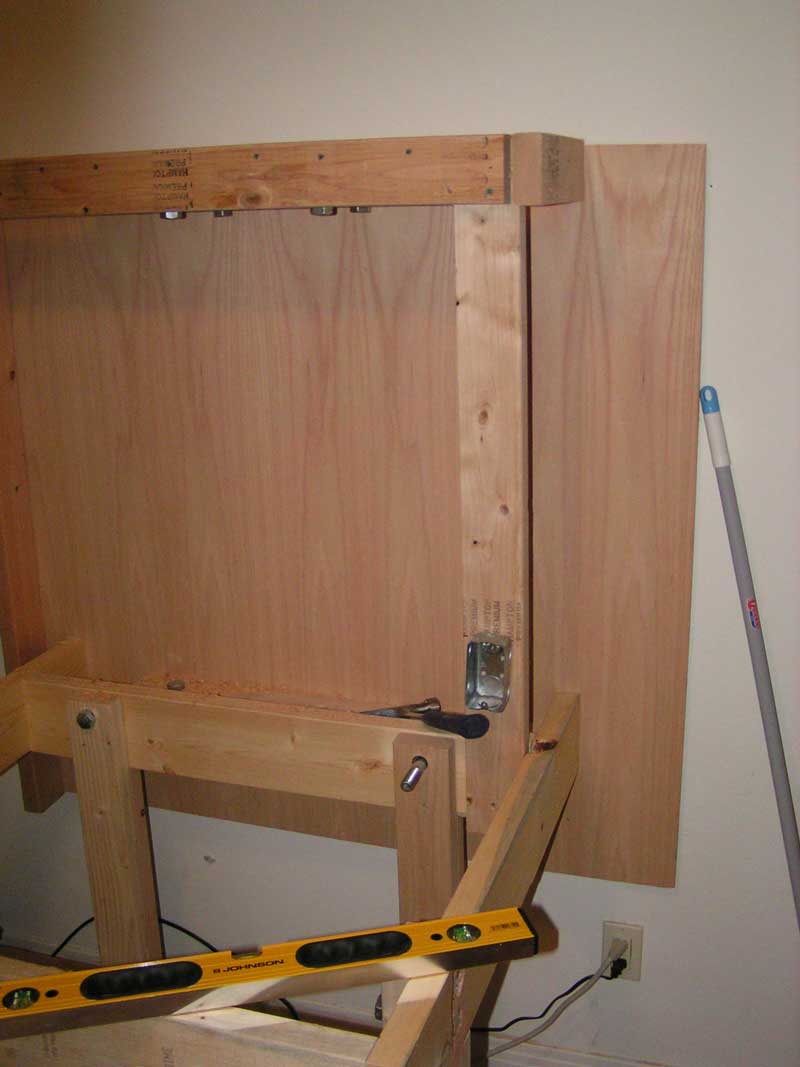
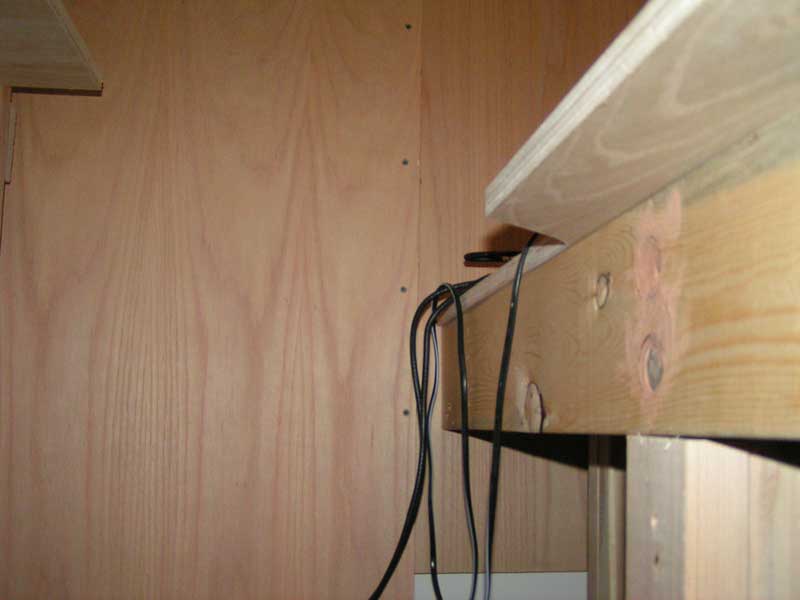
Gap on the end is on purpose- room for a wire for indirect lighting..

PICT7758.jpg

PICT7759.jpg

PICT7760.jpg


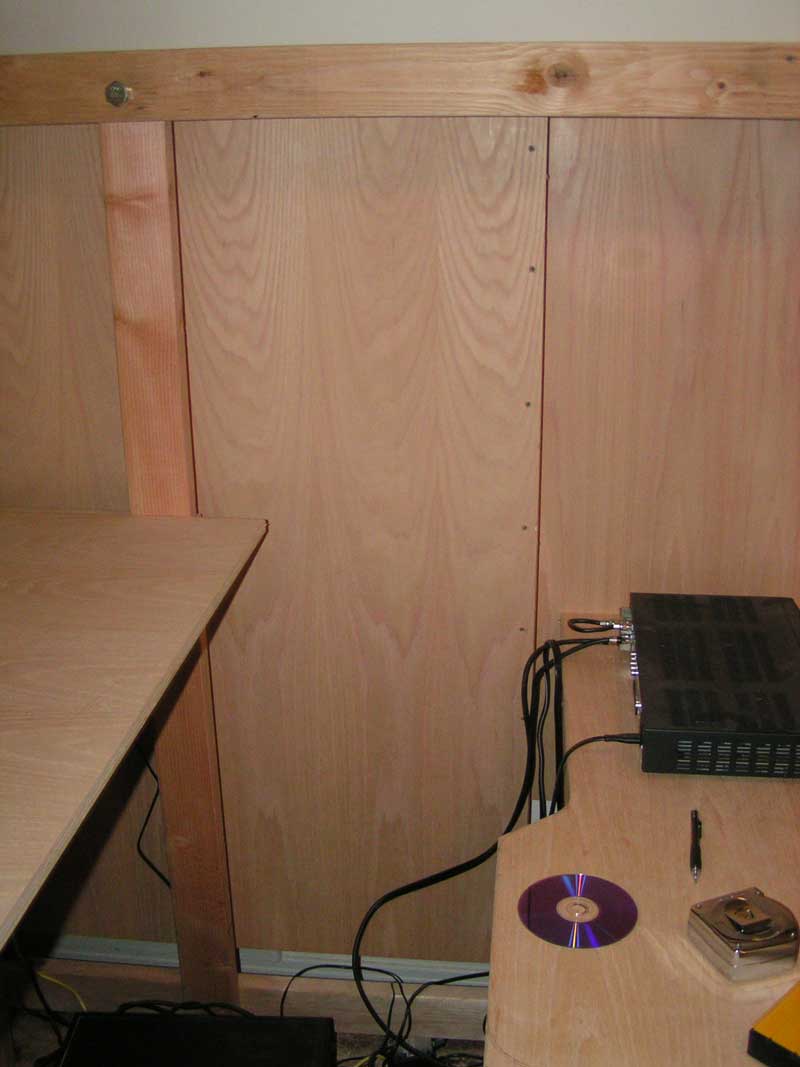
Keep in mind the framing and bolts will be hidden by an oak veneer...

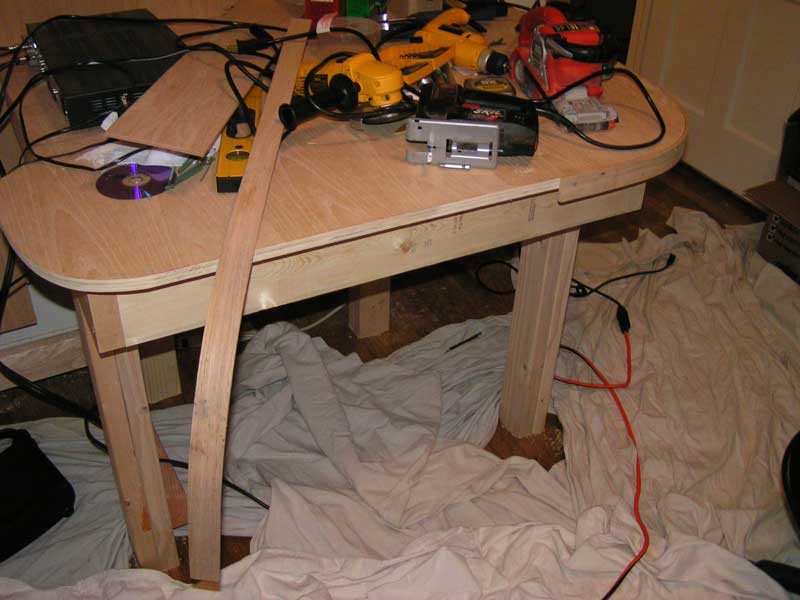
And, the main goal of this project is to be able to remove it (non-destructively) from this room without any hassle. So it's taking some thought to make sure it will come apart and go back together with ease..
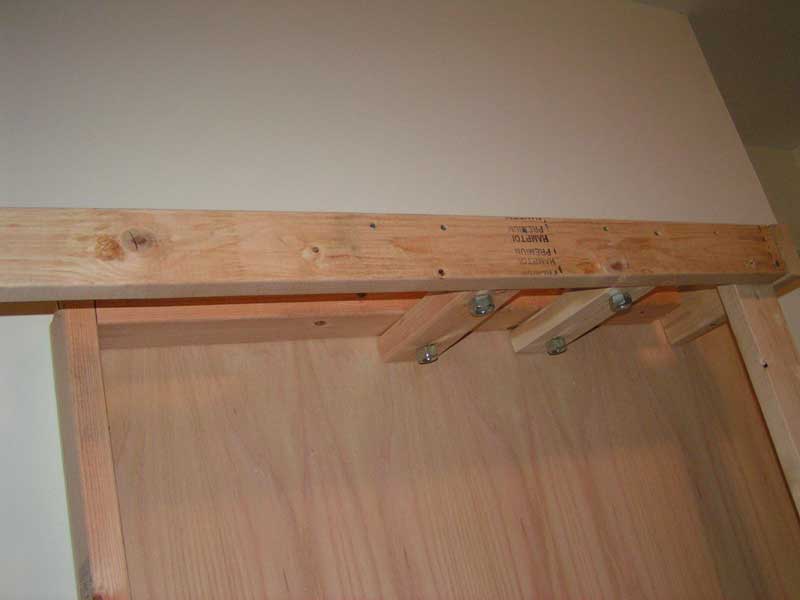
 
PICT7762.jpg

PICT7765.jpg


A first run of how the indirect lighting is going to look.. Obviously nothing is attached, the finished desk will not have that gap..
 
Are you going to paint the under side of that white, that would reflect more light. And do they make the GE Reveal bulbs in tube form? I love the GE Reveal bulbs.

Keep up the good work, both in building your desk and keeping all of us up-to-date with pictures.
 
Back from lockedness - thanks Mashie..

Here are some pics:

PICT7773.jpg


PICT7774.jpg


PICT7775.jpg


PICT7776.jpg


PICT7777.jpg


PICT7778.jpg

DAMMIT! No brackets on H.. :mad: [H]... :D

PICT7779.jpg


PICT7780.jpg


PICT7781.jpg


PICT7782.jpg


PICT7783.jpg


PICT7784.jpg


PICT7785.jpg
 
More pics- bending wood, breaking that one, and bending new wood...

PICT7791.jpg


PICT7795.jpg


PICT7798.jpg


PICT7799.jpg


PICT7804.jpg


PICT7803.jpg


PICT7805.jpg


PICT7807.jpg
 
Closing up shop for the night- cleaned up a little..

Drop cloths are in the wash, and all of the papers are drawings of the desk..

PICT7808.jpg


PICT7809.jpg


PICT7810.jpg
 
Nice pair of Shit-Kickers you have there :D I haven't worn a pair of them in years. Need to go buy some.
 
Thanks for the props- and I like my shit-kickers! :D

I'll try to keep it up to date and finish in a reasonable timeframe.. Living in a woodshop gets a little old-
 
Made some good progress on bending the oak for the molding on the workbench.


The oak is sitting there without any additional force after soaking in water for 3 days with the cinderblock and shims.
PICT7811.jpg


PICT7812.jpg


PICT7813.jpg


I'm going to let the pieces completely dry out for a couple days in this jig to make sure they hold their shape.
PICT7815.jpg
 
Here are some pics of what I did tonight- molding went on well. Discovered that the thin oak only needs to soak in boiling hot water for about 30 minutes to become pliable. The inside corner that was the third peice added was only in the hot water for that long, and I bent it with the smallest radius...

PICT7824.jpg


PICT7825.jpg


PICT7827.jpg


PICT7831.jpg


PICT7835.jpg


PICT7836.jpg


A little more work with the belt sander and it will look pretty good..
 
BigDan said:
looks great, cant wait to see how it turns out.

Hopefully some people are interested in the process too :D I'm really enjoying this undertaking at the moment.
 
Yeah man, that is looking very nice.

I'm going to build a new desk soon, as is right now I am afraid to post a picture of it up in any of the workstation threads. :p

What a cheap old pingpong table... :)
 
Dont look now but I think your dog is a zombie!!

Great work, cant wait to see the finished product.
 
Erasmus354 said:
Dont look now but I think your dog is a zombie!!

Great work, cant wait to see the finished product.

He's got this thing for tennis balls- I had one in my hand there- :D
 
jen4950 said:
Hopefully some people are interested in the process too :D I'm really enjoying this undertaking at the moment.
...indeed. Nothing like seeing a nice project come together. Great work......B.B.S.
 
Looks sweet, dude! I hate this knockdown piece of junk, but I have no budget for upgrades. That's on The List, though.
 
New Pics:
Working on a template for the uprights.


PICT8171.jpg


PICT8173.jpg


PICT8174.jpg


Seem as though I feel more comfortable using bent wood, I'm adding more curves to the whole setup. I think it will look cool.
 
Stopping point for the night- got the template cut for the rest of the up-rights. And the side shelves.

PICT8177.jpg
 
This is looking really nice, and giving me some nice ideas about what I want to do when I have the space. That, and I like your dog.

Rock on!

BTW: I am a dyke, and I have a saw like that. :D
 
hound said:
This is looking really nice, and giving me some nice ideas about what I want to do when I have the space. That, and I like your dog.

Rock on!

BTW: I am a dyke, and I have a saw like that. :D

Nice :D - I occasionally say things like that to get people going; I'm sick of the Political Correctness in this world; but it's not going to change anytime soon, so I do my part to throw sand in the cogs whenever I get a chance..

Show your saw!! :D
 
Here's a Critical Element:

Proper footrest height. :D

The one thing I really screwed up on my old desk was I didn't have a proper footrest, so I'd always kick my feet up on the wire chase.. And broke it one night..

Gotta kick your feet up after a long day of work..

Obviously.. :rolleyes: :D

So this one is going to have a proper footrest with wiring high and out of the way.


PICT8180.jpg


PICT8181.jpg


Old Desk:

Desk_007.jpg
 
It took Dallas a little while to figure out the whole tennis ball hidden in the drop-cloth trick :D

PICT8209.jpg
 
I command you to finish, I want to see what this desk is going to look like! So far it looks great though.
 
Working on it dammit! :D Only worked 10 and 14 hour days this week- gotta love deadlines :eek: Gotta work tommorrow and Sunday too- nice paycheck at least..
 
that is a very very professional build, i commend you. i also love the boots, good ole boy style, like me!
 
GtrPmp said:
that is a very very professional build, i commend you. i also love the boots, good ole boy style, like me!

Nuthin' like shit-kickers! Gig-em' Whoop! :D

Aight- Here's the beginning of the desk frame.

Here's a good example about how I am working out easy dissasembly into the design. Bolts might seem really big and overkill; that's for a reason. Easier to thread and stripped or nicked threads are much less difficult with a larger diameter bolt.

PICT8228.jpg


Frame being worked out.
PICT8235.jpg


What the hell is this mess for?!?
PICT8229.jpg


Getting Closer..
PICT8231.jpg


PICT8234.jpg


Exhaust from computer cabinet :D
PICT8233.jpg

Going to mount one of these rack fan units in there:

http://neubauer.tv/images/Office/W_01/McMaster_Carr_0570.pdf

You can find it at http://www.mcmaster.com - what a damn cool website!

PICT8232.jpg


PICT8236.jpg

^ Another shot of where the air chase is..
 
Wow, very cool. As mentioned, that this is going to be sturdy as hell :eek:

Like the concept, and the all the curves look great. Keep up the good work
 
Man that is awesome...

I just moved into a house as well and I stumbled upon your thread while doing a little bit of desk research. I have a whole room which is going to be transformed into my office, with three walls that can be used for my desk. The house was built in the early 80's and has outdoors / nature feel to , with alot of stuff being custom built by hand, so I want to keep it that way with the office. I'm just now getting started with brainstorming and drafting out ideas.

Here's the kicker though, I've got very little experience with wood working. What tools are required and where have you been sourcing your materials? What other tips can you offer for those less experienced?

Keep up the good work, I'm interested in how it will look when its all completed!
 
Status
Not open for further replies.
Back
Top