Navigation
Install the app
How to install the app on iOS
Follow along with the video below to see how to install our site as a web app on your home screen.
Note: This feature may not be available in some browsers.
More options
You are using an out of date browser. It may not display this or other websites correctly.
You should upgrade or use an alternative browser.
You should upgrade or use an alternative browser.
Project: Fruitf***er
- Thread starter altmann
- Start date
swatbat
[H]F Junkie
- Joined
- Apr 25, 2001
- Messages
- 13,052
I have the fruitfucker as my picture on xboxlive. Can't wait to see this finished.
InfernalMachine
Limp Gawd
- Joined
- Jan 8, 2004
- Messages
- 418
swatbat said:I have the fruitfucker as my picture on xboxlive. Can't wait to see this finished.
Me too!
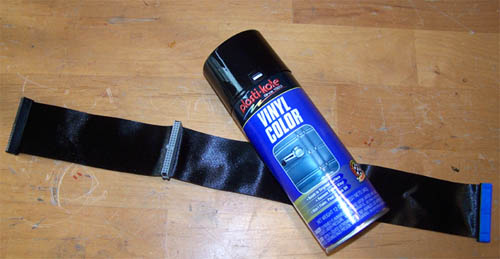
ARTbyTROY said:Just use some automotive vinyl dye to paint the tubing black, it works great on plastics and is flexible. Here is an IDE cable I vinyl dyed black and the can...
I'm warning that this may not work in some cases, I've attemped to use vinyl dye both IDE and sata cables and even though it looks GREAT, it just never "stuck" to the plastic and got pretty messy in many cases. Ended up just buying black sata cables.
small update:
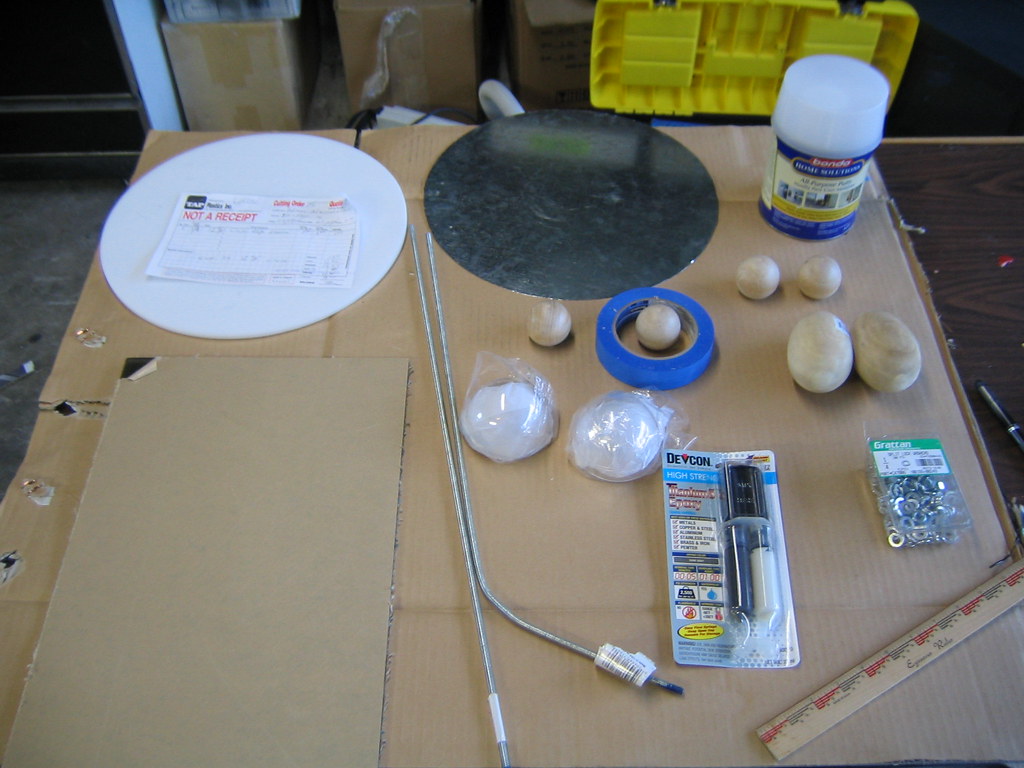
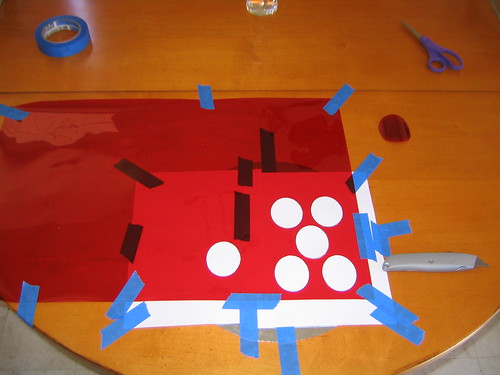
here are a bunch of miscellanious components for the build: Acrylic sheet and circle. Wooden pieces for the hand joints. Clear plastic balls for the top and bondo.
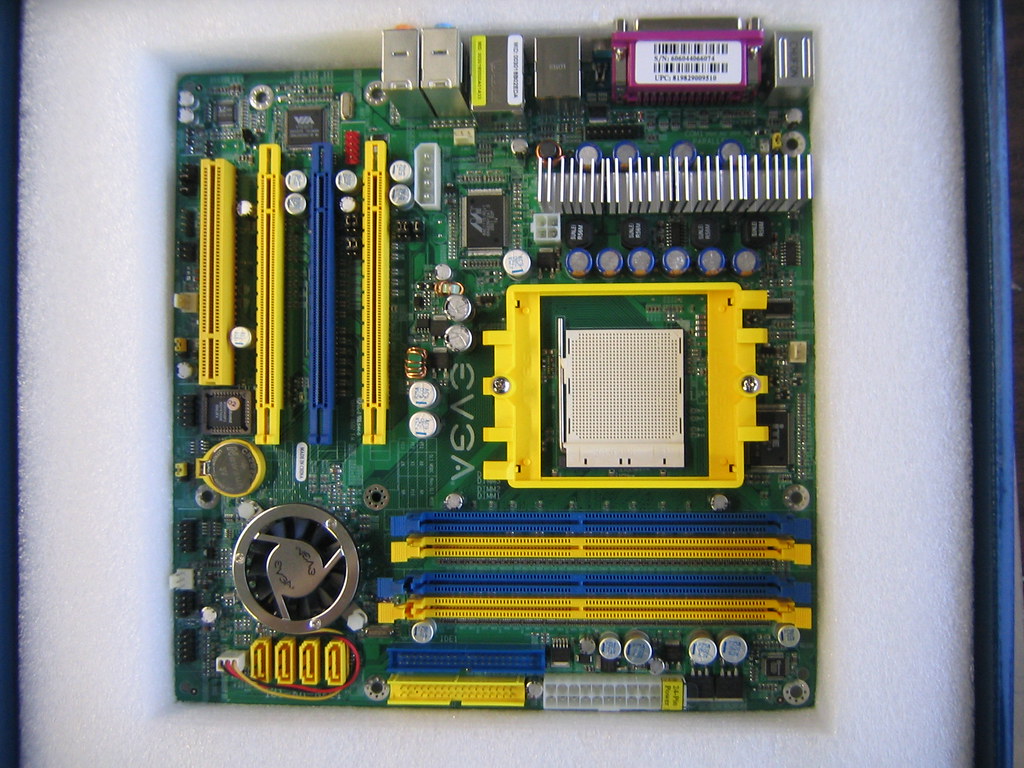
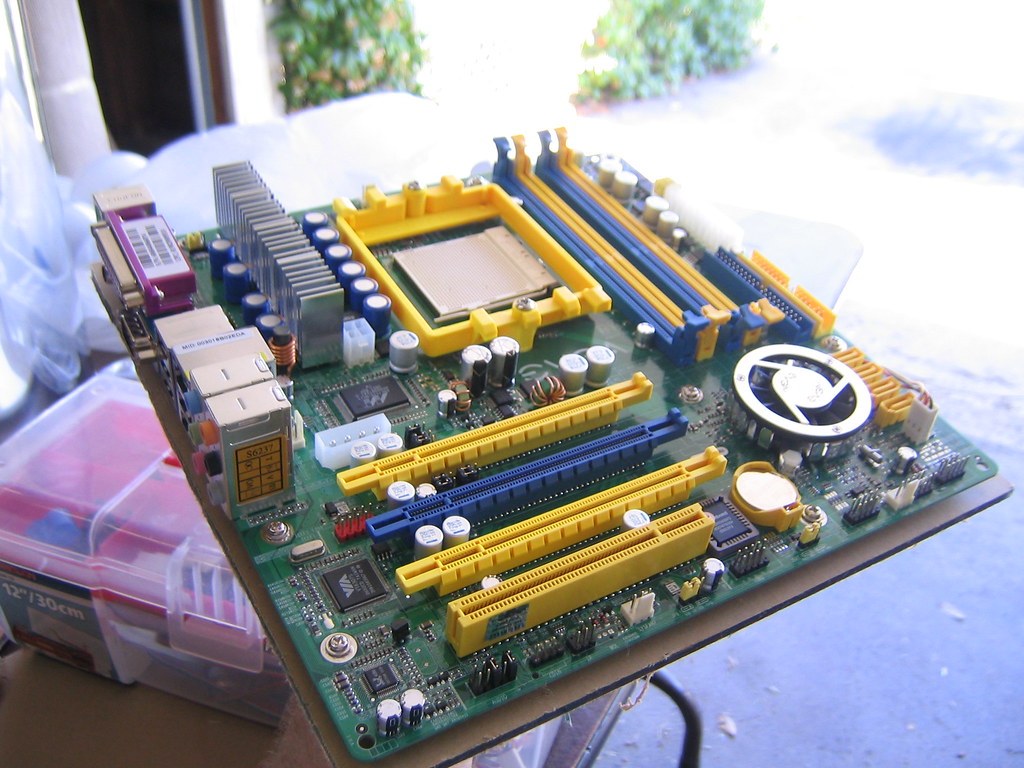
Below is the motherboard. So pristine!
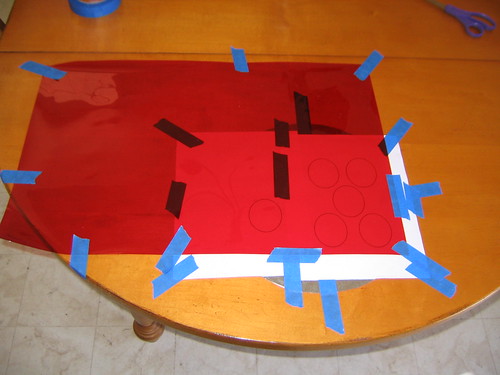
And finally, The acrylic motherboard mounting piece. Marked for size and riser placement. I just need to cut it now.

here are a bunch of miscellanious components for the build: Acrylic sheet and circle. Wooden pieces for the hand joints. Clear plastic balls for the top and bondo.
Below is the motherboard. So pristine!
And finally, The acrylic motherboard mounting piece. Marked for size and riser placement. I just need to cut it now.
OK, purchased some of that blue tubing. Thanks for that suggestion Psyco,
As for painting it, I'm thinking that if I bend it to the desired shape, with the rigid allthread inside, and it'll be locked in that shape, then painting it with regular paint won't be a problem, as it won't be moving. I've cut out the motherboard acrylic mounting piece. Working on the eyes now.
-A
PsycoGeek
[H]ard|Gawd
- Joined
- Jun 25, 2000
- Messages
- 1,226
No problem... Glad I could help. Sometime you have to take a few hours out of the day and just wonder around the whole store... Idea's will pop into your head as you find things you didn't know existed before.
Keep up the good work. I liked the Anarchy Case, and this one too. Excelent idea's.
Keep up the good work. I liked the Anarchy Case, and this one too. Excelent idea's.
OK. It's sunday, Italy won the world cup WOO HOO!!! (BTW, never should have gone into OT and PK showdown. That penalty kick in the beginning for France was total BS)
Now, time to get to work.
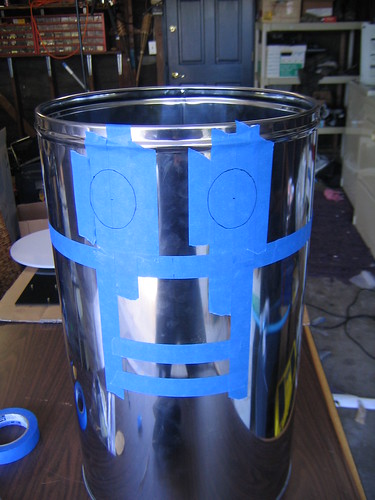
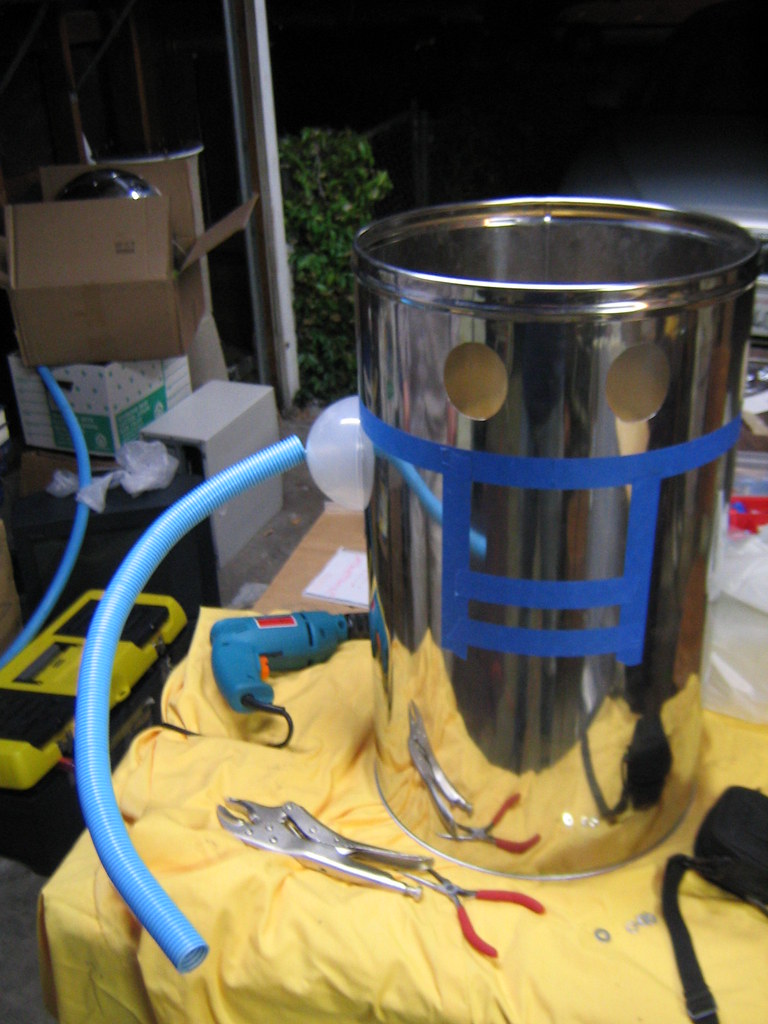
I've begun with cutting out the eyes for the case. I bought some flexible plastic and I'm cutting out 6 pieces which I'll combine into 2 sandwiches of 3 pieces each. Each circle will get a rubber ring around it to keep them together and then that will go on the case with an LED behind it. Don't know if that makes sense or not, but it will eventually") .
.
Cutting out the eyes:
Eyes cut out!
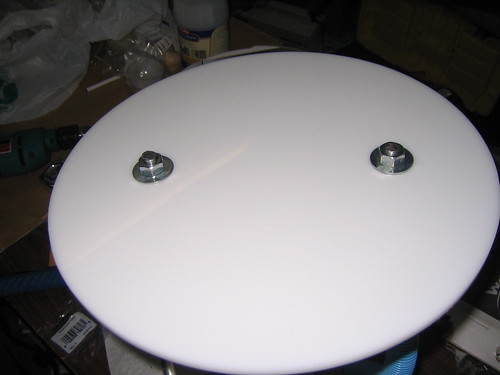
Here's where things get scary. OK remember that acrylic motherboard plate I marked out?
This one:

Well, now comes the moment of truth. I had marked the spots for the Mobo riser holes by sitting the motherboard on the plate and taking a pen and marking through all the screw holes. Well, having found the correct size dremel bit, i now cut all the holes and put risers in. Will the motherboard fit?! Oh GOD!
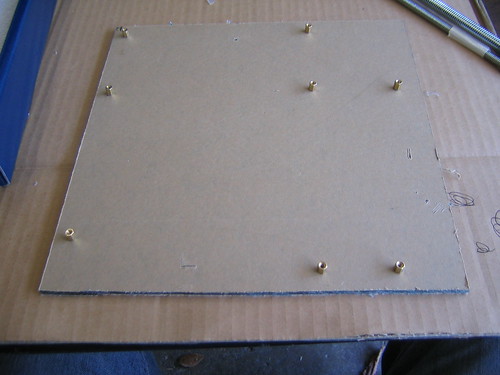
IT DOES! All but one hole matched up enought to be screwed into from the motherboard:
Some more pics of the mounting plate (I'm pretty proud of it and I definitely want to make another some day, it's a cool piece to have):
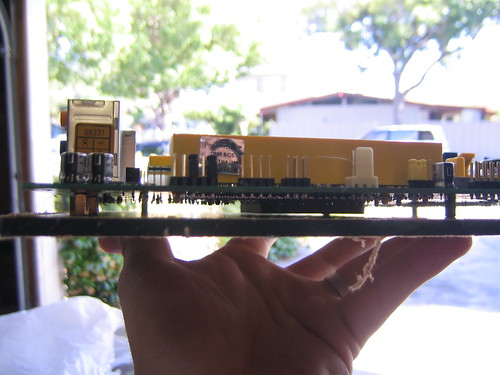
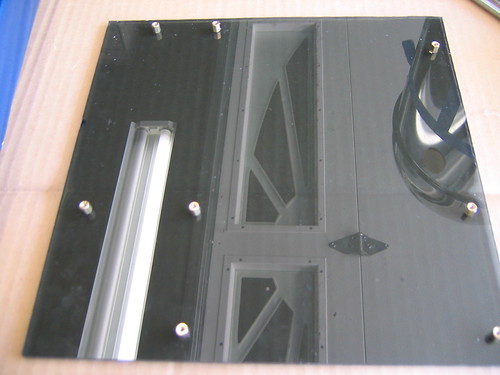
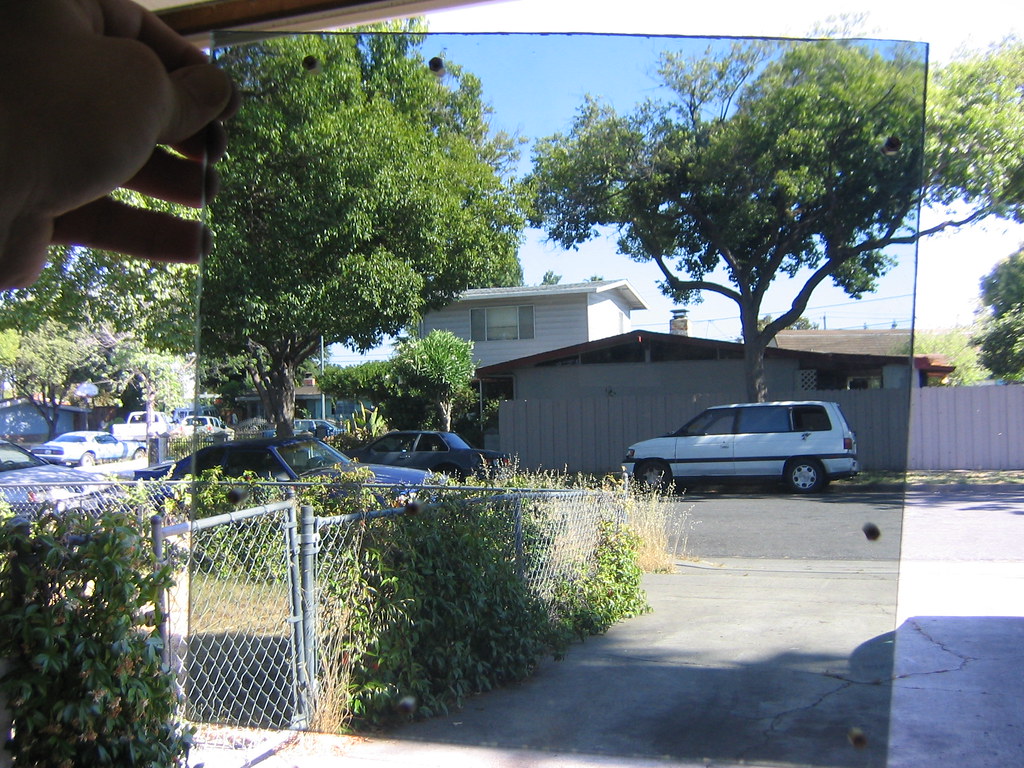
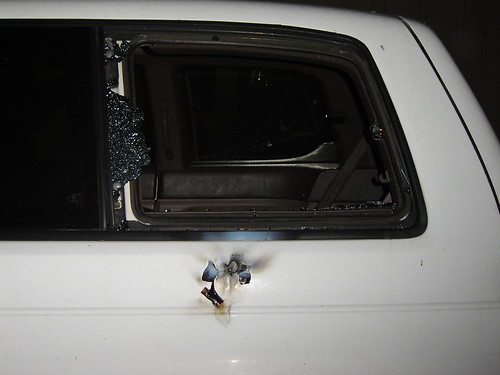
P.S. the white van in the background of the last shot? well, you might notice the back window is out. All I'll say is I had an interesting experience on the 4th of july:
Alright, now I wanted to start on the arm dome thingys. I wanted them to be flush with the side of the case, but they were flat on the bottom. So I came up with the idea of using the case as a sanding block and then sanding them down on it. That way, they'd get the exact fit of the case. Which worked out fine as you can see here:
That's all for right now, but I need to get my butt in gear on this thing to finish it in time so expect more througout the week.
-A
Now, time to get to work.
I've begun with cutting out the eyes for the case. I bought some flexible plastic and I'm cutting out 6 pieces which I'll combine into 2 sandwiches of 3 pieces each. Each circle will get a rubber ring around it to keep them together and then that will go on the case with an LED behind it. Don't know if that makes sense or not, but it will eventually
. Cutting out the eyes:
Eyes cut out!
Here's where things get scary. OK remember that acrylic motherboard plate I marked out?
This one:
Well, now comes the moment of truth. I had marked the spots for the Mobo riser holes by sitting the motherboard on the plate and taking a pen and marking through all the screw holes. Well, having found the correct size dremel bit, i now cut all the holes and put risers in. Will the motherboard fit?! Oh GOD!
IT DOES! All but one hole matched up enought to be screwed into from the motherboard:
Some more pics of the mounting plate (I'm pretty proud of it and I definitely want to make another some day, it's a cool piece to have):
P.S. the white van in the background of the last shot? well, you might notice the back window is out. All I'll say is I had an interesting experience on the 4th of july:
Alright, now I wanted to start on the arm dome thingys. I wanted them to be flush with the side of the case, but they were flat on the bottom. So I came up with the idea of using the case as a sanding block and then sanding them down on it. That way, they'd get the exact fit of the case. Which worked out fine as you can see here:
That's all for right now, but I need to get my butt in gear on this thing to finish it in time so expect more througout the week.
-A
I need to ask for information:
On the motherboard mounting plate, i noticed that it has a lot of static feeling (you know, the hairs on your arm raising) since I ripped off the plastic protection sheet. Is there anyway to de-static-ize it? Will that affect my motherboard?
SC385:
Tinted plexi was from a local plastics shop. The place is great, we got the circle made, and they have a bargain bin full of just scraps. That piece said $3.00 on it, and then when I went to pay for it, I pulled out a credit card and the dude was like "Whatever, it's free". Sweet!
www.tapplastics.com a plexi modder's heaven.
Also, tieing fireworks to a van to see if it'll melt through the glass = exploding glass all over you.
Lunas
[H]F Junkie
- Joined
- Jul 22, 2001
- Messages
- 10,048
Humm i dont know which is funnier exploding a car window with a firework or the concept of a fruit fu*ker computer... i cant wait till it is done...
The deal with the credit card is that it costs a business about 2 dollars every time a card is swiped so on a 3 dollar purchase...
to see if it would melt tempered glass... ok... i was told by a metal worker that he couldnt get glass to melt with any of his welding equipment... yeah a firework is doing nothing to a window except heating one point quickly to the point the spot expands and the window explodes...
Unknown-One
[H]F Junkie
- Joined
- Mar 5, 2005
- Messages
- 8,909
Any idea what the final system specs are going to be? I see you have a SLI capable nForce 4, and an Athlon 64 3200+...
Well,
System specs are obviously the NF4 SLI mobo w/ Athlon 64 3200+, plus 1 gig ram (digging that from a friends system) probably an old 60 gig HD I have lying around and then... well, then I'm not sure for the GPU. I'm not trying to make this my main computer, I already have an XPS laptop for that and i don't have any PCI Express cards laying around so I'll have to figure something out. Maybe I can get Fruitf*cker inc. to sponser my mod...
Next on the agenda is the bottom plate figured out for the leg mounting etc. Probably won't be on that till Tues though.
P.S.
Fireworks are fun no matter what you do w/em.
Update: 12 July.
OK,
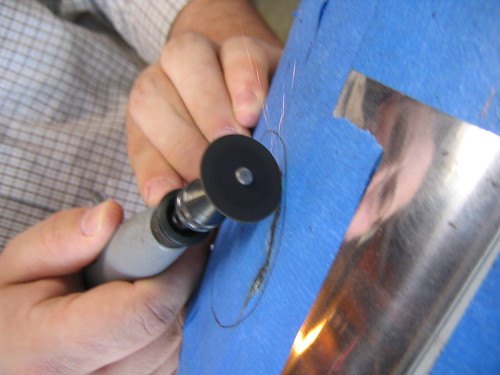
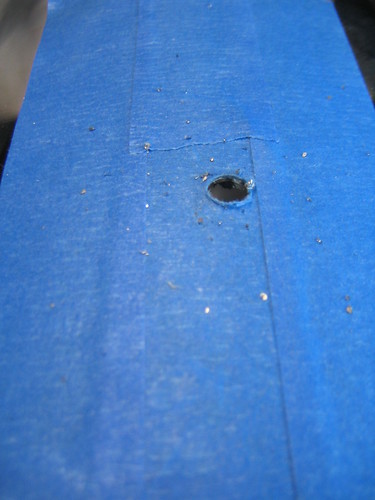
Got the eyes marked and cut out:
Cuttin:
Holy Hole:
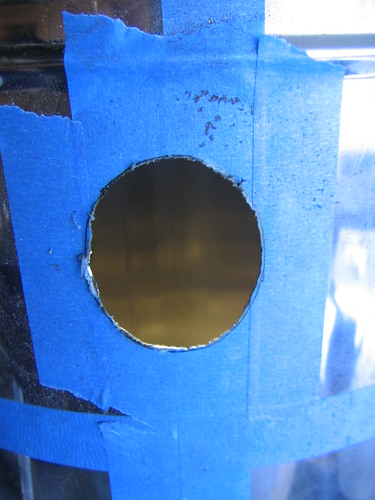
It's looking at you:
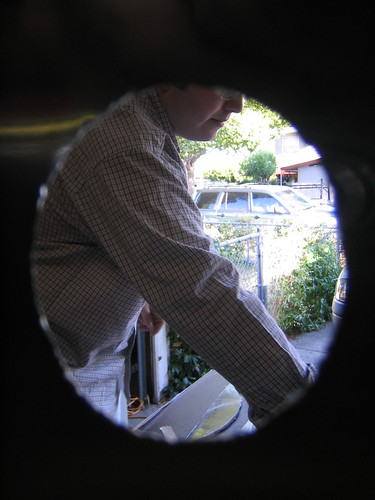
Through the eye of insanity:
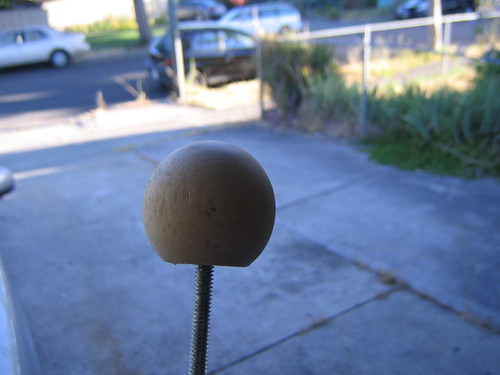
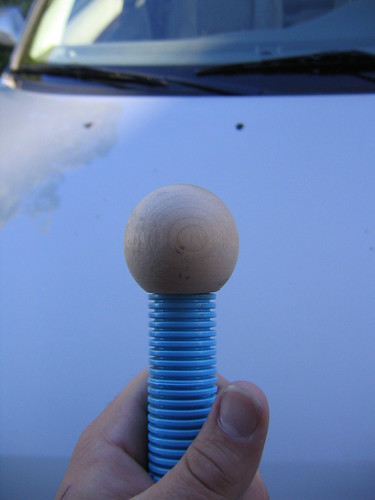
Allthread with the wrist ball screwed on for measure:
This is the tubing we got. slipped over the allthread to the base of the wrist ball. It certainly is starting to take shape. I'll have to paint it, but the concept is there:
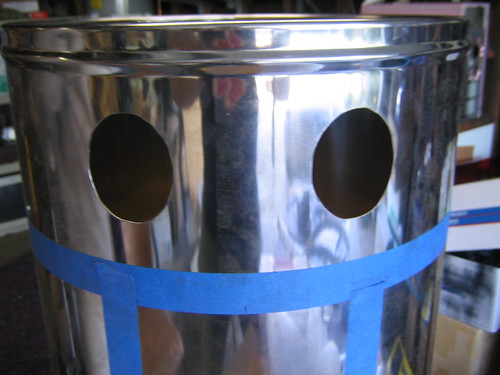
The arm hole is cut:
this is a bad example of how it will kinda look when it's done. The arm is too long, the wrist ball isn't on there, but the basics are there:
Next up is the feet and I've come up with an ingenious setting for the FruitFucker... Stay tuned!
-Altmann
OK,
Got the eyes marked and cut out:
Cuttin:
Holy Hole:
It's looking at you:
Through the eye of insanity:
Allthread with the wrist ball screwed on for measure:
This is the tubing we got. slipped over the allthread to the base of the wrist ball. It certainly is starting to take shape. I'll have to paint it, but the concept is there:
The arm hole is cut:
this is a bad example of how it will kinda look when it's done. The arm is too long, the wrist ball isn't on there, but the basics are there:
Next up is the feet and I've come up with an ingenious setting for the FruitFucker... Stay tuned!
-Altmann
stryder2720
Supreme [H]ardness
- Joined
- Jun 29, 2004
- Messages
- 5,728
Oh man, this is looking awesome!!
Update 16 July,
So while there was progress made, I didn't document every step (I'm bad, I know).
What we've completed is the legs and mounting them to the baseplate.
The legs are made from (i think it's 3/8") Allthread. We bent it in the shape we wanted and then using hot water, slowly bent the plastic tubing over it. The Allthread solved the issue of attaching the legs, as we could just use it as the bolts. Throw some washers on there and the suckers aint movin.
Then, it was onto cutting holes into the baseplate for the legs to mount to. The baseplate is going to be the bottom of the Fruitfucker. The motherboard is going to be mounted on it as well as the PSU and it will have L brackets for mounting the rest of the case. None of that makes sense w/o pictures. What I do have pics of though, are the unpainted legs:
You can see the top of the legs mounted to the base here:
Next, shots of the legs.
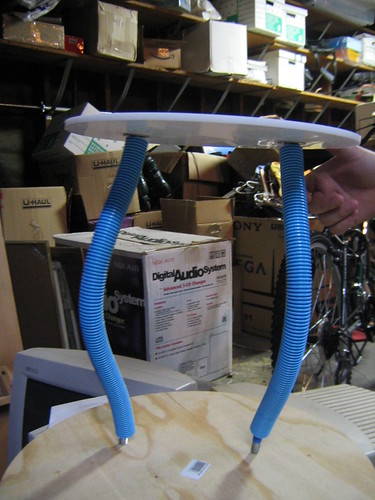
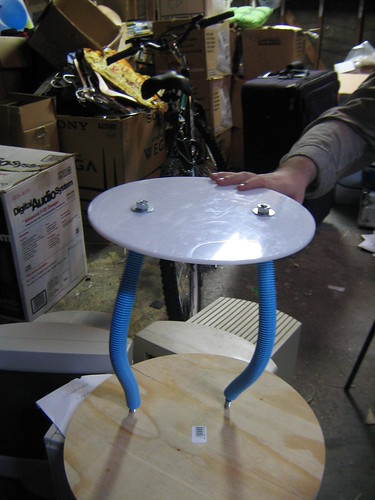
Note that the tubing isn't fully flush with the base, that will be fixed. It'll also be painted the proper color, but the hard work is done on that end. More work to be done tonight! I'll try to get more pics up there for you guys.
So while there was progress made, I didn't document every step (I'm bad, I know).
What we've completed is the legs and mounting them to the baseplate.
The legs are made from (i think it's 3/8") Allthread. We bent it in the shape we wanted and then using hot water, slowly bent the plastic tubing over it. The Allthread solved the issue of attaching the legs, as we could just use it as the bolts. Throw some washers on there and the suckers aint movin.
Then, it was onto cutting holes into the baseplate for the legs to mount to. The baseplate is going to be the bottom of the Fruitfucker. The motherboard is going to be mounted on it as well as the PSU and it will have L brackets for mounting the rest of the case. None of that makes sense w/o pictures. What I do have pics of though, are the unpainted legs:
You can see the top of the legs mounted to the base here:
Next, shots of the legs.
Note that the tubing isn't fully flush with the base, that will be fixed. It'll also be painted the proper color, but the hard work is done on that end. More work to be done tonight! I'll try to get more pics up there for you guys.
PsycoGeek
[H]ard|Gawd
- Joined
- Jun 25, 2000
- Messages
- 1,226
Really nice so far... I like mods like this, really cool and creative. Too bad I'm more of the functional type of modder. Although I did have an idea about doing Tweaky from Buck Rodgers...
HedgeHodge
Weaksauce
- Joined
- Feb 17, 2006
- Messages
- 65
this is possibly the greatest thing i've ever seen in my life. i read the title and thought it would be half assed but man was i wrong! this si shaping out to be a picture perfect representation of the Fruit Fucker himself. keep up the good work
Psyco:
I totally know what you're saying. It's not so much a "mod" as it is a complete fabrication of an item, with a computer inside it. My next "mod" project will be something functional though. But for now, I've just always wanted to make this, and it's like a true test of my skills.
Hedge: Thanks! I appreciate that you notice the quality. I feel that things like this should be true to form and not skimped on. It pains me to see people go the short route on things and it looks "meh".
Anyhoo my buddy is coming over right now so we can get some more work in on this puppy.
-A
OK,
well the thing's we worked on last night were gluing the feet on and starting the top antenna thingy.
I first had to get the base level on both axis which took some interesting shimming:
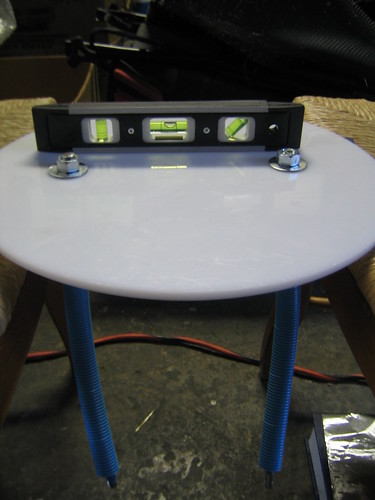
good enough for government work I say.
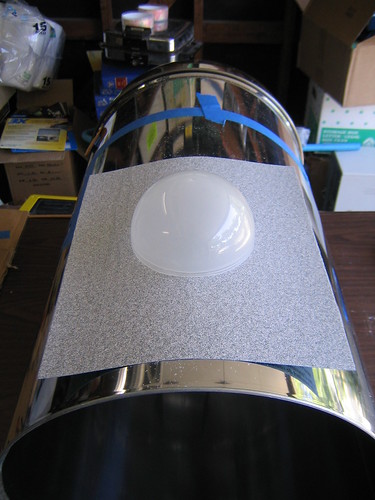
Then, well, I'd been looking all over for a suitable rod to use as the antenna for the top. After looking around the garage and seeing an old paper towel holder I decided to use that. After attempting to hack-saw it, then failing, the dremel was whipped out and I got down to the task of cutting it.
The antenna is going to sit on top of a funnel that I bought to give it some a gradual slope. Bondo will be applied to even that out somewhat. Then the rod then a clear ball.
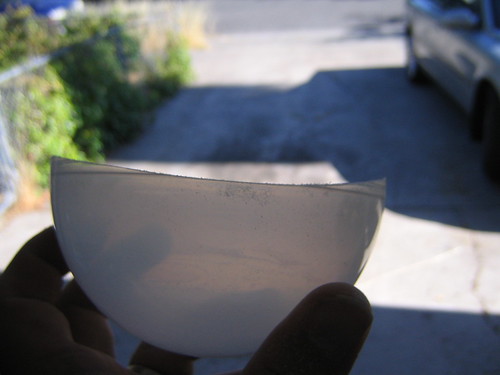
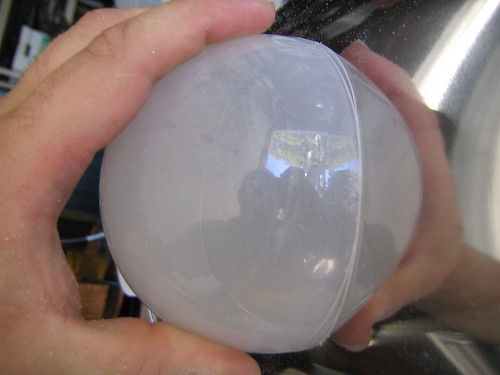
The problem that I ran into, is that the clear ball doesn't seem to scale with the rest of the case. It seems out of proportion. I'm really racking my brain on this one, because where the F*CK do you find a clear ball? I mean, I need to get a certain size and I need to be able to mount an LED in there. You can take a look here:
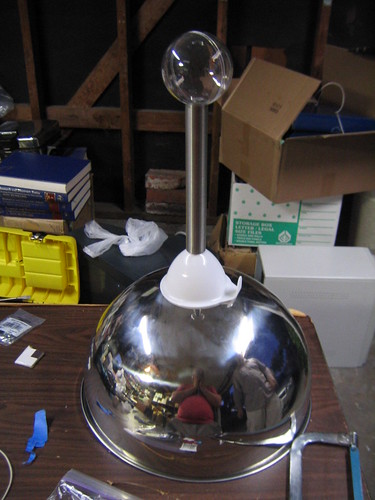
Meh, I have an idea. For now, it's onto mounting the mobo and all that jazz.
well the thing's we worked on last night were gluing the feet on and starting the top antenna thingy.
I first had to get the base level on both axis which took some interesting shimming:
good enough for government work I say.
Then, well, I'd been looking all over for a suitable rod to use as the antenna for the top. After looking around the garage and seeing an old paper towel holder I decided to use that. After attempting to hack-saw it, then failing, the dremel was whipped out and I got down to the task of cutting it.
The antenna is going to sit on top of a funnel that I bought to give it some a gradual slope. Bondo will be applied to even that out somewhat. Then the rod then a clear ball.
The problem that I ran into, is that the clear ball doesn't seem to scale with the rest of the case. It seems out of proportion. I'm really racking my brain on this one, because where the F*CK do you find a clear ball? I mean, I need to get a certain size and I need to be able to mount an LED in there. You can take a look here:
Meh, I have an idea. For now, it's onto mounting the mobo and all that jazz.
Rufus P Tumbeltin IV
Limp Gawd
- Joined
- May 10, 2006
- Messages
- 133
You might be able to use a drawer knob, i have seen clear plastic and glass ones from about 3/4" to about 1 7/8".
Lunas
[H]F Junkie
- Joined
- Jul 22, 2001
- Messages
- 10,048
i have seen little toy vending machines with small clear balls with toys inside themthey are about the size of one of those super balls the smaller ones not the big ones...
you may want to look into those...
you may want to look into those...
PsycoGeek
[H]ard|Gawd
- Joined
- Jun 25, 2000
- Messages
- 1,226
GodSpeed said:Suggestion: Once you find a proper ball you should get it bead-blasted so it has an icy finish and you only see a nice soft glow instead of the LED inside. When the LED's off it will just have a nice iced look.
Great idea!
You can also do that yourself with a palm sander and some 320 or 400 sandpaper. Cut the sheets yourself, leaving them a few inches longer than necessary on the side where they would clip onto the sander. Then get yourself a piece of foam about 1/2' or 1' in thickness and cut it to the size ot the sanders base. When you put the paper on, clip one end and put the foam in between the paper and the sander, then clip the other end while pilling the paper taught over the foam. Easiest way is to put the face of the sander down and apply some pressure, then cut the sand paper to length, then clip iit in the other side of the sander. And voila... a sander that can follow contours... All it will take is a light sanding and it will be nice and frosty.
awesome work. I like the allthread leg idea... easy to work with the threads and sturdy though it keeps the "unstable" look of FF's legs.
sorry to quote pic but this:
reminded me of the ebay teapot... lol. Keep your pants on!
sorry to quote pic but this:
altmann said:
reminded me of the ebay teapot... lol. Keep your pants on!
lol.
btw - would this thing cut in half be the right size?
http://www.wicklowpets.ie/product.php/BIORB_ACRYLIC_BOWL_SILVER_-_NEW_SIZE_60_LITRE/669/
btw - would this thing cut in half be the right size?
http://www.wicklowpets.ie/product.php/BIORB_ACRYLIC_BOWL_SILVER_-_NEW_SIZE_60_LITRE/669/
$130??? good loooowwwwdddd [/chrisrock]
hey alt... how bout this?:
http://www.boomusa.com/products/detail.asp?PRODUCT_ID=9133-12
don't know if that's a half dome tho - hard to tell from pics...
**edit: wait - realized you were looking for a ball... not a half dome. what size?
hey alt... how bout this?:
http://www.boomusa.com/products/detail.asp?PRODUCT_ID=9133-12
don't know if that's a half dome tho - hard to tell from pics...
**edit: wait - realized you were looking for a ball... not a half dome. what size?
ThirtySixBelow
Gawd
- Joined
- Dec 4, 2004
- Messages
- 846
for $130 dollars a few better mean 6-10.Qtip42 said:Gotta pay to play. I just spend 130 on a few cathodes